Enemies in MMBN4: Difference between revisions
From The Rockman EXE Zone Wiki
No edit summary |
No edit summary |
||
| Line 1: | Line 1: | ||
This page lists every enemy which can appear in battle in [[Mega Man Battle Network 4]]. | This page lists every enemy which can appear in battle in [[Mega Man Battle Network 4]]. | ||
| Line 94: | Line 92: | ||
|airshoes= |shadowshoes= |floatshoes= |statusguard= |superarmor= | |airshoes= |shadowshoes= |floatshoes= |statusguard= |superarmor= | ||
|info= | |info= | ||
|locations= | |locations='''Always:''' [[Doghouse Comp (MMBN4)|Dog House Comp]] (85.4%), [[Game Comp]] (70.8%), [[Microwave Comp]] (68.7%), [[Stereo Comp]] (59.6%), [[LCD Comp]] (43.8%), [[Dome NetBattle Machine Comp]] (37.3%), [[Card Comp]] (20.8%), [[CyberTop Comp]] (12.5%)<br/>'''Game 1:''' [[ACDC Area 1 (MMBN4)|ACDC Area 1]] (68.5%), [[ACDC Area 2 (MMBN4)|ACDC Area 2]] (63.0%), [[Town Area 1]] (46.3%), [[Elec Tower Comp 2]] (41.7%), [[Town Area 3]] (41.2%), [[Town Area 2]] (40.7%), [[ACDC Area 3 (MMBN4)|ACDC Area 3]] (38.9%), [[Elec Tower Comp 1]] (37.5%) | ||
|attacks= | |attacks= | ||
{{EnemyInfo/Attack |name_en=Shockwave<ref name="Shockwave">Mega Man Battle Network 4 Official Strategy Guide</ref> |name_jp=ショックウェーブ |name_tl=Shock Wave | {{EnemyInfo/Attack |name_en=Shockwave<ref name="Shockwave">Mega Man Battle Network 4 Official Strategy Guide</ref> |name_jp=ショックウェーブ |name_tl=Shock Wave | ||
| Line 114: | Line 112: | ||
|airshoes= |shadowshoes= |floatshoes= |statusguard= |superarmor= | |airshoes= |shadowshoes= |floatshoes= |statusguard= |superarmor= | ||
|info= | |info= | ||
|locations= | |locations='''Always:''' [[Antenna Comps (MMBN4)|Antenna Comps]] (70.8%), [[CyberTop Comp]] (58.3%), [[Nupopo Comp]] (58.3%), [[Lion Comp (MMBN4)|Lion Comp]] (56.3%), [[Ticket Comp (MMBN4)|Ticket Comp]] (47.1%), [[Castillo NetBattle Machine Comp]] (35.2%), [[Dome NetBattle Machine Comp]] (33.3%), [[Computer Comp (MMBN4)|Computer Comp]] (33.3%), [[Stand Comp]] (27.5%), [[LCD Comp]] (27.1%), [[Goddess Comp (MMBN4)|Goddess Comp]] (22.9%), [[Stereo Comp]] (14.1%), [[Card Comp]] (12.5%)<br/>'''Game 1:''' [[Park Area 1|Park Areas (Windy)]] (41.7%), [[Toy Robot Comp 1]] (35.0%), [[Town Area 4]] (31.5%), [[Toy Robot Comp 3]] (26.7%), [[Toy Robot Comp 2]] (25.0%), [[Toy Robot Comp 4]] (25.0%), [[Sharo Area]] (24.4%), [[YumLand Area]] (20.5%), [[NetFrica Area]] (17.8%), [[Undernet 5 (MMBN4)|Undernet 5]] (15.4%), [[Water God Comps]] (14.6%) | ||
|attacks= | |attacks= | ||
{{EnemyInfo/Attack |name_en=Shockwave<ref name="Shockwave"/> |name_jp=ショックウェーブ |name_tl=Shock Wave | {{EnemyInfo/Attack |name_en=Shockwave<ref name="Shockwave"/> |name_jp=ショックウェーブ |name_tl=Shock Wave | ||
| Line 137: | Line 135: | ||
|airshoes= |shadowshoes= |floatshoes= |statusguard= |superarmor= | |airshoes= |shadowshoes= |floatshoes= |statusguard= |superarmor= | ||
|info= | |info= | ||
|locations= | |locations='''Always:''' [[Dome NetBattle Machine Comp]] (5.9%)<br/>'''Game 2:''' [[ACDC Area 1 (MMBN4)|ACDC Area 1]] (68.5%), [[ACDC Area 2 (MMBN4)|ACDC Area 2]] (63.0%), [[Town Area 1]] (46.3%), [[Elec Tower Comp 2]] (41.7%), [[Town Area 3]] (41.2%), [[Town Area 2]] (40.7%), [[ACDC Area 3 (MMBN4)|ACDC Area 3]] (38.9%), [[Elec Tower Comp 1]] (37.5%) | ||
|attacks= | |attacks= | ||
{{EnemyInfo/Attack |name_en=Shockwave<ref name="Shockwave"/> |name_jp=ショックウェーブ |name_tl=Shock Wave | {{EnemyInfo/Attack |name_en=Shockwave<ref name="Shockwave"/> |name_jp=ショックウェーブ |name_tl=Shock Wave | ||
| Line 162: | Line 160: | ||
|airshoes= |shadowshoes= |floatshoes= |statusguard= |superarmor= | |airshoes= |shadowshoes= |floatshoes= |statusguard= |superarmor= | ||
|info= | |info= | ||
|locations= | |locations='''Game 2:''' [[Park Area 1|Park Areas (Windy)]] (41.7%), [[Toy Robot Comp 1]] (35.0%), [[Town Area 4]] (31.5%), [[Toy Robot Comp 3]] (26.7%), [[Toy Robot Comp 2]] (25.0%), [[Toy Robot Comp 4]] (25.0%), [[Sharo Area]] (24.4%), [[YumLand Area]] (20.5%), [[NetFrica Area]] (17.8%), [[Undernet 5 (MMBN4)|Undernet 5]] (15.4%), [[Water God Comps]] (14.6%) | ||
|attacks= | |attacks= | ||
{{EnemyInfo/Attack |name_en=Shockwave<ref name="Shockwave"/> |name_jp=ショックウェーブ |name_tl=Shock Wave | {{EnemyInfo/Attack |name_en=Shockwave<ref name="Shockwave"/> |name_jp=ショックウェーブ |name_tl=Shock Wave | ||
| Line 188: | Line 186: | ||
|airshoes= |shadowshoes= |floatshoes= |statusguard= |superarmor= | |airshoes= |shadowshoes= |floatshoes= |statusguard= |superarmor= | ||
|info= | |info= | ||
|locations= | |locations='''Game 3+:''' [[ACDC Area 1 (MMBN4)|ACDC Area 1]] (68.5%), [[ACDC Area 2 (MMBN4)|ACDC Area 2]] (63.0%), [[Town Area 1]] (46.3%), [[Elec Tower Comp 2]] (41.7%), [[Town Area 3]] (41.2%), [[Town Area 2]] (40.7%), [[ACDC Area 3 (MMBN4)|ACDC Area 3]] (38.9%), [[Elec Tower Comp 1]] (37.5%) | ||
|attacks= | |attacks= | ||
{{EnemyInfo/Attack |name_en=Shockwave<ref name="Shockwave"/> |name_jp=ショックウェーブ |name_tl=Shock Wave | {{EnemyInfo/Attack |name_en=Shockwave<ref name="Shockwave"/> |name_jp=ショックウェーブ |name_tl=Shock Wave | ||
| Line 213: | Line 211: | ||
|airshoes= |shadowshoes= |floatshoes= |statusguard= |superarmor= | |airshoes= |shadowshoes= |floatshoes= |statusguard= |superarmor= | ||
|info= | |info= | ||
|locations= | |locations='''Always:''' [[Black Earth 1]] (12.5%)<br/>'''Game 3+:''' [[Park Area 1|Park Areas (Windy)]] (41.7%), [[Toy Robot Comp 1]] (35.0%), [[Town Area 4]] (31.5%), [[Toy Robot Comp 3]] (26.7%), [[Toy Robot Comp 2]] (25.0%), [[Toy Robot Comp 4]] (25.0%), [[Sharo Area]] (24.4%), [[YumLand Area]] (20.5%), [[NetFrica Area]] (17.8%), [[Undernet 5 (MMBN4)|Undernet 5]] (15.4%), [[Water God Comps]] (14.6%) | ||
|attacks= | |attacks= | ||
{{EnemyInfo/Attack |name_en=Shockwave<ref name="Shockwave"/> |name_jp=ショックウェーブ |name_tl=Shock Wave | {{EnemyInfo/Attack |name_en=Shockwave<ref name="Shockwave"/> |name_jp=ショックウェーブ |name_tl=Shock Wave | ||
| Line 239: | Line 237: | ||
|airshoes= |shadowshoes= |floatshoes=y |statusguard= |superarmor= | |airshoes= |shadowshoes= |floatshoes=y |statusguard= |superarmor= | ||
|info= | |info= | ||
|locations= | |locations='''Always:''' [[Hotdog Comp]] (27.8%), [[Ticket Comp (MMBN4)|Ticket Comp]] (27.5%), [[Microwave Comp]] (1.0%)<br/>'''Game 1:''' [[Park Area 1|Park Areas (Aflame)]] (45.0%), [[ACDC Area 1 (MMBN4)|ACDC Areas (Aflame)]] (37.5%), [[Toy Robot Comp 4]] (28.3%), [[Town Area 3]] (21.6%), [[Town Area 2]] (5.6%) | ||
|attacks= | |attacks= | ||
{{EnemyInfo/Attack |name_en=FlameTower |name_jp=フレイムタワー |name_tl=Flame Tower | {{EnemyInfo/Attack |name_en=FlameTower |name_jp=フレイムタワー |name_tl=Flame Tower | ||
| Line 262: | Line 260: | ||
|airshoes= |shadowshoes= |floatshoes=y |statusguard= |superarmor= | |airshoes= |shadowshoes= |floatshoes=y |statusguard= |superarmor= | ||
|info= | |info= | ||
|locations= | |locations='''Always:''' [[Computer Comp (MMBN4)|Computer Comp]] (37.0%), [[Nupopo Comp]] (22.9%)<br/>'''Game 1:''' [[Netopia Area]] (26.9%), [[Undernet 4 (MMBN4)|Undernet 4]] (11.5%), [[NetFrica Area]] (10.0%) | ||
|attacks= | |attacks= | ||
{{EnemyInfo/Attack |name_en=GroundBurner<ref name="GroundBurner">Listed as '''Flame Tower''' in Mega Man Battle Network 4 Official Strategy Guide</ref> |name_jp=グランドバーナー |name_tl=Ground Burner | {{EnemyInfo/Attack |name_en=GroundBurner<ref name="GroundBurner">Listed as '''Flame Tower''' in Mega Man Battle Network 4 Official Strategy Guide</ref> |name_jp=グランドバーナー |name_tl=Ground Burner | ||
| Line 285: | Line 283: | ||
|airshoes= |shadowshoes= |floatshoes=y |statusguard= |superarmor= | |airshoes= |shadowshoes= |floatshoes=y |statusguard= |superarmor= | ||
|info= | |info= | ||
|locations= | |locations='''Always:''' [[Hotdog Comp]] (2.8%)<br/>'''Game 2:''' [[Park Area 1|Park Areas (Aflame)]] (45.0%), [[ACDC Area 1 (MMBN4)|ACDC Areas (Aflame)]] (37.5%), [[Toy Robot Comp 4]] (28.3%), [[Town Area 3]] (21.6%), [[Town Area 2]] (5.6%) | ||
|attacks= | |attacks= | ||
{{EnemyInfo/Attack |name_en=FlameTower |name_jp=フレイムタワー |name_tl=Flame Tower | {{EnemyInfo/Attack |name_en=FlameTower |name_jp=フレイムタワー |name_tl=Flame Tower | ||
| Line 311: | Line 309: | ||
|airshoes= |shadowshoes= |floatshoes=y |statusguard= |superarmor= | |airshoes= |shadowshoes= |floatshoes=y |statusguard= |superarmor= | ||
|info= | |info= | ||
|locations= | |locations='''Always:''' [[Hotdog Comp]] (2.8%)<br/>'''Game 2:''' [[Netopia Area]] (26.9%), [[Undernet 4 (MMBN4)|Undernet 4]] (11.5%), [[NetFrica Area]] (10.0%) | ||
|attacks= | |attacks= | ||
{{EnemyInfo/Attack |name_en=GroundBurner<ref name="GroundBurner"/> |name_jp=グランドバーナー |name_tl=Ground Burner | {{EnemyInfo/Attack |name_en=GroundBurner<ref name="GroundBurner"/> |name_jp=グランドバーナー |name_tl=Ground Burner | ||
| Line 337: | Line 335: | ||
|airshoes= |shadowshoes= |floatshoes=y |statusguard= |superarmor= | |airshoes= |shadowshoes= |floatshoes=y |statusguard= |superarmor= | ||
|info= | |info= | ||
|locations= | |locations='''Game 3+:''' [[Park Area 1|Park Areas (Aflame)]] (45.0%), [[ACDC Area 1 (MMBN4)|ACDC Areas (Aflame)]] (37.5%), [[Toy Robot Comp 4]] (28.3%), [[Town Area 3]] (21.6%), [[Town Area 2]] (5.6%) | ||
|attacks= | |attacks= | ||
{{EnemyInfo/Attack |name_en=FlameTower |name_jp=フレイムタワー |name_tl=Flame Tower | {{EnemyInfo/Attack |name_en=FlameTower |name_jp=フレイムタワー |name_tl=Flame Tower | ||
| Line 361: | Line 359: | ||
|airshoes= |shadowshoes= |floatshoes=y |statusguard= |superarmor= | |airshoes= |shadowshoes= |floatshoes=y |statusguard= |superarmor= | ||
|info= | |info= | ||
|locations= | |locations='''Always:''' [[Black Earth 2]] (6.4%)<br/>'''Game 3+:''' [[Netopia Area]] (26.9%), [[Undernet 4 (MMBN4)|Undernet 4]] (11.5%), [[NetFrica Area]] (10.0%) | ||
|attacks= | |attacks= | ||
{{EnemyInfo/Attack |name_en=GroundBurner<ref name="GroundBurner"/> |name_jp=グランドバーナー |name_tl=Ground Burner | {{EnemyInfo/Attack |name_en=GroundBurner<ref name="GroundBurner"/> |name_jp=グランドバーナー |name_tl=Ground Burner | ||
| Line 386: | Line 384: | ||
|airshoes= |shadowshoes= |floatshoes= |statusguard= |superarmor= | |airshoes= |shadowshoes= |floatshoes= |statusguard= |superarmor= | ||
|info= | |info= | ||
|locations= | |locations='''Always:''' [[LCD Comp]] (29.2%), [[Game Comp]] (29.2%)<br/>'''Game 1:''' [[Elec Tower Comp 1]] (33.3%), [[ACDC Area 3 (MMBN4)|ACDC Area 3]] (31.5%), [[Elec Tower Comp 2]] (25.0%), [[ACDC Area 1 (MMBN4)|ACDC Area 1]] (20.4%), [[ACDC Area 2 (MMBN4)|ACDC Area 2]] (16.7%), [[Toy Robot Comp 3]] (15.0%), [[Town Area 1]] (11.1%) | ||
|attacks= | |attacks= | ||
{{EnemyInfo/Attack |name_en=Thunder<ref name="ThunderBall">Listed as '''Thunder Ball''' in Mega Man Battle Network 4 Official Strategy Guide</ref> |name_jp=サンダーボール |name_tl=Thunder Ball | {{EnemyInfo/Attack |name_en=Thunder<ref name="ThunderBall">Listed as '''Thunder Ball''' in Mega Man Battle Network 4 Official Strategy Guide</ref> |name_jp=サンダーボール |name_tl=Thunder Ball | ||
| Line 406: | Line 404: | ||
|airshoes= |shadowshoes= |floatshoes= |statusguard= |superarmor= | |airshoes= |shadowshoes= |floatshoes= |statusguard= |superarmor= | ||
|info= | |info= | ||
|locations= | |locations='''Always:''' [[Colosseum NetBattle Machine Comp]] (50.0%), [[Castillo NetBattle Machine Comp]] (24.1%), [[Stand Comp]] (21.6%)<br/>'''Game 1:''' [[Undernet 1 (MMBN4)|Undernet 1]] (21.8%), [[Meteor Comp 2]] (21.7%), [[Meteor Comp 1]] (10.0%), [[Toy Robot Comp 3]] (8.3%) | ||
|attacks= | |attacks= | ||
{{EnemyInfo/Attack |name_en=Thunder<ref name="ThunderBall"/> |name_jp=サンダーボール |name_tl=Thunder Ball | {{EnemyInfo/Attack |name_en=Thunder<ref name="ThunderBall"/> |name_jp=サンダーボール |name_tl=Thunder Ball | ||
| Line 430: | Line 428: | ||
|airshoes= |shadowshoes= |floatshoes= |statusguard= |superarmor= | |airshoes= |shadowshoes= |floatshoes= |statusguard= |superarmor= | ||
|info= | |info= | ||
|locations= | |locations='''Always:''' [[Stand Comp]] (2.9%)<br/>'''Game 2:''' [[Elec Tower Comp 1]] (33.3%), [[ACDC Area 3 (MMBN4)|ACDC Area 3]] (31.5%), [[Elec Tower Comp 2]] (25.0%), [[ACDC Area 1 (MMBN4)|ACDC Area 1]] (20.4%), [[ACDC Area 2 (MMBN4)|ACDC Area 2]] (16.7%), [[Toy Robot Comp 3]] (15.0%), [[Town Area 1]] (11.1%) | ||
|attacks= | |attacks= | ||
{{EnemyInfo/Attack |name_en=Thunder<ref name="ThunderBall"/> |name_jp=サンダーボール |name_tl=Thunder Ball | {{EnemyInfo/Attack |name_en=Thunder<ref name="ThunderBall"/> |name_jp=サンダーボール |name_tl=Thunder Ball | ||
| Line 454: | Line 452: | ||
|airshoes= |shadowshoes= |floatshoes= |statusguard= |superarmor= | |airshoes= |shadowshoes= |floatshoes= |statusguard= |superarmor= | ||
|info= | |info= | ||
|locations= | |locations='''Game 2:''' [[Undernet 1 (MMBN4)|Undernet 1]] (21.8%), [[Meteor Comp 2]] (21.7%), [[Meteor Comp 1]] (10.0%), [[Toy Robot Comp 3]] (8.3%) | ||
|attacks= | |attacks= | ||
{{EnemyInfo/Attack |name_en=Thunder<ref name="ThunderBall"/> |name_jp=サンダーボール |name_tl=Thunder Ball | {{EnemyInfo/Attack |name_en=Thunder<ref name="ThunderBall"/> |name_jp=サンダーボール |name_tl=Thunder Ball | ||
| Line 478: | Line 476: | ||
|airshoes= |shadowshoes= |floatshoes= |statusguard= |superarmor= | |airshoes= |shadowshoes= |floatshoes= |statusguard= |superarmor= | ||
|info= | |info= | ||
|locations= | |locations='''Game 3+:''' [[Elec Tower Comp 1]] (33.3%), [[ACDC Area 3 (MMBN4)|ACDC Area 3]] (31.5%), [[Elec Tower Comp 2]] (25.0%), [[ACDC Area 1 (MMBN4)|ACDC Area 1]] (20.4%), [[ACDC Area 2 (MMBN4)|ACDC Area 2]] (16.7%), [[Toy Robot Comp 3]] (15.0%), [[Town Area 1]] (11.1%) | ||
|attacks= | |attacks= | ||
{{EnemyInfo/Attack |name_en=Thunder<ref name="ThunderBall"/> |name_jp=サンダーボール |name_tl=Thunder Ball | {{EnemyInfo/Attack |name_en=Thunder<ref name="ThunderBall"/> |name_jp=サンダーボール |name_tl=Thunder Ball | ||
| Line 499: | Line 497: | ||
|airshoes= |shadowshoes= |floatshoes= |statusguard= |superarmor= | |airshoes= |shadowshoes= |floatshoes= |statusguard= |superarmor= | ||
|info= | |info= | ||
|locations= | |locations='''Always:''' [[Black Earth 1]] (2.8%)<br/>'''Game 3+:''' [[Undernet 1 (MMBN4)|Undernet 1]] (21.8%), [[Meteor Comp 2]] (21.7%), [[Meteor Comp 1]] (10.0%), [[Toy Robot Comp 3]] (8.3%) | ||
|attacks= | |attacks= | ||
{{EnemyInfo/Attack |name_en=Thunder<ref name="ThunderBall"/> |name_jp=サンダーボール |name_tl=Thunder Ball | {{EnemyInfo/Attack |name_en=Thunder<ref name="ThunderBall"/> |name_jp=サンダーボール |name_tl=Thunder Ball | ||
| Line 524: | Line 522: | ||
|airshoes= |shadowshoes= |floatshoes= |statusguard= |superarmor= | |airshoes= |shadowshoes= |floatshoes= |statusguard= |superarmor= | ||
|info= | |info= | ||
|locations= | |locations='''Always:''' [[Castillo NetBattle Machine Comp]] (29.6%), [[Buddha Comp]] (29.2%)<br/>'''Game 1:''' [[Park Area 2]] (28.8%), [[Park Area 1|Park Areas (Windy)]] (18.3%), [[Town Area 4]] (16.7%), [[Park Area 1]] (16.7%), [[Park Area 3]] (10.6%) | ||
|attacks= | |attacks= | ||
{{EnemyInfo/Attack |name_en=Hammer<ref name="Hammer">Mega Man Battle Network 4 Official Strategy Guide</ref> |name_jp=ハンマー直撃 |name_tl=Hammer Direct Hit | {{EnemyInfo/Attack |name_en=Hammer<ref name="Hammer">Mega Man Battle Network 4 Official Strategy Guide</ref> |name_jp=ハンマー直撃 |name_tl=Hammer Direct Hit | ||
| Line 547: | Line 545: | ||
|airshoes= |shadowshoes= |floatshoes= |statusguard= |superarmor= | |airshoes= |shadowshoes= |floatshoes= |statusguard= |superarmor= | ||
|info= | |info= | ||
|locations= | |locations='''Game 1:''' [[Meteor Comp 4]] (21.7%), [[Meteor Comp 2]] (13.3%), [[Meteor Comp 3]] (8.3%) | ||
|attacks= | |attacks= | ||
{{EnemyInfo/Attack |name_en=Hammer<ref name="Hammer"/> |name_jp=ハンマー直撃 |name_tl=Hammer Direct Hit | {{EnemyInfo/Attack |name_en=Hammer<ref name="Hammer"/> |name_jp=ハンマー直撃 |name_tl=Hammer Direct Hit | ||
| Line 569: | Line 567: | ||
|airshoes= |shadowshoes= |floatshoes= |statusguard= |superarmor= | |airshoes= |shadowshoes= |floatshoes= |statusguard= |superarmor= | ||
|info= | |info= | ||
|locations= | |locations='''Always:''' [[Colosseum NetBattle Machine Comp]] (2.8%)<br/>'''Game 2:''' [[Park Area 2]] (28.8%), [[Park Area 1|Park Areas (Windy)]] (18.3%), [[Town Area 4]] (16.7%), [[Park Area 1]] (16.7%), [[Park Area 3]] (10.6%) | ||
|attacks= | |attacks= | ||
{{EnemyInfo/Attack |name_en=Hammer<ref name="Hammer"/> |name_jp=ハンマー直撃 |name_tl=Hammer Direct Hit | {{EnemyInfo/Attack |name_en=Hammer<ref name="Hammer"/> |name_jp=ハンマー直撃 |name_tl=Hammer Direct Hit | ||
| Line 595: | Line 593: | ||
|airshoes= |shadowshoes= |floatshoes= |statusguard= |superarmor= | |airshoes= |shadowshoes= |floatshoes= |statusguard= |superarmor= | ||
|info= | |info= | ||
|locations= | |locations='''Game 2:''' [[Meteor Comp 4]] (21.7%), [[Meteor Comp 2]] (13.3%), [[Meteor Comp 3]] (8.3%) | ||
|attacks= | |attacks= | ||
{{EnemyInfo/Attack |name_en=Hammer<ref name="Hammer"/> |name_jp=ハンマー直撃 |name_tl=Hammer Direct Hit | {{EnemyInfo/Attack |name_en=Hammer<ref name="Hammer"/> |name_jp=ハンマー直撃 |name_tl=Hammer Direct Hit | ||
| Line 620: | Line 618: | ||
|airshoes= |shadowshoes= |floatshoes= |statusguard= |superarmor= | |airshoes= |shadowshoes= |floatshoes= |statusguard= |superarmor= | ||
|info= | |info= | ||
|locations= | |locations='''Game 3+:''' [[Park Area 2]] (28.8%), [[Park Area 1|Park Areas (Windy)]] (18.3%), [[Town Area 4]] (16.7%), [[Park Area 1]] (16.7%), [[Park Area 3]] (10.6%) | ||
|attacks= | |attacks= | ||
{{EnemyInfo/Attack |name_en=Hammer<ref name="Hammer"/> |name_jp=ハンマー直撃 |name_tl=Hammer Direct Hit | {{EnemyInfo/Attack |name_en=Hammer<ref name="Hammer"/> |name_jp=ハンマー直撃 |name_tl=Hammer Direct Hit | ||
| Line 646: | Line 644: | ||
|airshoes= |shadowshoes= |floatshoes= |statusguard= |superarmor= | |airshoes= |shadowshoes= |floatshoes= |statusguard= |superarmor= | ||
|info= | |info= | ||
|locations= | |locations='''Always:''' [[Black Earth 2]] (11.5%)<br/>'''Game 3+:''' [[Meteor Comp 4]] (21.7%), [[Meteor Comp 2]] (13.3%), [[Meteor Comp 3]] (8.3%) | ||
|attacks= | |attacks= | ||
{{EnemyInfo/Attack |name_en=Hammer<ref name="Hammer"/> |name_jp=ハンマー直撃 |name_tl=Hammer Direct Hit | {{EnemyInfo/Attack |name_en=Hammer<ref name="Hammer"/> |name_jp=ハンマー直撃 |name_tl=Hammer Direct Hit | ||
| Line 672: | Line 670: | ||
|airshoes= |shadowshoes= |floatshoes= |statusguard= |superarmor= | |airshoes= |shadowshoes= |floatshoes= |statusguard= |superarmor= | ||
|info= | |info= | ||
|locations= | |locations='''Always:''' [[Hotdog Comp]] (61.1%), [[Vending Machine Comp (MMBN4)|Vending Machine Comp]] (51.1%), [[Microwave Comp]] (30.3%), [[Doghouse Comp (MMBN4)|Dog House Comp]] (14.6%)<br/>'''Game 1:''' [[ACDC Area 1 (MMBN4)|ACDC Areas (Aflame)]] (45.8%), [[Toy Robot Comp 2]] (41.7%), [[Park Area 1|Park Areas (Aflame)]] (31.7%), [[ACDC Area 3 (MMBN4)|ACDC Area 3]] (18.5%), [[ACDC Area 2 (MMBN4)|ACDC Area 2]] (9.3%), [[Elec Tower Comp 2]] (6.2%), [[Park Area 1|Park Areas (Windy)]] (5.0%) | ||
|attacks= | |attacks= | ||
{{EnemyInfo/Attack |name_en=HeatShot |name_jp=ヒートショット |name_tl=Heat Shot | {{EnemyInfo/Attack |name_en=HeatShot |name_jp=ヒートショット |name_tl=Heat Shot | ||
| Line 692: | Line 690: | ||
|airshoes= |shadowshoes= |floatshoes= |statusguard= |superarmor= | |airshoes= |shadowshoes= |floatshoes= |statusguard= |superarmor= | ||
|info= | |info= | ||
|locations= | |locations='''Always:''' [[Statue Comp (MMBN4)|Statue Comp]] (54.9%), [[Buddha Comp]] (35.4%)<br/>'''Game 1:''' [[Town Area 4]] (24.1%), [[Park Area 1|Park Areas (Aflame)]] (23.3%), [[ACDC Area 1 (MMBN4)|ACDC Areas (Aflame)]] (16.7%), [[NetFrica Area]] (10.0%), [[Toy Robot Comp 2]] (3.3%) | ||
|attacks= | |attacks= | ||
{{EnemyInfo/Attack |name_en=HeatShot |name_jp=ヒートショット |name_tl=Heat Shot | {{EnemyInfo/Attack |name_en=HeatShot |name_jp=ヒートショット |name_tl=Heat Shot | ||
| Line 714: | Line 712: | ||
|airshoes= |shadowshoes= |floatshoes= |statusguard= |superarmor= | |airshoes= |shadowshoes= |floatshoes= |statusguard= |superarmor= | ||
|info= | |info= | ||
|locations= | |locations='''Always:''' [[Hotdog Comp]] (2.8%)<br/>'''Game 2:''' [[ACDC Area 1 (MMBN4)|ACDC Areas (Aflame)]] (45.8%), [[Toy Robot Comp 2]] (41.7%), [[Park Area 1|Park Areas (Aflame)]] (31.7%), [[ACDC Area 3 (MMBN4)|ACDC Area 3]] (18.5%), [[ACDC Area 2 (MMBN4)|ACDC Area 2]] (9.3%), [[Elec Tower Comp 2]] (6.2%), [[Park Area 1|Park Areas (Windy)]] (5.0%) | ||
|attacks= | |attacks= | ||
{{EnemyInfo/Attack |name_en=Heat-V |name_jp=ヒートブイ |name_tl=Heat V | {{EnemyInfo/Attack |name_en=Heat-V |name_jp=ヒートブイ |name_tl=Heat V | ||
| Line 734: | Line 732: | ||
|airshoes= |shadowshoes= |floatshoes= |statusguard= |superarmor= | |airshoes= |shadowshoes= |floatshoes= |statusguard= |superarmor= | ||
|info= | |info= | ||
|locations= | |locations='''Always:''' [[Hotdog Comp]] (2.8%)<br/>'''Game 2:''' [[Town Area 4]] (24.1%), [[Park Area 1|Park Areas (Aflame)]] (23.3%), [[ACDC Area 1 (MMBN4)|ACDC Areas (Aflame)]] (16.7%), [[NetFrica Area]] (10.0%), [[Toy Robot Comp 2]] (3.3%) | ||
|attacks= | |attacks= | ||
{{EnemyInfo/Attack |name_en=Heat-V |name_jp=ヒートブイ |name_tl=Heat V | {{EnemyInfo/Attack |name_en=Heat-V |name_jp=ヒートブイ |name_tl=Heat V | ||
| Line 754: | Line 752: | ||
|airshoes= |shadowshoes= |floatshoes= |statusguard= |superarmor= | |airshoes= |shadowshoes= |floatshoes= |statusguard= |superarmor= | ||
|info= | |info= | ||
|locations= | |locations='''Game 3+:''' [[ACDC Area 1 (MMBN4)|ACDC Areas (Aflame)]] (45.8%), [[Toy Robot Comp 2]] (41.7%), [[Park Area 1|Park Areas (Aflame)]] (31.7%), [[ACDC Area 3 (MMBN4)|ACDC Area 3]] (18.5%), [[ACDC Area 2 (MMBN4)|ACDC Area 2]] (9.3%), [[Elec Tower Comp 2]] (6.2%), [[Park Area 1|Park Areas (Windy)]] (5.0%) | ||
|attacks= | |attacks= | ||
{{EnemyInfo/Attack |name_en=HeatSide |name_jp=ヒートサイド |name_tl=Heat Side | {{EnemyInfo/Attack |name_en=HeatSide |name_jp=ヒートサイド |name_tl=Heat Side | ||
| Line 774: | Line 772: | ||
|airshoes= |shadowshoes= |floatshoes= |statusguard= |superarmor= | |airshoes= |shadowshoes= |floatshoes= |statusguard= |superarmor= | ||
|info= | |info= | ||
|locations= | |locations='''Always:''' [[Black Earth 1]] (13.9%)<br/>'''Game 3+:''' [[Town Area 4]] (24.1%), [[Park Area 1|Park Areas (Aflame)]] (23.3%), [[ACDC Area 1 (MMBN4)|ACDC Areas (Aflame)]] (16.7%), [[NetFrica Area]] (10.0%), [[Toy Robot Comp 2]] (3.3%) | ||
|attacks= | |attacks= | ||
{{EnemyInfo/Attack |name_en=HeatSide |name_jp=ヒートサイド |name_tl=Heat Side | {{EnemyInfo/Attack |name_en=HeatSide |name_jp=ヒートサイド |name_tl=Heat Side | ||
| Line 795: | Line 793: | ||
|airshoes= |shadowshoes= |floatshoes=y |statusguard= |superarmor= | |airshoes= |shadowshoes= |floatshoes=y |statusguard= |superarmor= | ||
|info= | |info= | ||
|locations= | |locations='''Always:''' [[Vending Machine Comp (MMBN4)|Vending Machine Comp]] (46.7%), [[Water Comp]] (33.3%)<br/>'''Game 1:''' [[ACDC Area 1 (MMBN4)|ACDC Areas (Flooded)]] (70.0%), [[Town Area 1|Town Areas (Flooded)]] (70.0%), [[Park Area 3]] (37.9%) | ||
|attacks= | |attacks= | ||
{{EnemyInfo/Attack |name_en=Bubbler |name_jp=バブルショット |name_tl=Bubble Shot | {{EnemyInfo/Attack |name_en=Bubbler |name_jp=バブルショット |name_tl=Bubble Shot | ||
| Line 814: | Line 812: | ||
|airshoes= |shadowshoes= |floatshoes=y |statusguard= |superarmor= | |airshoes= |shadowshoes= |floatshoes=y |statusguard= |superarmor= | ||
|info= | |info= | ||
|locations= | |locations='''Always:''' [[Water Comp]] (24.1%)<br/>'''Game 1:''' [[Water God Comps]] (52.1%), [[Undernet 3 (MMBN4)|Undernet 3]] (23.1%), [[Undernet 1 (MMBN4)|Undernet 1]] (21.8%), [[Undernet 2 (MMBN4)|Undernet 2]] (19.2%), [[Meteor Comp 1]] (13.3%), [[Meteor Comp 2]] (10.0%) | ||
|attacks= | |attacks= | ||
{{EnemyInfo/Attack |name_en=Bubbler |name_jp=バブルショット |name_tl=Bubble Shot | {{EnemyInfo/Attack |name_en=Bubbler |name_jp=バブルショット |name_tl=Bubble Shot | ||
| Line 834: | Line 832: | ||
|airshoes= |shadowshoes= |floatshoes=y |statusguard= |superarmor= | |airshoes= |shadowshoes= |floatshoes=y |statusguard= |superarmor= | ||
|info= | |info= | ||
|locations= | |locations='''Always:''' [[Computer Comp (MMBN4)|Computer Comp]] (2.8%)<br/>'''Game 2:''' [[ACDC Area 1 (MMBN4)|ACDC Areas (Flooded)]] (70.0%), [[Town Area 1|Town Areas (Flooded)]] (70.0%), [[Park Area 3]] (37.9%) | ||
|attacks= | |attacks= | ||
{{EnemyInfo/Attack |name_en=Bub-V |name_jp=バブルブイ |name_tl=Bubble V | {{EnemyInfo/Attack |name_en=Bub-V |name_jp=バブルブイ |name_tl=Bubble V | ||
| Line 854: | Line 852: | ||
|airshoes= |shadowshoes= |floatshoes=y |statusguard= |superarmor= | |airshoes= |shadowshoes= |floatshoes=y |statusguard= |superarmor= | ||
|info= | |info= | ||
|locations= | |locations='''Always:''' [[Computer Comp (MMBN4)|Computer Comp]] (2.8%)<br/>'''Game 2:''' [[Water God Comps]] (52.1%), [[Undernet 3 (MMBN4)|Undernet 3]] (23.1%), [[Undernet 1 (MMBN4)|Undernet 1]] (21.8%), [[Undernet 2 (MMBN4)|Undernet 2]] (19.2%), [[Meteor Comp 1]] (13.3%), [[Meteor Comp 2]] (10.0%) | ||
|attacks= | |attacks= | ||
{{EnemyInfo/Attack |name_en=Bub-V |name_jp=バブルブイ |name_tl=Bubble V | {{EnemyInfo/Attack |name_en=Bub-V |name_jp=バブルブイ |name_tl=Bubble V | ||
| Line 874: | Line 872: | ||
|airshoes= |shadowshoes= |floatshoes=y |statusguard= |superarmor= | |airshoes= |shadowshoes= |floatshoes=y |statusguard= |superarmor= | ||
|info= | |info= | ||
|locations= | |locations='''Game 3+:''' [[ACDC Area 1 (MMBN4)|ACDC Areas (Flooded)]] (70.0%), [[Town Area 1|Town Areas (Flooded)]] (70.0%), [[Park Area 3]] (37.9%) | ||
|attacks= | |attacks= | ||
{{EnemyInfo/Attack |name_en=BubbleSide |name_jp=バブルサイド |name_tl=Bubble Side | {{EnemyInfo/Attack |name_en=BubbleSide |name_jp=バブルサイド |name_tl=Bubble Side | ||
| Line 894: | Line 892: | ||
|airshoes= |shadowshoes= |floatshoes=y |statusguard= |superarmor= | |airshoes= |shadowshoes= |floatshoes=y |statusguard= |superarmor= | ||
|info= | |info= | ||
|locations= | |locations='''Always:''' [[Black Earth 2]] (9.0%)<br/>'''Game 3+:''' [[Water God Comps]] (52.1%), [[Undernet 3 (MMBN4)|Undernet 3]] (23.1%), [[Undernet 1 (MMBN4)|Undernet 1]] (21.8%), [[Undernet 2 (MMBN4)|Undernet 2]] (19.2%), [[Meteor Comp 1]] (13.3%), [[Meteor Comp 2]] (10.0%) | ||
|attacks= | |attacks= | ||
{{EnemyInfo/Attack |name_en=BubbleSide |name_jp=バブルサイド |name_tl=Bubble Side | {{EnemyInfo/Attack |name_en=BubbleSide |name_jp=バブルサイド |name_tl=Bubble Side | ||
| Line 915: | Line 913: | ||
|airshoes=y |shadowshoes= |floatshoes=y |statusguard= |superarmor= | |airshoes=y |shadowshoes= |floatshoes=y |statusguard= |superarmor= | ||
|info= | |info= | ||
|locations= | |locations='''Always:''' [[Stereo Comp]] (24.2%), [[Dome NetBattle Machine Comp]] (23.5%)<br/>'''Game 1:''' [[Toy Robot Comp 3]] (20.0%), [[Town Area 2]] (16.7%), [[Park Area 1|Park Areas (Windy)]] (15.0%), [[Town Area 1]] (11.1%), [[Town Area 3]] (3.9%) | ||
|attacks= | |attacks= | ||
{{EnemyInfo/Attack |name_en=Boomer |name_jp=ブーメラン |name_tl=Boomerang | {{EnemyInfo/Attack |name_en=Boomer |name_jp=ブーメラン |name_tl=Boomerang | ||
| Line 934: | Line 932: | ||
|airshoes=y |shadowshoes= |floatshoes=y |statusguard= |superarmor= | |airshoes=y |shadowshoes= |floatshoes=y |statusguard= |superarmor= | ||
|info= | |info= | ||
|locations= | |locations='''Always:''' [[Nupopo Comp]] (18.8%)<br/>'''Game 1:''' [[NetFrica Area]] (16.7%), [[Netopia Area]] (15.4%), [[Undernet 3 (MMBN4)|Undernet 3]] (15.4%), [[Sharo Area]] (7.7%), [[Undernet 5 (MMBN4)|Undernet 5]] (2.6%) | ||
|attacks= | |attacks= | ||
{{EnemyInfo/Attack |name_en=Boomer |name_jp=ブーメラン |name_tl=Boomerang | {{EnemyInfo/Attack |name_en=Boomer |name_jp=ブーメラン |name_tl=Boomerang | ||
| Line 956: | Line 954: | ||
|airshoes=y |shadowshoes= |floatshoes=y |statusguard= |superarmor= | |airshoes=y |shadowshoes= |floatshoes=y |statusguard= |superarmor= | ||
|info= | |info= | ||
|locations= | |locations='''Always:''' [[Water Comp]] (2.8%)<br/>'''Game 2:''' [[Toy Robot Comp 3]] (20.0%), [[Town Area 2]] (16.7%), [[Park Area 1|Park Areas (Windy)]] (15.0%), [[Town Area 1]] (11.1%), [[Town Area 3]] (3.9%) | ||
|attacks= | |attacks= | ||
{{EnemyInfo/Attack |name_en=Boomer |name_jp=ブーメラン |name_tl=Boomerang | {{EnemyInfo/Attack |name_en=Boomer |name_jp=ブーメラン |name_tl=Boomerang | ||
| Line 979: | Line 977: | ||
|airshoes=y |shadowshoes= |floatshoes=y |statusguard= |superarmor= | |airshoes=y |shadowshoes= |floatshoes=y |statusguard= |superarmor= | ||
|info= | |info= | ||
|locations= | |locations='''Always:''' [[Water Comp]] (2.8%)<br/>'''Game 2:''' [[NetFrica Area]] (16.7%), [[Netopia Area]] (15.4%), [[Undernet 3 (MMBN4)|Undernet 3]] (15.4%), [[Sharo Area]] (7.7%), [[Undernet 5 (MMBN4)|Undernet 5]] (2.6%) | ||
|attacks= | |attacks= | ||
{{EnemyInfo/Attack |name_en=Boomer |name_jp=ブーメラン |name_tl=Boomerang | {{EnemyInfo/Attack |name_en=Boomer |name_jp=ブーメラン |name_tl=Boomerang | ||
| Line 1,002: | Line 1,000: | ||
|airshoes=y |shadowshoes= |floatshoes=y |statusguard= |superarmor= | |airshoes=y |shadowshoes= |floatshoes=y |statusguard= |superarmor= | ||
|info= | |info= | ||
|locations= | |locations='''Game 3+:''' [[Toy Robot Comp 3]] (20.0%), [[Town Area 2]] (16.7%), [[Park Area 1|Park Areas (Windy)]] (15.0%), [[Town Area 1]] (11.1%), [[Town Area 3]] (3.9%) | ||
|attacks= | |attacks= | ||
{{EnemyInfo/Attack |name_en=Boomer |name_jp=ブーメラン |name_tl=Boomerang | {{EnemyInfo/Attack |name_en=Boomer |name_jp=ブーメラン |name_tl=Boomerang | ||
| Line 1,025: | Line 1,023: | ||
|airshoes=y |shadowshoes= |floatshoes=y |statusguard= |superarmor= | |airshoes=y |shadowshoes= |floatshoes=y |statusguard= |superarmor= | ||
|info= | |info= | ||
|locations= | |locations='''Always:''' [[Black Earth 2]] (6.4%)<br/>'''Game 3+:''' [[NetFrica Area]] (16.7%), [[Netopia Area]] (15.4%), [[Undernet 3 (MMBN4)|Undernet 3]] (15.4%), [[Sharo Area]] (7.7%), [[Undernet 5 (MMBN4)|Undernet 5]] (2.6%) | ||
|attacks= | |attacks= | ||
{{EnemyInfo/Attack |name_en=Boomer |name_jp=ブーメラン |name_tl=Boomerang | {{EnemyInfo/Attack |name_en=Boomer |name_jp=ブーメラン |name_tl=Boomerang | ||
| Line 1,049: | Line 1,047: | ||
|airshoes= |shadowshoes= |floatshoes= |statusguard= |superarmor= | |airshoes= |shadowshoes= |floatshoes= |statusguard= |superarmor= | ||
|info= | |info= | ||
|locations= | |locations='''Always:''' [[Hero Comp]] (27.1%), [[Ticket Comp (MMBN4)|Ticket Comp]] (19.6%), [[Stand Comp]] (17.6%)<br/>'''Game 1:''' [[Toy Robot Comp 1]] (15.0%), [[Toy Robot Comp 4]] (15.0%) | ||
|attacks= | |attacks= | ||
{{EnemyInfo/Attack |name_en=Fanfare |name_jp=オウエンカ |name_tl=Ouenka | {{EnemyInfo/Attack |name_en=Fanfare |name_jp=オウエンカ |name_tl=Ouenka | ||
| Line 1,070: | Line 1,068: | ||
|airshoes= |shadowshoes= |floatshoes= |statusguard= |superarmor= | |airshoes= |shadowshoes= |floatshoes= |statusguard= |superarmor= | ||
|info= | |info= | ||
|locations= | |locations='''Game 1:''' [[Undernet 2 (MMBN4)|Undernet 2]] (19.2%), [[Undernet 5 (MMBN4)|Undernet 5]] (11.5%)<br/>'''Game 2:''' [[Undernet 2 (MMBN4)|Undernet 2]] (3.8%)<br/>'''Game 3+:''' [[Undernet 2 (MMBN4)|Undernet 2]] (3.8%) | ||
|attacks= | |attacks= | ||
{{EnemyInfo/Attack |name_en=Discord |name_jp=ディスコード |name_tl=Discord | {{EnemyInfo/Attack |name_en=Discord |name_jp=ディスコード |name_tl=Discord | ||
| Line 1,092: | Line 1,090: | ||
|airshoes= |shadowshoes= |floatshoes= |statusguard= |superarmor= | |airshoes= |shadowshoes= |floatshoes= |statusguard= |superarmor= | ||
|info= | |info= | ||
|locations= | |locations='''Always:''' [[Ticket Comp (MMBN4)|Ticket Comp]] (2.9%)<br/>'''Game 2:''' [[Toy Robot Comp 1]] (15.0%), [[Toy Robot Comp 4]] (15.0%) | ||
|attacks= | |attacks= | ||
{{EnemyInfo/Attack |name_en=Timpani |name_jp=ティンパニー |name_tl=Timpani | {{EnemyInfo/Attack |name_en=Timpani |name_jp=ティンパニー |name_tl=Timpani | ||
| Line 1,114: | Line 1,112: | ||
|airshoes= |shadowshoes= |floatshoes= |statusguard= |superarmor= | |airshoes= |shadowshoes= |floatshoes= |statusguard= |superarmor= | ||
|info= | |info= | ||
|locations= | |locations='''Always:''' [[Stand Comp]] (2.9%)<br/>'''Game 2:''' [[Undernet 2 (MMBN4)|Undernet 2]] (15.4%), [[Undernet 5 (MMBN4)|Undernet 5]] (11.5%) | ||
|attacks= | |attacks= | ||
{{EnemyInfo/Attack |name_en=Silence |name_jp=サイレンス |name_tl=Silence | {{EnemyInfo/Attack |name_en=Silence |name_jp=サイレンス |name_tl=Silence | ||
| Line 1,136: | Line 1,134: | ||
|airshoes= |shadowshoes= |floatshoes= |statusguard= |superarmor= | |airshoes= |shadowshoes= |floatshoes= |statusguard= |superarmor= | ||
|info= | |info= | ||
|locations= | |locations='''Game 3+:''' [[Toy Robot Comp 1]] (15.0%), [[Toy Robot Comp 4]] (15.0%) | ||
|attacks= | |attacks= | ||
{{EnemyInfo/Attack |name_en=Horn<ref name="Horn">Mega Man Battle Network 4 Official Strategy Guide</ref> |name_jp=ホルン |name_tl=Horn | {{EnemyInfo/Attack |name_en=Horn<ref name="Horn">Mega Man Battle Network 4 Official Strategy Guide</ref> |name_jp=ホルン |name_tl=Horn | ||
| Line 1,154: | Line 1,152: | ||
|airshoes= |shadowshoes= |floatshoes= |statusguard= |superarmor= | |airshoes= |shadowshoes= |floatshoes= |statusguard= |superarmor= | ||
|info= | |info= | ||
|locations= | |locations='''Game 3+:''' [[Undernet 2 (MMBN4)|Undernet 2]] (15.4%), [[Undernet 5 (MMBN4)|Undernet 5]] (11.5%) | ||
|attacks= | |attacks= | ||
{{EnemyInfo/Attack |name_en=Fanfare |name_jp=オウエンカ |name_tl=Ouenka | {{EnemyInfo/Attack |name_en=Fanfare |name_jp=オウエンカ |name_tl=Ouenka | ||
| Line 1,175: | Line 1,173: | ||
|airshoes=y |shadowshoes= |floatshoes=y |statusguard= |superarmor= | |airshoes=y |shadowshoes= |floatshoes=y |statusguard= |superarmor= | ||
|info= | |info= | ||
|locations= | |locations='''Always:''' [[Colosseum NetBattle Machine Comp]] (2.8%)<br/>'''Game 1:''' [[YumLand Area]] (28.2%), [[Toy Robot Comp 3]] (26.7%), [[NetFrica Area]] (18.9%) | ||
|attacks= | |attacks= | ||
{{EnemyInfo/Attack |name_en=MagShock<ref name="MagShock">Listed as '''Magshock''' in Mega Man Battle Network 4 Official Strategy Guide</ref> |name_jp=マグショック |name_tl=Mag Shock | {{EnemyInfo/Attack |name_en=MagShock<ref name="MagShock">Listed as '''Magshock''' in Mega Man Battle Network 4 Official Strategy Guide</ref> |name_jp=マグショック |name_tl=Mag Shock | ||
| Line 1,195: | Line 1,193: | ||
|airshoes=y |shadowshoes= |floatshoes=y |statusguard= |superarmor= | |airshoes=y |shadowshoes= |floatshoes=y |statusguard= |superarmor= | ||
|info= | |info= | ||
|locations= | |locations='''Always:''' [[Hero Comp]] (22.9%)<br/>'''Game 1:''' [[Meteor Comp 1]] (20.0%), [[Meteor Comp 3]] (13.3%), [[Undernet 4 (MMBN4)|Undernet 4]] (11.5%), [[Meteor Comp 2]] (10.0%), [[Meteor Comp 4]] (10.0%) | ||
|attacks= | |attacks= | ||
{{EnemyInfo/Attack |name_en=MagShock<ref name="MagShock"/> |name_jp=マグショック |name_tl=Mag Shock | {{EnemyInfo/Attack |name_en=MagShock<ref name="MagShock"/> |name_jp=マグショック |name_tl=Mag Shock | ||
| Line 1,215: | Line 1,213: | ||
|airshoes=y |shadowshoes= |floatshoes=y |statusguard= |superarmor= | |airshoes=y |shadowshoes= |floatshoes=y |statusguard= |superarmor= | ||
|info= | |info= | ||
|locations= | |locations='''Always:''' [[Colosseum NetBattle Machine Comp]] (2.8%)<br/>'''Game 2:''' [[YumLand Area]] (28.2%), [[Toy Robot Comp 3]] (26.7%), [[NetFrica Area]] (18.9%) | ||
|attacks= | |attacks= | ||
{{EnemyInfo/Attack |name_en=MagShock<ref name="MagShock"/> |name_jp=マグショック |name_tl=Mag Shock | {{EnemyInfo/Attack |name_en=MagShock<ref name="MagShock"/> |name_jp=マグショック |name_tl=Mag Shock | ||
| Line 1,235: | Line 1,233: | ||
|airshoes=y |shadowshoes= |floatshoes=y |statusguard= |superarmor= | |airshoes=y |shadowshoes= |floatshoes=y |statusguard= |superarmor= | ||
|info= | |info= | ||
|locations= | |locations='''Always:''' [[Colosseum NetBattle Machine Comp]] (2.8%)<br/>'''Game 2:''' [[Meteor Comp 1]] (20.0%), [[Meteor Comp 3]] (13.3%), [[Undernet 4 (MMBN4)|Undernet 4]] (11.5%), [[Meteor Comp 2]] (10.0%), [[Meteor Comp 4]] (10.0%) | ||
|attacks= | |attacks= | ||
{{EnemyInfo/Attack |name_en=MagShock<ref name="MagShock"/> |name_jp=マグショック |name_tl=Mag Shock | {{EnemyInfo/Attack |name_en=MagShock<ref name="MagShock"/> |name_jp=マグショック |name_tl=Mag Shock | ||
| Line 1,255: | Line 1,253: | ||
|airshoes=y |shadowshoes= |floatshoes=y |statusguard= |superarmor= | |airshoes=y |shadowshoes= |floatshoes=y |statusguard= |superarmor= | ||
|info= | |info= | ||
|locations= | |locations='''Game 3+:''' [[YumLand Area]] (28.2%), [[Toy Robot Comp 3]] (26.7%), [[NetFrica Area]] (18.9%) | ||
|attacks= | |attacks= | ||
{{EnemyInfo/Attack |name_en=MagShock<ref name="MagShock"/> |name_jp=マグショック |name_tl=Mag Shock | {{EnemyInfo/Attack |name_en=MagShock<ref name="MagShock"/> |name_jp=マグショック |name_tl=Mag Shock | ||
| Line 1,275: | Line 1,273: | ||
|airshoes=y |shadowshoes= |floatshoes=y |statusguard= |superarmor= | |airshoes=y |shadowshoes= |floatshoes=y |statusguard= |superarmor= | ||
|info= | |info= | ||
|locations= | |locations='''Always:''' [[Black Earth 1]] (5.6%)<br/>'''Game 3+:''' [[Meteor Comp 1]] (20.0%), [[Meteor Comp 3]] (13.3%), [[Undernet 4 (MMBN4)|Undernet 4]] (11.5%), [[Meteor Comp 2]] (10.0%), [[Meteor Comp 4]] (10.0%) | ||
|attacks= | |attacks= | ||
{{EnemyInfo/Attack |name_en=MagShock<ref name="MagShock"/> |name_jp=マグショック |name_tl=Mag Shock | {{EnemyInfo/Attack |name_en=MagShock<ref name="MagShock"/> |name_jp=マグショック |name_tl=Mag Shock | ||
| Line 1,296: | Line 1,294: | ||
|airshoes= |shadowshoes= |floatshoes= |statusguard= |superarmor= | |airshoes= |shadowshoes= |floatshoes= |statusguard= |superarmor= | ||
|info= | |info= | ||
|locations= | |locations='''Always:''' [[Toy Comp]] (29.2%), [[Stereo Comp]] (2.0%)<br/>'''Game 1:''' [[Elec Tower Comp 1]] (29.2%), [[Elec Tower Comp 2]] (27.1%), [[Park Area 1|Park Areas (Windy)]] (15.0%) | ||
|attacks= | |attacks= | ||
{{EnemyInfo/Attack |name_en=High-Bound<ref name="High-Bound">Mega Man Battle Network 4 Official Strategy Guide</ref> |name_jp=ハイバウンド |name_tl=High Bound | {{EnemyInfo/Attack |name_en=High-Bound<ref name="High-Bound">Mega Man Battle Network 4 Official Strategy Guide</ref> |name_jp=ハイバウンド |name_tl=High Bound | ||
| Line 1,318: | Line 1,316: | ||
|airshoes= |shadowshoes= |floatshoes= |statusguard= |superarmor= | |airshoes= |shadowshoes= |floatshoes= |statusguard= |superarmor= | ||
|info= | |info= | ||
|locations= | |locations='''Always:''' [[Goddess Comp (MMBN4)|Goddess Comp]] (41.7%), [[Toy Comp]] (29.2%), [[Hero Comp]] (25.0%)<br/>'''Game 1:''' [[Toy Robot Comp 2]] (30.0%), [[Toy Robot Comp 1]] (28.3%), [[Sharo Area]] (23.1%), [[Undernet 5 (MMBN4)|Undernet 5]] (19.2%), [[YumLand Area]] (19.2%), [[Toy Robot Comp 4]] (10.0%), [[Meteor Comp 3]] (6.7%), [[Meteor Comp 2]] (5.0%), [[Toy Robot Comp 3]] (3.3%) | ||
|attacks= | |attacks= | ||
{{EnemyInfo/Attack |name_en=High-Bound<ref name="High-Bound"/> |name_jp=ハイバウンド |name_tl=High Bound | {{EnemyInfo/Attack |name_en=High-Bound<ref name="High-Bound"/> |name_jp=ハイバウンド |name_tl=High Bound | ||
| Line 1,339: | Line 1,337: | ||
|airshoes= |shadowshoes= |floatshoes= |statusguard= |superarmor= | |airshoes= |shadowshoes= |floatshoes= |statusguard= |superarmor= | ||
|info= | |info= | ||
|locations= | |locations='''Always:''' [[Castillo NetBattle Machine Comp]] (2.8%)<br/>'''Game 2:''' [[Elec Tower Comp 1]] (29.2%), [[Elec Tower Comp 2]] (27.1%), [[Park Area 1|Park Areas (Windy)]] (15.0%) | ||
|attacks= | |attacks= | ||
{{EnemyInfo/Attack |name_en=High-Bound<ref name="High-Bound"/> |name_jp=ハイバウンド |name_tl=High Bound | {{EnemyInfo/Attack |name_en=High-Bound<ref name="High-Bound"/> |name_jp=ハイバウンド |name_tl=High Bound | ||
| Line 1,361: | Line 1,359: | ||
|airshoes= |shadowshoes= |floatshoes= |statusguard= |superarmor= | |airshoes= |shadowshoes= |floatshoes= |statusguard= |superarmor= | ||
|info= | |info= | ||
|locations= | |locations='''Always:''' [[Castillo NetBattle Machine Comp]] (2.8%)<br/>'''Game 2:''' [[Toy Robot Comp 2]] (30.0%), [[Toy Robot Comp 1]] (28.3%), [[Sharo Area]] (23.1%), [[Undernet 5 (MMBN4)|Undernet 5]] (19.2%), [[YumLand Area]] (19.2%), [[Toy Robot Comp 4]] (10.0%), [[Meteor Comp 3]] (6.7%), [[Meteor Comp 2]] (5.0%), [[Toy Robot Comp 3]] (3.3%) | ||
|attacks= | |attacks= | ||
{{EnemyInfo/Attack |name_en=High-Bound<ref name="High-Bound"/> |name_jp=ハイバウンド |name_tl=High Bound | {{EnemyInfo/Attack |name_en=High-Bound<ref name="High-Bound"/> |name_jp=ハイバウンド |name_tl=High Bound | ||
| Line 1,383: | Line 1,381: | ||
|airshoes= |shadowshoes= |floatshoes= |statusguard= |superarmor= | |airshoes= |shadowshoes= |floatshoes= |statusguard= |superarmor= | ||
|info= | |info= | ||
|locations= | |locations='''Game 3+:''' [[Elec Tower Comp 1]] (29.2%), [[Elec Tower Comp 2]] (27.1%), [[Park Area 1|Park Areas (Windy)]] (15.0%) | ||
|attacks= | |attacks= | ||
{{EnemyInfo/Attack |name_en=High-Bound<ref name="High-Bound"/> |name_jp=ハイバウンド |name_tl=High Bound | {{EnemyInfo/Attack |name_en=High-Bound<ref name="High-Bound"/> |name_jp=ハイバウンド |name_tl=High Bound | ||
| Line 1,403: | Line 1,401: | ||
|airshoes= |shadowshoes= |floatshoes= |statusguard= |superarmor= | |airshoes= |shadowshoes= |floatshoes= |statusguard= |superarmor= | ||
|info= | |info= | ||
|locations= | |locations='''Always:''' [[Black Earth 1]] (6.9%), [[Black Earth 2]] (2.6%)<br/>'''Game 3+:''' [[Toy Robot Comp 2]] (30.0%), [[Toy Robot Comp 1]] (28.3%), [[Sharo Area]] (23.1%), [[Undernet 5 (MMBN4)|Undernet 5]] (19.2%), [[YumLand Area]] (19.2%), [[Toy Robot Comp 4]] (10.0%), [[Meteor Comp 3]] (6.7%), [[Meteor Comp 2]] (5.0%), [[Toy Robot Comp 3]] (3.3%) | ||
|attacks= | |attacks= | ||
{{EnemyInfo/Attack |name_en=High-Bound<ref name="High-Bound"/> |name_jp=ハイバウンド |name_tl=High Bound | {{EnemyInfo/Attack |name_en=High-Bound<ref name="High-Bound"/> |name_jp=ハイバウンド |name_tl=High Bound | ||
| Line 1,423: | Line 1,421: | ||
|airshoes= |shadowshoes= |floatshoes= |statusguard= |superarmor= | |airshoes= |shadowshoes= |floatshoes= |statusguard= |superarmor= | ||
|info= | |info= | ||
|locations= | |locations='''Always:''' [[CyberTop Comp]] (29.2%), [[Stand Comp]] (15.7%)<br/>'''Game 1:''' [[Park Area 1]] (22.7%), [[Park Area 2]] (22.7%), [[Park Area 3]] (18.2%) | ||
|attacks= | |attacks= | ||
{{EnemyInfo/Attack |name_en=AirHockey |name_jp=エアホッケー |name_tl=Air Hockey | {{EnemyInfo/Attack |name_en=AirHockey |name_jp=エアホッケー |name_tl=Air Hockey | ||
| Line 1,442: | Line 1,440: | ||
|airshoes= |shadowshoes= |floatshoes= |statusguard= |superarmor= | |airshoes= |shadowshoes= |floatshoes= |statusguard= |superarmor= | ||
|info= | |info= | ||
|locations= | |locations='''Always:''' [[Hero Comp]] (25.0%)<br/>'''Game 1:''' [[Undernet 4 (MMBN4)|Undernet 4]] (15.4%), [[Undernet 5 (MMBN4)|Undernet 5]] (14.1%), [[Undernet 6 (MMBN4)|Undernet 6]] (4.6%) | ||
|attacks= | |attacks= | ||
{{EnemyInfo/Attack |name_en=AirHockey |name_jp=エアホッケー |name_tl=Air Hockey | {{EnemyInfo/Attack |name_en=AirHockey |name_jp=エアホッケー |name_tl=Air Hockey | ||
| Line 1,463: | Line 1,461: | ||
|airshoes= |shadowshoes= |floatshoes= |statusguard= |superarmor= | |airshoes= |shadowshoes= |floatshoes= |statusguard= |superarmor= | ||
|info= | |info= | ||
|locations= | |locations='''Always:''' [[Castillo NetBattle Machine Comp]] (2.8%)<br/>'''Game 2:''' [[Park Area 1]] (22.7%), [[Park Area 2]] (22.7%), [[Park Area 3]] (18.2%) | ||
|attacks= | |attacks= | ||
{{EnemyInfo/Attack |name_en=AirHockey |name_jp=エアホッケー |name_tl=Air Hockey | {{EnemyInfo/Attack |name_en=AirHockey |name_jp=エアホッケー |name_tl=Air Hockey | ||
| Line 1,484: | Line 1,482: | ||
|airshoes= |shadowshoes= |floatshoes= |statusguard= |superarmor= | |airshoes= |shadowshoes= |floatshoes= |statusguard= |superarmor= | ||
|info= | |info= | ||
|locations= | |locations='''Always:''' [[Castillo NetBattle Machine Comp]] (2.8%)<br/>'''Game 2:''' [[Undernet 4 (MMBN4)|Undernet 4]] (15.4%), [[Undernet 5 (MMBN4)|Undernet 5]] (14.1%), [[Undernet 6 (MMBN4)|Undernet 6]] (4.6%) | ||
|attacks= | |attacks= | ||
{{EnemyInfo/Attack |name_en=AirHockey |name_jp=エアホッケー |name_tl=Air Hockey | {{EnemyInfo/Attack |name_en=AirHockey |name_jp=エアホッケー |name_tl=Air Hockey | ||
| Line 1,505: | Line 1,503: | ||
|airshoes= |shadowshoes= |floatshoes= |statusguard= |superarmor= | |airshoes= |shadowshoes= |floatshoes= |statusguard= |superarmor= | ||
|info= | |info= | ||
|locations= | |locations='''Game 3+:''' [[Park Area 1]] (22.7%), [[Park Area 2]] (22.7%), [[Park Area 3]] (18.2%) | ||
|attacks= | |attacks= | ||
{{EnemyInfo/Attack |name_en=AirHockey |name_jp=エアホッケー |name_tl=Air Hockey | {{EnemyInfo/Attack |name_en=AirHockey |name_jp=エアホッケー |name_tl=Air Hockey | ||
| Line 1,526: | Line 1,524: | ||
|airshoes= |shadowshoes= |floatshoes= |statusguard= |superarmor= | |airshoes= |shadowshoes= |floatshoes= |statusguard= |superarmor= | ||
|info= | |info= | ||
|locations= | |locations='''Game 3+:''' [[Undernet 4 (MMBN4)|Undernet 4]] (15.4%), [[Undernet 5 (MMBN4)|Undernet 5]] (14.1%), [[Undernet 6 (MMBN4)|Undernet 6]] (4.6%) | ||
|attacks= | |attacks= | ||
{{EnemyInfo/Attack |name_en=AirHockey |name_jp=エアホッケー |name_tl=Air Hockey | {{EnemyInfo/Attack |name_en=AirHockey |name_jp=エアホッケー |name_tl=Air Hockey | ||
| Line 1,548: | Line 1,546: | ||
|airshoes= |shadowshoes= |floatshoes= |statusguard= |superarmor= | |airshoes= |shadowshoes= |floatshoes= |statusguard= |superarmor= | ||
|info=Can attack over holes. | |info=Can attack over holes. | ||
|locations= | |locations='''Always:''' [[Statue Comp (MMBN4)|Statue Comp]] (39.2%)<br/>'''Game 1:''' [[YumLand Area]] (24.4%) | ||
|attacks= | |attacks= | ||
{{EnemyInfo/Attack |name_en=SideBamboo<ref name="SideBamboo">Listed as '''SideLance''' in Mega Man Battle Network 4 Official Strategy Guide</ref> |name_jp=サイドバンブー |name_tl=Side Bamboo | {{EnemyInfo/Attack |name_en=SideBamboo<ref name="SideBamboo">Listed as '''SideLance''' in Mega Man Battle Network 4 Official Strategy Guide</ref> |name_jp=サイドバンブー |name_tl=Side Bamboo | ||
| Line 1,568: | Line 1,566: | ||
|airshoes= |shadowshoes= |floatshoes= |statusguard= |superarmor= | |airshoes= |shadowshoes= |floatshoes= |statusguard= |superarmor= | ||
|info=Can attack over holes. | |info=Can attack over holes. | ||
|locations= | |locations='''Game 1:''' [[Undernet 3 (MMBN4)|Undernet 3]] (26.9%), [[Undernet 5 (MMBN4)|Undernet 5]] (14.1%)<br/>'''Game 2:''' [[Undernet 3 (MMBN4)|Undernet 3]] (3.8%)<br/>'''Game 3+:''' [[Undernet 3 (MMBN4)|Undernet 3]] (3.8%) | ||
|attacks= | |attacks= | ||
{{EnemyInfo/Attack |name_en=SideBamboo<ref name="SideBamboo"/> |name_jp=サイドバンブー |name_tl=Side Bamboo | {{EnemyInfo/Attack |name_en=SideBamboo<ref name="SideBamboo"/> |name_jp=サイドバンブー |name_tl=Side Bamboo | ||
| Line 1,588: | Line 1,586: | ||
|airshoes= |shadowshoes= |floatshoes= |statusguard= |superarmor= | |airshoes= |shadowshoes= |floatshoes= |statusguard= |superarmor= | ||
|info=Can attack over holes. | |info=Can attack over holes. | ||
|locations= | |locations='''Always:''' [[Statue Comp (MMBN4)|Statue Comp]] (2.0%)<br/>'''Game 2:''' [[YumLand Area]] (24.4%) | ||
|attacks= | |attacks= | ||
{{EnemyInfo/Attack |name_en=SideBamboo<ref name="SideBamboo"/> |name_jp=サイドバンブー |name_tl=Side Bamboo | {{EnemyInfo/Attack |name_en=SideBamboo<ref name="SideBamboo"/> |name_jp=サイドバンブー |name_tl=Side Bamboo | ||
| Line 1,607: | Line 1,605: | ||
|airshoes= |shadowshoes= |floatshoes= |statusguard= |superarmor= | |airshoes= |shadowshoes= |floatshoes= |statusguard= |superarmor= | ||
|info=Can attack over holes. | |info=Can attack over holes. | ||
|locations= | |locations='''Game 2:''' [[Undernet 3 (MMBN4)|Undernet 3]] (23.1%), [[Undernet 5 (MMBN4)|Undernet 5]] (14.1%) | ||
|attacks= | |attacks= | ||
{{EnemyInfo/Attack |name_en=SideBamboo<ref name="SideBamboo"/> |name_jp=サイドバンブー |name_tl=Side Bamboo | {{EnemyInfo/Attack |name_en=SideBamboo<ref name="SideBamboo"/> |name_jp=サイドバンブー |name_tl=Side Bamboo | ||
| Line 1,625: | Line 1,623: | ||
|airshoes= |shadowshoes= |floatshoes= |statusguard= |superarmor= | |airshoes= |shadowshoes= |floatshoes= |statusguard= |superarmor= | ||
|info=Can attack over holes. | |info=Can attack over holes. | ||
|locations= | |locations='''Game 3+:''' [[YumLand Area]] (24.4%) | ||
|attacks= | |attacks= | ||
{{EnemyInfo/Attack |name_en=SideBamboo<ref name="SideBamboo"/> |name_jp=サイドバンブー |name_tl=Side Bamboo | {{EnemyInfo/Attack |name_en=SideBamboo<ref name="SideBamboo"/> |name_jp=サイドバンブー |name_tl=Side Bamboo | ||
| Line 1,644: | Line 1,642: | ||
|airshoes= |shadowshoes= |floatshoes= |statusguard= |superarmor= | |airshoes= |shadowshoes= |floatshoes= |statusguard= |superarmor= | ||
|info=Can attack over holes. | |info=Can attack over holes. | ||
|locations= | |locations='''Always:''' [[Black Earth 2]] (3.8%), [[Black Earth 1]] (2.8%)<br/>'''Game 3+:''' [[Undernet 3 (MMBN4)|Undernet 3]] (23.1%), [[Undernet 5 (MMBN4)|Undernet 5]] (14.1%) | ||
|attacks= | |attacks= | ||
{{EnemyInfo/Attack |name_en=SideBamboo<ref name="SideBamboo"/> |name_jp=サイドバンブー |name_tl=Side Bamboo | {{EnemyInfo/Attack |name_en=SideBamboo<ref name="SideBamboo"/> |name_jp=サイドバンブー |name_tl=Side Bamboo | ||
| Line 1,663: | Line 1,661: | ||
|airshoes=y |shadowshoes= |floatshoes=y |statusguard= |superarmor= | |airshoes=y |shadowshoes= |floatshoes=y |statusguard= |superarmor= | ||
|info= | |info= | ||
|locations= | |locations='''Always:''' [[Vending Machine Comp (MMBN4)|Vending Machine Comp]] (2.2%)<br/>'''Game 1:''' [[Park Area 3]] (24.2%), [[Park Area 2]] (21.2%), [[Park Area 1]] (18.2%), [[Sharo Area]] (7.7%), [[Park Area 1|Park Areas (Windy)]] (5.0%) | ||
|attacks= | |attacks= | ||
{{EnemyInfo/Attack |name_en=Blizzard<ref name="Blizzard">Listed as '''Teruteru Breath Aqua''' in Mega Man Battle Network 4 Official Strategy Guide</ref> |name_jp=ブリザード |name_tl=Blizzard | {{EnemyInfo/Attack |name_en=Blizzard<ref name="Blizzard">Listed as '''Teruteru Breath Aqua''' in Mega Man Battle Network 4 Official Strategy Guide</ref> |name_jp=ブリザード |name_tl=Blizzard | ||
| Line 1,688: | Line 1,686: | ||
|airshoes=y |shadowshoes= |floatshoes=y |statusguard= |superarmor= | |airshoes=y |shadowshoes= |floatshoes=y |statusguard= |superarmor= | ||
|info= | |info= | ||
|locations= | |locations='''Game 1:''' [[NetFrica Area]] (20.0%), [[Meteor Comp 1]] (16.7%), [[Undernet 4 (MMBN4)|Undernet 4]] (12.8%), [[Undernet 6 (MMBN4)|Undernet 6]] (10.2%), [[Meteor Comp 3]] (3.3%), [[Undernet 5 (MMBN4)|Undernet 5]] (2.6%)<br/>'''Game 2:''' [[NetFrica Area]] (20.0%), [[Undernet 4 (MMBN4)|Undernet 4]] (5.1%)<br/>'''Game 3+:''' [[NetFrica Area]] (20.0%), [[Undernet 4 (MMBN4)|Undernet 4]] (5.1%) | ||
|attacks= | |attacks= | ||
{{EnemyInfo/Attack |name_en=Blizzard<ref name="Blizzard"/> |name_jp=ブリザード |name_tl=Blizzard | {{EnemyInfo/Attack |name_en=Blizzard<ref name="Blizzard"/> |name_jp=ブリザード |name_tl=Blizzard | ||
| Line 1,716: | Line 1,714: | ||
|airshoes=y |shadowshoes= |floatshoes=y |statusguard= |superarmor= | |airshoes=y |shadowshoes= |floatshoes=y |statusguard= |superarmor= | ||
|info= | |info= | ||
|locations= | |locations='''Always:''' [[Statue Comp (MMBN4)|Statue Comp]] (2.0%)<br/>'''Game 2:''' [[Park Area 3]] (24.2%), [[Park Area 2]] (21.2%), [[Park Area 1]] (18.2%), [[Sharo Area]] (7.7%), [[Park Area 1|Park Areas (Windy)]] (5.0%) | ||
|attacks= | |attacks= | ||
{{EnemyInfo/Attack |name_en=Blizzard<ref name="Blizzard"/> |name_jp=ブリザード |name_tl=Blizzard | {{EnemyInfo/Attack |name_en=Blizzard<ref name="Blizzard"/> |name_jp=ブリザード |name_tl=Blizzard | ||
| Line 1,742: | Line 1,740: | ||
|airshoes=y |shadowshoes= |floatshoes=y |statusguard= |superarmor= | |airshoes=y |shadowshoes= |floatshoes=y |statusguard= |superarmor= | ||
|info= | |info= | ||
|locations= | |locations='''Always:''' [[Statue Comp (MMBN4)|Statue Comp]] (2.0%)<br/>'''Game 2:''' [[Meteor Comp 1]] (16.7%), [[Undernet 6 (MMBN4)|Undernet 6]] (10.2%), [[Undernet 4 (MMBN4)|Undernet 4]] (7.7%), [[Meteor Comp 3]] (3.3%), [[Undernet 5 (MMBN4)|Undernet 5]] (2.6%) | ||
|attacks= | |attacks= | ||
{{EnemyInfo/Attack |name_en=ElecShock<ref name="ElecShock"/> |name_jp=エレキショック |name_tl=Elec Shock | {{EnemyInfo/Attack |name_en=ElecShock<ref name="ElecShock"/> |name_jp=エレキショック |name_tl=Elec Shock | ||
| Line 1,768: | Line 1,766: | ||
|airshoes=y |shadowshoes= |floatshoes=y |statusguard= |superarmor= | |airshoes=y |shadowshoes= |floatshoes=y |statusguard= |superarmor= | ||
|info= | |info= | ||
|locations= | |locations='''Game 3+:''' [[Park Area 3]] (24.2%), [[Park Area 2]] (21.2%), [[Park Area 1]] (18.2%), [[Sharo Area]] (7.7%), [[Park Area 1|Park Areas (Windy)]] (5.0%) | ||
|attacks= | |attacks= | ||
{{EnemyInfo/Attack |name_en=Blizzard<ref name="Blizzard"/> |name_jp=ブリザード |name_tl=Blizzard | {{EnemyInfo/Attack |name_en=Blizzard<ref name="Blizzard"/> |name_jp=ブリザード |name_tl=Blizzard | ||
| Line 1,804: | Line 1,802: | ||
|airshoes=y |shadowshoes= |floatshoes=y |statusguard= |superarmor= | |airshoes=y |shadowshoes= |floatshoes=y |statusguard= |superarmor= | ||
|info= | |info= | ||
|locations= | |locations='''Always:''' [[Black Earth 2]] (9.0%)<br/>'''Game 3+:''' [[Meteor Comp 1]] (16.7%), [[Undernet 6 (MMBN4)|Undernet 6]] (10.2%), [[Undernet 4 (MMBN4)|Undernet 4]] (7.7%), [[Meteor Comp 3]] (3.3%), [[Undernet 5 (MMBN4)|Undernet 5]] (2.6%) | ||
|attacks= | |attacks= | ||
{{EnemyInfo/Attack |name_en=Blizzard<ref name="Blizzard"/> |name_jp=ブリザード |name_tl=Blizzard | {{EnemyInfo/Attack |name_en=Blizzard<ref name="Blizzard"/> |name_jp=ブリザード |name_tl=Blizzard | ||
| Line 1,838: | Line 1,836: | ||
|airshoes=y |shadowshoes= |floatshoes=y |statusguard= |superarmor= | |airshoes=y |shadowshoes= |floatshoes=y |statusguard= |superarmor= | ||
|info= | |info= | ||
|locations= | |locations='''Game 1:''' [[Undernet 1 (MMBN4)|Undernet 1]] (23.1%), [[Undernet 4 (MMBN4)|Undernet 4]] (17.9%), [[Undernet 2 (MMBN4)|Undernet 2]] (15.4%)<br/>'''Game 2:''' [[Undernet 4 (MMBN4)|Undernet 4]] (2.6%)<br/>'''Game 3+:''' [[Undernet 4 (MMBN4)|Undernet 4]] (2.6%) | ||
|attacks= | |attacks= | ||
{{EnemyInfo/Attack |name_en=BodyCheck<ref name="BodyCheck">Mega Man Battle Network 4 Official Strategy Guide</ref> |name_jp=接触 |name_tl=Contact | {{EnemyInfo/Attack |name_en=BodyCheck<ref name="BodyCheck">Mega Man Battle Network 4 Official Strategy Guide</ref> |name_jp=接触 |name_tl=Contact | ||
| Line 1,858: | Line 1,856: | ||
|airshoes=y |shadowshoes= |floatshoes=y |statusguard= |superarmor= | |airshoes=y |shadowshoes= |floatshoes=y |statusguard= |superarmor= | ||
|info= | |info= | ||
|locations= | |locations='''Game 1:''' [[Undernet 5 (MMBN4)|Undernet 5]] (5.1%), [[Undernet 6 (MMBN4)|Undernet 6]] (4.6%)<br/>'''Game 2:''' [[Undernet 6 (MMBN4)|Undernet 6]] (1.9%)<br/>'''Game 3+:''' [[Undernet 6 (MMBN4)|Undernet 6]] (1.9%) | ||
|attacks= | |attacks= | ||
{{EnemyInfo/Attack |name_en=BodyCheck<ref name="BodyCheck"/> |name_jp=接触 |name_tl=Contact | {{EnemyInfo/Attack |name_en=BodyCheck<ref name="BodyCheck"/> |name_jp=接触 |name_tl=Contact | ||
| Line 1,881: | Line 1,879: | ||
|airshoes=y |shadowshoes= |floatshoes=y |statusguard= |superarmor= | |airshoes=y |shadowshoes= |floatshoes=y |statusguard= |superarmor= | ||
|info= | |info= | ||
|locations= | |locations='''Game 2:''' [[Undernet 1 (MMBN4)|Undernet 1]] (23.1%), [[Undernet 2 (MMBN4)|Undernet 2]] (15.4%), [[Undernet 4 (MMBN4)|Undernet 4]] (15.4%) | ||
|attacks= | |attacks= | ||
{{EnemyInfo/Attack |name_en=BodyCheck<ref name="BodyCheck"/> |name_jp=接触 |name_tl=Contact | {{EnemyInfo/Attack |name_en=BodyCheck<ref name="BodyCheck"/> |name_jp=接触 |name_tl=Contact | ||
| Line 1,905: | Line 1,903: | ||
|airshoes=y |shadowshoes= |floatshoes=y |statusguard= |superarmor= | |airshoes=y |shadowshoes= |floatshoes=y |statusguard= |superarmor= | ||
|info= | |info= | ||
|locations= | |locations='''Game 1:''' [[Undernet 6 (MMBN4)|Undernet 6]] (1.9%)<br/>'''Game 2:''' [[Undernet 5 (MMBN4)|Undernet 5]] (5.1%), [[Undernet 6 (MMBN4)|Undernet 6]] (4.6%)<br/>'''Game 3+:''' [[Undernet 6 (MMBN4)|Undernet 6]] (1.9%) | ||
|attacks= | |attacks= | ||
{{EnemyInfo/Attack |name_en=BodyCheck<ref name="BodyCheck"/> |name_jp=接触 |name_tl=Contact | {{EnemyInfo/Attack |name_en=BodyCheck<ref name="BodyCheck"/> |name_jp=接触 |name_tl=Contact | ||
| Line 1,928: | Line 1,926: | ||
|airshoes=y |shadowshoes= |floatshoes=y |statusguard= |superarmor= | |airshoes=y |shadowshoes= |floatshoes=y |statusguard= |superarmor= | ||
|info= | |info= | ||
|locations= | |locations='''Game 3+:''' [[Undernet 1 (MMBN4)|Undernet 1]] (23.1%), [[Undernet 2 (MMBN4)|Undernet 2]] (15.4%), [[Undernet 4 (MMBN4)|Undernet 4]] (15.4%) | ||
|attacks= | |attacks= | ||
{{EnemyInfo/Attack |name_en=BodyCheck<ref name="BodyCheck"/> |name_jp=接触 |name_tl=Contact | {{EnemyInfo/Attack |name_en=BodyCheck<ref name="BodyCheck"/> |name_jp=接触 |name_tl=Contact | ||
| Line 1,952: | Line 1,950: | ||
|airshoes=y |shadowshoes= |floatshoes=y |statusguard= |superarmor= | |airshoes=y |shadowshoes= |floatshoes=y |statusguard= |superarmor= | ||
|info= | |info= | ||
|locations= | |locations='''Game 3+:''' [[Undernet 5 (MMBN4)|Undernet 5]] (5.1%), [[Undernet 6 (MMBN4)|Undernet 6]] (2.8%) | ||
|attacks= | |attacks= | ||
{{EnemyInfo/Attack |name_en=BodyCheck<ref name="BodyCheck"/> |name_jp=接触 |name_tl=Contact | {{EnemyInfo/Attack |name_en=BodyCheck<ref name="BodyCheck"/> |name_jp=接触 |name_tl=Contact | ||
| Line 1,976: | Line 1,974: | ||
|airshoes=y |shadowshoes= |floatshoes=y |statusguard= |superarmor= | |airshoes=y |shadowshoes= |floatshoes=y |statusguard= |superarmor= | ||
|info= | |info= | ||
|locations= | |locations='''Always:''' [[Card Comp]] (66.7%)<br/>'''Game 1:''' [[ACDC Area 1 (MMBN4)|ACDC Areas (Flooded)]] (30.0%), [[Town Area 1|Town Areas (Flooded)]] (30.0%), [[Town Area 2]] (25.9%), [[Town Area 3]] (21.6%), [[Town Area 1]] (20.4%), [[Town Area 4]] (16.7%) | ||
|attacks= | |attacks= | ||
{{EnemyInfo/Attack |name_en=WideShot |name_jp=ワイドショット |name_tl=Wide Shot | {{EnemyInfo/Attack |name_en=WideShot |name_jp=ワイドショット |name_tl=Wide Shot | ||
| Line 1,995: | Line 1,993: | ||
|airshoes=y |shadowshoes= |floatshoes=y |statusguard= |superarmor= | |airshoes=y |shadowshoes= |floatshoes=y |statusguard= |superarmor= | ||
|info= | |info= | ||
|locations= | |locations='''Always:''' [[Lion Comp (MMBN4)|Lion Comp]] (43.8%), [[Buddha Comp]] (35.4%), [[Water Comp]] (31.5%)<br/>'''Game 1:''' [[Undernet 1 (MMBN4)|Undernet 1]] (25.6%), [[Water God Comps]] (20.8%), [[Undernet 2 (MMBN4)|Undernet 2]] (15.4%) | ||
|attacks= | |attacks= | ||
{{EnemyInfo/Attack |name_en=WideShot |name_jp=ワイドショット |name_tl=Wide Shot | {{EnemyInfo/Attack |name_en=WideShot |name_jp=ワイドショット |name_tl=Wide Shot | ||
| Line 2,019: | Line 2,017: | ||
|airshoes=y |shadowshoes= |floatshoes=y |statusguard= |superarmor= | |airshoes=y |shadowshoes= |floatshoes=y |statusguard= |superarmor= | ||
|info= | |info= | ||
|locations= | |locations='''Always:''' [[Water Comp]] (2.8%)<br/>'''Game 2:''' [[ACDC Area 1 (MMBN4)|ACDC Areas (Flooded)]] (30.0%), [[Town Area 1|Town Areas (Flooded)]] (30.0%), [[Town Area 2]] (25.9%), [[Town Area 3]] (21.6%), [[Town Area 1]] (20.4%), [[Town Area 4]] (16.7%) | ||
|attacks= | |attacks= | ||
{{EnemyInfo/Attack |name_en=WideShot |name_jp=ワイドショット |name_tl=Wide Shot | {{EnemyInfo/Attack |name_en=WideShot |name_jp=ワイドショット |name_tl=Wide Shot | ||
| Line 2,043: | Line 2,041: | ||
|airshoes=y |shadowshoes= |floatshoes=y |statusguard= |superarmor= | |airshoes=y |shadowshoes= |floatshoes=y |statusguard= |superarmor= | ||
|info= | |info= | ||
|locations= | |locations='''Always:''' [[Water Comp]] (2.8%)<br/>'''Game 2:''' [[Undernet 1 (MMBN4)|Undernet 1]] (25.6%), [[Water God Comps]] (20.8%), [[Undernet 2 (MMBN4)|Undernet 2]] (15.4%) | ||
|attacks= | |attacks= | ||
{{EnemyInfo/Attack |name_en=WideShot |name_jp=ワイドショット |name_tl=Wide Shot | {{EnemyInfo/Attack |name_en=WideShot |name_jp=ワイドショット |name_tl=Wide Shot | ||
| Line 2,067: | Line 2,065: | ||
|airshoes=y |shadowshoes= |floatshoes=y |statusguard= |superarmor= | |airshoes=y |shadowshoes= |floatshoes=y |statusguard= |superarmor= | ||
|info= | |info= | ||
|locations= | |locations='''Game 3+:''' [[ACDC Area 1 (MMBN4)|ACDC Areas (Flooded)]] (30.0%), [[Town Area 1|Town Areas (Flooded)]] (30.0%), [[Town Area 2]] (25.9%), [[Town Area 3]] (21.6%), [[Town Area 1]] (20.4%), [[Town Area 4]] (16.7%) | ||
|attacks= | |attacks= | ||
{{EnemyInfo/Attack |name_en=WideShot |name_jp=ワイドショット |name_tl=Wide Shot | {{EnemyInfo/Attack |name_en=WideShot |name_jp=ワイドショット |name_tl=Wide Shot | ||
| Line 2,089: | Line 2,087: | ||
|airshoes=y |shadowshoes= |floatshoes=y |statusguard= |superarmor= | |airshoes=y |shadowshoes= |floatshoes=y |statusguard= |superarmor= | ||
|info= | |info= | ||
|locations= | |locations='''Always:''' [[Black Earth 1]] (9.7%), [[Black Earth 2]] (2.6%)<br/>'''Game 3+:''' [[Undernet 1 (MMBN4)|Undernet 1]] (25.6%), [[Water God Comps]] (20.8%), [[Undernet 2 (MMBN4)|Undernet 2]] (15.4%) | ||
|attacks= | |attacks= | ||
{{EnemyInfo/Attack |name_en=WideShot |name_jp=ワイドショット |name_tl=Wide Shot | {{EnemyInfo/Attack |name_en=WideShot |name_jp=ワイドショット |name_tl=Wide Shot | ||
| Line 2,112: | Line 2,110: | ||
|airshoes= |shadowshoes= |floatshoes= |statusguard= |superarmor= | |airshoes= |shadowshoes= |floatshoes= |statusguard= |superarmor= | ||
|info= | |info= | ||
|locations= | |locations='''Game 1:''' [[Control Area]] (100.0%), [[Meteor Comp 1]] (20.0%), [[Meteor Comp 2]] (16.7%), [[Meteor Comp 3]] (16.7%), [[Meteor Comp 4]] (16.7%) | ||
|attacks= | |attacks= | ||
{{EnemyInfo/Attack |name_en=RoundShot |name_jp=ラウンドショット |name_tl=Round Shot | {{EnemyInfo/Attack |name_en=RoundShot |name_jp=ラウンドショット |name_tl=Round Shot | ||
| Line 2,133: | Line 2,131: | ||
|airshoes= |shadowshoes= |floatshoes= |statusguard= |superarmor= | |airshoes= |shadowshoes= |floatshoes= |statusguard= |superarmor= | ||
|info= | |info= | ||
|locations= | |locations='''Game 1:''' [[Undernet 6 (MMBN4)|Undernet 6]] (20.4%)<br/>'''Game 2:''' [[Undernet 6 (MMBN4)|Undernet 6]] (6.5%)<br/>'''Game 3+:''' [[Undernet 6 (MMBN4)|Undernet 6]] (6.5%) | ||
|attacks= | |attacks= | ||
{{EnemyInfo/Attack |name_en=RoundShot |name_jp=ラウンドショット |name_tl=Round Shot | {{EnemyInfo/Attack |name_en=RoundShot |name_jp=ラウンドショット |name_tl=Round Shot | ||
| Line 2,154: | Line 2,152: | ||
|airshoes= |shadowshoes= |floatshoes= |statusguard= |superarmor= | |airshoes= |shadowshoes= |floatshoes= |statusguard= |superarmor= | ||
|info= | |info= | ||
|locations= | |locations='''Game 2:''' [[Control Area]] (100.0%), [[Meteor Comp 1]] (20.0%), [[Meteor Comp 2]] (16.7%), [[Meteor Comp 3]] (16.7%), [[Meteor Comp 4]] (16.7%) | ||
|attacks= | |attacks= | ||
{{EnemyInfo/Attack |name_en=RoundShot |name_jp=ラウンドショット |name_tl=Round Shot | {{EnemyInfo/Attack |name_en=RoundShot |name_jp=ラウンドショット |name_tl=Round Shot | ||
| Line 2,175: | Line 2,173: | ||
|airshoes= |shadowshoes= |floatshoes= |statusguard= |superarmor= | |airshoes= |shadowshoes= |floatshoes= |statusguard= |superarmor= | ||
|info= | |info= | ||
|locations= | |locations='''Game 1:''' [[Undernet 6 (MMBN4)|Undernet 6]] (3.7%)<br/>'''Game 2:''' [[Undernet 6 (MMBN4)|Undernet 6]] (17.6%)<br/>'''Game 3+:''' [[Undernet 6 (MMBN4)|Undernet 6]] (3.7%) | ||
|attacks= | |attacks= | ||
{{EnemyInfo/Attack |name_en=RoundShot |name_jp=ラウンドショット |name_tl=Round Shot | {{EnemyInfo/Attack |name_en=RoundShot |name_jp=ラウンドショット |name_tl=Round Shot | ||
| Line 2,196: | Line 2,194: | ||
|airshoes= |shadowshoes= |floatshoes= |statusguard= |superarmor= | |airshoes= |shadowshoes= |floatshoes= |statusguard= |superarmor= | ||
|info= | |info= | ||
|locations= | |locations='''Game 3+:''' [[Control Area]] (100.0%), [[Meteor Comp 1]] (20.0%), [[Meteor Comp 2]] (16.7%), [[Meteor Comp 3]] (16.7%), [[Meteor Comp 4]] (16.7%) | ||
|attacks= | |attacks= | ||
{{EnemyInfo/Attack |name_en=RoundShot |name_jp=ラウンドショット |name_tl=Round Shot | {{EnemyInfo/Attack |name_en=RoundShot |name_jp=ラウンドショット |name_tl=Round Shot | ||
| Line 2,217: | Line 2,215: | ||
|airshoes= |shadowshoes= |floatshoes= |statusguard= |superarmor= | |airshoes= |shadowshoes= |floatshoes= |statusguard= |superarmor= | ||
|info= | |info= | ||
|locations= | |locations='''Always:''' [[Black Earth 2]] (11.5%)<br/>'''Game 3+:''' [[Undernet 6 (MMBN4)|Undernet 6]] (13.9%) | ||
|attacks= | |attacks= | ||
{{EnemyInfo/Attack |name_en=RoundShot |name_jp=ラウンドショット |name_tl=Round Shot | {{EnemyInfo/Attack |name_en=RoundShot |name_jp=ラウンドショット |name_tl=Round Shot | ||
| Line 2,239: | Line 2,237: | ||
|airshoes= |shadowshoes= |floatshoes= |statusguard= |superarmor= | |airshoes= |shadowshoes= |floatshoes= |statusguard= |superarmor= | ||
|info= | |info= | ||
|locations= | |locations='''Always:''' [[Toy Comp]] (41.7%), [[Stand Comp]] (11.8%)<br/>'''Game 1:''' [[Park Area 1]] (33.3%), [[Toy Robot Comp 1]] (21.7%), [[Toy Robot Comp 4]] (21.7%), [[Park Area 2]] (18.2%) | ||
|attacks= | |attacks= | ||
{{EnemyInfo/Attack |name_en=MokoRush<ref name="MokoRush">Mega Man Battle Network 4 Official Strategy Guide</ref> |name_jp=モコアヘッド |name_tl=Moko Ahead | {{EnemyInfo/Attack |name_en=MokoRush<ref name="MokoRush">Mega Man Battle Network 4 Official Strategy Guide</ref> |name_jp=モコアヘッド |name_tl=Moko Ahead | ||
| Line 2,259: | Line 2,257: | ||
|airshoes= |shadowshoes= |floatshoes= |statusguard= |superarmor= | |airshoes= |shadowshoes= |floatshoes= |statusguard= |superarmor= | ||
|info= | |info= | ||
|locations= | |locations='''Always:''' [[Goddess Comp (MMBN4)|Goddess Comp]] (35.4%)<br/>'''Game 1:''' [[Netopia Area]] (21.8%), [[Undernet 5 (MMBN4)|Undernet 5]] (7.7%) | ||
|attacks= | |attacks= | ||
{{EnemyInfo/Attack |name_en=MokoRush<ref name="MokoRush"/> |name_jp=モコアヘッド |name_tl=Moko Ahead | {{EnemyInfo/Attack |name_en=MokoRush<ref name="MokoRush"/> |name_jp=モコアヘッド |name_tl=Moko Ahead | ||
| Line 2,278: | Line 2,276: | ||
|airshoes= |shadowshoes= |floatshoes= |statusguard= |superarmor= | |airshoes= |shadowshoes= |floatshoes= |statusguard= |superarmor= | ||
|info= | |info= | ||
|locations= | |locations='''Always:''' [[Ticket Comp (MMBN4)|Ticket Comp]] (2.9%)<br/>'''Game 2:''' [[Park Area 1]] (33.3%), [[Toy Robot Comp 1]] (21.7%), [[Toy Robot Comp 4]] (21.7%), [[Park Area 2]] (18.2%) | ||
|attacks= | |attacks= | ||
{{EnemyInfo/Attack |name_en=MokoRush<ref name="MokoRush"/> |name_jp=モコアヘッド |name_tl=Moko Ahead | {{EnemyInfo/Attack |name_en=MokoRush<ref name="MokoRush"/> |name_jp=モコアヘッド |name_tl=Moko Ahead | ||
| Line 2,298: | Line 2,296: | ||
|airshoes= |shadowshoes= |floatshoes= |statusguard= |superarmor= | |airshoes= |shadowshoes= |floatshoes= |statusguard= |superarmor= | ||
|info= | |info= | ||
|locations= | |locations='''Game 2:''' [[Netopia Area]] (21.8%), [[Undernet 5 (MMBN4)|Undernet 5]] (7.7%) | ||
|attacks= | |attacks= | ||
{{EnemyInfo/Attack |name_en=MokoRush<ref name="MokoRush"/> |name_jp=モコアヘッド |name_tl=Moko Ahead | {{EnemyInfo/Attack |name_en=MokoRush<ref name="MokoRush"/> |name_jp=モコアヘッド |name_tl=Moko Ahead | ||
| Line 2,317: | Line 2,315: | ||
|airshoes= |shadowshoes= |floatshoes= |statusguard= |superarmor= | |airshoes= |shadowshoes= |floatshoes= |statusguard= |superarmor= | ||
|info= | |info= | ||
|locations= | |locations='''Game 3+:''' [[Park Area 1]] (33.3%), [[Toy Robot Comp 1]] (21.7%), [[Toy Robot Comp 4]] (21.7%), [[Park Area 2]] (18.2%) | ||
|attacks= | |attacks= | ||
{{EnemyInfo/Attack |name_en=MokoRush<ref name="MokoRush"/> |name_jp=モコアヘッド |name_tl=Moko Ahead | {{EnemyInfo/Attack |name_en=MokoRush<ref name="MokoRush"/> |name_jp=モコアヘッド |name_tl=Moko Ahead | ||
| Line 2,337: | Line 2,335: | ||
|airshoes= |shadowshoes= |floatshoes= |statusguard= |superarmor= | |airshoes= |shadowshoes= |floatshoes= |statusguard= |superarmor= | ||
|info= | |info= | ||
|locations= | |locations='''Game 3+:''' [[Netopia Area]] (21.8%), [[Undernet 5 (MMBN4)|Undernet 5]] (7.7%) | ||
|attacks= | |attacks= | ||
{{EnemyInfo/Attack |name_en=MokoRush<ref name="MokoRush"/> |name_jp=モコアヘッド |name_tl=Moko Ahead | {{EnemyInfo/Attack |name_en=MokoRush<ref name="MokoRush"/> |name_jp=モコアヘッド |name_tl=Moko Ahead | ||
| Line 2,357: | Line 2,355: | ||
|airshoes= |shadowshoes= |floatshoes= |statusguard= |superarmor= | |airshoes= |shadowshoes= |floatshoes= |statusguard= |superarmor= | ||
|info= | |info= | ||
|locations= | |locations='''Always:''' [[Colosseum NetBattle Machine Comp]] (38.9%), [[Antenna Comps (MMBN4)|Antenna Comps]] (29.2%), [[Computer Comp (MMBN4)|Computer Comp]] (18.5%)<br/>'''Game 1:''' [[Sharo Area]] (29.5%), [[Netopia Area]] (28.2%), [[Water God Comps]] (12.5%) | ||
|attacks= | |attacks= | ||
{{EnemyInfo/Attack |name_en=TwinFang |name_jp=ツインファング |name_tl=Twin Fang | {{EnemyInfo/Attack |name_en=TwinFang |name_jp=ツインファング |name_tl=Twin Fang | ||
| Line 2,380: | Line 2,378: | ||
|airshoes= |shadowshoes= |floatshoes= |statusguard= |superarmor= | |airshoes= |shadowshoes= |floatshoes= |statusguard= |superarmor= | ||
|info= | |info= | ||
|locations= | |locations='''Game 1:''' [[Undernet 2 (MMBN4)|Undernet 2]] (23.1%), [[Meteor Comp 1]] (20.0%), [[Meteor Comp 2]] (20.0%), [[Meteor Comp 4]] (20.0%), [[Undernet 6 (MMBN4)|Undernet 6]] (18.5%), [[Meteor Comp 3]] (16.7%)<br/>'''Game 2:''' [[Undernet 2 (MMBN4)|Undernet 2]] (3.8%)<br/>'''Game 3+:''' [[Undernet 2 (MMBN4)|Undernet 2]] (3.8%) | ||
|attacks= | |attacks= | ||
{{EnemyInfo/Attack |name_en=TwinFang |name_jp=ツインファング |name_tl=Twin Fang | {{EnemyInfo/Attack |name_en=TwinFang |name_jp=ツインファング |name_tl=Twin Fang | ||
| Line 2,406: | Line 2,404: | ||
|airshoes= |shadowshoes= |floatshoes= |statusguard= |superarmor= | |airshoes= |shadowshoes= |floatshoes= |statusguard= |superarmor= | ||
|info= | |info= | ||
|locations= | |locations='''Always:''' [[Computer Comp (MMBN4)|Computer Comp]] (2.8%)<br/>'''Game 2:''' [[Sharo Area]] (29.5%), [[Netopia Area]] (28.2%), [[Water God Comps]] (12.5%) | ||
|attacks= | |attacks= | ||
{{EnemyInfo/Attack |name_en=TwinFang |name_jp=ツインファング |name_tl=Twin Fang | {{EnemyInfo/Attack |name_en=TwinFang |name_jp=ツインファング |name_tl=Twin Fang | ||
| Line 2,431: | Line 2,429: | ||
|airshoes= |shadowshoes= |floatshoes= |statusguard= |superarmor= | |airshoes= |shadowshoes= |floatshoes= |statusguard= |superarmor= | ||
|info= | |info= | ||
|locations= | |locations='''Always:''' [[Computer Comp (MMBN4)|Computer Comp]] (2.8%)<br/>'''Game 2:''' [[Meteor Comp 1]] (20.0%), [[Meteor Comp 2]] (20.0%), [[Meteor Comp 4]] (20.0%), [[Undernet 2 (MMBN4)|Undernet 2]] (19.2%), [[Undernet 6 (MMBN4)|Undernet 6]] (18.5%), [[Meteor Comp 3]] (16.7%) | ||
|attacks= | |attacks= | ||
{{EnemyInfo/Attack |name_en=TwinFang |name_jp=ツインファング |name_tl=Twin Fang | {{EnemyInfo/Attack |name_en=TwinFang |name_jp=ツインファング |name_tl=Twin Fang | ||
| Line 2,456: | Line 2,454: | ||
|airshoes= |shadowshoes= |floatshoes= |statusguard= |superarmor= | |airshoes= |shadowshoes= |floatshoes= |statusguard= |superarmor= | ||
|info= | |info= | ||
|locations= | |locations='''Game 3+:''' [[Sharo Area]] (29.5%), [[Netopia Area]] (28.2%), [[Water God Comps]] (12.5%) | ||
|attacks= | |attacks= | ||
{{EnemyInfo/Attack |name_en=TwinFang |name_jp=ツインファング |name_tl=Twin Fang | {{EnemyInfo/Attack |name_en=TwinFang |name_jp=ツインファング |name_tl=Twin Fang | ||
| Line 2,479: | Line 2,477: | ||
|airshoes= |shadowshoes= |floatshoes= |statusguard= |superarmor= | |airshoes= |shadowshoes= |floatshoes= |statusguard= |superarmor= | ||
|info= | |info= | ||
|locations= | |locations='''Always:''' [[Black Earth 1]] (9.7%)<br/>'''Game 3+:''' [[Meteor Comp 1]] (20.0%), [[Meteor Comp 2]] (20.0%), [[Meteor Comp 4]] (20.0%), [[Undernet 2 (MMBN4)|Undernet 2]] (19.2%), [[Undernet 6 (MMBN4)|Undernet 6]] (18.5%), [[Meteor Comp 3]] (16.7%) | ||
|attacks= | |attacks= | ||
{{EnemyInfo/Attack |name_en=TwinFang |name_jp=ツインファング |name_tl=Twin Fang | {{EnemyInfo/Attack |name_en=TwinFang |name_jp=ツインファング |name_tl=Twin Fang | ||
| Line 2,503: | Line 2,501: | ||
|airshoes= |shadowshoes= |floatshoes=y |statusguard= |superarmor= | |airshoes= |shadowshoes= |floatshoes=y |statusguard= |superarmor= | ||
|info=When standing on swamp, grass, ice, lava or pitfall panel: recovers 1 HP every 12 frames. | |info=When standing on swamp, grass, ice, lava or pitfall panel: recovers 1 HP every 12 frames. | ||
|locations= | |locations='''Game 1:''' [[Undernet 3 (MMBN4)|Undernet 3]] (23.1%)<br/>'''Game 2:''' [[Undernet 3 (MMBN4)|Undernet 3]] (3.8%)<br/>'''Game 3+:''' [[Undernet 3 (MMBN4)|Undernet 3]] (3.8%) | ||
|attacks= | |attacks= | ||
{{EnemyInfo/Attack |name_en=ElementBreath |name_jp=エレメントブレス |name_tl=Element Breath | {{EnemyInfo/Attack |name_en=ElementBreath |name_jp=エレメントブレス |name_tl=Element Breath | ||
| Line 2,524: | Line 2,522: | ||
|airshoes= |shadowshoes= |floatshoes=y |statusguard= |superarmor= | |airshoes= |shadowshoes= |floatshoes=y |statusguard= |superarmor= | ||
|info=When standing on swamp, grass, ice, lava or pitfall panel: recovers 1 HP every 9 frames. | |info=When standing on swamp, grass, ice, lava or pitfall panel: recovers 1 HP every 9 frames. | ||
|locations= | |locations='''Game 1:''' [[Undernet 6 (MMBN4)|Undernet 6]] (19.4%)<br/>'''Game 2:''' [[Undernet 6 (MMBN4)|Undernet 6]] (2.8%)<br/>'''Game 3+:''' [[Undernet 6 (MMBN4)|Undernet 6]] (2.8%) | ||
|attacks= | |attacks= | ||
{{EnemyInfo/Attack |name_en=ElementBreath |name_jp=エレメントブレス |name_tl=Element Breath | {{EnemyInfo/Attack |name_en=ElementBreath |name_jp=エレメントブレス |name_tl=Element Breath | ||
| Line 2,545: | Line 2,543: | ||
|airshoes= |shadowshoes= |floatshoes=y |statusguard= |superarmor= | |airshoes= |shadowshoes= |floatshoes=y |statusguard= |superarmor= | ||
|info=When standing on swamp, grass, ice, lava or pitfall panel: recovers 1 HP every 7 frames. | |info=When standing on swamp, grass, ice, lava or pitfall panel: recovers 1 HP every 7 frames. | ||
|locations= | |locations='''Game 1:''' [[Undernet 6 (MMBN4)|Undernet 6]] (1.9%)<br/>'''Game 2:''' [[Undernet 3 (MMBN4)|Undernet 3]] (19.2%), [[Undernet 6 (MMBN4)|Undernet 6]] (1.9%)<br/>'''Game 3+:''' [[Undernet 6 (MMBN4)|Undernet 6]] (1.9%) | ||
|attacks= | |attacks= | ||
{{EnemyInfo/Attack |name_en=ElementBreath |name_jp=エレメントブレス |name_tl=Element Breath | {{EnemyInfo/Attack |name_en=ElementBreath |name_jp=エレメントブレス |name_tl=Element Breath | ||
| Line 2,566: | Line 2,564: | ||
|airshoes= |shadowshoes= |floatshoes=y |statusguard= |superarmor= | |airshoes= |shadowshoes= |floatshoes=y |statusguard= |superarmor= | ||
|info=When standing on swamp, grass, ice, lava or pitfall panel: recovers 1 HP every 5 frames. | |info=When standing on swamp, grass, ice, lava or pitfall panel: recovers 1 HP every 5 frames. | ||
|locations= | |locations='''Game 1:''' [[Undernet 6 (MMBN4)|Undernet 6]] (1.9%)<br/>'''Game 2:''' [[Undernet 6 (MMBN4)|Undernet 6]] (18.5%)<br/>'''Game 3+:''' [[Undernet 6 (MMBN4)|Undernet 6]] (1.9%) | ||
|attacks= | |attacks= | ||
{{EnemyInfo/Attack |name_en=ElementBreath |name_jp=エレメントブレス |name_tl=Element Breath | {{EnemyInfo/Attack |name_en=ElementBreath |name_jp=エレメントブレス |name_tl=Element Breath | ||
| Line 2,587: | Line 2,585: | ||
|airshoes= |shadowshoes= |floatshoes=y |statusguard= |superarmor= | |airshoes= |shadowshoes= |floatshoes=y |statusguard= |superarmor= | ||
|info=When standing on swamp, grass, ice, lava or pitfall panel: recovers 1 HP every 4 frames. | |info=When standing on swamp, grass, ice, lava or pitfall panel: recovers 1 HP every 4 frames. | ||
|locations= | |locations='''Game 3+:''' [[Undernet 3 (MMBN4)|Undernet 3]] (19.2%) | ||
|attacks= | |attacks= | ||
{{EnemyInfo/Attack |name_en=ElementBreath |name_jp=エレメントブレス |name_tl=Element Breath | {{EnemyInfo/Attack |name_en=ElementBreath |name_jp=エレメントブレス |name_tl=Element Breath | ||
| Line 2,610: | Line 2,608: | ||
|airshoes= |shadowshoes= |floatshoes=y |statusguard= |superarmor= | |airshoes= |shadowshoes= |floatshoes=y |statusguard= |superarmor= | ||
|info=When standing on swamp, grass, ice, lava or pitfall panel: recovers 1 HP every 3 frames. | |info=When standing on swamp, grass, ice, lava or pitfall panel: recovers 1 HP every 3 frames. | ||
|locations= | |locations='''Always:''' [[Black Earth 1]] (9.7%)<br/>'''Game 3+:''' [[Undernet 6 (MMBN4)|Undernet 6]] (16.7%) | ||
|attacks= | |attacks= | ||
{{EnemyInfo/Attack |name_en=ElementBreath |name_jp=エレメントブレス |name_tl=Element Breath | {{EnemyInfo/Attack |name_en=ElementBreath |name_jp=エレメントブレス |name_tl=Element Breath | ||
| Line 2,635: | Line 2,633: | ||
|airshoes= |shadowshoes= |floatshoes= |statusguard= |superarmor= | |airshoes= |shadowshoes= |floatshoes= |statusguard= |superarmor= | ||
|info= | |info= | ||
|locations= | |locations='''Game 1:''' [[Meteor Comp 4]] (25.0%), [[Meteor Comp 3]] (20.0%), [[Meteor Comp 2]] (3.3%) | ||
|attacks= | |attacks= | ||
{{EnemyInfo/Attack |name_en=Boy's Bomb<ref name="BoysBomb">Mega Man Battle Network 4 Official Strategy Guide</ref> |name_jp=ボーイズボム |name_tl=Boy's Bomb | {{EnemyInfo/Attack |name_en=Boy's Bomb<ref name="BoysBomb">Mega Man Battle Network 4 Official Strategy Guide</ref> |name_jp=ボーイズボム |name_tl=Boy's Bomb | ||
| Line 2,657: | Line 2,655: | ||
|airshoes= |shadowshoes= |floatshoes= |statusguard= |superarmor= | |airshoes= |shadowshoes= |floatshoes= |statusguard= |superarmor= | ||
|info= | |info= | ||
|locations= | |locations='''Game 1:''' [[Undernet 4 (MMBN4)|Undernet 4]] (15.4%)<br/>'''Game 2:''' [[Undernet 4 (MMBN4)|Undernet 4]] (7.7%)<br/>'''Game 3+:''' [[Undernet 4 (MMBN4)|Undernet 4]] (7.7%) | ||
|attacks= | |attacks= | ||
{{EnemyInfo/Attack |name_en=Boy's Bomb<ref name="BoysBomb"/> |name_jp=ボーイズボム |name_tl=Boy's Bomb | {{EnemyInfo/Attack |name_en=Boy's Bomb<ref name="BoysBomb"/> |name_jp=ボーイズボム |name_tl=Boy's Bomb | ||
| Line 2,679: | Line 2,677: | ||
|airshoes= |shadowshoes= |floatshoes= |statusguard= |superarmor= | |airshoes= |shadowshoes= |floatshoes= |statusguard= |superarmor= | ||
|info= | |info= | ||
|locations= | |locations='''Game 1:''' [[Undernet 6 (MMBN4)|Undernet 6]] (3.7%)<br/>'''Game 2:''' [[Meteor Comp 4]] (25.0%), [[Meteor Comp 3]] (20.0%), [[Undernet 6 (MMBN4)|Undernet 6]] (3.7%), [[Meteor Comp 2]] (3.3%)<br/>'''Game 3+:''' [[Undernet 6 (MMBN4)|Undernet 6]] (3.7%) | ||
|attacks= | |attacks= | ||
{{EnemyInfo/Attack |name_en=Boy's Bomb<ref name="BoysBomb"/> |name_jp=ボーイズボム |name_tl=Boy's Bomb | {{EnemyInfo/Attack |name_en=Boy's Bomb<ref name="BoysBomb"/> |name_jp=ボーイズボム |name_tl=Boy's Bomb | ||
| Line 2,701: | Line 2,699: | ||
|airshoes= |shadowshoes= |floatshoes= |statusguard= |superarmor= | |airshoes= |shadowshoes= |floatshoes= |statusguard= |superarmor= | ||
|info= | |info= | ||
|locations= | |locations='''Game 1:''' [[Undernet 6 (MMBN4)|Undernet 6]] (3.7%)<br/>'''Game 2:''' [[Undernet 4 (MMBN4)|Undernet 4]] (7.7%), [[Undernet 6 (MMBN4)|Undernet 6]] (3.7%)<br/>'''Game 3+:''' [[Undernet 6 (MMBN4)|Undernet 6]] (3.7%) | ||
|attacks= | |attacks= | ||
{{EnemyInfo/Attack |name_en=Boy's Bomb<ref name="BoysBomb"/> |name_jp=ボーイズボム |name_tl=Boy's Bomb | {{EnemyInfo/Attack |name_en=Boy's Bomb<ref name="BoysBomb"/> |name_jp=ボーイズボム |name_tl=Boy's Bomb | ||
| Line 2,723: | Line 2,721: | ||
|airshoes= |shadowshoes= |floatshoes= |statusguard= |superarmor= | |airshoes= |shadowshoes= |floatshoes= |statusguard= |superarmor= | ||
|info= | |info= | ||
|locations= | |locations='''Game 3+:''' [[Meteor Comp 4]] (25.0%), [[Meteor Comp 3]] (20.0%), [[Meteor Comp 2]] (3.3%) | ||
|attacks= | |attacks= | ||
{{EnemyInfo/Attack |name_en=Boy's Bomb<ref name="BoysBomb"/> |name_jp=ボーイズボム |name_tl=Boy's Bomb | {{EnemyInfo/Attack |name_en=Boy's Bomb<ref name="BoysBomb"/> |name_jp=ボーイズボム |name_tl=Boy's Bomb | ||
| Line 2,745: | Line 2,743: | ||
|airshoes= |shadowshoes= |floatshoes= |statusguard= |superarmor= | |airshoes= |shadowshoes= |floatshoes= |statusguard= |superarmor= | ||
|info= | |info= | ||
|locations= | |locations='''Always:''' [[Black Earth 2]] (9.0%)<br/>'''Game 3+:''' [[Undernet 4 (MMBN4)|Undernet 4]] (7.7%) | ||
|attacks= | |attacks= | ||
{{EnemyInfo/Attack |name_en=Boy's Bomb<ref name="BoysBomb"/> |name_jp=ボーイズボム |name_tl=Boy's Bomb | {{EnemyInfo/Attack |name_en=Boy's Bomb<ref name="BoysBomb"/> |name_jp=ボーイズボム |name_tl=Boy's Bomb | ||
| Line 2,768: | Line 2,766: | ||
|airshoes= |shadowshoes= |floatshoes= |statusguard= |superarmor= | |airshoes= |shadowshoes= |floatshoes= |statusguard= |superarmor= | ||
|info= | |info= | ||
|locations= | |locations='''Game 1:''' [[Meteor Comp 4]] (6.7%), [[Meteor Comp 3]] (3.3%) | ||
|attacks= | |attacks= | ||
{{EnemyInfo/Attack |name_en=Wind<ref name="Wind">Listed as '''WindGust''' in Mega Man Battle Network 4 Official Strategy Guide</ref> |name_jp=トップウ |name_tl=Toppuu | {{EnemyInfo/Attack |name_en=Wind<ref name="Wind">Listed as '''WindGust''' in Mega Man Battle Network 4 Official Strategy Guide</ref> |name_jp=トップウ |name_tl=Toppuu | ||
| Line 2,783: | Line 2,781: | ||
|airshoes= |shadowshoes= |floatshoes= |statusguard= |superarmor= | |airshoes= |shadowshoes= |floatshoes= |statusguard= |superarmor= | ||
|info= | |info= | ||
|locations= | |locations='''Game 1:''' [[Meteor Comp 3]] (11.7%) | ||
|attacks= | |attacks= | ||
{{EnemyInfo/Attack |name_en=Fan<ref name="Fan">Listed as '''Vacuum''' in Mega Man Battle Network 4 Official Strategy Guide</ref> |name_jp=スイコミ |name_tl=Suikomi | {{EnemyInfo/Attack |name_en=Fan<ref name="Fan">Listed as '''Vacuum''' in Mega Man Battle Network 4 Official Strategy Guide</ref> |name_jp=スイコミ |name_tl=Suikomi | ||
| Line 2,798: | Line 2,796: | ||
|airshoes= |shadowshoes= |floatshoes= |statusguard= |superarmor= | |airshoes= |shadowshoes= |floatshoes= |statusguard= |superarmor= | ||
|info= | |info= | ||
|locations= | |locations='''Game 1:''' [[Undernet 4 (MMBN4)|Undernet 4]] (7.7%), [[Undernet 3 (MMBN4)|Undernet 3]] (3.8%)<br/>'''Game 2:''' [[Meteor Comp 4]] (6.7%), [[Meteor Comp 3]] (3.3%) | ||
|attacks= | |attacks= | ||
{{EnemyInfo/Attack |name_en=Wind<ref name="Wind"/> |name_jp=トップウ |name_tl=Toppuu | {{EnemyInfo/Attack |name_en=Wind<ref name="Wind"/> |name_jp=トップウ |name_tl=Toppuu | ||
| Line 2,813: | Line 2,811: | ||
|airshoes= |shadowshoes= |floatshoes= |statusguard= |superarmor= | |airshoes= |shadowshoes= |floatshoes= |statusguard= |superarmor= | ||
|info= | |info= | ||
|locations= | |locations='''Game 2:''' [[Meteor Comp 3]] (11.7%) | ||
|attacks= | |attacks= | ||
{{EnemyInfo/Attack |name_en=Fan<ref name="Fan"/> |name_jp=スイコミ |name_tl=Suikomi | {{EnemyInfo/Attack |name_en=Fan<ref name="Fan"/> |name_jp=スイコミ |name_tl=Suikomi | ||
| Line 2,828: | Line 2,826: | ||
|airshoes= |shadowshoes= |floatshoes= |statusguard= |superarmor= | |airshoes= |shadowshoes= |floatshoes= |statusguard= |superarmor= | ||
|info= | |info= | ||
|locations= | |locations='''Game 2:''' [[Undernet 4 (MMBN4)|Undernet 4]] (7.7%), [[Undernet 3 (MMBN4)|Undernet 3]] (3.8%)<br/>'''Game 3+:''' [[Meteor Comp 4]] (6.7%), [[Meteor Comp 3]] (3.3%) | ||
|attacks= | |attacks= | ||
{{EnemyInfo/Attack |name_en=Wind<ref name="Wind"/> |name_jp=トップウ |name_tl=Toppuu | {{EnemyInfo/Attack |name_en=Wind<ref name="Wind"/> |name_jp=トップウ |name_tl=Toppuu | ||
| Line 2,843: | Line 2,841: | ||
|airshoes= |shadowshoes= |floatshoes= |statusguard= |superarmor= | |airshoes= |shadowshoes= |floatshoes= |statusguard= |superarmor= | ||
|info= | |info= | ||
|locations= | |locations='''Game 3+:''' [[Meteor Comp 3]] (11.7%), [[Undernet 4 (MMBN4)|Undernet 4]] (7.7%), [[Undernet 3 (MMBN4)|Undernet 3]] (3.8%) | ||
|attacks= | |attacks= | ||
{{EnemyInfo/Attack |name_en=Fan<ref name="Fan"/> |name_jp=スイコミ |name_tl=Suikomi | {{EnemyInfo/Attack |name_en=Fan<ref name="Fan"/> |name_jp=スイコミ |name_tl=Suikomi | ||
| Line 2,859: | Line 2,857: | ||
|airshoes= |shadowshoes= |floatshoes= |statusguard= |superarmor= | |airshoes= |shadowshoes= |floatshoes= |statusguard= |superarmor= | ||
|info= | |info= | ||
|locations= | |locations='''Always:''' [[Black Earth 1]] (20.8%), [[Black Earth 2]] (2.6%) | ||
|attacks= | |attacks= | ||
{{EnemyInfo/Attack |name_en=Cannon |name_jp=キャノン |name_tl=Cannon | {{EnemyInfo/Attack |name_en=Cannon |name_jp=キャノン |name_tl=Cannon | ||
| Line 2,880: | Line 2,878: | ||
|airshoes= |shadowshoes= |floatshoes= |statusguard= |superarmor= | |airshoes= |shadowshoes= |floatshoes= |statusguard= |superarmor= | ||
|info= | |info= | ||
|locations= | |locations='''Always:''' [[Black Earth 2]] (12.8%) | ||
|attacks= | |attacks= | ||
{{EnemyInfo/Attack |name_en=FighterSword |name_jp=ファイターソード |name_tl=Fighter Sword | {{EnemyInfo/Attack |name_en=FighterSword |name_jp=ファイターソード |name_tl=Fighter Sword | ||
| Line 2,990: | Line 2,988: | ||
|airshoes= |shadowshoes= |floatshoes=y |statusguard= |superarmor= | |airshoes= |shadowshoes= |floatshoes=y |statusguard= |superarmor= | ||
|info= | |info= | ||
|locations= | |locations=[[Town Area 3]] (11.8%) | ||
|attacks= | |attacks= | ||
{{EnemyInfo/Attack |name_en=RollWhip |name_jp=ロールウィップ |name_tl=Roll Whip | {{EnemyInfo/Attack |name_en=RollWhip |name_jp=ロールウィップ |name_tl=Roll Whip | ||
| Line 3,108: | Line 3,106: | ||
|airshoes= |shadowshoes= |floatshoes= |statusguard= |superarmor= | |airshoes= |shadowshoes= |floatshoes= |statusguard= |superarmor= | ||
|info=Contact knocks back all the way and does not cause flashing. Becomes more aggressive when HP < 50 %. | |info=Contact knocks back all the way and does not cause flashing. Becomes more aggressive when HP < 50 %. | ||
|locations= | |locations=[[ACDC Area 2 (MMBN4)|ACDC Area 2]] (11.1%) | ||
|attacks= | |attacks= | ||
{{EnemyInfo/Attack |name_en=GutsQuake<ref name="GutsQuake"/> |name_jp=ガッツクエイク直撃 |name_tl=Guts Quake Direct Hit | {{EnemyInfo/Attack |name_en=GutsQuake<ref name="GutsQuake"/> |name_jp=ガッツクエイク直撃 |name_tl=Guts Quake Direct Hit | ||
| Line 3,228: | Line 3,226: | ||
|airshoes=y |shadowshoes= |floatshoes=y |statusguard= |superarmor= | |airshoes=y |shadowshoes= |floatshoes=y |statusguard= |superarmor= | ||
|info= | |info= | ||
|locations= | |locations=[[YumLand Area]] (7.7%) | ||
|attacks= | |attacks= | ||
{{EnemyInfo/Attack |name_en=BirdCrash<ref name="BirdCrash"/> |name_jp=バードクラッシュ |name_tl=Bird Crash | {{EnemyInfo/Attack |name_en=BirdCrash<ref name="BirdCrash"/> |name_jp=バードクラッシュ |name_tl=Bird Crash | ||
| Line 3,341: | Line 3,339: | ||
|airshoes= |shadowshoes= |floatshoes= |statusguard= |superarmor= | |airshoes= |shadowshoes= |floatshoes= |statusguard= |superarmor= | ||
|info= | |info= | ||
|locations= | |locations=[[Undernet 1 (MMBN4)|Undernet 1]] (7.7%) | ||
|attacks= | |attacks= | ||
{{EnemyInfo/Attack |name_en=SearchGrenade |name_jp=サーチグレネード |name_tl=Search Grenade | {{EnemyInfo/Attack |name_en=SearchGrenade |name_jp=サーチグレネード |name_tl=Search Grenade | ||
| Line 3,468: | Line 3,466: | ||
|airshoes= |shadowshoes= |floatshoes= |statusguard= |superarmor= | |airshoes= |shadowshoes= |floatshoes= |statusguard= |superarmor= | ||
|info=Contact knocks back all the way and does not cause flashing. | |info=Contact knocks back all the way and does not cause flashing. | ||
|locations= | |locations=[[Town Area 2]] (11.1%) | ||
|attacks= | |attacks= | ||
{{EnemyInfo/Attack |name_en=FireArm |name_jp=ファイアアーム |name_tl=Fire Arm | {{EnemyInfo/Attack |name_en=FireArm |name_jp=ファイアアーム |name_tl=Fire Arm | ||
| Line 3,601: | Line 3,599: | ||
|airshoes= |shadowshoes= |floatshoes= |statusguard= |superarmor= | |airshoes= |shadowshoes= |floatshoes= |statusguard= |superarmor= | ||
|info= | |info= | ||
|locations= | |locations=[[Netopia Area]] (7.7%) | ||
|attacks= | |attacks= | ||
{{EnemyInfo/Attack |name_en=Stormcloud<ref name="Stormcloud"/> (direct hit) |name_jp=雷雲直撃 |name_tl=Thundercloud Direct Hit | {{EnemyInfo/Attack |name_en=Stormcloud<ref name="Stormcloud"/> (direct hit) |name_jp=雷雲直撃 |name_tl=Thundercloud Direct Hit | ||
| Line 3,729: | Line 3,727: | ||
|airshoes= |shadowshoes= |floatshoes= |statusguard= |superarmor= | |airshoes= |shadowshoes= |floatshoes= |statusguard= |superarmor= | ||
|info= | |info= | ||
|locations= | |locations=[[Undernet 6 (MMBN4)|Undernet 6]] (5.6%) | ||
|attacks= | |attacks= | ||
{{EnemyInfo/Attack |name_en=WideSword |name_jp=ワイドソード |name_tl=Wide Sword | {{EnemyInfo/Attack |name_en=WideSword |name_jp=ワイドソード |name_tl=Wide Sword | ||
| Line 3,869: | Line 3,867: | ||
|airshoes= |shadowshoes= |floatshoes= |statusguard= |superarmor= | |airshoes= |shadowshoes= |floatshoes= |statusguard= |superarmor= | ||
|info=Contact knocks back all the way and does not cause flashing. | |info=Contact knocks back all the way and does not cause flashing. | ||
|locations= | |locations=[[Town Area 4]] (11.1%) | ||
|attacks= | |attacks= | ||
{{EnemyInfo/Attack |name_en=NumberBall |name_jp=ナンバーボール |name_tl=Number Ball | {{EnemyInfo/Attack |name_en=NumberBall |name_jp=ナンバーボール |name_tl=Number Ball | ||
| Line 4,004: | Line 4,002: | ||
|airshoes=y |shadowshoes= |floatshoes=y |statusguard= |superarmor=y | |airshoes=y |shadowshoes= |floatshoes=y |statusguard= |superarmor=y | ||
|info= | |info= | ||
|locations= | |locations=[[Undernet 3 (MMBN4)|Undernet 3]] (7.7%) | ||
|attacks= | |attacks= | ||
{{EnemyInfo/Attack |name_en=MetalGear |name_jp=メタルギア |name_tl=Metal Gear | {{EnemyInfo/Attack |name_en=MetalGear |name_jp=メタルギア |name_tl=Metal Gear | ||
| Line 4,130: | Line 4,128: | ||
|airshoes= |shadowshoes= |floatshoes= |statusguard= |superarmor= | |airshoes= |shadowshoes= |floatshoes= |statusguard= |superarmor= | ||
|info= | |info= | ||
|locations= | |locations=[[Undernet 2 (MMBN4)|Undernet 2]] (7.7%) | ||
|attacks= | |attacks= | ||
{{EnemyInfo/Attack |name_en=JunkCube |name_jp=ジャンクキューブ |name_tl=Junk Cube | {{EnemyInfo/Attack |name_en=JunkCube |name_jp=ジャンクキューブ |name_tl=Junk Cube | ||
| Line 4,243: | Line 4,241: | ||
|airshoes= |shadowshoes= |floatshoes= |statusguard= |superarmor= | |airshoes= |shadowshoes= |floatshoes= |statusguard= |superarmor= | ||
|info=Contact knocks back all the way and does not cause flashing. | |info=Contact knocks back all the way and does not cause flashing. | ||
|locations= | |locations=[[ACDC Area 1 (MMBN4)|ACDC Area 1]] (11.1%) | ||
|attacks= | |attacks= | ||
{{EnemyInfo/Attack |name_en=AquaBomb<ref name="AquaBomb"/> |name_jp=アクアホース |name_tl=Aqua Hose | {{EnemyInfo/Attack |name_en=AquaBomb<ref name="AquaBomb"/> |name_jp=アクアホース |name_tl=Aqua Hose | ||
| Line 4,353: | Line 4,351: | ||
|airshoes= |shadowshoes= |floatshoes= |statusguard= |superarmor= | |airshoes= |shadowshoes= |floatshoes= |statusguard= |superarmor= | ||
|info= | |info= | ||
|locations= | |locations=[[Park Area 1]] (9.1%) | ||
|attacks= | |attacks= | ||
{{EnemyInfo/Attack |name_en=TrafficLog |name_jp=トラフィックログ |name_tl=Traffic Log | {{EnemyInfo/Attack |name_en=TrafficLog |name_jp=トラフィックログ |name_tl=Traffic Log | ||
| Line 4,465: | Line 4,463: | ||
|airshoes= |shadowshoes= |floatshoes= |statusguard= |superarmor= | |airshoes= |shadowshoes= |floatshoes= |statusguard= |superarmor= | ||
|info= | |info= | ||
|locations= | |locations=[[Town Area 1]] (11.1%) | ||
|attacks= | |attacks= | ||
{{EnemyInfo/Attack |name_en=TopSpin |name_jp=タップスピン |name_tl=Top Spin | {{EnemyInfo/Attack |name_en=TopSpin |name_jp=タップスピン |name_tl=Top Spin | ||
| Line 4,546: | Line 4,544: | ||
|airshoes=y |shadowshoes= |floatshoes=y |statusguard= |superarmor= | |airshoes=y |shadowshoes= |floatshoes=y |statusguard= |superarmor= | ||
|info= | |info= | ||
|locations= | |locations=[[Undernet 4 (MMBN4)|Undernet 4]] (7.7%) | ||
|attacks= | |attacks= | ||
{{EnemyInfo/Attack |name_en=CrushNoise<ref name="CrushNoise"/> |name_jp=クラッシュノイズ |name_tl=Crush Noise | {{EnemyInfo/Attack |name_en=CrushNoise<ref name="CrushNoise"/> |name_jp=クラッシュノイズ |name_tl=Crush Noise | ||
| Line 4,643: | Line 4,641: | ||
|airshoes= |shadowshoes= |floatshoes= |statusguard= |superarmor= | |airshoes= |shadowshoes= |floatshoes= |statusguard= |superarmor= | ||
|info= | |info= | ||
|locations= | |locations=[[Park Area 2]] (9.1%) | ||
|attacks= | |attacks= | ||
{{EnemyInfo/Attack |name_en=HeatChaser (body) |name_jp=ヒートチェイサー本体 |name_tl=Heat Chaser Body | {{EnemyInfo/Attack |name_en=HeatChaser (body) |name_jp=ヒートチェイサー本体 |name_tl=Heat Chaser Body | ||
| Line 4,738: | Line 4,736: | ||
|airshoes= |shadowshoes= |floatshoes= |statusguard= |superarmor= | |airshoes= |shadowshoes= |floatshoes= |statusguard= |superarmor= | ||
|info= | |info= | ||
|locations= | |locations=[[Sharo Area]] (7.7%) | ||
|attacks= | |attacks= | ||
{{EnemyInfo/Attack |name_en=IceShot<ref name="IceShot"/> |name_jp=アイスシュート |name_tl=Ice Shoot | {{EnemyInfo/Attack |name_en=IceShot<ref name="IceShot"/> |name_jp=アイスシュート |name_tl=Ice Shoot | ||
| Line 4,838: | Line 4,836: | ||
|airshoes= |shadowshoes= |floatshoes= |statusguard= |superarmor= | |airshoes= |shadowshoes= |floatshoes= |statusguard= |superarmor= | ||
|info= | |info= | ||
|locations= | |locations=[[ACDC Area 3 (MMBN4)|ACDC Area 3]] (11.1%) | ||
|attacks= | |attacks= | ||
{{EnemyInfo/Attack |name_en=SparkBall (direct hit) |name_jp=スパークボール直撃 |name_tl=Spark Ball Direct Hit | {{EnemyInfo/Attack |name_en=SparkBall (direct hit) |name_jp=スパークボール直撃 |name_tl=Spark Ball Direct Hit | ||
| Line 5,236: | Line 5,234: | ||
|airshoes= |shadowshoes= |floatshoes= |statusguard= |superarmor=y | |airshoes= |shadowshoes= |floatshoes= |statusguard= |superarmor=y | ||
|info=When a DarkHole is on the field, recovers 1 HP every 4 frames. | |info=When a DarkHole is on the field, recovers 1 HP every 4 frames. | ||
|locations= | |locations=[[Undernet 5 (MMBN4)|Undernet 5]] (7.7%) | ||
|attacks= | |attacks= | ||
{{EnemyInfo/Attack |name_en=CrossLaser |name_jp=クロスレーザー |name_tl=Cross Laser | {{EnemyInfo/Attack |name_en=CrossLaser |name_jp=クロスレーザー |name_tl=Cross Laser | ||
| Line 5,339: | Line 5,337: | ||
|airshoes= |shadowshoes= |floatshoes= |statusguard= |superarmor= | |airshoes= |shadowshoes= |floatshoes= |statusguard= |superarmor= | ||
|info= | |info= | ||
|locations= | |locations=[[NetFrica Area]] (6.7%) | ||
|attacks= | |attacks= | ||
{{EnemyInfo/Attack |name_en=Men |name_jp=メン<ref name="Men"/> |name_tl=Men | {{EnemyInfo/Attack |name_en=Men |name_jp=メン<ref name="Men"/> |name_tl=Men | ||
| Line 5,468: | Line 5,466: | ||
|airshoes= |shadowshoes= |floatshoes=y |statusguard= |superarmor= | |airshoes= |shadowshoes= |floatshoes=y |statusguard= |superarmor= | ||
|info= | |info= | ||
|locations= | |locations=[[Park Area 3]] (9.1%) | ||
|attacks= | |attacks= | ||
{{EnemyInfo/Attack |name_en=WindCutter |name_jp=ワインドカッター |name_tl=Wind Cutter | {{EnemyInfo/Attack |name_en=WindCutter |name_jp=ワインドカッター |name_tl=Wind Cutter | ||
| Line 5,678: | Line 5,676: | ||
|airshoes= |shadowshoes= |floatshoes=y |statusguard= |superarmor= | |airshoes= |shadowshoes= |floatshoes=y |statusguard= |superarmor= | ||
|info= | |info= | ||
|locations= | |locations=[[Black Earth 2]] (7.7%) | ||
|attacks= | |attacks= | ||
{{EnemyInfo/Attack |name_en=ShootingBuster |name_jp=シューティングバスター |name_tl=Shooting Buster | {{EnemyInfo/Attack |name_en=ShootingBuster |name_jp=シューティングバスター |name_tl=Shooting Buster | ||
| Line 5,704: | Line 5,702: | ||
|airshoes= |shadowshoes= |floatshoes=y |statusguard= |superarmor= | |airshoes= |shadowshoes= |floatshoes=y |statusguard= |superarmor= | ||
|info=Has a 300 HP {{name|en=BlackBarrier|jp=ブラックバリア|tl=Black Barrier}}<ref name="BlackBarrier">Rockman EXE4 Ultimate Navigation DS</ref>. | |info=Has a 300 HP {{name|en=BlackBarrier|jp=ブラックバリア|tl=Black Barrier}}<ref name="BlackBarrier">Rockman EXE4 Ultimate Navigation DS</ref>. | ||
|locations= | |locations=[[Black Earth 2]] (7.7%) | ||
|attacks= | |attacks= | ||
{{EnemyInfo/Attack |name_en=ShootingBuster |name_jp=シューティングバスター |name_tl=Shooting Buster | {{EnemyInfo/Attack |name_en=ShootingBuster |name_jp=シューティングバスター |name_tl=Shooting Buster | ||
Revision as of 19:32, 29 December 2022
This page lists every enemy which can appear in battle in Mega Man Battle Network 4.
In this game, FloatShoes protects against the effects of cracked, swamp, ice, lava and pitfall panels. It does not prevent Good MegaMan from erasing DarkHole panels, or prevent Evil MegaMan from erasing Holy panels.
Get Data is dependent on the player's remaining HP % when they finish the battle:
| Name | HP range | Example for 1000 HP |
|---|---|---|
| High | HP ≥ 37.5 % | 375 – 1000 |
| Low | HP < 37.5 % | 1 – 374 |
For Ω (SP) level Navis, they will drop their DS NaviChip instead of their normal chip if the player finishes the battle with less than 470 karma, or has used a DarkChip or Dark DoubleSoul during that battle.
DS Navis are affected by the following abilities from the player:
- SuperArmor
- FirstBarrier
- FloatShoes (except WoodManDS)
- UnderShirt
- Attack+ (only MegaManDS)
- Speed+ (only MegaManDS)
- HP+ (only MegaManDS)
- Battle HP Bug
- Buster Bug (only MegaManDS)
- Panel Bug (only MegaManDS)
- Player Bug (only Level 1)
- Buster MiniBomb (only MegaManDS)
- BlindBuster (only MegaManDS)
- GrassBuster (only MegaManDS)
- Buster Attack10 (only MegaManDS)
- CrackBuster (only MegaManDS)
- PoisonBuster (only MegaManDS)
- Buster Guard1 (only MegaManDS)
- Buster CrakOut (only MegaManDS)
- Buster Attack15 (only MegaManDS)
- IceBuster (only MegaManDS)
- Buster Reflect (only MegaManDS)
- Buster Flower (only MegaManDS)
- Buster WaterGun (only MegaManDS)
- FirstBarrier100
- FirstBarrier200
- AllGuard
- FirstLifeAura
- PanelChange: Metal (only MegaManDS)
- PanelChange: Crack (only MegaManDS)
- PanelChange: Hole (only MegaManDS)
- PanelChange: Holy (only MegaManDS)
- Charge GutsMG (only MegaManDS)
- Charge Cannon (only MegaManDS)
- Charge MiniBomb (only MegaManDS)
- Charge HeatShot (only MegaManDS)
- Charge Bubbler (only MegaManDS)
- Charge Thunder1 (only MegaManDS)
- Charge Sword (only MegaManDS)
- Charge Spreader (only MegaManDS)
- Charge CopyDmg (only MegaManDS)
- Charge WideSht1 (only MegaManDS)
- Charge Blizzard (only MegaManDS)
- Charge HeatBrth (only MegaManDS)
- Charge ElecShok (only MegaManDS)
- Charge WoodPwdr (only MegaManDS)
- Charge PnlRetrn (only MegaManDS)
- Charge WideSwrd (only MegaManDS)
- Charge Hole (only MegaManDS)
- Charge WideSht2 (only MegaManDS)
- Charge ZapRing (only MegaManDS)
- Charge SandRing (only MegaManDS)
- Charge EnergBom (only MegaManDS)
- Charge Thunder2 (only MegaManDS)
- Charge Repair (only MegaManDS)
- Charge TripCrak (only MegaManDS)
- Charge LongSwrd (only MegaManDS)
- Charge FullCust (only MegaManDS)
- Charge WideSht3 (only MegaManDS)
- Charge Thunder3 (only MegaManDS)
- Charge WindRack (only MegaManDS)
- Charge MegEnBom (only MegaManDS)
- Charge Ball (only MegaManDS)
- Charge BugBomb (only MegaManDS)
- Charge WideBlde (only MegaManDS)
- Charge LongBlde (only MegaManDS)
Viruses
Mettaur
VolGear
Billy
Gaia
 |
||
|---|---|---|
 |
||
|---|---|---|
 |
||
|---|---|---|
 |
||
|---|---|---|
 |
||
|---|---|---|
 |
||
|---|---|---|
Spikey
 |
||
|---|---|---|
 |
||
|---|---|---|
 |
||
|---|---|---|
 |
||
|---|---|---|
 |
||
|---|---|---|
 |
||
|---|---|---|
Shrimpy
 |
||
|---|---|---|
 |
||
|---|---|---|
 |
||
|---|---|---|
 |
||
|---|---|---|
 |
||
|---|---|---|
 |
||
|---|---|---|
Boomer
Trumpy
MagTect
Melody
Dharma
Kilby
 |
||
|---|---|---|
 |
||
|---|---|---|
 |
||
|---|---|---|
 |
||
|---|---|---|
 |
||
|---|---|---|
 |
||
|---|---|---|
Weather
Spidy
Lark
CirKill
Moloko
Walla
Elemperor
BomBoy
WindBox
Bosses
MegaMan
Roll
GutsMan
 |
||
|---|---|---|
|
||
|---|---|---|
|
||
|---|---|---|
 |
||
|---|---|---|
 |
||
|---|---|---|
WindMan
 |
||
|---|---|---|
|
||
|---|---|---|
|
||
|---|---|---|
 |
||
|---|---|---|
 |
||
|---|---|---|
SearchMan
 |
||
|---|---|---|
|
||
|---|---|---|
|
||
|---|---|---|
 |
||
|---|---|---|
 |
||
|---|---|---|
FireMan
ThunderMan
ProtoMan
 |
||
|---|---|---|
|
||
|---|---|---|
|
||
|---|---|---|
 |
||
|---|---|---|
 |
||
|---|---|---|
NumberMan
MetalMan
 |
||
|---|---|---|
|
||
|---|---|---|
|
||
|---|---|---|
 |
||
|---|---|---|
 |
||
|---|---|---|
JunkMan
 |
||
|---|---|---|
|
||
|---|---|---|
|
||
|---|---|---|
 |
||
|---|---|---|
 |
||
|---|---|---|
AquaMan
WoodMan
TopMan
 |
||
|---|---|---|
|
||
|---|---|---|
|
||
|---|---|---|
 |
||
|---|---|---|
ShadeMan
 |
||
|---|---|---|
|
||
|---|---|---|
|
||
|---|---|---|
 |
||
|---|---|---|
BurnMan
 |
||
|---|---|---|
|
||
|---|---|---|
|
||
|---|---|---|
 |
||
|---|---|---|
ColdMan
SparkMan
 |
||
|---|---|---|
|
||
|---|---|---|
|
||
|---|---|---|
 |
||
|---|---|---|
LaserMan
 |
||
|---|---|---|
|
||
|---|---|---|
|
||
|---|---|---|
 |
||
|---|---|---|
KendoMan
 |
||
|---|---|---|
|
||
|---|---|---|
|
||
|---|---|---|
 |
||
|---|---|---|
VideoMan
Duo
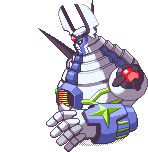 |
||
|---|---|---|
|
||
|---|---|---|
|
||
|---|---|---|
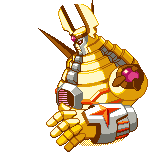 |
||
|---|---|---|
Bass
 |
||
|---|---|---|
 |
||
|---|---|---|
 |
||
|---|---|---|
References
- ↑ 1.0 1.1 1.2 1.3 1.4 Derived from "All Helmet"; Interview with TOM-PON
- ↑ 2.0 2.1 2.2 2.3 2.4 2.5 Mega Man Battle Network 4 Official Strategy Guide
- ↑ Mega Man Battle Network 4 Official Strategy Guide; written as MettEX in-game
- ↑ Mega Man Battle Network 4 Official Strategy Guide; written as Mett2EX in-game
- ↑ Mega Man Battle Network 4 Official Strategy Guide; written as Mett3EX in-game
- ↑ 6.0 6.1 6.2 Listed as Flame Tower in Mega Man Battle Network 4 Official Strategy Guide
- ↑ 7.0 7.1 7.2 7.3 7.4 7.5 Listed as Thunder Ball in Mega Man Battle Network 4 Official Strategy Guide
- ↑ 8.0 8.1 8.2 8.3 8.4 8.5 Mega Man Battle Network 4 Official Strategy Guide
- ↑ 9.0 9.1 9.2 9.3 9.4 9.5 Mega Man Battle Network 4 Official Strategy Guide
- ↑ Mega Man Battle Network 4 Official Strategy Guide
- ↑ Mega Man Battle Network 4 Official Strategy Guide; written as TrumpEX in-game
- ↑ 12.0 12.1 12.2 12.3 12.4 12.5 Listed as Magshock in Mega Man Battle Network 4 Official Strategy Guide
- ↑ 13.0 13.1 13.2 13.3 13.4 13.5 Mega Man Battle Network 4 Official Strategy Guide
- ↑ 14.0 14.1 14.2 14.3 14.4 14.5 Listed as SideLance in Mega Man Battle Network 4 Official Strategy Guide
- ↑ 15.0 15.1 15.2 15.3 15.4 Listed as Teruteru Breath Aqua in Mega Man Battle Network 4 Official Strategy Guide
- ↑ 16.0 16.1 16.2 16.3 16.4 Listed as Teruteru Breath Wood in Mega Man Battle Network 4 Official Strategy Guide
- ↑ 17.0 17.1 17.2 Listed as Teruteru Breath Fire in Mega Man Battle Network 4 Official Strategy Guide
- ↑ 18.0 18.1 18.2 18.3 Listed as Teruteru Breath Elec in Mega Man Battle Network 4 Official Strategy Guide
- ↑ Mega Man Battle Network 4 Official Strategy Guide; written as WeathEX in-game
- ↑ 20.0 20.1 20.2 20.3 20.4 20.5 Mega Man Battle Network 4 Official Strategy Guide
- ↑ 21.0 21.1 21.2 21.3 21.4 21.5 Mega Man Battle Network 4 Official Strategy Guide
- ↑ 22.0 22.1 22.2 22.3 22.4 22.5 Mega Man Battle Network 4 Official Strategy Guide; written as Elmperor in-game
- ↑ 23.0 23.1 23.2 23.3 23.4 23.5 Mega Man Battle Network 4 Official Strategy Guide
- ↑ 24.0 24.1 24.2 Listed as WindGust in Mega Man Battle Network 4 Official Strategy Guide
- ↑ 25.0 25.1 25.2 Listed as Vacuum in Mega Man Battle Network 4 Official Strategy Guide
- ↑ 26.0 26.1 26.2 26.3 Mega Man Battle Network 4 Official Strategy Guide
- ↑ 27.0 27.1 27.2 27.3 27.4 Mega Man Battle Network 4 Official Strategy Guide
- ↑ 28.0 28.1 28.2 28.3 28.4 Also listed as GutMG in Mega Man Battle Network 4; listed as Guts-MachineGun in Mega Man Battle Network 4 Official Strategy Guide
- ↑ 29.0 29.1 29.2 29.3 29.4 Listed as GutsPunch in Mega Man Battle Network 4 Official Strategy Guide
- ↑ 30.0 30.1 30.2 30.3 30.4 Mega Man Battle Network 4 Official Strategy Guide
- ↑ 31.0 31.1 31.2 31.3 31.4 31.5 31.6 31.7 31.8 31.9 Mega Man Battle Network 4 Official Strategy Guide
- ↑ 32.0 32.1 32.2 32.3 32.4 Mega Man Battle Network 4 Official Strategy Guide
- ↑ 33.0 33.1 33.2 33.3 Mega Man Battle Network 4 Official Strategy Guide
- ↑ 34.0 34.1 Due to a glitch, the game only stores the low 8 bits of the attack power. This results in an attack power of 14 (should be 270) for DSLV 9, and an attack power of 44 (should be 300) for DSLV 10. DSLV 1~8 are not affected.
- ↑ 35.0 35.1 35.2 35.3 35.4 Mega Man Battle Network 4 Official Strategy Guide
- ↑ 36.0 36.1 36.2 36.3 36.4 Mega Man Battle Network 4 Official Strategy Guide
- ↑ 37.0 37.1 37.2 37.3 37.4 Mega Man Battle Network 4 Official Strategy Guide
- ↑ 38.0 38.1 38.2 38.3 38.4 Mega Man Battle Network 4 Official Strategy Guide
- ↑ 39.0 39.1 39.2 39.3 Mega Man Battle Network 4 Official Strategy Guide
- ↑ 40.0 40.1 40.2 Mega Man Battle Network 4 Official Strategy Guide
- ↑ 41.0 41.1 41.2 41.3 41.4 41.5 41.6 41.7 41.8 41.9 Listed as DiceBomb in Mega Man Battle Network 4 Official Strategy Guide
- ↑ 42.0 42.1 42.2 42.3 42.4 Mega Man Battle Network 4 Official Strategy Guide
- ↑ 43.0 43.1 43.2 43.3 43.4 Mega Man Battle Network 4 Official Strategy Guide
- ↑ 44.0 44.1 44.2 44.3 44.4 Mega Man Battle Network 4 Official Strategy Guide
- ↑ 45.0 45.1 45.2 45.3 45.4 Mega Man Battle Network 4 Official Strategy Guide
- ↑ 46.0 46.1 46.2 46.3 Mega Man Battle Network 4 Official Strategy Guide
- ↑ 47.0 47.1 47.2 47.3 Mega Man Battle Network 4; listed as Noise Crush in Mega Man Battle Network 4 Official Strategy Guide
- ↑ 48.0 48.1 48.2 48.3 Mega Man Battle Network 4 Official Strategy Guide
- ↑ 49.0 49.1 49.2 49.3 Mega Man Battle Network 4 Official Strategy Guide
- ↑ 59.0 59.1 59.2 59.3 Listed as Hiden Ken Men (ヒデンケン・メン) in Rockman EXE4 Official Guidebook
- ↑ 60.0 60.1 60.2 60.3 Mega Man Battle Network 4 Official Strategy Guide
- ↑ 61.0 61.1 61.2 61.3 Listed as Hiden Ken Kote (ヒデンケン・コテ) in Rockman EXE4 Official Guidebook
- ↑ 62.0 62.1 62.2 62.3 Listed as Hiden Ken Dou (ヒデンケン・ドウ) in Rockman EXE4 Official Guidebook
- ↑ 63.0 63.1 63.2 63.3 Listed as Deadly Kakari Geiko (ヒッサツ・カカリゲイコ) in Rockman EXE4 Official Guidebook
- ↑ 64.00 64.01 64.02 64.03 64.04 64.05 64.06 64.07 64.08 64.09 64.10 64.11 Mega Man Battle Network 4 Official Strategy Guide
- ↑ 65.0 65.1 65.2 65.3 Mega Man Battle Network 4 Official Strategy Guide
- ↑ 66.0 66.1 66.2 66.3 Mega Man Battle Network 4 Official Strategy Guide
- ↑ 67.0 67.1 67.2 67.3 Mega Man Battle Network 4 Official Strategy Guide
- ↑ 68.0 68.1 68.2 68.3 Mega Man Battle Network 4 Official Strategy Guide
- ↑ 69.0 69.1 69.2 Mega Man Battle Network 5; listed as Hells Rolling in Mega Man Battle Network 4 Official Strategy Guide
- ↑ Rockman EXE4 Ultimate Navigation DS