Enemies in MMBN5: Difference between revisions
From The Rockman EXE Zone Wiki
(→Meddy) |
mNo edit summary |
||
| (31 intermediate revisions by 2 users not shown) | |||
| Line 1: | Line 1: | ||
This page lists every enemy which can appear in battle in [[Mega Man Battle Network 5]]. | This page lists every enemy which can appear in battle in [[Mega Man Battle Network 5]]. | ||
| Line 23: | Line 21: | ||
|airshoes= |shadowshoes= |floatshoes= |statusguard= |superarmor= | |airshoes= |shadowshoes= |floatshoes= |statusguard= |superarmor= | ||
|info= | |info= | ||
|locations= | |locations='''Level 1:''' [[Doghouse Comp (MMBN5)|Doghouse Comp]] (75.0%), [[Sculpture Comp]] (66.7%), [[Tree Comp]] (58.3%), [[Kitchen Comp]] (58.3%), [[ACDC Area 1 (MMBN5)|ACDC Area 1]] (57.6%), [[Mayl's HP (MMBN5)|Mayl's HP]] (56.7%), [[Yai's HP (MMBN5)|Yai's HP]] (56.7%), [[Dad's Comp]] (47.2%), [[ACDC Area 2 (MMBN5)|ACDC Area 2]] (44.4%), [[Main Comp 1]] (31.9%), [[Main Comp 2]] (27.8%), [[Oran Area 1]] (23.8%), [[Oran Area 2]] (19.4%), [[ACDC Area 3 (MMBN5)|ACDC Area 3]] (16.7%), [[Air Filter Comp]] (13.3%), [[Electric Lock Comp]] (11.1%), [[Furnace Comp]] (8.3%), [[Drill Comp 1]] (3.7%)<br/>'''Liberation Mission:''' [[ACDC Area 3 (Liberation Mission)|ACDC Area]] | ||
|attacks= | |attacks= | ||
{{EnemyInfo/Attack |name_en=Shockwave<ref name="Shockwave">Mega Man Battle Network 5 Official Strategy Guide</ref> |name_jp=ショックウェーブ |name_tl=Shock Wave | |||
|attack=10 |emotion=10 |element=none | |||
}} | |||
|getdata= | |getdata= | ||
{{EnemyInfo/GetData |hp=Any |chip=Guard1 |code=A |lv1= 7: 50% |lv2= 8-S: 100% }} | |||
{{EnemyInfo/GetData |hp=Any |chip=Guard1 |code=D |version=Team ProtoMan |lv1= 5: 25% |lv2= 6: 50% |lv3= 7: 25% }} | |||
{{EnemyInfo/GetData |hp=Any |chip=Guard1 |code=K |version=Team Colonel |lv1= 5: 25% |lv2= 6: 50% |lv3= 7: 25% }} | |||
{{EnemyInfo/GetData |hp=High |zenny=100 |lv1= 5: 25% |lv2= 6: 50% |lv3= 7: 25% }} | |||
{{EnemyInfo/GetData |hp=High |zenny=50 |lv1= 4-5: 50% }} | |||
{{EnemyInfo/GetData |hp=High |zenny=30 |lv1= 1-3: 100% |lv2= 4: 50% }} | |||
{{EnemyInfo/GetData |hp=Low |recov=50 |lv1= 1-4: 100% |lv2= 5: 75% |lv3= 6: 50% |lv4= 7: 25% }} | |||
}} | }} | ||
| Line 34: | Line 42: | ||
|airshoes= |shadowshoes= |floatshoes= |statusguard= |superarmor= | |airshoes= |shadowshoes= |floatshoes= |statusguard= |superarmor= | ||
|info= | |info= | ||
|locations= | |locations='''Level 1:''' [[Drill Comp 1]] (37.0%), [[Drill Comp 3]] (24.1%), [[Oran Area 3]] (20.5%), [[Drill Comp 2]] (20.4%), [[Drill Comp 4]] (17.6%), [[SciLab HP]] (16.7%), [[SciLab Area 1]] (15.3%), [[Squirrel Comps]] (13.9%), [[Gargoyle Castle HP]] (13.3%), [[SciLab Area 3]] (10.3%), [[Wine Case Comp]] (9.3%), [[SciLab Area 2]] (8.3%), [[View Comp]] (8.3%), [[SciLab Area 4]] (7.7%), [[End Area 1]] (5.6%), [[End Area 2]] (5.6%), [[Undernet 2 (MMBN5)|Undernet 2]] (5.1%), [[End Area 3]] (2.6%), [[End Area 4]] (2.6%)<br/>'''Liberation Mission:''' [[Oran Area 3 (Liberation Mission)|Oran Area 3]], [[SciLab Area 3 (Liberation Mission)|SciLab Area 3]], [[End Area 2 (Liberation Mission)|End Area 2]] | ||
|attacks= | |attacks= | ||
{{EnemyInfo/Attack |name_en=Shockwave<ref name="Shockwave"/> |name_jp=ショックウェーブ |name_tl=Shock Wave | |||
|attack=40 |emotion=20 |element=none | |||
}} | |||
|getdata= | |getdata= | ||
{{EnemyInfo/GetData |hp=Any |chip=Guard1 |code=A |lv1= 7: 25% |lv2= 8: 50% |lv3= 9: 46.875% |lv4= 10: 25% }} | |||
{{EnemyInfo/GetData |hp=Any |chip=Guard1 |code=D |version=Team ProtoMan |lv1= 5: 25% |lv2= 6: 50% |lv3= 7: 25% }} | |||
{{EnemyInfo/GetData |hp=Any |chip=Guard1 |code=K |version=Team Colonel |lv1= 5: 25% |lv2= 6: 50% |lv3= 7: 25% }} | |||
{{EnemyInfo/GetData |hp=Any |chip=Guard1 |code=* |lv1= 9: 3.125% |lv2= 10: 25% |lv3= S: 50% }} | |||
{{EnemyInfo/GetData |hp=High |zenny=300 |lv1= 9: 3.125% |lv2= 10: 25% |lv3= S: 50% }} | |||
{{EnemyInfo/GetData |hp=High |zenny=250 |lv1= 7: 25% |lv2= 8: 50% |lv3= 9: 46.875% |lv4= 10: 25% }} | |||
{{EnemyInfo/GetData |hp=High |zenny=200 |lv1= 5: 25% |lv2= 6: 50% |lv3= 7: 25% }} | |||
{{EnemyInfo/GetData |hp=High |zenny=50 |lv1= 4-5: 50% }} | |||
{{EnemyInfo/GetData |hp=High |zenny=30 |lv1= 1-3: 100% |lv2= 4: 50% }} | |||
{{EnemyInfo/GetData |hp=Low |recov=100 |lv1= 1-4: 100% |lv2= 5: 75% |lv3= 6-S: 50% }} | |||
}} | }} | ||
| Line 45: | Line 66: | ||
|airshoes= |shadowshoes= |floatshoes= |statusguard= |superarmor= | |airshoes= |shadowshoes= |floatshoes= |statusguard= |superarmor= | ||
|info= | |info= | ||
|locations= | |locations='''Level 2:''' [[Doghouse Comp (MMBN5)|Doghouse Comp]] (75.0%), [[Sculpture Comp]] (66.7%), [[Tree Comp]] (58.3%), [[Kitchen Comp]] (58.3%), [[ACDC Area 1 (MMBN5)|ACDC Area 1]] (57.6%), [[Mayl's HP (MMBN5)|Mayl's HP]] (56.7%), [[Yai's HP (MMBN5)|Yai's HP]] (56.7%), [[Dad's Comp]] (47.2%), [[ACDC Area 2 (MMBN5)|ACDC Area 2]] (44.4%), [[Main Comp 1]] (31.9%), [[Main Comp 2]] (27.8%), [[Oran Area 1]] (23.8%), [[Oran Area 2]] (19.4%), [[ACDC Area 3 (MMBN5)|ACDC Area 3]] (16.7%), [[Air Filter Comp]] (13.3%), [[Electric Lock Comp]] (11.1%), [[Furnace Comp]] (8.3%), [[Drill Comp 1]] (3.7%)<br/>'''Liberation Mission:''' [[Nebula Area 1 (Liberation Mission)|Nebula Area 1]] | ||
|attacks= | |attacks= | ||
{{EnemyInfo/Attack |name_en=Shockwave<ref name="Shockwave"/> |name_jp=ショックウェーブ |name_tl=Shock Wave | |||
|attack=80 |emotion=30 |element=none | |||
}} | |||
{{EnemyInfo/Attack |name_en=BattleChip | |||
|info=Invisibl ({{chance|3/16}}), Blinder ({{chance|1/16}}) | |||
}} | |||
|getdata= | |getdata= | ||
{{EnemyInfo/GetData |hp=Any |chip=Guard2 |code=B |lv1= 7: 25% |lv2= 8-S: 50% }} | |||
{{EnemyInfo/GetData |hp=Any |chip=Guard2 |code=L |version=Team ProtoMan |lv1= 5: 25% |lv2= 6: 50% |lv3= 7: 25% }} | |||
{{EnemyInfo/GetData |hp=Any |chip=Guard2 |code=Q |version=Team Colonel |lv1= 5: 25% |lv2= 6: 50% |lv3= 7: 25% }} | |||
{{EnemyInfo/GetData |hp=High |zenny=400 |lv1= 9: 3.125% |lv2= 10: 25% |lv3= S: 50% }} | |||
{{EnemyInfo/GetData |hp=High |zenny=350 |lv1= 7: 25% |lv2= 8: 50% |lv3= 9: 46.875% |lv4= 10: 25% }} | |||
{{EnemyInfo/GetData |hp=High |zenny=300 |lv1= 5: 25% |lv2= 6: 50% |lv3= 7: 25% }} | |||
{{EnemyInfo/GetData |hp=High |zenny=50 |lv1= 4-5: 50% }} | |||
{{EnemyInfo/GetData |hp=High |zenny=30 |lv1= 1-3: 100% |lv2= 4: 50% }} | |||
{{EnemyInfo/GetData |hp=Low |recov=200 |lv1= 1-4: 100% |lv2= 5: 75% |lv3= 6-S: 50% }} | |||
}} | }} | ||
| Line 56: | Line 92: | ||
|airshoes= |shadowshoes= |floatshoes= |statusguard= |superarmor= | |airshoes= |shadowshoes= |floatshoes= |statusguard= |superarmor= | ||
|info= | |info= | ||
|locations= | |locations='''Level 2:''' [[Drill Comp 1]] (37.0%), [[Nebula Area 1]] (25.0%), [[Drill Comp 3]] (24.1%), [[Nebula Area 2]] (23.6%), [[Oran Area 3]] (20.5%), [[Drill Comp 2]] (20.4%), [[Drill Comp 4]] (17.6%), [[SciLab HP]] (16.7%), [[SciLab Area 1]] (15.3%), [[Nebula Area 3]] (13.9%), [[Squirrel Comps]] (13.9%), [[Gargoyle Castle HP]] (13.3%), [[SciLab Area 3]] (10.3%), [[Wine Case Comp]] (9.3%), [[SciLab Area 2]] (8.3%), [[View Comp]] (8.3%), [[SciLab Area 4]] (7.7%), [[End Area 1]] (5.6%), [[End Area 2]] (5.6%), [[Undernet 2 (MMBN5)|Undernet 2]] (5.1%), [[End Area 3]] (2.6%), [[End Area 4]] (2.6%)<br/>'''Liberation Mission:''' [[Nebula Area 1 (Liberation Mission)|Nebula Area 1]] | ||
|attacks= | |attacks= | ||
{{EnemyInfo/Attack |name_en=Shockwave<ref name="Shockwave"/> |name_jp=ショックウェーブ |name_tl=Shock Wave | |||
|attack=120 |emotion=40 |element=none | |||
}} | |||
{{EnemyInfo/Attack |name_en=BattleChip | |||
|info=Recov150 ({{chance|2/16}}), Blinder ({{chance|2/16}}) | |||
}} | |||
|getdata= | |getdata= | ||
{{EnemyInfo/GetData |hp=Any |chip=Guard2 |code=B |lv1= 5: 25% |lv2= 6-8: 50% |lv3= 9: 46.875% |lv4= 10: 25% }} | |||
{{EnemyInfo/GetData |hp=Any |chip=Guard2 |code=* |lv1= 9: 3.125% |lv2= 10: 25% |lv3= S: 50% }} | |||
{{EnemyInfo/GetData |hp=High |zenny=400 |lv1= 9: 3.125% |lv2= 10: 25% |lv3= S: 50% }} | |||
{{EnemyInfo/GetData |hp=High |zenny=350 |lv1= 7: 25% |lv2= 8: 50% |lv3= 9: 46.875% |lv4= 10: 25% }} | |||
{{EnemyInfo/GetData |hp=High |zenny=300 |lv1= 5: 25% |lv2= 6: 50% |lv3= 7: 25% }} | |||
{{EnemyInfo/GetData |hp=High |zenny=50 |lv1= 4-5: 50% }} | |||
{{EnemyInfo/GetData |hp=High |zenny=30 |lv1= 1-3: 100% |lv2= 4: 50% }} | |||
{{EnemyInfo/GetData |hp=Low |recov=300 |lv1= 1-4: 100% |lv2= 5: 75% |lv3= 6-S: 50% }} | |||
}} | }} | ||
| Line 67: | Line 117: | ||
|airshoes= |shadowshoes= |floatshoes= |statusguard= |superarmor= | |airshoes= |shadowshoes= |floatshoes= |statusguard= |superarmor= | ||
|info= | |info= | ||
|locations= | |locations='''Level 3:''' [[Doghouse Comp (MMBN5)|Doghouse Comp]] (75.0%), [[Sculpture Comp]] (66.7%), [[Tree Comp]] (58.3%), [[Kitchen Comp]] (58.3%), [[ACDC Area 1 (MMBN5)|ACDC Area 1]] (57.6%), [[Mayl's HP (MMBN5)|Mayl's HP]] (56.7%), [[Yai's HP (MMBN5)|Yai's HP]] (56.7%), [[Dad's Comp]] (47.2%), [[ACDC Area 2 (MMBN5)|ACDC Area 2]] (44.4%), [[Main Comp 1]] (31.9%), [[Main Comp 2]] (27.8%), [[Oran Area 1]] (23.8%), [[Oran Area 2]] (19.4%), [[ACDC Area 3 (MMBN5)|ACDC Area 3]] (16.7%), [[Air Filter Comp]] (13.3%), [[Electric Lock Comp]] (11.1%), [[Furnace Comp]] (8.3%), [[Drill Comp 1]] (3.7%) | ||
|attacks= | |attacks= | ||
{{EnemyInfo/Attack |name_en=Shockwave<ref name="Shockwave"/> |name_jp=ショックウェーブ |name_tl=Shock Wave | |||
|attack=160 |emotion=50 |element=none |ground=y | |||
|info=Cracks panels. | |||
}} | |||
{{EnemyInfo/Attack |name_en=BattleChip | |||
|info=Recov150 ({{chance|2/16}}), Invisibl ({{chance|2/16}}), Blinder ({{chance|2/16}}) | |||
}} | |||
|getdata= | |getdata= | ||
{{EnemyInfo/GetData |hp=Any |chip=Guard3 |code=C |lv1= 9: 3.125% |lv2= 10: 25% |lv3= S: 50% }} | |||
{{EnemyInfo/GetData |hp=Any |chip=Guard3 |code=M |version=Team ProtoMan |lv1= 7: 25% |lv2= 8: 50% |lv3= 9: 46.875% |lv4= 10: 25% }} | |||
{{EnemyInfo/GetData |hp=Any |chip=Guard3 |code=S |version=Team Colonel |lv1= 7: 25% |lv2= 8: 50% |lv3= 9: 46.875% |lv4= 10: 25% }} | |||
{{EnemyInfo/GetData |hp=High |zenny=500 |lv1= 9: 3.125% |lv2= 10: 25% |lv3= S: 50% }} | |||
{{EnemyInfo/GetData |hp=High |zenny=450 |lv1= 7: 25% |lv2= 8: 50% |lv3= 9: 46.875% |lv4= 10: 25% }} | |||
{{EnemyInfo/GetData |hp=High |zenny=400 |lv1= 5: 50% |lv2= 6: 100% |lv3= 7: 50% }} | |||
{{EnemyInfo/GetData |hp=High |zenny=50 |lv1= 4-5: 50% }} | |||
{{EnemyInfo/GetData |hp=High |zenny=30 |lv1= 1-3: 100% |lv2= 4: 50% }} | |||
{{EnemyInfo/GetData |hp=Low |recov=400 |lv1= 1-6: 100% |lv2= 7: 75% |lv3= 8-S: 50% }} | |||
}} | }} | ||
| Line 78: | Line 144: | ||
|airshoes= |shadowshoes= |floatshoes= |statusguard= |superarmor= | |airshoes= |shadowshoes= |floatshoes= |statusguard= |superarmor= | ||
|info= | |info= | ||
|locations= | |locations='''Level 3:''' [[Drill Comp 1]] (37.0%), [[Nebula Area 1]] (25.0%), [[Drill Comp 3]] (24.1%), [[Nebula Area 2]] (23.6%), [[Oran Area 3]] (20.5%), [[Drill Comp 2]] (20.4%), [[Drill Comp 4]] (17.6%), [[SciLab HP]] (16.7%), [[SciLab Area 1]] (15.3%), [[Nebula Area 3]] (13.9%), [[Squirrel Comps]] (13.9%), [[Gargoyle Castle HP]] (13.3%), [[SciLab Area 3]] (10.3%), [[Wine Case Comp]] (9.3%), [[SciLab Area 2]] (8.3%), [[View Comp]] (8.3%), [[SciLab Area 4]] (7.7%), [[End Area 1]] (5.6%), [[End Area 2]] (5.6%), [[Undernet 2 (MMBN5)|Undernet 2]] (5.1%), [[Nebula Area 6]] (4.4%), [[End Area 3]] (2.6%), [[End Area 4]] (2.6%)<br/>'''Liberation Mission:''' [[Nebula Area 5 (Liberation Mission)|Nebula Area 5]] | ||
|attacks= | |attacks= | ||
{{EnemyInfo/Attack |name_en=Shockwave<ref name="Shockwave"/> |name_jp=ショックウェーブ |name_tl=Shock Wave | |||
|attack=200 |emotion=60 |element=none |ground=y | |||
|info=Changes panels to swamp. | |||
}} | |||
{{EnemyInfo/Attack |name_en=BattleChip | |||
|info=Invisibl ({{chance|2/16}}), Blinder ({{chance|2/16}}), Snctuary ({{chance|2/16}}) | |||
}} | |||
|getdata= | |getdata= | ||
{{EnemyInfo/GetData |hp=Any |chip=Guard3 |code=C |lv1= 7: 25% |lv2= 8: 50% |lv3= 9: 46.875% |lv4= 10: 25% }} | |||
{{EnemyInfo/GetData |hp=Any |chip=Guard3 |code=* |lv1= 9: 3.125% |lv2= 10: 25% |lv3= S: 50% }} | |||
{{EnemyInfo/GetData |hp=High |zenny=500 |lv1= 9: 3.125% |lv2= 10: 25% |lv3= S: 50% }} | |||
{{EnemyInfo/GetData |hp=High |zenny=450 |lv1= 7: 25% |lv2= 8: 50% |lv3= 9: 46.875% |lv4= 10: 25% }} | |||
{{EnemyInfo/GetData |hp=High |zenny=400 |lv1= 5: 50% |lv2= 6: 100% |lv3= 7: 50% }} | |||
{{EnemyInfo/GetData |hp=High |zenny=50 |lv1= 4-5: 50% }} | |||
{{EnemyInfo/GetData |hp=High |zenny=30 |lv1= 1-3: 100% |lv2= 4: 50% }} | |||
{{EnemyInfo/GetData |hp=Low |recov=400 |lv1= 1-6: 100% |lv2= 7: 75% |lv3= 8-S: 50% }} | |||
}} | }} | ||
| Line 90: | Line 171: | ||
|airshoes= |shadowshoes= |floatshoes=y |statusguard= |superarmor= | |airshoes= |shadowshoes= |floatshoes=y |statusguard= |superarmor= | ||
|info= | |info= | ||
|locations= | |locations='''Level 1:''' [[Terminal Comp]] (50.0%), [[Dex's HP (MMBN5)|Dex's HP]] (46.7%), [[Yai's HP (MMBN5)|Yai's HP]] (43.3%), [[Tree Comp]] (41.7%), [[Air Filter Comp]] (28.3%), [[Drill Comp 2]] (25.0%), [[ACDC Area 2 (MMBN5)|ACDC Area 2]] (23.6%), [[Main Comp 1]] (20.8%), [[Main Comp 2]] (19.4%), [[Old Terminal Comp]] (18.8%), [[Drill Comp 1]] (17.6%), [[ACDC Area 3 (MMBN5)|ACDC Area 3]] (11.5%), [[Oran Area 3]] (10.3%), [[NetBattle Comp (MMBN5)|NetBattle Comp]] (7.1%)<br/>'''Liberation Mission:''' [[ACDC Area 3 (Liberation Mission)|ACDC Area]] | ||
|attacks= | |attacks= | ||
{{EnemyInfo/Attack |name_en=Quake<ref name="Powie-Quake">Listed as '''Earthquake''' in Mega Man Battle Network 5 Official Strategy Guide</ref> |name_jp=アースクエイク |name_tl=Earthquake | |||
|attack=20 |emotion=10 |element=none |guard=y |ground=y | |||
|info=Cracks panel. | |||
}} | |||
|getdata= | |getdata= | ||
{{EnemyInfo/GetData |hp=Any |chip=Quake1 |code=A |lv1= 9: 3.125% |lv2= 10: 25% |lv3= S: 50% }} | |||
{{EnemyInfo/GetData |hp=Any |chip=Quake1 |code=K |version=Team ProtoMan |lv1= 5: 25% |lv2= 6-S: 50% }} | |||
{{EnemyInfo/GetData |hp=Any |chip=Quake1 |code=P |version=Team Colonel |lv1= 5: 25% |lv2= 6-S: 50% }} | |||
{{EnemyInfo/GetData |hp=High |zenny=150 |lv1= 7: 25% |lv2= 8: 50% |lv3= 9: 46.875% |lv4= 10: 25% }} | |||
{{EnemyInfo/GetData |hp=High |zenny=100 |lv1= 5: 25% |lv2= 6: 50% |lv3= 7: 25% }} | |||
{{EnemyInfo/GetData |hp=High |zenny=50 |lv1= 4-5: 50% }} | |||
{{EnemyInfo/GetData |hp=High |zenny=30 |lv1= 1-3: 100% |lv2= 4: 50% }} | |||
{{EnemyInfo/GetData |hp=Low |recov=100 |lv1= 1-4: 100% |lv2= 5: 75% |lv3= 6-8: 50% |lv4= 9: 46.875% |lv5= 10: 25% }} | |||
}} | }} | ||
| Line 101: | Line 194: | ||
|airshoes= |shadowshoes= |floatshoes=y |statusguard= |superarmor= | |airshoes= |shadowshoes= |floatshoes=y |statusguard= |superarmor= | ||
|info= | |info= | ||
|locations= | |locations='''Level 1:''' [[End Area 2]] (22.2%), [[End Area 1]] (20.8%), [[Armor Comp (MMBN5)|Armor Comp]] (19.0%), [[Helmet Comp]] (19.0%), [[Katana Comp]] (19.0%), [[Gargoyle Comp 1]] (18.7%), [[Gargoyle Comp 2]] (13.5%), [[Gargoyle Comp 3]] (10.4%)<br/>'''Liberation Mission:''' [[End Area 5 (Liberation Mission)|End Area 5]], [[Undernet 4 (Liberation Mission)|Undernet 4]] | ||
|attacks= | |attacks= | ||
{{EnemyInfo/Attack |name_en=Quake<ref name="Powie-Quake"/> |name_jp=アースクエイク |name_tl=Earthquake | |||
|attack=40 |emotion=10 |element=none |guard=y |ground=y | |||
|info=Spreads in {{!}} shape. Cracks single panel. Only direct contact pierces guard and underground. | |||
}} | |||
|getdata= | |getdata= | ||
{{EnemyInfo/GetData |hp=Any |chip=Quake1 |code=A |lv1= 7: 50% |lv2= 8-S: 100% }} | |||
{{EnemyInfo/GetData |hp=High |zenny=150 |lv1= 5: 50% |lv2= 6: 100% |lv3= 7: 50% }} | |||
{{EnemyInfo/GetData |hp=High |zenny=50 |lv1= 4-5: 50% }} | |||
{{EnemyInfo/GetData |hp=High |zenny=30 |lv1= 1-3: 100% |lv2= 4: 50% }} | |||
{{EnemyInfo/GetData |hp=Low |recov=200 |lv1= 1-6: 100% |lv2= 7: 50% }} | |||
}} | }} | ||
| Line 112: | Line 214: | ||
|airshoes= |shadowshoes= |floatshoes=y |statusguard= |superarmor= | |airshoes= |shadowshoes= |floatshoes=y |statusguard= |superarmor= | ||
|info= | |info= | ||
|locations= | |locations='''Level 2:''' [[Terminal Comp]] (50.0%), [[Dex's HP (MMBN5)|Dex's HP]] (46.7%), [[Yai's HP (MMBN5)|Yai's HP]] (43.3%), [[Tree Comp]] (41.7%), [[Air Filter Comp]] (28.3%), [[Drill Comp 2]] (25.0%), [[ACDC Area 2 (MMBN5)|ACDC Area 2]] (23.6%), [[Main Comp 1]] (20.8%), [[Main Comp 2]] (19.4%), [[Old Terminal Comp]] (18.8%), [[Drill Comp 1]] (17.6%), [[ACDC Area 3 (MMBN5)|ACDC Area 3]] (11.5%), [[Oran Area 3]] (10.3%), [[NetBattle Comp (MMBN5)|NetBattle Comp]] (7.1%) | ||
|attacks= | |attacks= | ||
{{EnemyInfo/Attack |name_en=Quake<ref name="Powie-Quake"/> |name_jp=アースクエイク |name_tl=Earthquake | |||
|attack=70 |emotion=10 |element=none |guard=y |ground=y | |||
|info=Spreads in + shape. Cracks single panel. Only direct contact pierces guard and underground. | |||
}} | |||
{{EnemyInfo/Attack |name_en=BattleChip | |||
|info=Geddon1 ({{chance|2/16}}) | |||
}} | |||
|getdata= | |getdata= | ||
{{EnemyInfo/GetData |hp=Any |chip=Quake2 |code=B |lv1= 9: 3.125% |lv2= 10: 25% |lv3= S: 50% }} | |||
{{EnemyInfo/GetData |hp=Any |chip=Quake2 |code=L |version=Team ProtoMan |lv1= 7: 25% |lv2= 8: 50% |lv3= 9: 46.875% |lv4= 10: 25% }} | |||
{{EnemyInfo/GetData |hp=Any |chip=Quake2 |code=Y |version=Team Colonel |lv1= 7: 25% |lv2= 8: 50% |lv3= 9: 46.875% |lv4= 10: 25% }} | |||
{{EnemyInfo/GetData |hp=High |zenny=350 |lv1= 9: 3.125% |lv2= 10: 25% |lv3= S: 50% }} | |||
{{EnemyInfo/GetData |hp=High |zenny=300 |lv1= 7: 25% |lv2= 8: 50% |lv3= 9: 46.875% |lv4= 10: 25% }} | |||
{{EnemyInfo/GetData |hp=High |zenny=250 |lv1= 5: 50% |lv2= 6: 100% |lv3= 7: 50% }} | |||
{{EnemyInfo/GetData |hp=High |zenny=50 |lv1= 4-5: 50% }} | |||
{{EnemyInfo/GetData |hp=High |zenny=30 |lv1= 1-3: 100% |lv2= 4: 50% }} | |||
{{EnemyInfo/GetData |hp=Low |recov=300 |lv1= 1-6: 100% |lv2= 7: 75% |lv3= 8-S: 50% }} | |||
}} | }} | ||
| Line 123: | Line 241: | ||
|airshoes= |shadowshoes= |floatshoes=y |statusguard= |superarmor= | |airshoes= |shadowshoes= |floatshoes=y |statusguard= |superarmor= | ||
|info= | |info= | ||
|locations= | |locations='''Level 2:''' [[End Area 2]] (22.2%), [[End Area 1]] (20.8%), [[Armor Comp (MMBN5)|Armor Comp]] (19.0%), [[Helmet Comp]] (19.0%), [[Katana Comp]] (19.0%), [[Gargoyle Comp 1]] (18.7%), [[Gargoyle Comp 2]] (13.5%), [[Gargoyle Comp 3]] (10.4%), [[Nebula Area 2]] (9.7%)<br/>'''Liberation Mission:''' [[Nebula Area 1 (Liberation Mission)|Nebula Area 1]], [[Nebula Area 3 (Liberation Mission)|Nebula Area 3]] | ||
|attacks= | |attacks= | ||
{{EnemyInfo/Attack |name_en=Quake<ref name="Powie-Quake"/> |name_jp=アースクエイク |name_tl=Earthquake | |||
|attack=110 |emotion=10 |element=none |guard=y |ground=y | |||
|info=Spreads in + shape. Cracks single panel. Only direct contact pierces guard and underground. | |||
}} | |||
{{EnemyInfo/Attack |name_en=BattleChip | |||
|info=Geddon1 ({{chance|2/16}}) | |||
}} | |||
|getdata= | |getdata= | ||
{{EnemyInfo/GetData |hp=Any |chip=Quake2 |code=B |lv1= 9: 6.25% |lv2= 10: 50% |lv3= S: 100% }} | |||
{{EnemyInfo/GetData |hp=Any |chip=Quake2 |code=L |version=Team ProtoMan |lv1= 7: 25% |lv2= 8: 50% |lv3= 9: 46.875% |lv4= 10: 25% }} | |||
{{EnemyInfo/GetData |hp=Any |chip=Quake2 |code=Y |version=Team Colonel |lv1= 7: 25% |lv2= 8: 50% |lv3= 9: 46.875% |lv4= 10: 25% }} | |||
{{EnemyInfo/GetData |hp=High |zenny=350 |lv1= 7: 25% |lv2= 8: 50% |lv3= 9: 46.875% |lv4= 10: 25% }} | |||
{{EnemyInfo/GetData |hp=High |zenny=300 |lv1= 5: 50% |lv2= 6: 100% |lv3= 7: 50% }} | |||
{{EnemyInfo/GetData |hp=High |zenny=50 |lv1= 4-5: 50% }} | |||
{{EnemyInfo/GetData |hp=High |zenny=30 |lv1= 1-3: 100% |lv2= 4: 50% }} | |||
{{EnemyInfo/GetData |hp=Low |recov=400 |lv1= 1-6: 100% |lv2= 7: 75% |lv3= 8: 50% |lv4= 9: 46.875% |lv5= 10: 25% }} | |||
}} | }} | ||
| Line 134: | Line 267: | ||
|airshoes= |shadowshoes= |floatshoes=y |statusguard= |superarmor= | |airshoes= |shadowshoes= |floatshoes=y |statusguard= |superarmor= | ||
|info= | |info= | ||
|locations= | |locations='''Level 3:''' [[Terminal Comp]] (50.0%), [[Dex's HP (MMBN5)|Dex's HP]] (46.7%), [[Yai's HP (MMBN5)|Yai's HP]] (43.3%), [[Tree Comp]] (41.7%), [[Air Filter Comp]] (28.3%), [[Drill Comp 2]] (25.0%), [[ACDC Area 2 (MMBN5)|ACDC Area 2]] (23.6%), [[Main Comp 1]] (20.8%), [[Main Comp 2]] (19.4%), [[Old Terminal Comp]] (18.8%), [[Drill Comp 1]] (17.6%), [[ACDC Area 3 (MMBN5)|ACDC Area 3]] (11.5%), [[Oran Area 3]] (10.3%), [[NetBattle Comp (MMBN5)|NetBattle Comp]] (7.1%) | ||
|attacks= | |attacks= | ||
{{EnemyInfo/Attack |name_en=Quake<ref name="Powie-Quake"/> |name_jp=アースクエイク |name_tl=Earthquake | |||
|attack=150 |emotion=10 |element=none |guard=y |ground=y | |||
|info=Spreads in + shape. Cracks single panel. Only direct contact pierces guard and underground. | |||
}} | |||
{{EnemyInfo/Attack |name_en=BattleChip | |||
|info=Geddon1 ({{chance|2/16}}) | |||
}} | |||
|getdata= | |getdata= | ||
{{EnemyInfo/GetData |hp=Any |chip=Quake3 |code=H |version=Team ProtoMan |lv1= 9: 6.25% |lv2= 10: 50% |lv3= S: 100% }} | |||
{{EnemyInfo/GetData |hp=Any |chip=Quake3 |code=N |version=Team Colonel |lv1= 9: 6.25% |lv2= 10: 50% |lv3= S: 100% }} | |||
{{EnemyInfo/GetData |hp=High |zenny=450 |lv1= 7: 50% |lv2= 8: 100% |lv3= 9: 93.75% |lv4= 10: 50% }} | |||
{{EnemyInfo/GetData |hp=High |zenny=400 |lv1= 5: 50% |lv2= 6: 100% |lv3= 7: 50% }} | |||
{{EnemyInfo/GetData |hp=High |zenny=50 |lv1= 4-5: 50% }} | |||
{{EnemyInfo/GetData |hp=High |zenny=30 |lv1= 1-3: 100% |lv2= 4: 50% }} | |||
{{EnemyInfo/GetData |hp=Low |recov=500 |lv1= 1-8: 100% |lv2= 9: 93.75% |lv3= 10: 50% }} | |||
}} | }} | ||
| Line 145: | Line 292: | ||
|airshoes= |shadowshoes= |floatshoes=y |statusguard= |superarmor= | |airshoes= |shadowshoes= |floatshoes=y |statusguard= |superarmor= | ||
|info= | |info= | ||
|locations= | |locations='''Level 3:''' [[End Area 2]] (22.2%), [[End Area 1]] (20.8%), [[Armor Comp (MMBN5)|Armor Comp]] (19.0%), [[Helmet Comp]] (19.0%), [[Katana Comp]] (19.0%), [[Gargoyle Comp 1]] (18.7%), [[Gargoyle Comp 2]] (13.5%), [[Gargoyle Comp 3]] (10.4%), [[Nebula Area 2]] (9.7%) | ||
|attacks= | |attacks= | ||
{{EnemyInfo/Attack |name_en=Quake<ref name="Powie-Quake"/> |name_jp=アースクエイク |name_tl=Earthquake | |||
|attack=190 |emotion=10 |element=none |guard=y |ground=y | |||
|info=Spreads in + shape. Cracks single panel. Only direct contact pierces guard and underground. | |||
}} | |||
{{EnemyInfo/Attack |name_en=BattleChip | |||
|info=Geddon1 ({{chance|2/16}}) | |||
}} | |||
|getdata= | |getdata= | ||
{{EnemyInfo/GetData |hp=Any |chip=Quake3 |code=F |lv1= 9: 6.25% |lv2= 10: 50% |lv3= S: 100% }} | |||
{{EnemyInfo/GetData |hp=High |zenny=500 |lv1= 7: 50% |lv2= 8: 100% |lv3= 9: 93.75% |lv4= 10: 50% }} | |||
{{EnemyInfo/GetData |hp=High |zenny=450 |lv1= 5: 50% |lv2= 6: 100% |lv3= 7: 50% }} | |||
{{EnemyInfo/GetData |hp=High |zenny=50 |lv1= 4-5: 50% }} | |||
{{EnemyInfo/GetData |hp=High |zenny=30 |lv1= 1-3: 100% |lv2= 4: 50% }} | |||
{{EnemyInfo/GetData |hp=Low |recov=max |lv1= 1-8: 100% |lv2= 9: 93.75% |lv3= 10: 50% }} | |||
}} | }} | ||
| Line 157: | Line 317: | ||
|airshoes= |shadowshoes= |floatshoes= |statusguard= |superarmor= | |airshoes= |shadowshoes= |floatshoes= |statusguard= |superarmor= | ||
|info= | |info= | ||
|locations= | |locations='''Level 1:''' [[Crane Comp (MMBN5)|Crane Comp]] (52.4%), [[Elevator Comp (MMBN5)|Elevator Comp]] (52.4%), [[Electric Lock Comp]] (33.3%), [[ACDC Area 3 (MMBN5)|ACDC Area 3]] (25.6%), [[Dad's Comp]] (25.0%), [[Oran Area 2]] (23.6%), [[Oran Area 1]] (22.6%), [[NetBattle Comp (MMBN5)|NetBattle Comp]] (14.3%), [[Oran Area 3]] (10.3%), [[SciLab Area 1]] (9.7%), [[Drill Comp 3]] (7.4%), [[SciLab HP]] (6.7%), [[Air Filter Comp]] (5.0%), [[Furnace Comp]] (4.2%), [[SciLab Area 2]] (2.8%), [[Drill Comp 4]] (1.9%)<br/>'''Liberation Mission:''' [[Oran Area 3 (Liberation Mission)|Oran Area 3]] | ||
|attacks= | |attacks= | ||
{{EnemyInfo/Attack |name_en=Bomb |name_jp=ボム |name_tl=Bomb | |||
|attack=30 |emotion=10 |element=none |ground=y | |||
}} | |||
|getdata= | |getdata= | ||
{{EnemyInfo/GetData |hp=Any |chip=CrakBom |code=R |version=Team ProtoMan |lv1= 9: 6.25% |lv2= 10: 50% |lv3= S: 100% }} | |||
{{EnemyInfo/GetData |hp=Any |chip=CrakBom |code=V |version=Team Colonel |lv1= 9: 6.25% |lv2= 10: 50% |lv3= S: 100% }} | |||
{{EnemyInfo/GetData |hp=High |zenny=150 |lv1= 7: 50% |lv2= 8: 100% |lv3= 9: 93.75% |lv4= 10: 50% }} | |||
{{EnemyInfo/GetData |hp=High |zenny=100 |lv1= 5: 50% |lv2= 6: 100% |lv3= 7: 50% }} | |||
{{EnemyInfo/GetData |hp=High |zenny=50 |lv1= 4-5: 50% }} | |||
{{EnemyInfo/GetData |hp=High |zenny=30 |lv1= 1-3: 100% |lv2= 4: 50% }} | |||
{{EnemyInfo/GetData |hp=Low |recov=100 |lv1= 1-8: 100% |lv2= 9: 93.75% |lv3= 10: 50% }} | |||
}} | }} | ||
| Line 168: | Line 338: | ||
|airshoes= |shadowshoes= |floatshoes= |statusguard= |superarmor= | |airshoes= |shadowshoes= |floatshoes= |statusguard= |superarmor= | ||
|info= | |info= | ||
|locations= | |locations='''Level 1:''' [[ACDC Town Vision Burst]] (36.7%), [[SciLab Area 1]] (18.1%), [[SciLab HP]] (16.7%), [[Drill Comp 4]] (15.7%), [[Wind God Comp]] (12.5%), [[SciLab Area 2]] (9.7%), [[Drill Comp 3]] (1.9%)<br/>'''Liberation Mission:''' [[End Area 5 (Liberation Mission)|End Area 5]], [[Undernet 4 (Liberation Mission)|Undernet 4]] | ||
|attacks= | |attacks= | ||
{{EnemyInfo/Attack |name_en=Bomb |name_jp=ボム |name_tl=Bomb | |||
|attack=50 |emotion=10 |element=none |ground=y | |||
}} | |||
{{EnemyInfo/Attack |name_en=BattleChip | |||
|info=AreaGrab ({{chance|2/16}}) | |||
}} | |||
|getdata= | |getdata= | ||
{{EnemyInfo/GetData |hp=Any |chip=CrakBom |code=C |lv1= 7: 50% |lv2= 8: 100% |lv3= 9: 93.75% |lv4= 10: 50% }} | |||
{{EnemyInfo/GetData |hp=Any |chip=CrakBom |code=* |lv1= 9: 6.25% |lv2= 10: 50% |lv3= S: 100% }} | |||
{{EnemyInfo/GetData |hp=High |zenny=250 |lv1= 5: 50% |lv2= 6: 100% |lv3= 7: 50% }} | |||
{{EnemyInfo/GetData |hp=High |zenny=50 |lv1= 4-5: 50% }} | |||
{{EnemyInfo/GetData |hp=High |zenny=30 |lv1= 1-3: 100% |lv2= 4: 50% }} | |||
{{EnemyInfo/GetData |hp=Low |recov=200 |lv1= 1-6: 100% |lv2= 7: 50% }} | |||
}} | }} | ||
| Line 179: | Line 361: | ||
|airshoes= |shadowshoes= |floatshoes= |statusguard= |superarmor= | |airshoes= |shadowshoes= |floatshoes= |statusguard= |superarmor= | ||
|info= | |info= | ||
|locations= | |locations='''Level 2:''' [[Crane Comp (MMBN5)|Crane Comp]] (52.4%), [[Elevator Comp (MMBN5)|Elevator Comp]] (52.4%), [[Electric Lock Comp]] (33.3%), [[ACDC Area 3 (MMBN5)|ACDC Area 3]] (25.6%), [[Dad's Comp]] (25.0%), [[Oran Area 2]] (23.6%), [[Oran Area 1]] (22.6%), [[NetBattle Comp (MMBN5)|NetBattle Comp]] (14.3%), [[Oran Area 3]] (10.3%), [[SciLab Area 1]] (9.7%), [[Drill Comp 3]] (7.4%), [[SciLab HP]] (6.7%), [[Air Filter Comp]] (5.0%), [[Furnace Comp]] (4.2%), [[SciLab Area 2]] (2.8%), [[Drill Comp 4]] (1.9%)<br/>'''Liberation Mission:''' [[Nebula Area 1 (Liberation Mission)|Nebula Area 1]] | ||
|attacks= | |attacks= | ||
{{EnemyInfo/Attack |name_en=ParaBomb<ref name="ParaBomb">Mega Man Battle Network 5 Official Strategy Guide</ref> |name_jp=パラライズボム |name_tl=Paralyze Bomb | |||
|attack=100 |emotion=10 |element=none |ground=y | |||
|info=Inflicts Paralyze LV. 1 (1.5 seconds). | |||
}} | |||
{{EnemyInfo/Attack |name_en=BattleChip | |||
|info=AreaGrab ({{chance|2/16}}) | |||
}} | |||
|getdata= | |getdata= | ||
{{EnemyInfo/GetData |hp=Any |chip=ParaBom |code=N |version=Team ProtoMan |lv1= 9: 6.25% |lv2= 10: 50% |lv3= S: 100% }} | |||
{{EnemyInfo/GetData |hp=Any |chip=ParaBom |code=P |version=Team Colonel |lv1= 9: 6.25% |lv2= 10: 50% |lv3= S: 100% }} | |||
{{EnemyInfo/GetData |hp=High |zenny=300 |lv1= 7: 50% |lv2= 8: 100% |lv3= 9: 93.75% |lv4= 10: 50% }} | |||
{{EnemyInfo/GetData |hp=High |zenny=250 |lv1= 5: 50% |lv2= 6: 100% |lv3= 7: 50% }} | |||
{{EnemyInfo/GetData |hp=High |zenny=50 |lv1= 4-5: 50% }} | |||
{{EnemyInfo/GetData |hp=High |zenny=30 |lv1= 1-3: 100% |lv2= 4: 50% }} | |||
{{EnemyInfo/GetData |hp=Low |recov=300 |lv1= 1-8: 100% |lv2= 9: 93.75% |lv3= 10: 50% }} | |||
}} | }} | ||
| Line 190: | Line 386: | ||
|airshoes= |shadowshoes= |floatshoes= |statusguard= |superarmor= | |airshoes= |shadowshoes= |floatshoes= |statusguard= |superarmor= | ||
|info= | |info= | ||
|locations= | |locations='''Level 2:''' [[ACDC Town Vision Burst]] (36.7%), [[SciLab Area 1]] (18.1%), [[SciLab HP]] (16.7%), [[Drill Comp 4]] (15.7%), [[Wind God Comp]] (12.5%), [[SciLab Area 2]] (9.7%), [[Drill Comp 3]] (1.9%)<br/>'''Liberation Mission:''' [[Nebula Area 1 (Liberation Mission)|Nebula Area 1]] | ||
|attacks= | |attacks= | ||
{{EnemyInfo/Attack |name_en=ParaBomb<ref name="ParaBomb"/> |name_jp=パラライズボム |name_tl=Paralyze Bomb | |||
|attack=150 |emotion=10 |element=none |ground=y | |||
|info=Inflicts Paralyze LV. 1 (1.5 seconds). | |||
}} | |||
{{EnemyInfo/Attack |name_en=BattleChip | |||
|info=Recov80 ({{chance|2/16}}), Recov120 ({{chance|2/16}}) | |||
}} | |||
|getdata= | |getdata= | ||
{{EnemyInfo/GetData |hp=Any |chip=ParaBom |code=H |lv1= 9: 6.25% |lv2= 10: 50% |lv3= S: 100% }} | |||
{{EnemyInfo/GetData |hp=Any |chip=ParaBom |code=N |version=Team ProtoMan |lv1= 7: 25% |lv2= 8: 50% |lv3= 9: 46.875% |lv4= 10: 25% }} | |||
{{EnemyInfo/GetData |hp=Any |chip=ParaBom |code=P |version=Team Colonel |lv1= 7: 25% |lv2= 8: 50% |lv3= 9: 46.875% |lv4= 10: 25% }} | |||
{{EnemyInfo/GetData |hp=High |zenny=350 |lv1= 7: 25% |lv2= 8: 50% |lv3= 9: 46.875% |lv4= 10: 25% }} | |||
{{EnemyInfo/GetData |hp=High |zenny=300 |lv1= 5: 50% |lv2= 6: 100% |lv3= 7: 50% }} | |||
{{EnemyInfo/GetData |hp=High |zenny=50 |lv1= 4-5: 50% }} | |||
{{EnemyInfo/GetData |hp=High |zenny=30 |lv1= 1-3: 100% |lv2= 4: 50% }} | |||
{{EnemyInfo/GetData |hp=Low |recov=400 |lv1= 1-6: 100% |lv2= 7: 75% |lv3= 8: 50% |lv4= 9: 46.875% |lv5= 10: 25% }} | |||
}} | }} | ||
| Line 201: | Line 412: | ||
|airshoes= |shadowshoes= |floatshoes= |statusguard= |superarmor= | |airshoes= |shadowshoes= |floatshoes= |statusguard= |superarmor= | ||
|info= | |info= | ||
|locations= | |locations='''Level 3:''' [[Crane Comp (MMBN5)|Crane Comp]] (52.4%), [[Elevator Comp (MMBN5)|Elevator Comp]] (52.4%), [[Electric Lock Comp]] (33.3%), [[ACDC Area 3 (MMBN5)|ACDC Area 3]] (25.6%), [[Dad's Comp]] (25.0%), [[Oran Area 2]] (23.6%), [[Oran Area 1]] (22.6%), [[NetBattle Comp (MMBN5)|NetBattle Comp]] (14.3%), [[Oran Area 3]] (10.3%), [[SciLab Area 1]] (9.7%), [[Drill Comp 3]] (7.4%), [[SciLab HP]] (6.7%), [[Air Filter Comp]] (5.0%), [[Furnace Comp]] (4.2%), [[SciLab Area 2]] (2.8%), [[Drill Comp 4]] (1.9%) | ||
|attacks= | |attacks= | ||
{{EnemyInfo/Attack |name_en=ResetBomb |name_jp=リセットボム |name_tl=Reset Bomb | |||
|attack=200 |emotion=10 |element=none |ground=y | |||
|info=Uninstalls abilities: SuperArmor, FloatShoes, AirShoes, UnderShirt. Removes B+Left abilities from NaviCust and Patch Cards. | |||
}} | |||
{{EnemyInfo/Attack |name_en=BattleChip | |||
|info=Recov80 ({{chance|2/16}}), Recov120 ({{chance|2/16}}) | |||
}} | |||
|getdata= | |getdata= | ||
{{EnemyInfo/GetData |hp=Any |chip=ResetBom |code=I |version=Team ProtoMan |lv1= 9: 6.25% |lv2= 10: 50% |lv3= S: 100% }} | |||
{{EnemyInfo/GetData |hp=Any |chip=ResetBom |code=O |version=Team Colonel |lv1= 9: 6.25% |lv2= 10: 50% |lv3= S: 100% }} | |||
{{EnemyInfo/GetData |hp=High |zenny=400 |lv1= 7: 50% |lv2= 8: 100% |lv3= 9: 93.75% |lv4= 10: 50% }} | |||
{{EnemyInfo/GetData |hp=High |zenny=350 |lv1= 5: 50% |lv2= 6: 100% |lv3= 7: 50% }} | |||
{{EnemyInfo/GetData |hp=High |zenny=50 |lv1= 4-5: 50% }} | |||
{{EnemyInfo/GetData |hp=High |zenny=30 |lv1= 1-3: 100% |lv2= 4: 50% }} | |||
{{EnemyInfo/GetData |hp=Low |recov=500 |lv1= 1-8: 100% |lv2= 9: 93.75% |lv3= 10: 50% }} | |||
}} | }} | ||
| Line 212: | Line 437: | ||
|airshoes= |shadowshoes= |floatshoes= |statusguard= |superarmor= | |airshoes= |shadowshoes= |floatshoes= |statusguard= |superarmor= | ||
|info= | |info= | ||
|locations= | |locations='''Level 3:''' [[ACDC Town Vision Burst]] (36.7%), [[SciLab Area 1]] (18.1%), [[SciLab HP]] (16.7%), [[Drill Comp 4]] (15.7%), [[Wind God Comp]] (12.5%), [[SciLab Area 2]] (9.7%), [[Drill Comp 3]] (1.9%) | ||
|attacks= | |attacks= | ||
{{EnemyInfo/Attack |name_en=ResetBomb |name_jp=リセットボム |name_tl=Reset Bomb | |||
|attack=250 |emotion=10 |element=none |ground=y | |||
|info=Uninstalls abilities: SuperArmor, FloatShoes, AirShoes, UnderShirt. Removes B+Left abilities from NaviCust and Patch Cards. | |||
}} | |||
{{EnemyInfo/Attack |name_en=BattleChip | |||
|info=Recov120 ({{chance|2/16}}) | |||
}} | |||
|getdata= | |getdata= | ||
{{EnemyInfo/GetData |hp=Any |chip=ResetBom |code=D |lv1= 9: 6.25% |lv2= 10: 50% |lv3= S: 100% }} | |||
{{EnemyInfo/GetData |hp=High |zenny=600 |lv1= 7: 50% |lv2= 8: 100% |lv3= 9: 93.75% |lv4= 10: 50% }} | |||
{{EnemyInfo/GetData |hp=High |zenny=550 |lv1= 5: 50% |lv2= 6: 100% |lv3= 7: 50% }} | |||
{{EnemyInfo/GetData |hp=High |zenny=50 |lv1= 4-5: 50% }} | |||
{{EnemyInfo/GetData |hp=High |zenny=30 |lv1= 1-3: 100% |lv2= 4: 50% }} | |||
{{EnemyInfo/GetData |hp=Low |recov=max |lv1= 1-8: 100% |lv2= 9: 93.75% |lv3= 10: 50% }} | |||
}} | }} | ||
| Line 224: | Line 462: | ||
|airshoes=y |shadowshoes= |floatshoes=y |statusguard= |superarmor= | |airshoes=y |shadowshoes= |floatshoes=y |statusguard= |superarmor= | ||
|info=Cannot attack over holes. | |info=Cannot attack over holes. | ||
|locations= | |locations='''Level 1:''' [[View Comp]] (69.4%), [[SciLab Area 2]] (19.4%), [[SciLab Area 4]] (19.2%), [[SciLab Area 3]] (17.9%), [[Chip Maker Comp]] (12.5%), [[Dumpling Comp]] (12.5%)<br/>'''Liberation Mission:''' [[SciLab Area 3 (Liberation Mission)|SciLab Area 3]] | ||
|attacks= | |attacks= | ||
{{EnemyInfo/Attack |name_en=TimeBomb |name_jp=カウントボム |name_tl=Count Bomb | |||
|attack=50 |emotion=10 |element=none | |||
|info=TimeBomb has 3 HP. | |||
}} | |||
|getdata= | |getdata= | ||
{{EnemyInfo/GetData |hp=Any |chip=TimeBom1 |code=N |version=Team ProtoMan |lv1= 7: 25% |lv2= 8: 50% |lv3= 9: 53.125% |lv4= 10: 75% |lv5= S: 100% }} | |||
{{EnemyInfo/GetData |hp=Any |chip=TimeBom1 |code=T |version=Team Colonel |lv1= 7: 25% |lv2= 8: 50% |lv3= 9: 53.125% |lv4= 10: 75% |lv5= S: 100% }} | |||
{{EnemyInfo/GetData |hp=High |zenny=300 |lv1= 7: 25% |lv2= 8: 50% |lv3= 9: 46.875% |lv4= 10: 25% }} | |||
{{EnemyInfo/GetData |hp=High |zenny=250 |lv1= 5: 50% |lv2= 6: 100% |lv3= 7: 50% }} | |||
{{EnemyInfo/GetData |hp=High |zenny=50 |lv1= 4-5: 50% }} | |||
{{EnemyInfo/GetData |hp=High |zenny=30 |lv1= 1-3: 100% |lv2= 4: 50% }} | |||
{{EnemyInfo/GetData |hp=Low |recov=200 |lv1= 1-6: 100% |lv2= 7: 75% |lv3= 8: 50% |lv4= 9: 46.875% |lv5= 10: 25% }} | |||
}} | }} | ||
| Line 235: | Line 484: | ||
|airshoes=y |shadowshoes= |floatshoes=y |statusguard= |superarmor= | |airshoes=y |shadowshoes= |floatshoes=y |statusguard= |superarmor= | ||
|info=Cannot attack over holes. | |info=Cannot attack over holes. | ||
|locations= | |locations='''Level 1:''' [[Factory Comp 3 (MMBN5)|Factory Comp 3]] (15.6%), [[Factory Comp 4 (MMBN5)|Factory Comp 4]] (15.6%), [[Undernet 2 (MMBN5)|Undernet 2]] (11.5%) | ||
|attacks= | |attacks= | ||
{{EnemyInfo/Attack |name_en=TimeBomb<ref name="TimeBombUnexplodedOrdnance">Mega Man Battle Network 5 Official Strategy Guide</ref> |name_jp=カウントボム&不発弾 |name_tl=Count Bomb &{{CanBreak}}Unexploded Ordnance | |||
|attack=70 |emotion=10 |element=none | |||
|info=TimeBomb has 3 HP. Unexploded Ordnance has 1 HP. | |||
}} | |||
|getdata= | |getdata= | ||
{{EnemyInfo/GetData |hp=Any |chip=TimeBom1 |code=H |lv1= 9: 6.25% |lv2= 10: 50% |lv3= S: 100% }} | |||
{{EnemyInfo/GetData |hp=Any |chip=TimeBom1 |code=N |version=Team ProtoMan |lv1= 7: 25% |lv2= 8: 50% |lv3= 9: 46.875% |lv4= 10: 25% }} | |||
{{EnemyInfo/GetData |hp=Any |chip=TimeBom1 |code=T |version=Team Colonel |lv1= 7: 25% |lv2= 8: 50% |lv3= 9: 46.875% |lv4= 10: 25% }} | |||
{{EnemyInfo/GetData |hp=High |zenny=350 |lv1= 7: 25% |lv2= 8: 50% |lv3= 9: 46.875% |lv4= 10: 25% }} | |||
{{EnemyInfo/GetData |hp=High |zenny=300 |lv1= 5: 50% |lv2= 6: 100% |lv3= 7: 50% }} | |||
{{EnemyInfo/GetData |hp=High |zenny=50 |lv1= 4-5: 50% }} | |||
{{EnemyInfo/GetData |hp=High |zenny=30 |lv1= 1-3: 100% |lv2= 4: 50% }} | |||
{{EnemyInfo/GetData |hp=Low |recov=300 |lv1= 1-6: 100% |lv2= 7: 75% |lv3= 8: 50% |lv4= 9: 46.875% |lv5= 10: 25% }} | |||
}} | }} | ||
| Line 246: | Line 507: | ||
|airshoes=y |shadowshoes= |floatshoes=y |statusguard= |superarmor= | |airshoes=y |shadowshoes= |floatshoes=y |statusguard= |superarmor= | ||
|info=Cannot attack over holes. | |info=Cannot attack over holes. | ||
|locations= | |locations='''Level 2:''' [[View Comp]] (69.4%), [[SciLab Area 2]] (19.4%), [[SciLab Area 4]] (19.2%), [[SciLab Area 3]] (17.9%), [[Chip Maker Comp]] (12.5%), [[Dumpling Comp]] (12.5%) | ||
|attacks= | |attacks= | ||
{{EnemyInfo/Attack |name_en=TimeBomb<ref name="TimeBombUnexplodedOrdnance"/> |name_jp=カウントボム&不発弾 |name_tl=Count Bomb &{{CanBreak}}Unexploded Ordnance | |||
|attack=90 |emotion=10 |element=none | |||
|info=TimeBomb has 5 HP. Unexploded Ordnance has 1 HP. | |||
}} | |||
|getdata= | |getdata= | ||
{{EnemyInfo/GetData |hp=Any |chip=TimeBom2 |code=D |version=Team ProtoMan |lv1= 7: 25% |lv2= 8: 50% |lv3= 9: 53.125% |lv4= 10: 75% |lv5= S: 100% }} | |||
{{EnemyInfo/GetData |hp=Any |chip=TimeBom2 |code=Z |version=Team Colonel |lv1= 7: 25% |lv2= 8: 50% |lv3= 9: 53.125% |lv4= 10: 75% |lv5= S: 100% }} | |||
{{EnemyInfo/GetData |hp=High |zenny=400 |lv1= 7: 25% |lv2= 8: 50% |lv3= 9: 46.875% |lv4= 10: 25% }} | |||
{{EnemyInfo/GetData |hp=High |zenny=350 |lv1= 5: 50% |lv2= 6: 100% |lv3= 7: 50% }} | |||
{{EnemyInfo/GetData |hp=High |zenny=50 |lv1= 4-5: 50% }} | |||
{{EnemyInfo/GetData |hp=High |zenny=30 |lv1= 1-3: 100% |lv2= 4: 50% }} | |||
{{EnemyInfo/GetData |hp=Low |recov=400 |lv1= 1-6: 100% |lv2= 7: 75% |lv3= 8: 50% |lv4= 9: 46.875% |lv5= 10: 25% }} | |||
}} | }} | ||
| Line 257: | Line 529: | ||
|airshoes=y |shadowshoes= |floatshoes=y |statusguard= |superarmor= | |airshoes=y |shadowshoes= |floatshoes=y |statusguard= |superarmor= | ||
|info=Cannot attack over holes. | |info=Cannot attack over holes. | ||
|locations= | |locations='''Level 2:''' [[Factory Comp 3 (MMBN5)|Factory Comp 3]] (15.6%), [[Factory Comp 4 (MMBN5)|Factory Comp 4]] (15.6%), [[Undernet 2 (MMBN5)|Undernet 2]] (11.5%) | ||
|attacks= | |attacks= | ||
{{EnemyInfo/Attack |name_en=TimeBomb<ref name="TimeBombUnexplodedOrdnance"/> |name_jp=カウントボム&不発弾 |name_tl=Count Bomb &{{CanBreak}}Unexploded Ordnance | |||
|attack=120 |emotion=10 |element=none | |||
|info=TimeBomb has 5 HP. Unexploded Ordnance has 1 HP. | |||
}} | |||
|getdata= | |getdata= | ||
{{EnemyInfo/GetData |hp=Any |chip=TimeBom2 |code=D |version=Team ProtoMan |lv1= 7: 25% |lv2= 8: 50% |lv3= 9: 46.875% |lv4= 10: 25% }} | |||
{{EnemyInfo/GetData |hp=Any |chip=TimeBom2 |code=H |lv1= 9: 6.25% |lv2= 10: 50% |lv3= S: 100% }} | |||
{{EnemyInfo/GetData |hp=Any |chip=TimeBom2 |code=Z |version=Team Colonel |lv1= 7: 25% |lv2= 8: 50% |lv3= 9: 46.875% |lv4= 10: 25% }} | |||
{{EnemyInfo/GetData |hp=High |zenny=500 |lv1= 7: 25% |lv2= 8: 50% |lv3= 9: 46.875% |lv4= 10: 25% }} | |||
{{EnemyInfo/GetData |hp=High |zenny=450 |lv1= 5: 50% |lv2= 6: 100% |lv3= 7: 50% }} | |||
{{EnemyInfo/GetData |hp=High |zenny=50 |lv1= 4-5: 50% }} | |||
{{EnemyInfo/GetData |hp=High |zenny=30 |lv1= 1-3: 100% |lv2= 4: 50% }} | |||
{{EnemyInfo/GetData |hp=Low |recov=500 |lv1= 1-6: 100% |lv2= 7: 75% |lv3= 8: 50% |lv4= 9: 46.875% |lv5= 10: 25% }} | |||
}} | }} | ||
| Line 268: | Line 552: | ||
|airshoes=y |shadowshoes= |floatshoes=y |statusguard= |superarmor= | |airshoes=y |shadowshoes= |floatshoes=y |statusguard= |superarmor= | ||
|info=Cannot attack over holes. | |info=Cannot attack over holes. | ||
|locations= | |locations='''Level 3:''' [[View Comp]] (69.4%), [[SciLab Area 2]] (19.4%), [[SciLab Area 4]] (19.2%), [[SciLab Area 3]] (17.9%), [[Chip Maker Comp]] (12.5%), [[Dumpling Comp]] (12.5%) | ||
|attacks= | |attacks= | ||
{{EnemyInfo/Attack |name_en=TimeBomb<ref name="TimeBombUnexplodedOrdnance"/> |name_jp=カウントボム&不発弾 |name_tl=Count Bomb &{{CanBreak}}Unexploded Ordnance | |||
|attack=160 |emotion=10 |element=none | |||
|info=TimeBomb has 10 HP. Unexploded Ordnance has 1 HP. | |||
}} | |||
|getdata= | |getdata= | ||
{{EnemyInfo/GetData |hp=Any |chip=TimeBom3 |code=F |version=Team ProtoMan |lv1= 7: 25% |lv2= 8: 50% |lv3= 9: 53.125% |lv4= 10: 75% |lv5= S: 100% }} | |||
{{EnemyInfo/GetData |hp=Any |chip=TimeBom3 |code=S |version=Team Colonel |lv1= 7: 25% |lv2= 8: 50% |lv3= 9: 53.125% |lv4= 10: 75% |lv5= S: 100% }} | |||
{{EnemyInfo/GetData |hp=High |zenny=600 |lv1= 7: 25% |lv2= 8: 50% |lv3= 9: 46.875% |lv4= 10: 25% }} | |||
{{EnemyInfo/GetData |hp=High |zenny=550 |lv1= 5: 50% |lv2= 6: 100% |lv3= 7: 50% }} | |||
{{EnemyInfo/GetData |hp=High |zenny=50 |lv1= 4-5: 50% }} | |||
{{EnemyInfo/GetData |hp=High |zenny=30 |lv1= 1-3: 100% |lv2= 4: 50% }} | |||
{{EnemyInfo/GetData |hp=Low |recov=500 |lv1= 1-6: 100% |lv2= 7: 75% |lv3= 8: 50% |lv4= 9: 46.875% |lv5= 10: 25% }} | |||
}} | }} | ||
| Line 279: | Line 574: | ||
|airshoes=y |shadowshoes= |floatshoes=y |statusguard= |superarmor= | |airshoes=y |shadowshoes= |floatshoes=y |statusguard= |superarmor= | ||
|info=Cannot attack over holes. | |info=Cannot attack over holes. | ||
|locations= | |locations='''Level 3:''' [[Factory Comp 3 (MMBN5)|Factory Comp 3]] (15.6%), [[Factory Comp 4 (MMBN5)|Factory Comp 4]] (15.6%), [[Undernet 2 (MMBN5)|Undernet 2]] (11.5%), [[Nebula Area 6]] (4.4%)<br/>'''Liberation Mission:''' [[Nebula Area 5 (Liberation Mission)|Nebula Area 5]] | ||
|attacks= | |attacks= | ||
{{EnemyInfo/Attack |name_en=TimeBomb<ref name="TimeBombUnexplodedOrdnance"/> |name_jp=カウントボム&不発弾 |name_tl=Count Bomb &{{CanBreak}}Unexploded Ordnance | |||
|attack=200 |emotion=10 |element=none | |||
|info=TimeBomb has 10 HP. Unexploded Ordnance has 1 HP. | |||
}} | |||
|getdata= | |getdata= | ||
{{EnemyInfo/GetData |hp=Any |chip=TimeBom3 |code=H |lv1= 9: 6.25% |lv2= 10: 50% |lv3= S: 100% }} | |||
{{EnemyInfo/GetData |hp=High |zenny=600 |lv1= 7: 50% |lv2= 8: 100% |lv3= 9: 93.75% |lv4= 10: 50% }} | |||
{{EnemyInfo/GetData |hp=High |zenny=550 |lv1= 5: 50% |lv2= 6: 100% |lv3= 7: 50% }} | |||
{{EnemyInfo/GetData |hp=High |zenny=50 |lv1= 4-5: 50% }} | |||
{{EnemyInfo/GetData |hp=High |zenny=30 |lv1= 1-3: 100% |lv2= 4: 50% }} | |||
{{EnemyInfo/GetData |hp=Low |recov=500 |lv1= 1-8: 100% |lv2= 9: 93.75% |lv3= 10: 50% }} | |||
}} | }} | ||
| Line 291: | Line 596: | ||
|airshoes= |shadowshoes= |floatshoes=y |statusguard= |superarmor= | |airshoes= |shadowshoes= |floatshoes=y |statusguard= |superarmor= | ||
|info=Can attack over holes. | |info=Can attack over holes. | ||
|locations= | |locations='''Level 1:''' [[Factory Comp 1 (MMBN5)|Factory Comp 1]] (26.4%), [[Factory Comp 2 (MMBN5)|Factory Comp 2]] (8.3%)<br/>'''Liberation Mission:''' [[Undernet 4 (Liberation Mission)|Undernet 4]] | ||
|attacks= | |attacks= | ||
{{EnemyInfo/Attack |name_en=Charge<ref name="Dominerd-Charge">Mega Man Battle Network 5 Official Strategy Guide</ref> |name_jp=噛み付き |name_tl=Bite | |||
|attack=60 |emotion=10 |element=none |guard=y | |||
}} | |||
|getdata= | |getdata= | ||
{{EnemyInfo/GetData |hp=Any |chip=CrsShld1 |code=F |version=Team ProtoMan |lv1= 7: 25% |lv2= 8: 50% |lv3= 9: 53.125% |lv4= 10: 75% |lv5= S: 100% }} | |||
{{EnemyInfo/GetData |hp=Any |chip=CrsShld1 |code=V |version=Team Colonel |lv1= 7: 25% |lv2= 8: 50% |lv3= 9: 53.125% |lv4= 10: 75% |lv5= S: 100% }} | |||
{{EnemyInfo/GetData |hp=Any |zenny=500 |lv1= 7: 25% |lv2= 8: 50% |lv3= 9: 46.875% |lv4= 10: 25% }} | |||
{{EnemyInfo/GetData |hp=Any |zenny=450 |lv1= 5: 50% |lv2= 6: 100% |lv3= 7: 50% }} | |||
{{EnemyInfo/GetData |hp=Any |zenny=50 |lv1= 4-5: 50% }} | |||
{{EnemyInfo/GetData |hp=Any |zenny=30 |lv1= 1-3: 100% |lv2= 4: 50% }} | |||
}} | }} | ||
| Line 302: | Line 616: | ||
|airshoes= |shadowshoes= |floatshoes=y |statusguard= |superarmor= | |airshoes= |shadowshoes= |floatshoes=y |statusguard= |superarmor= | ||
|info=Can attack over holes. | |info=Can attack over holes. | ||
|locations= | |locations='''Level 1:''' [[SoulServer Comp]] (11.1%) | ||
|attacks= | |attacks= | ||
{{EnemyInfo/Attack |name_en=Charge<ref name="Dominerd-Charge"/> |name_jp=噛み付き |name_tl=Bite | |||
|attack=100 |emotion=10 |element=none |guard=y | |||
}} | |||
|getdata= | |getdata= | ||
{{EnemyInfo/GetData |hp=Any |chip=CrsShld1 |code=B |lv1= 7: 25% |lv2= 8: 50% |lv3= 9: 53.125% |lv4= 10: 75% |lv5= S: 100% }} | |||
{{EnemyInfo/GetData |hp=Any |zenny=550 |lv1= 7: 25% |lv2= 8: 50% |lv3= 9: 46.875% |lv4= 10: 25% }} | |||
{{EnemyInfo/GetData |hp=Any |zenny=500 |lv1= 5: 50% |lv2= 6: 100% |lv3= 7: 50% }} | |||
{{EnemyInfo/GetData |hp=Any |zenny=50 |lv1= 4-5: 50% }} | |||
{{EnemyInfo/GetData |hp=Any |zenny=30 |lv1= 1-3: 100% |lv2= 4: 50% }} | |||
}} | }} | ||
| Line 313: | Line 635: | ||
|airshoes= |shadowshoes= |floatshoes=y |statusguard= |superarmor= | |airshoes= |shadowshoes= |floatshoes=y |statusguard= |superarmor= | ||
|info=Can attack over holes. | |info=Can attack over holes. | ||
|locations= | |locations='''Level 2:''' [[Factory Comp 1 (MMBN5)|Factory Comp 1]] (26.4%), [[Factory Comp 2 (MMBN5)|Factory Comp 2]] (8.3%)<br/>'''Liberation Mission:''' [[Nebula Area 1 (Liberation Mission)|Nebula Area 1]] | ||
|attacks= | |attacks= | ||
{{EnemyInfo/Attack |name_en=Charge<ref name="Dominerd-Charge"/> |name_jp=噛み付き |name_tl=Bite | |||
|attack=140 |emotion=10 |element=none |guard=y | |||
}} | |||
|getdata= | |getdata= | ||
{{EnemyInfo/GetData |hp=Any |chip=CrsShld2 |code=M |version=Team ProtoMan |lv1= 7: 25% |lv2= 8: 50% |lv3= 9: 53.125% |lv4= 10: 75% |lv5= S: 100% }} | |||
{{EnemyInfo/GetData |hp=Any |chip=CrsShld2 |code=R |version=Team Colonel |lv1= 7: 25% |lv2= 8: 50% |lv3= 9: 53.125% |lv4= 10: 75% |lv5= S: 100% }} | |||
{{EnemyInfo/GetData |hp=Any |zenny=600 |lv1= 7: 25% |lv2= 8: 50% |lv3= 9: 46.875% |lv4= 10: 25% }} | |||
{{EnemyInfo/GetData |hp=Any |zenny=550 |lv1= 5: 50% |lv2= 6: 100% |lv3= 7: 50% }} | |||
{{EnemyInfo/GetData |hp=Any |zenny=50 |lv1= 4-5: 50% }} | |||
{{EnemyInfo/GetData |hp=Any |zenny=30 |lv1= 1-3: 100% |lv2= 4: 50% }} | |||
}} | }} | ||
| Line 324: | Line 655: | ||
|airshoes= |shadowshoes= |floatshoes=y |statusguard= |superarmor= | |airshoes= |shadowshoes= |floatshoes=y |statusguard= |superarmor= | ||
|info=Can attack over holes. | |info=Can attack over holes. | ||
|locations= | |locations='''Level 2:''' [[Nebula Area 2]] (30.6%), [[Nebula Area 3]] (18.1%), [[SoulServer Comp]] (11.1%)<br/>'''Liberation Mission:''' [[Nebula Area 1 (Liberation Mission)|Nebula Area 1]] | ||
|attacks= | |attacks= | ||
{{EnemyInfo/Attack |name_en=Charge<ref name="Dominerd-Charge"/> |name_jp=噛み付き |name_tl=Bite | |||
|attack=180 |emotion=10 |element=none |guard=y | |||
}} | |||
|getdata= | |getdata= | ||
{{EnemyInfo/GetData |hp=Any |chip=CrsShld2 |code=C |lv1= 7: 25% |lv2= 8: 50% |lv3= 9: 53.125% |lv4= 10: 75% |lv5= S: 100% }} | |||
{{EnemyInfo/GetData |hp=Any |zenny=650 |lv1= 7: 25% |lv2= 8: 50% |lv3= 9: 46.875% |lv4= 10: 25% }} | |||
{{EnemyInfo/GetData |hp=Any |zenny=600 |lv1= 5: 50% |lv2= 6: 100% |lv3= 7: 50% }} | |||
{{EnemyInfo/GetData |hp=Any |zenny=50 |lv1= 4-5: 50% }} | |||
{{EnemyInfo/GetData |hp=Any |zenny=30 |lv1= 1-3: 100% |lv2= 4: 50% }} | |||
}} | }} | ||
| Line 335: | Line 674: | ||
|airshoes= |shadowshoes= |floatshoes=y |statusguard= |superarmor= | |airshoes= |shadowshoes= |floatshoes=y |statusguard= |superarmor= | ||
|info=Can attack over holes. | |info=Can attack over holes. | ||
|locations= | |locations='''Level 3:''' [[Factory Comp 1 (MMBN5)|Factory Comp 1]] (26.4%), [[Factory Comp 2 (MMBN5)|Factory Comp 2]] (8.3%) | ||
|attacks= | |attacks= | ||
{{EnemyInfo/Attack |name_en=Charge<ref name="Dominerd-Charge"/> |name_jp=噛み付き |name_tl=Bite | |||
|attack=220 |emotion=10 |element=none |guard=y | |||
}} | |||
|getdata= | |getdata= | ||
{{EnemyInfo/GetData |hp=Any |chip=CrsShld3 |code=O |version=Team ProtoMan |lv1= 7: 25% |lv2= 8: 50% |lv3= 9: 53.125% |lv4= 10: 75% |lv5= S: 100% }} | |||
{{EnemyInfo/GetData |hp=Any |chip=CrsShld3 |code=Z |version=Team Colonel |lv1= 7: 25% |lv2= 8: 50% |lv3= 9: 53.125% |lv4= 10: 75% |lv5= S: 100% }} | |||
{{EnemyInfo/GetData |hp=Any |zenny=700 |lv1= 7: 25% |lv2= 8: 50% |lv3= 9: 46.875% |lv4= 10: 25% }} | |||
{{EnemyInfo/GetData |hp=Any |zenny=650 |lv1= 5: 50% |lv2= 6: 100% |lv3= 7: 50% }} | |||
{{EnemyInfo/GetData |hp=Any |zenny=50 |lv1= 4-5: 50% }} | |||
{{EnemyInfo/GetData |hp=Any |zenny=30 |lv1= 1-3: 100% |lv2= 4: 50% }} | |||
}} | }} | ||
| Line 346: | Line 694: | ||
|airshoes= |shadowshoes= |floatshoes=y |statusguard= |superarmor= | |airshoes= |shadowshoes= |floatshoes=y |statusguard= |superarmor= | ||
|info=Can attack over holes. | |info=Can attack over holes. | ||
|locations= | |locations='''Level 3:''' [[Nebula Area 2]] (30.6%), [[Nebula Area 3]] (18.1%), [[SoulServer Comp]] (11.1%), [[Nebula Area 6]] (6.7%) | ||
|attacks= | |attacks= | ||
{{EnemyInfo/Attack |name_en=Charge<ref name="Dominerd-Charge"/> |name_jp=噛み付き |name_tl=Bite | |||
|attack=260 |emotion=10 |element=none |guard=y | |||
}} | |||
|getdata= | |getdata= | ||
{{EnemyInfo/GetData |hp=Any |chip=CrsShld3 |code=D |lv1= 7: 25% |lv2= 8: 50% |lv3= 9: 53.125% |lv4= 10: 75% |lv5= S: 100% }} | |||
{{EnemyInfo/GetData |hp=Any |zenny=800 |lv1= 7: 25% |lv2= 8: 50% |lv3= 9: 46.875% |lv4= 10: 25% }} | |||
{{EnemyInfo/GetData |hp=Any |zenny=750 |lv1= 5: 50% |lv2= 6: 100% |lv3= 7: 50% }} | |||
{{EnemyInfo/GetData |hp=Any |zenny=50 |lv1= 4-5: 50% }} | |||
{{EnemyInfo/GetData |hp=Any |zenny=30 |lv1= 1-3: 100% |lv2= 4: 50% }} | |||
}} | }} | ||
| Line 358: | Line 714: | ||
|airshoes= |shadowshoes= |floatshoes= |statusguard= |superarmor= | |airshoes= |shadowshoes= |floatshoes= |statusguard= |superarmor= | ||
|info= | |info= | ||
|locations= | |locations='''Level 1:''' [[Dumpling Comp]] (27.1%), [[End Area 4]] (14.1%), [[End Area 5]] (13.9%), [[End Area 1]] (12.5%), [[End Area 3]] (11.5%), [[End Area 2]] (8.3%)<br/>'''Liberation Mission:''' [[End Area 2 (Liberation Mission)|End Area 2]], [[Undernet 4 (Liberation Mission)|Undernet 4]] | ||
|attacks= | |attacks= | ||
{{EnemyInfo/Attack |name_en=Meteo<ref name="Meteo">Mega Man Battle Network 5 Official Strategy Guide</ref> |name_jp=メテオ |name_tl=Meteo | |||
|attack=30 |emotion=10 |element=fire |ground=y | |||
}} | |||
|getdata= | |getdata= | ||
{{EnemyInfo/GetData |hp=Any |chip=Astroid1 |code=Q |version=Team ProtoMan |lv1= 9: 6.25% |lv2= 10: 50% |lv3= S: 100% }} | |||
{{EnemyInfo/GetData |hp=Any |chip=Astroid1 |code=T |version=Team Colonel |lv1= 9: 6.25% |lv2= 10: 50% |lv3= S: 100% }} | |||
{{EnemyInfo/GetData |hp=Any |zenny=300 |lv1= 7: 50% |lv2= 8: 100% |lv3= 9: 93.75% |lv4= 10: 50% }} | |||
{{EnemyInfo/GetData |hp=Any |zenny=200 |lv1= 5: 50% |lv2= 6: 100% |lv3= 7: 50% }} | |||
{{EnemyInfo/GetData |hp=Any |zenny=50 |lv1= 4-5: 50% }} | |||
{{EnemyInfo/GetData |hp=Any |zenny=30 |lv1= 1-3: 100% |lv2= 4: 50% }} | |||
}} | }} | ||
| Line 369: | Line 734: | ||
|airshoes= |shadowshoes= |floatshoes= |statusguard= |superarmor= | |airshoes= |shadowshoes= |floatshoes= |statusguard= |superarmor= | ||
|info= | |info= | ||
|locations= | |locations='''Level 1:''' [[Undernet 4 (MMBN5)|Undernet 4]] (16.7%), [[Pipe Comp (MMBN5)|Pipe Comp]] (12.5%), [[Undernet 1 (MMBN5)|Undernet 1]] (9.7%), [[Factory Comp 3 (MMBN5)|Factory Comp 3]] (7.8%), [[Factory Comp 4 (MMBN5)|Factory Comp 4]] (7.8%) | ||
|attacks= | |attacks= | ||
{{EnemyInfo/Attack |name_en=Meteo<ref name="Meteo"/> |name_jp=メテオ |name_tl=Meteo | |||
|attack=50 |emotion=10 |element=fire |ground=y | |||
}} | |||
{{EnemyInfo/Attack |name_en=BattleChip | |||
|info=RockCube ({{chance|3/16}}) | |||
}} | |||
|getdata= | |getdata= | ||
{{EnemyInfo/GetData |hp=Any |chip=Astroid1 |code=A |lv1= 9: 6.25% |lv2= 10: 50% |lv3= S: 100% }} | |||
{{EnemyInfo/GetData |hp=Any |zenny=400 |lv1= 7: 50% |lv2= 8: 100% |lv3= 9: 93.75% |lv4= 10: 50% }} | |||
{{EnemyInfo/GetData |hp=Any |zenny=300 |lv1= 5: 50% |lv2= 6: 100% |lv3= 7: 50% }} | |||
{{EnemyInfo/GetData |hp=Any |zenny=50 |lv1= 4-5: 50% }} | |||
{{EnemyInfo/GetData |hp=Any |zenny=30 |lv1= 1-3: 100% |lv2= 4: 50% }} | |||
}} | }} | ||
| Line 380: | Line 756: | ||
|airshoes= |shadowshoes= |floatshoes= |statusguard= |superarmor= | |airshoes= |shadowshoes= |floatshoes= |statusguard= |superarmor= | ||
|info= | |info= | ||
|locations= | |locations='''Level 2:''' [[Dumpling Comp]] (27.1%), [[End Area 4]] (14.1%), [[End Area 5]] (13.9%), [[End Area 1]] (12.5%), [[End Area 3]] (11.5%), [[End Area 2]] (8.3%) | ||
|attacks= | |attacks= | ||
{{EnemyInfo/Attack |name_en=Meteo<ref name="Meteo"/> |name_jp=メテオ |name_tl=Meteo | |||
|attack=70 |emotion=10 |element=fire |ground=y | |||
}} | |||
{{EnemyInfo/Attack |name_en=BattleChip | |||
|info=RockCube ({{chance|1/16}}) | |||
}} | |||
|getdata= | |getdata= | ||
{{EnemyInfo/GetData |hp=Any |chip=Astroid2 |code=M |version=Team ProtoMan |lv1= 9: 6.25% |lv2= 10: 50% |lv3= S: 100% }} | |||
{{EnemyInfo/GetData |hp=Any |chip=Astroid2 |code=U |version=Team Colonel |lv1= 9: 6.25% |lv2= 10: 50% |lv3= S: 100% }} | |||
{{EnemyInfo/GetData |hp=Any |zenny=500 |lv1= 7: 50% |lv2= 8: 100% |lv3= 9: 93.75% |lv4= 10: 50% }} | |||
{{EnemyInfo/GetData |hp=Any |zenny=400 |lv1= 5: 50% |lv2= 6: 100% |lv3= 7: 50% }} | |||
{{EnemyInfo/GetData |hp=Any |zenny=50 |lv1= 4-5: 50% }} | |||
{{EnemyInfo/GetData |hp=Any |zenny=30 |lv1= 1-3: 100% |lv2= 4: 50% }} | |||
}} | }} | ||
| Line 391: | Line 779: | ||
|airshoes= |shadowshoes= |floatshoes= |statusguard= |superarmor= | |airshoes= |shadowshoes= |floatshoes= |statusguard= |superarmor= | ||
|info= | |info= | ||
|locations= | |locations='''Level 2:''' [[Undernet 4 (MMBN5)|Undernet 4]] (16.7%), [[Nebula Area 3]] (13.9%), [[Pipe Comp (MMBN5)|Pipe Comp]] (12.5%), [[Undernet 1 (MMBN5)|Undernet 1]] (9.7%), [[Factory Comp 3 (MMBN5)|Factory Comp 3]] (7.8%), [[Factory Comp 4 (MMBN5)|Factory Comp 4]] (7.8%)<br/>'''Liberation Mission:''' [[Nebula Area 3 (Liberation Mission)|Nebula Area 3]] | ||
|attacks= | |attacks= | ||
{{EnemyInfo/Attack |name_en=Meteo<ref name="Meteo"/> |name_jp=メテオ |name_tl=Meteo | |||
|attack=100 |emotion=10 |element=fire |ground=y | |||
}} | |||
{{EnemyInfo/Attack |name_en=BattleChip | |||
|info=AreaGrab ({{chance|1/16}}) | |||
}} | |||
|getdata= | |getdata= | ||
{{EnemyInfo/GetData |hp=Any |chip=Astroid2 |code=E |lv1= 9: 6.25% |lv2= 10: 50% |lv3= S: 100% }} | |||
{{EnemyInfo/GetData |hp=Any |zenny=600 |lv1= 7: 50% |lv2= 8: 100% |lv3= 9: 93.75% |lv4= 10: 50% }} | |||
{{EnemyInfo/GetData |hp=Any |zenny=500 |lv1= 5: 50% |lv2= 6: 100% |lv3= 7: 50% }} | |||
{{EnemyInfo/GetData |hp=Any |zenny=50 |lv1= 4-5: 50% }} | |||
{{EnemyInfo/GetData |hp=Any |zenny=30 |lv1= 1-3: 100% |lv2= 4: 50% }} | |||
}} | }} | ||
| Line 402: | Line 801: | ||
|airshoes= |shadowshoes= |floatshoes= |statusguard= |superarmor= | |airshoes= |shadowshoes= |floatshoes= |statusguard= |superarmor= | ||
|info= | |info= | ||
|locations= | |locations='''Level 3:''' [[Dumpling Comp]] (27.1%), [[Nebula Area 4]] (18.1%), [[End Area 4]] (14.1%), [[End Area 5]] (13.9%), [[End Area 1]] (12.5%), [[End Area 3]] (11.5%), [[End Area 2]] (8.3%)<br/>'''Liberation Mission:''' [[Nebula Area 3 (Liberation Mission)|Nebula Area 3]] | ||
|attacks= | |attacks= | ||
{{EnemyInfo/Attack |name_en=Meteo<ref name="Meteo"/> |name_jp=メテオ |name_tl=Meteo | |||
|attack=120 |emotion=10 |element=fire |ground=y | |||
}} | |||
{{EnemyInfo/Attack |name_en=BattleChip | |||
|info=AreaGrab ({{chance|1/16}}), RockCube ({{chance|2/16}}) | |||
}} | |||
|getdata= | |getdata= | ||
{{EnemyInfo/GetData |hp=Any |chip=Astroid3 |code=P |version=Team ProtoMan |lv1= 9: 6.25% |lv2= 10: 50% |lv3= S: 100% }} | |||
{{EnemyInfo/GetData |hp=Any |chip=Astroid3 |code=Y |version=Team Colonel |lv1= 9: 6.25% |lv2= 10: 50% |lv3= S: 100% }} | |||
{{EnemyInfo/GetData |hp=Any |zenny=650 |lv1= 7: 50% |lv2= 8: 100% |lv3= 9: 93.75% |lv4= 10: 50% }} | |||
{{EnemyInfo/GetData |hp=Any |zenny=600 |lv1= 5: 50% |lv2= 6: 100% |lv3= 7: 50% }} | |||
{{EnemyInfo/GetData |hp=Any |zenny=50 |lv1= 4-5: 50% }} | |||
{{EnemyInfo/GetData |hp=Any |zenny=30 |lv1= 1-3: 100% |lv2= 4: 50% }} | |||
}} | }} | ||
| Line 413: | Line 824: | ||
|airshoes= |shadowshoes= |floatshoes= |statusguard= |superarmor= | |airshoes= |shadowshoes= |floatshoes= |statusguard= |superarmor= | ||
|info= | |info= | ||
|locations= | |locations='''Level 3:''' [[Undernet 4 (MMBN5)|Undernet 4]] (16.7%), [[Nebula Area 3]] (13.9%), [[Pipe Comp (MMBN5)|Pipe Comp]] (12.5%), [[Undernet 1 (MMBN5)|Undernet 1]] (9.7%), [[Factory Comp 3 (MMBN5)|Factory Comp 3]] (7.8%), [[Factory Comp 4 (MMBN5)|Factory Comp 4]] (7.8%) | ||
|attacks= | |attacks= | ||
{{EnemyInfo/Attack |name_en=Meteo<ref name="Meteo"/> |name_jp=メテオ |name_tl=Meteo | |||
|attack=150 |emotion=10 |element=fire |ground=y | |||
}} | |||
{{EnemyInfo/Attack |name_en=BattleChip | |||
|info=AreaGrab ({{chance|2/16}}), RockCube ({{chance|1/16}}) | |||
}} | |||
|getdata= | |getdata= | ||
{{EnemyInfo/GetData |hp=Any |chip=Astroid3 |code=C |lv1= 9: 6.25% |lv2= 10: 50% |lv3= S: 100% }} | |||
{{EnemyInfo/GetData |hp=Any |zenny=750 |lv1= 7: 50% |lv2= 8: 100% |lv3= 9: 93.75% |lv4= 10: 50% }} | |||
{{EnemyInfo/GetData |hp=Any |zenny=700 |lv1= 5: 50% |lv2= 6: 100% |lv3= 7: 50% }} | |||
{{EnemyInfo/GetData |hp=Any |zenny=50 |lv1= 4-5: 50% }} | |||
{{EnemyInfo/GetData |hp=Any |zenny=30 |lv1= 1-3: 100% |lv2= 4: 50% }} | |||
}} | }} | ||
| Line 425: | Line 847: | ||
|airshoes=y |shadowshoes= |floatshoes=y |statusguard= |superarmor= | |airshoes=y |shadowshoes= |floatshoes=y |statusguard= |superarmor= | ||
|info= | |info= | ||
|locations= | |locations='''Level 1:''' [[Old Comp]] (38.1%), [[Ship Comp 3]] (20.8%), [[Ship Comp 4]] (19.4%), [[SciLab Vision Burst]] (16.7%), [[End Area 4]] (7.7%)<br/>'''Liberation Mission:''' [[End Area 2 (Liberation Mission)|End Area 2]] | ||
|attacks= | |attacks= | ||
{{EnemyInfo/Attack |name_en=Orbit |name_jp=オービット |name_tl=Orbit | |||
|attack=40 |emotion=10 |element=elec |guard=y | |||
}} | |||
|getdata= | |getdata= | ||
{{EnemyInfo/GetData |hp=Any |chip=SpShake1 |code=H |lv1= 9: 6.25% |lv2= 10: 50% |lv3= S: 100% }} | |||
{{EnemyInfo/GetData |hp=Any |chip=SpShake1 |code=I |lv1= 7: 50% |lv2= 8: 100% |lv3= 9: 93.75% |lv4= 10: 50% }} | |||
{{EnemyInfo/GetData |hp=Any |zenny=250 |lv1= 5: 50% |lv2= 6: 100% |lv3= 7: 50% }} | |||
{{EnemyInfo/GetData |hp=Any |zenny=50 |lv1= 4-5: 50% }} | |||
{{EnemyInfo/GetData |hp=Any |zenny=30 |lv1= 1-3: 100% |lv2= 4: 50% }} | |||
}} | }} | ||
| Line 436: | Line 866: | ||
|airshoes=y |shadowshoes= |floatshoes=y |statusguard= |superarmor= | |airshoes=y |shadowshoes= |floatshoes=y |statusguard= |superarmor= | ||
|info= | |info= | ||
|locations= | |locations='''Level 1:''' [[Experiment Server Comp]] (25.0%), [[Factory Comp 1 (MMBN5)|Factory Comp 1]] (11.1%), [[SoulServer Comp]] (11.1%), [[Undernet 2 (MMBN5)|Undernet 2]] (7.7%) | ||
|attacks= | |attacks= | ||
{{EnemyInfo/Attack |name_en=Orbit |name_jp=オービット |name_tl=Orbit | |||
|attack=60 |emotion=10 |element=elec |guard=y | |||
}} | |||
|getdata= | |getdata= | ||
{{EnemyInfo/GetData |hp=Any |chip=SpShake1 |code=G |lv1= 9: 6.25% |lv2= 10: 50% |lv3= S: 100% }} | |||
{{EnemyInfo/GetData |hp=Any |chip=SpShake1 |code=H |lv1= 7: 25% |lv2= 8: 50% |lv3= 9: 46.875% |lv4= 10: 25% }} | |||
{{EnemyInfo/GetData |hp=Any |zenny=350 |lv1= 7: 25% |lv2= 8: 50% |lv3= 9: 46.875% |lv4= 10: 25% }} | |||
{{EnemyInfo/GetData |hp=Any |zenny=300 |lv1= 5: 50% |lv2= 6: 100% |lv3= 7: 50% }} | |||
{{EnemyInfo/GetData |hp=Any |zenny=50 |lv1= 4-5: 50% }} | |||
{{EnemyInfo/GetData |hp=Any |zenny=30 |lv1= 1-3: 100% |lv2= 4: 50% }} | |||
}} | }} | ||
| Line 447: | Line 886: | ||
|airshoes=y |shadowshoes= |floatshoes=y |statusguard= |superarmor= | |airshoes=y |shadowshoes= |floatshoes=y |statusguard= |superarmor= | ||
|info= | |info= | ||
|locations= | |locations='''Level 2:''' [[Old Comp]] (38.1%), [[Ship Comp 3]] (20.8%), [[Ship Comp 4]] (19.4%), [[SciLab Vision Burst]] (16.7%), [[End Area 4]] (7.7%)<br/>'''Liberation Mission:''' [[Nebula Area 1 (Liberation Mission)|Nebula Area 1]] | ||
|attacks= | |attacks= | ||
{{EnemyInfo/Attack |name_en=Orbit |name_jp=オービット |name_tl=Orbit | |||
|attack=80 |emotion=10 |element=elec |guard=y | |||
}} | |||
|getdata= | |getdata= | ||
{{EnemyInfo/GetData |hp=Any |chip=SpShake2 |code=C |lv1= 9: 6.25% |lv2= 10: 50% |lv3= S: 100% }} | |||
{{EnemyInfo/GetData |hp=Any |chip=SpShake2 |code=D |lv1= 7: 25% |lv2= 8: 50% |lv3= 9: 46.875% |lv4= 10: 25% }} | |||
{{EnemyInfo/GetData |hp=Any |zenny=450 |lv1= 7: 25% |lv2= 8: 50% |lv3= 9: 46.875% |lv4= 10: 25% }} | |||
{{EnemyInfo/GetData |hp=Any |zenny=400 |lv1= 5: 50% |lv2= 6: 100% |lv3= 7: 50% }} | |||
{{EnemyInfo/GetData |hp=Any |zenny=50 |lv1= 4-5: 50% }} | |||
{{EnemyInfo/GetData |hp=Any |zenny=30 |lv1= 1-3: 100% |lv2= 4: 50% }} | |||
}} | }} | ||
| Line 458: | Line 906: | ||
|airshoes=y |shadowshoes= |floatshoes=y |statusguard= |superarmor= | |airshoes=y |shadowshoes= |floatshoes=y |statusguard= |superarmor= | ||
|info= | |info= | ||
|locations= | |locations='''Level 2:''' [[Experiment Server Comp]] (25.0%), [[Factory Comp 1 (MMBN5)|Factory Comp 1]] (11.1%), [[SoulServer Comp]] (11.1%), [[Undernet 2 (MMBN5)|Undernet 2]] (7.7%), [[Nebula Area 3]] (2.8%)<br/>'''Liberation Mission:''' [[Nebula Area 1 (Liberation Mission)|Nebula Area 1]] | ||
|attacks= | |attacks= | ||
{{EnemyInfo/Attack |name_en=Orbit |name_jp=オービット |name_tl=Orbit | |||
|attack=120 |emotion=10 |element=elec |guard=y | |||
}} | |||
|getdata= | |getdata= | ||
{{EnemyInfo/GetData |hp=Any |chip=SpShake2 |code=B |lv1= 9: 6.25% |lv2= 10: 50% |lv3= S: 100% }} | |||
{{EnemyInfo/GetData |hp=Any |chip=SpShake2 |code=D |lv1= 7: 25% |lv2= 8: 50% |lv3= 9: 46.875% |lv4= 10: 25% }} | |||
{{EnemyInfo/GetData |hp=Any |zenny=550 |lv1= 7: 25% |lv2= 8: 50% |lv3= 9: 46.875% |lv4= 10: 25% }} | |||
{{EnemyInfo/GetData |hp=Any |zenny=500 |lv1= 5: 50% |lv2= 6: 100% |lv3= 7: 50% }} | |||
{{EnemyInfo/GetData |hp=Any |zenny=50 |lv1= 4-5: 50% }} | |||
{{EnemyInfo/GetData |hp=Any |zenny=30 |lv1= 1-3: 100% |lv2= 4: 50% }} | |||
}} | }} | ||
| Line 469: | Line 926: | ||
|airshoes=y |shadowshoes= |floatshoes=y |statusguard= |superarmor= | |airshoes=y |shadowshoes= |floatshoes=y |statusguard= |superarmor= | ||
|info= | |info= | ||
|locations= | |locations='''Level 3:''' [[Old Comp]] (38.1%), [[Ship Comp 3]] (20.8%), [[Ship Comp 4]] (19.4%), [[SciLab Vision Burst]] (16.7%), [[Nebula Area 4]] (11.1%), [[End Area 4]] (7.7%)<br/>'''Liberation Mission:''' [[Nebula Area 3 (Liberation Mission)|Nebula Area 3]] | ||
|attacks= | |attacks= | ||
{{EnemyInfo/Attack |name_en=Orbit |name_jp=オービット |name_tl=Orbit | |||
|attack=160 |emotion=10 |element=elec |guard=y | |||
}} | |||
|getdata= | |getdata= | ||
{{EnemyInfo/GetData |hp=Any |chip=SpShake3 |code=T |lv1= 9: 6.25% |lv2= 10: 50% |lv3= S: 100% }} | |||
{{EnemyInfo/GetData |hp=Any |chip=SpShake3 |code=U |lv1= 7: 25% |lv2= 8: 50% |lv3= 9: 46.875% |lv4= 10: 25% }} | |||
{{EnemyInfo/GetData |hp=Any |zenny=650 |lv1= 7: 25% |lv2= 8: 50% |lv3= 9: 46.875% |lv4= 10: 25% }} | |||
{{EnemyInfo/GetData |hp=Any |zenny=600 |lv1= 5: 50% |lv2= 6: 100% |lv3= 7: 50% }} | |||
{{EnemyInfo/GetData |hp=Any |zenny=50 |lv1= 4-5: 50% }} | |||
{{EnemyInfo/GetData |hp=Any |zenny=30 |lv1= 1-3: 100% |lv2= 4: 50% }} | |||
}} | }} | ||
| Line 480: | Line 946: | ||
|airshoes=y |shadowshoes= |floatshoes=y |statusguard= |superarmor= | |airshoes=y |shadowshoes= |floatshoes=y |statusguard= |superarmor= | ||
|info= | |info= | ||
|locations= | |locations='''Level 3:''' [[Experiment Server Comp]] (25.0%), [[Factory Comp 1 (MMBN5)|Factory Comp 1]] (11.1%), [[SoulServer Comp]] (11.1%), [[Undernet 2 (MMBN5)|Undernet 2]] (7.7%), [[Nebula Area 3]] (2.8%) | ||
|attacks= | |attacks= | ||
{{EnemyInfo/Attack |name_en=Orbit |name_jp=オービット |name_tl=Orbit | |||
|attack=200 |emotion=10 |element=elec |guard=y | |||
}} | |||
|getdata= | |getdata= | ||
{{EnemyInfo/GetData |hp=Any |chip=SpShake3 |code=S |lv1= 9: 6.25% |lv2= 10: 50% |lv3= S: 100% }} | |||
{{EnemyInfo/GetData |hp=Any |chip=SpShake3 |code=U |lv1= 7: 25% |lv2= 8: 50% |lv3= 9: 46.875% |lv4= 10: 25% }} | |||
{{EnemyInfo/GetData |hp=Any |zenny=750 |lv1= 7: 25% |lv2= 8: 50% |lv3= 9: 46.875% |lv4= 10: 25% }} | |||
{{EnemyInfo/GetData |hp=Any |zenny=700 |lv1= 5: 50% |lv2= 6: 100% |lv3= 7: 50% }} | |||
{{EnemyInfo/GetData |hp=Any |zenny=50 |lv1= 4-5: 50% }} | |||
{{EnemyInfo/GetData |hp=Any |zenny=30 |lv1= 1-3: 100% |lv2= 4: 50% }} | |||
}} | }} | ||
| Line 492: | Line 967: | ||
|airshoes= |shadowshoes= |floatshoes= |statusguard= |superarmor= | |airshoes= |shadowshoes= |floatshoes= |statusguard= |superarmor= | ||
|info= | |info= | ||
|locations= | |locations='''Level 1:''' [[NetBattle Comp (MMBN5)|NetBattle Comp]] (28.6%), [[View Comp]] (22.2%), [[Old Comp]] (19.0%), [[Message Comp]] (16.7%), [[Squirrel Comps]] (11.1%), [[SciLab Area 3]] (9.0%), [[SciLab Area 4]] (9.0%), [[End Area 1]] (5.6%), [[End Area 2]] (5.6%), [[End Area 3]] (5.1%), [[End Area 4]] (3.8%)<br/>'''Liberation Mission:''' [[SciLab Area 3 (Liberation Mission)|SciLab Area 3]] | ||
|attacks= | |attacks= | ||
{{EnemyInfo/Attack |name_en=Fanfare |name_jp=オウエンカ |name_tl=Ouenka | |||
|info=Makes allies invincible while attacking. | |||
}} | |||
|getdata= | |getdata= | ||
{{EnemyInfo/GetData |hp=Any |chip=Fanfare |code=F |lv1= 7: 25% |lv2= 8-S: 50% }} | |||
{{EnemyInfo/GetData |hp=Any |chip=Fanfare |code=P |version=Team ProtoMan |lv1= 5: 25% |lv2= 6: 50% |lv3= 7: 25% }} | |||
{{EnemyInfo/GetData |hp=Any |chip=Fanfare |code=Z |version=Team Colonel |lv1= 5: 25% |lv2= 6: 50% |lv3= 7: 25% }} | |||
{{EnemyInfo/GetData |hp=Any |zenny=300 |lv1= 9: 3.125% |lv2= 10: 25% |lv3= S: 50% }} | |||
{{EnemyInfo/GetData |hp=Any |zenny=200 |lv1= 7: 25% |lv2= 8: 50% |lv3= 9: 46.875% |lv4= 10: 25% }} | |||
{{EnemyInfo/GetData |hp=Any |zenny=150 |lv1= 5: 25% |lv2= 6: 50% |lv3= 7: 25% }} | |||
{{EnemyInfo/GetData |hp=Any |zenny=50 |lv1= 4-5: 50% }} | |||
{{EnemyInfo/GetData |hp=Any |zenny=30 |lv1= 1-3: 100% |lv2= 4: 50% }} | |||
}} | }} | ||
| Line 503: | Line 989: | ||
|airshoes= |shadowshoes= |floatshoes= |statusguard= |superarmor= | |airshoes= |shadowshoes= |floatshoes= |statusguard= |superarmor= | ||
|info= | |info= | ||
|locations= | |locations='''Level 1:''' [[Wine Case Comp]] (18.5%), [[Message Comp]] (16.7%), [[Undernet 2 (MMBN5)|Undernet 2]] (7.7%), [[Factory Comp 3 (MMBN5)|Factory Comp 3]] (4.4%), [[Factory Comp 4 (MMBN5)|Factory Comp 4]] (4.4%) | ||
|attacks= | |attacks= | ||
{{EnemyInfo/Attack |name_en=Discord |name_jp=ディスコード |name_tl=Discord | |||
|guard=y |ground=y | |||
|info=Inflicts Confuse while attacking. | |||
}} | |||
|getdata= | |getdata= | ||
{{EnemyInfo/GetData |hp=Any |chip=Discord |code=B |lv1= 9: 3.125% |lv2= 10: 25% |lv3= S: 50% }} | |||
{{EnemyInfo/GetData |hp=Any |chip=Discord |code=J |version=Team ProtoMan |lv1= 7: 25% |lv2= 8: 50% |lv3= 9: 46.875% |lv4= 10: 25% }} | |||
{{EnemyInfo/GetData |hp=Any |chip=Discord |code=Q |version=Team Colonel |lv1= 7: 25% |lv2= 8: 50% |lv3= 9: 46.875% |lv4= 10: 25% }} | |||
{{EnemyInfo/GetData |hp=Any |zenny=300 |lv1= 9: 3.125% |lv2= 10: 25% |lv3= S: 50% }} | |||
{{EnemyInfo/GetData |hp=Any |zenny=200 |lv1= 7: 25% |lv2= 8: 50% |lv3= 9: 46.875% |lv4= 10: 25% }} | |||
{{EnemyInfo/GetData |hp=Any |zenny=150 |lv1= 5: 50% |lv2= 6: 100% |lv3= 7: 50% }} | |||
{{EnemyInfo/GetData |hp=Any |zenny=50 |lv1= 4-5: 50% }} | |||
{{EnemyInfo/GetData |hp=Any |zenny=30 |lv1= 1-3: 100% |lv2= 4: 50% }} | |||
}} | }} | ||
| Line 514: | Line 1,012: | ||
|airshoes= |shadowshoes= |floatshoes= |statusguard= |superarmor= | |airshoes= |shadowshoes= |floatshoes= |statusguard= |superarmor= | ||
|info= | |info= | ||
|locations= | |locations='''Level 2:''' [[NetBattle Comp (MMBN5)|NetBattle Comp]] (28.6%), [[View Comp]] (22.2%), [[Old Comp]] (19.0%), [[Message Comp]] (16.7%), [[Squirrel Comps]] (11.1%), [[SciLab Area 3]] (9.0%), [[SciLab Area 4]] (9.0%), [[End Area 1]] (5.6%), [[End Area 2]] (5.6%), [[End Area 3]] (5.1%), [[End Area 4]] (3.8%) | ||
|attacks= | |attacks= | ||
{{EnemyInfo/Attack |name_en=Timpani |name_jp=ティンパニー |name_tl=Timpani | |||
|guard=y |ground=y | |||
|info=Inflicts Immobilize while attacking. | |||
}} | |||
|getdata= | |getdata= | ||
{{EnemyInfo/GetData |hp=Any |chip=Timpani |code=A |lv1= 9: 3.125% |lv2= 10: 25% |lv3= S: 50% }} | |||
{{EnemyInfo/GetData |hp=Any |chip=Timpani |code=L |version=Team ProtoMan |lv1= 7: 25% |lv2= 8: 50% |lv3= 9: 46.875% |lv4= 10: 25% }} | |||
{{EnemyInfo/GetData |hp=Any |chip=Timpani |code=V |version=Team Colonel |lv1= 7: 25% |lv2= 8: 50% |lv3= 9: 46.875% |lv4= 10: 25% }} | |||
{{EnemyInfo/GetData |hp=Any |zenny=400 |lv1= 9: 3.125% |lv2= 10: 25% |lv3= S: 50% }} | |||
{{EnemyInfo/GetData |hp=Any |zenny=300 |lv1= 7: 25% |lv2= 8: 50% |lv3= 9: 46.875% |lv4= 10: 25% }} | |||
{{EnemyInfo/GetData |hp=Any |zenny=200 |lv1= 5: 50% |lv2= 6: 100% |lv3= 7: 50% }} | |||
{{EnemyInfo/GetData |hp=Any |zenny=50 |lv1= 4-5: 50% }} | |||
{{EnemyInfo/GetData |hp=Any |zenny=30 |lv1= 1-3: 100% |lv2= 4: 50% }} | |||
}} | }} | ||
| Line 525: | Line 1,035: | ||
|airshoes= |shadowshoes= |floatshoes= |statusguard= |superarmor= | |airshoes= |shadowshoes= |floatshoes= |statusguard= |superarmor= | ||
|info= | |info= | ||
|locations= | |locations='''Level 2:''' [[Wine Case Comp]] (18.5%), [[Message Comp]] (16.7%), [[Undernet 2 (MMBN5)|Undernet 2]] (7.7%), [[Factory Comp 3 (MMBN5)|Factory Comp 3]] (4.4%), [[Factory Comp 4 (MMBN5)|Factory Comp 4]] (4.4%) | ||
|attacks= | |attacks= | ||
{{EnemyInfo/Attack |name_en=Silence |name_jp=サイレンス |name_tl=Silence | |||
|guard=y |ground=y | |||
|info=Inflicts Blind while attacking. | |||
}} | |||
|getdata= | |getdata= | ||
{{EnemyInfo/GetData |hp=Any |chip=Silence |code=C |lv1= 9: 3.125% |lv2= 10: 25% |lv3= S: 50% }} | |||
{{EnemyInfo/GetData |hp=Any |chip=Silence |code=J |version=Team ProtoMan |lv1= 7: 25% |lv2= 8: 50% |lv3= 9: 46.875% |lv4= 10: 25% }} | |||
{{EnemyInfo/GetData |hp=Any |chip=Silence |code=N |version=Team Colonel |lv1= 7: 25% |lv2= 8: 50% |lv3= 9: 46.875% |lv4= 10: 25% }} | |||
{{EnemyInfo/GetData |hp=Any |zenny=400 |lv1= 9: 3.125% |lv2= 10: 25% |lv3= S: 50% }} | |||
{{EnemyInfo/GetData |hp=Any |zenny=300 |lv1= 7: 25% |lv2= 8: 50% |lv3= 9: 46.875% |lv4= 10: 25% }} | |||
{{EnemyInfo/GetData |hp=Any |zenny=200 |lv1= 5: 50% |lv2= 6: 100% |lv3= 7: 50% }} | |||
{{EnemyInfo/GetData |hp=Any |zenny=50 |lv1= 4-5: 50% }} | |||
{{EnemyInfo/GetData |hp=Any |zenny=30 |lv1= 1-3: 100% |lv2= 4: 50% }} | |||
}} | }} | ||
| Line 536: | Line 1,058: | ||
|airshoes= |shadowshoes= |floatshoes= |statusguard= |superarmor= | |airshoes= |shadowshoes= |floatshoes= |statusguard= |superarmor= | ||
|info= | |info= | ||
|locations= | |locations='''Level 3:''' [[NetBattle Comp (MMBN5)|NetBattle Comp]] (28.6%), [[View Comp]] (22.2%), [[Old Comp]] (19.0%), [[Message Comp]] (16.7%), [[Squirrel Comps]] (11.1%), [[SciLab Area 3]] (9.0%), [[SciLab Area 4]] (9.0%), [[End Area 1]] (5.6%), [[End Area 2]] (5.6%), [[End Area 3]] (5.1%), [[End Area 4]] (3.8%) | ||
|attacks= | |attacks= | ||
{{EnemyInfo/Attack |name_en=Horn |name_jp=ホルン |name_tl=Horn | |||
|info=Recovers all allies' HPs to max. | |||
}} | |||
|getdata= | |getdata= | ||
{{EnemyInfo/GetData |hp=Any |zenny=500 |lv1= 9: 6.25% |lv2= 10: 50% |lv3= S: 100% }} | |||
{{EnemyInfo/GetData |hp=Any |zenny=400 |lv1= 7: 50% |lv2= 8: 100% |lv3= 9: 93.75% |lv4= 10: 50% }} | |||
{{EnemyInfo/GetData |hp=Any |zenny=300 |lv1= 5: 50% |lv2= 6: 100% |lv3= 7: 50% }} | |||
{{EnemyInfo/GetData |hp=Any |zenny=50 |lv1= 4-5: 50% }} | |||
{{EnemyInfo/GetData |hp=Any |zenny=30 |lv1= 1-3: 100% |lv2= 4: 50% }} | |||
}} | }} | ||
| Line 547: | Line 1,077: | ||
|airshoes= |shadowshoes= |floatshoes= |statusguard= |superarmor= | |airshoes= |shadowshoes= |floatshoes= |statusguard= |superarmor= | ||
|info= | |info= | ||
|locations= | |locations='''Level 3:''' [[Wine Case Comp]] (18.5%), [[Message Comp]] (16.7%), [[Undernet 2 (MMBN5)|Undernet 2]] (7.7%), [[Factory Comp 3 (MMBN5)|Factory Comp 3]] (4.4%), [[Factory Comp 4 (MMBN5)|Factory Comp 4]] (4.4%)<br/>'''Liberation Mission:''' [[Nebula Area 5 (Liberation Mission)|Nebula Area 5]] | ||
|attacks= | |attacks= | ||
{{EnemyInfo/Attack |name_en=Fanfare |name_jp=オウエンカ |name_tl=Ouenka | |||
|info=Makes allies invincible while attacking. | |||
}} | |||
|getdata= | |getdata= | ||
{{EnemyInfo/GetData |hp=Any |chip=Silence |code=* |lv1= 9: 3.125% |lv2= 10: 25% |lv3= S: 50% }} | |||
{{EnemyInfo/GetData |hp=Any |chip=Timpani |code=* |lv1= 9: 3.125% |lv2= 10: 25% |lv3= S: 50% }} | |||
{{EnemyInfo/GetData |hp=Any |chip=Discord |code=* |lv1= 7: 25% |lv2= 8: 50% |lv3= 9: 46.875% |lv4= 10: 25% }} | |||
{{EnemyInfo/GetData |hp=Any |chip=Fanfare |code=* |lv1= 7: 25% |lv2= 8: 50% |lv3= 9: 46.875% |lv4= 10: 25% }} | |||
{{EnemyInfo/GetData |hp=High |zenny=300 |lv1= 5: 50% |lv2= 6: 100% |lv3= 7: 50% }} | |||
{{EnemyInfo/GetData |hp=High |zenny=50 |lv1= 4-5: 50% }} | |||
{{EnemyInfo/GetData |hp=High |zenny=30 |lv1= 1-3: 100% |lv2= 4: 50% }} | |||
{{EnemyInfo/GetData |hp=Low |zenny=300 |lv1= 5: 50% |lv2= 6: 100% |lv3= 7: 50% }} | |||
{{EnemyInfo/GetData |hp=Low |zenny=50 |lv1= 4-5: 50% }} | |||
{{EnemyInfo/GetData |hp=Low |zenny=30 |lv1= 1-3: 100% |lv2= 4: 50% }} | |||
}} | }} | ||
| Line 559: | Line 1,102: | ||
|airshoes= |shadowshoes= |floatshoes= |statusguard= |superarmor= | |airshoes= |shadowshoes= |floatshoes= |statusguard= |superarmor= | ||
|info= | |info= | ||
|locations= | |locations='''Level 1:''' [[Gargoyle Comp 3]] (15.6%), [[End Area 5]] (15.3%), [[Gargoyle Comp 2]] (12.5%), [[Gargoyle Comp 1]] (9.4%), [[Gargoyle Comp 4]] (8.3%)<br/>'''Liberation Mission:''' [[End Area 5 (Liberation Mission)|End Area 5]], [[Undernet 4 (Liberation Mission)|Undernet 4]] | ||
|attacks= | |attacks= | ||
{{EnemyInfo/Attack |name_en=MoonBlade |name_jp=エンゲツクナイ |name_tl=Engetsu Kunai | |||
|attack=30 |emotion=10 |element=none |sword=y | |||
}} | |||
|getdata= | |getdata= | ||
{{EnemyInfo/GetData |hp=Any |chip=MoonBld1 |code=N |version=Team ProtoMan |lv1= 7: 50% |lv2= 8-S: 100% }} | |||
{{EnemyInfo/GetData |hp=Any |chip=MoonBld1 |code=Z |version=Team Colonel |lv1= 7: 50% |lv2= 8-S: 100% }} | |||
{{EnemyInfo/GetData |hp=Any |zenny=300 |lv1= 5: 50% |lv2= 6: 100% |lv3= 7: 50% }} | |||
{{EnemyInfo/GetData |hp=Any |zenny=50 |lv1= 4-5: 50% }} | |||
{{EnemyInfo/GetData |hp=Any |zenny=30 |lv1= 1-3: 100% |lv2= 4: 50% }} | |||
}} | }} | ||
| Line 570: | Line 1,121: | ||
|airshoes= |shadowshoes= |floatshoes= |statusguard= |superarmor= | |airshoes= |shadowshoes= |floatshoes= |statusguard= |superarmor= | ||
|info= | |info= | ||
|locations= | |locations='''Level 1:''' [[Factory Comp 2 (MMBN5)|Factory Comp 2]] (12.5%), [[Gargoyle Comp 3]] (10.4%), [[Gargoyle Comp 1]] (5.2%), [[Gargoyle Comp 2]] (5.2%), [[Gargoyle Comp 4]] (5.2%) | ||
|attacks= | |attacks= | ||
{{EnemyInfo/Attack |name_en=MoonBlade |name_jp=エンゲツクナイ |name_tl=Engetsu Kunai | |||
|attack=60 |emotion=10 |element=none |sword=y | |||
}} | |||
|getdata= | |getdata= | ||
{{EnemyInfo/GetData |hp=Any |chip=MoonBld1 |code=E |lv1= 7: 25% |lv2= 8: 50% |lv3= 9: 53.125% |lv4= 10: 75% |lv5= S: 100% }} | |||
{{EnemyInfo/GetData |hp=Any |zenny=400 |lv1= 7: 25% |lv2= 8: 50% |lv3= 9: 46.875% |lv4= 10: 25% }} | |||
{{EnemyInfo/GetData |hp=Any |zenny=350 |lv1= 5: 50% |lv2= 6: 100% |lv3= 7: 50% }} | |||
{{EnemyInfo/GetData |hp=Any |zenny=50 |lv1= 4-5: 50% }} | |||
{{EnemyInfo/GetData |hp=Any |zenny=30 |lv1= 1-3: 100% |lv2= 4: 50% }} | |||
}} | }} | ||
| Line 581: | Line 1,140: | ||
|airshoes= |shadowshoes= |floatshoes= |statusguard= |superarmor= | |airshoes= |shadowshoes= |floatshoes= |statusguard= |superarmor= | ||
|info= | |info= | ||
|locations= | |locations='''Level 2:''' [[Gargoyle Comp 3]] (15.6%), [[End Area 5]] (15.3%), [[Gargoyle Comp 2]] (12.5%), [[Gargoyle Comp 1]] (9.4%), [[Gargoyle Comp 4]] (8.3%) | ||
|attacks= | |attacks= | ||
{{EnemyInfo/Attack |name_en=MoonBlade |name_jp=エンゲツクナイ |name_tl=Engetsu Kunai | |||
|attack=90 |emotion=10 |element=none |sword=y | |||
}} | |||
|getdata= | |getdata= | ||
{{EnemyInfo/GetData |hp=Any |chip=MoonBld2 |code=O |version=Team ProtoMan |lv1= 7: 25% |lv2= 8: 50% |lv3= 9: 53.125% |lv4= 10: 75% |lv5= S: 100% }} | |||
{{EnemyInfo/GetData |hp=Any |chip=MoonBld2 |code=V |version=Team Colonel |lv1= 7: 25% |lv2= 8: 50% |lv3= 9: 53.125% |lv4= 10: 75% |lv5= S: 100% }} | |||
{{EnemyInfo/GetData |hp=Any |zenny=500 |lv1= 7: 25% |lv2= 8: 50% |lv3= 9: 46.875% |lv4= 10: 25% }} | |||
{{EnemyInfo/GetData |hp=Any |zenny=450 |lv1= 5: 50% |lv2= 6: 100% |lv3= 7: 50% }} | |||
{{EnemyInfo/GetData |hp=Any |zenny=50 |lv1= 4-5: 50% }} | |||
{{EnemyInfo/GetData |hp=Any |zenny=30 |lv1= 1-3: 100% |lv2= 4: 50% }} | |||
}} | }} | ||
| Line 592: | Line 1,160: | ||
|airshoes= |shadowshoes= |floatshoes= |statusguard= |superarmor= | |airshoes= |shadowshoes= |floatshoes= |statusguard= |superarmor= | ||
|info= | |info= | ||
|locations= | |locations='''Level 2:''' [[Factory Comp 2 (MMBN5)|Factory Comp 2]] (12.5%), [[Gargoyle Comp 3]] (10.4%), [[Gargoyle Comp 1]] (5.2%), [[Gargoyle Comp 2]] (5.2%), [[Gargoyle Comp 4]] (5.2%)<br/>'''Liberation Mission:''' [[Nebula Area 3 (Liberation Mission)|Nebula Area 3]] | ||
|attacks= | |attacks= | ||
{{EnemyInfo/Attack |name_en=MoonBlade |name_jp=エンゲツクナイ |name_tl=Engetsu Kunai | |||
|attack=120 |emotion=10 |element=none |sword=y | |||
}} | |||
|getdata= | |getdata= | ||
{{EnemyInfo/GetData |hp=Any |chip=MoonBld2 |code=G |lv1= 7: 25% |lv2= 8: 50% |lv3= 9: 53.125% |lv4= 10: 75% |lv5= S: 100% }} | |||
{{EnemyInfo/GetData |hp=Any |zenny=600 |lv1= 7: 25% |lv2= 8: 50% |lv3= 9: 46.875% |lv4= 10: 25% }} | |||
{{EnemyInfo/GetData |hp=Any |zenny=550 |lv1= 5: 50% |lv2= 6: 100% |lv3= 7: 50% }} | |||
{{EnemyInfo/GetData |hp=Any |zenny=50 |lv1= 4-5: 50% }} | |||
{{EnemyInfo/GetData |hp=Any |zenny=30 |lv1= 1-3: 100% |lv2= 4: 50% }} | |||
}} | }} | ||
| Line 603: | Line 1,179: | ||
|airshoes= |shadowshoes= |floatshoes= |statusguard= |superarmor= | |airshoes= |shadowshoes= |floatshoes= |statusguard= |superarmor= | ||
|info= | |info= | ||
|locations= | |locations='''Level 3:''' [[Gargoyle Comp 3]] (15.6%), [[End Area 5]] (15.3%), [[Gargoyle Comp 2]] (12.5%), [[Gargoyle Comp 1]] (9.4%), [[Gargoyle Comp 4]] (8.3%)<br/>'''Liberation Mission:''' [[Nebula Area 3 (Liberation Mission)|Nebula Area 3]] | ||
|attacks= | |attacks= | ||
{{EnemyInfo/Attack |name_en=MoonBlade |name_jp=エンゲツクナイ |name_tl=Engetsu Kunai | |||
|attack=160 |emotion=10 |element=none |sword=y | |||
}} | |||
|getdata= | |getdata= | ||
{{EnemyInfo/GetData |hp=Any |chip=MoonBld3 |code=L |version=Team ProtoMan |lv1= 7: 25% |lv2= 8: 50% |lv3= 9: 53.125% |lv4= 10: 75% |lv5= S: 100% }} | |||
{{EnemyInfo/GetData |hp=Any |chip=MoonBld3 |code=T |version=Team Colonel |lv1= 7: 25% |lv2= 8: 50% |lv3= 9: 53.125% |lv4= 10: 75% |lv5= S: 100% }} | |||
{{EnemyInfo/GetData |hp=Any |zenny=700 |lv1= 7: 25% |lv2= 8: 50% |lv3= 9: 46.875% |lv4= 10: 25% }} | |||
{{EnemyInfo/GetData |hp=Any |zenny=650 |lv1= 5: 50% |lv2= 6: 100% |lv3= 7: 50% }} | |||
{{EnemyInfo/GetData |hp=Any |zenny=50 |lv1= 4-5: 50% }} | |||
{{EnemyInfo/GetData |hp=Any |zenny=30 |lv1= 1-3: 100% |lv2= 4: 50% }} | |||
}} | }} | ||
| Line 614: | Line 1,199: | ||
|airshoes= |shadowshoes= |floatshoes= |statusguard= |superarmor= | |airshoes= |shadowshoes= |floatshoes= |statusguard= |superarmor= | ||
|info= | |info= | ||
|locations= | |locations='''Level 3:''' [[Factory Comp 2 (MMBN5)|Factory Comp 2]] (12.5%), [[Gargoyle Comp 3]] (10.4%), [[Nebula Area 5]] (8.3%), [[Gargoyle Comp 1]] (5.2%), [[Gargoyle Comp 2]] (5.2%), [[Gargoyle Comp 4]] (5.2%), [[Nebula Area 6]] (4.4%) | ||
|attacks= | |attacks= | ||
{{EnemyInfo/Attack |name_en=MoonBlade |name_jp=エンゲツクナイ |name_tl=Engetsu Kunai | |||
|attack=200 |emotion=10 |element=none |sword=y | |||
}} | |||
|getdata= | |getdata= | ||
{{EnemyInfo/GetData |hp=Any |chip=MoonBld3 |code=C |lv1= 7: 25% |lv2= 8: 50% |lv3= 9: 53.125% |lv4= 10: 75% |lv5= S: 100% }} | |||
{{EnemyInfo/GetData |hp=Any |zenny=750 |lv1= 7: 25% |lv2= 8: 50% |lv3= 9: 46.875% |lv4= 10: 25% }} | |||
{{EnemyInfo/GetData |hp=Any |zenny=700 |lv1= 5: 50% |lv2= 6: 100% |lv3= 7: 50% }} | |||
{{EnemyInfo/GetData |hp=Any |zenny=50 |lv1= 4-5: 50% }} | |||
{{EnemyInfo/GetData |hp=Any |zenny=30 |lv1= 1-3: 100% |lv2= 4: 50% }} | |||
}} | }} | ||
| Line 626: | Line 1,219: | ||
|airshoes= |shadowshoes= |floatshoes= |statusguard= |superarmor= | |airshoes= |shadowshoes= |floatshoes= |statusguard= |superarmor= | ||
|info= | |info= | ||
|locations= | |locations='''Level 1:''' [[Air Filter Comp]] (16.7%), [[ACDC Area 3 (MMBN5)|ACDC Area 3]] (14.1%), [[Furnace Comp]] (12.5%), [[Crane Comp (MMBN5)|Crane Comp]] (11.9%), [[Elevator Comp (MMBN5)|Elevator Comp]] (11.9%), [[SciLab Area 4]] (9.0%), [[Squirrel Comps]] (8.3%), [[SciLab Area 3]] (7.7%), [[Message Comp]] (5.6%), [[SciLab Area 2]] (5.6%), [[Oran Area 3]] (2.6%) | ||
|attacks= | |attacks= | ||
{{EnemyInfo/Attack |name_en=Wind |name_jp=トップウ |name_tl=Toppuu | |||
}} | |||
|getdata= | |getdata= | ||
{{EnemyInfo/GetData |hp=Any |chip=Wind |code=* |lv1= 5: 50% |lv2= 6-S: 100% }} | |||
{{EnemyInfo/GetData |hp=Any |zenny=50 |lv1= 4-5: 50% }} | |||
{{EnemyInfo/GetData |hp=Any |zenny=30 |lv1= 1-3: 100% |lv2= 4: 50% }} | |||
}} | }} | ||
| Line 637: | Line 1,235: | ||
|airshoes= |shadowshoes= |floatshoes= |statusguard= |superarmor= | |airshoes= |shadowshoes= |floatshoes= |statusguard= |superarmor= | ||
|info= | |info= | ||
|locations= | |locations='''Level 1:''' [[Wind God Comp]] (20.8%), [[Air Filter Comp]] (20.0%), [[Oran Area 2]] (15.3%), [[Crane Comp (MMBN5)|Crane Comp]] (11.9%), [[Elevator Comp (MMBN5)|Elevator Comp]] (11.9%), [[Message Comp]] (5.6%), [[Factory Comp 4 (MMBN5)|Factory Comp 4]] (4.4%), [[SciLab Area 1]] (2.8%), [[Undernet 3 (MMBN5)|Undernet 3]] (2.6%), [[Factory Comp 3 (MMBN5)|Factory Comp 3]] (2.2%) | ||
|attacks= | |attacks= | ||
{{EnemyInfo/Attack |name_en=Fan |name_jp=スイコミ |name_tl=Suikomi | |||
}} | |||
|getdata= | |getdata= | ||
{{EnemyInfo/GetData |hp=Any |chip=Fan |code=* |lv1= 5: 50% |lv2= 6-S: 100% }} | |||
{{EnemyInfo/GetData |hp=Any |zenny=50 |lv1= 4-5: 50% }} | |||
{{EnemyInfo/GetData |hp=Any |zenny=30 |lv1= 1-3: 100% |lv2= 4: 50% }} | |||
}} | }} | ||
| Line 648: | Line 1,251: | ||
|airshoes= |shadowshoes= |floatshoes= |statusguard= |superarmor= | |airshoes= |shadowshoes= |floatshoes= |statusguard= |superarmor= | ||
|info= | |info= | ||
|locations= | |locations='''Level 2:''' [[Air Filter Comp]] (16.7%), [[ACDC Area 3 (MMBN5)|ACDC Area 3]] (14.1%), [[Furnace Comp]] (12.5%), [[Crane Comp (MMBN5)|Crane Comp]] (11.9%), [[Elevator Comp (MMBN5)|Elevator Comp]] (11.9%), [[SciLab Area 4]] (9.0%), [[Squirrel Comps]] (8.3%), [[SciLab Area 3]] (7.7%), [[Message Comp]] (5.6%), [[SciLab Area 2]] (5.6%), [[Oran Area 3]] (2.6%) | ||
|attacks= | |attacks= | ||
{{EnemyInfo/Attack |name_en=Wind |name_jp=トップウ |name_tl=Toppuu | |||
}} | |||
|getdata= | |getdata= | ||
{{EnemyInfo/GetData |hp=Any |chip=Wind |code=* |lv1= 5: 50% |lv2= 6-S: 100% }} | |||
{{EnemyInfo/GetData |hp=Any |zenny=50 |lv1= 4-5: 50% }} | |||
{{EnemyInfo/GetData |hp=Any |zenny=30 |lv1= 1-3: 100% |lv2= 4: 50% }} | |||
}} | }} | ||
| Line 659: | Line 1,267: | ||
|airshoes= |shadowshoes= |floatshoes= |statusguard= |superarmor= | |airshoes= |shadowshoes= |floatshoes= |statusguard= |superarmor= | ||
|info= | |info= | ||
|locations= | |locations='''Level 2:''' [[Wind God Comp]] (20.8%), [[Air Filter Comp]] (20.0%), [[Oran Area 2]] (15.3%), [[Crane Comp (MMBN5)|Crane Comp]] (11.9%), [[Elevator Comp (MMBN5)|Elevator Comp]] (11.9%), [[Message Comp]] (5.6%), [[Factory Comp 4 (MMBN5)|Factory Comp 4]] (4.4%), [[SciLab Area 1]] (2.8%), [[Undernet 3 (MMBN5)|Undernet 3]] (2.6%), [[Factory Comp 3 (MMBN5)|Factory Comp 3]] (2.2%) | ||
|attacks= | |attacks= | ||
{{EnemyInfo/Attack |name_en=Fan |name_jp=スイコミ |name_tl=Suikomi | |||
}} | |||
|getdata= | |getdata= | ||
{{EnemyInfo/GetData |hp=Any |chip=Fan |code=* |lv1= 5: 50% |lv2= 6-S: 100% }} | |||
{{EnemyInfo/GetData |hp=Any |zenny=50 |lv1= 4-5: 50% }} | |||
{{EnemyInfo/GetData |hp=Any |zenny=30 |lv1= 1-3: 100% |lv2= 4: 50% }} | |||
}} | }} | ||
| Line 670: | Line 1,283: | ||
|airshoes= |shadowshoes= |floatshoes= |statusguard= |superarmor= | |airshoes= |shadowshoes= |floatshoes= |statusguard= |superarmor= | ||
|info= | |info= | ||
|locations= | |locations='''Level 3:''' [[Air Filter Comp]] (16.7%), [[ACDC Area 3 (MMBN5)|ACDC Area 3]] (14.1%), [[Furnace Comp]] (12.5%), [[Crane Comp (MMBN5)|Crane Comp]] (11.9%), [[Elevator Comp (MMBN5)|Elevator Comp]] (11.9%), [[SciLab Area 4]] (9.0%), [[Squirrel Comps]] (8.3%), [[SciLab Area 3]] (7.7%), [[Message Comp]] (5.6%), [[SciLab Area 2]] (5.6%), [[Oran Area 3]] (2.6%) | ||
|attacks= | |attacks= | ||
{{EnemyInfo/Attack |name_en=Wind |name_jp=トップウ |name_tl=Toppuu | |||
}} | |||
|getdata= | |getdata= | ||
{{EnemyInfo/GetData |hp=Any |chip=Wind |code=* |lv1= 5: 50% |lv2= 6-S: 100% }} | |||
{{EnemyInfo/GetData |hp=Any |zenny=50 |lv1= 4-5: 50% }} | |||
{{EnemyInfo/GetData |hp=Any |zenny=30 |lv1= 1-3: 100% |lv2= 4: 50% }} | |||
}} | }} | ||
{{EnemyInfo | {{EnemyInfo | ||
|image={{BattleField |style=bn5 |nocol1=true |nocol2=true |nocol3=true |object52=vacuumfan3 }} | |image={{BattleField |style=bn5 |nocol1=true |nocol2=true |nocol3=true |object52=vacuumfan3 }} | ||
|name_en=VacuumFan3 |name_jp=バキュームファン3 |name_tl=Vacuum Fan 3 | |name_en=VacuumFan3 |name_jp=バキュームファン3<ref>In the Japanese version of 5GBA, this enemy is named {{name|jp=ウインドボックス3|tl=Wind Box 3}}. This was corrected in the Japanese version of 5DS.</ref>|name_tl=Vacuum Fan 3 | ||
|hp=210 |contact=100 |emotion=10 |element=none | |hp=210 |contact=100 |emotion=10 |element=none | ||
|airshoes= |shadowshoes= |floatshoes= |statusguard= |superarmor= | |airshoes= |shadowshoes= |floatshoes= |statusguard= |superarmor= | ||
|info= | |info= | ||
|locations= | |locations='''Level 3:''' [[Wind God Comp]] (20.8%), [[Air Filter Comp]] (20.0%), [[Oran Area 2]] (15.3%), [[Crane Comp (MMBN5)|Crane Comp]] (11.9%), [[Elevator Comp (MMBN5)|Elevator Comp]] (11.9%), [[Message Comp]] (5.6%), [[Factory Comp 4 (MMBN5)|Factory Comp 4]] (4.4%), [[SciLab Area 1]] (2.8%), [[Undernet 3 (MMBN5)|Undernet 3]] (2.6%), [[Factory Comp 3 (MMBN5)|Factory Comp 3]] (2.2%) | ||
|attacks= | |attacks= | ||
{{EnemyInfo/Attack |name_en=Fan |name_jp=スイコミ |name_tl=Suikomi | |||
}} | |||
|getdata= | |getdata= | ||
{{EnemyInfo/GetData |hp=Any |chip=Fan |code=* |lv1= 5: 50% |lv2= 6-S: 100% }} | |||
{{EnemyInfo/GetData |hp=Any |zenny=50 |lv1= 4-5: 50% }} | |||
{{EnemyInfo/GetData |hp=Any |zenny=30 |lv1= 1-3: 100% |lv2= 4: 50% }} | |||
}} | }} | ||
| Line 693: | Line 1,316: | ||
|airshoes=y |shadowshoes= |floatshoes=y |statusguard= |superarmor= | |airshoes=y |shadowshoes= |floatshoes=y |statusguard= |superarmor= | ||
|info= | |info= | ||
|locations= | |locations='''Level 1:''' [[End Area 5]] (20.8%), [[Gargoyle Comp 1]] (19.8%), [[Gargoyle Comp 2]] (18.7%), [[Gargoyle Comp 4]] (15.6%), [[Gargoyle Comp 3]] (11.5%)<br/>'''Liberation Mission:''' [[End Area 5 (Liberation Mission)|End Area 5]] | ||
|attacks= | |attacks= | ||
{{EnemyInfo/Attack |name_en=WideShot |name_jp=ワイドショット |name_tl=Wide Shot | |||
|attack=20 |emotion=20 |element=aqua | |||
}} | |||
|getdata= | |getdata= | ||
{{EnemyInfo/GetData |hp=Any |chip=WideSht1 |code=M |lv1= 9: 6.25% |lv2= 10: 50% |lv3= S: 100% }} | |||
{{EnemyInfo/GetData |hp=Any |chip=WideSht1 |code=N |lv1= 7: 50% |lv2= 8: 100% |lv3= 9: 93.75% |lv4= 10: 50% }} | |||
{{EnemyInfo/GetData |hp=High |zenny=300 |lv1= 5: 50% |lv2= 6: 100% |lv3= 7: 50% }} | |||
{{EnemyInfo/GetData |hp=High |zenny=50 |lv1= 4-5: 50% }} | |||
{{EnemyInfo/GetData |hp=High |zenny=30 |lv1= 1-3: 100% |lv2= 4: 50% }} | |||
{{EnemyInfo/GetData |hp=Low |recov=200 |lv1= 1-6: 100% |lv2= 7: 50% }} | |||
}} | }} | ||
| Line 704: | Line 1,336: | ||
|airshoes=y |shadowshoes= |floatshoes=y |statusguard= |superarmor= | |airshoes=y |shadowshoes= |floatshoes=y |statusguard= |superarmor= | ||
|info= | |info= | ||
|locations= | |locations='''Level 1:''' [[Pipe Comp (MMBN5)|Pipe Comp]] (20.8%), [[Undernet 2 (MMBN5)|Undernet 2]] (19.2%), [[Factory Comp 1 (MMBN5)|Factory Comp 1]] (13.9%), [[Undernet 3 (MMBN5)|Undernet 3]] (11.5%), [[SoulServer Comp]] (11.1%), [[Gargoyle Comp 4]] (8.3%), [[Gargoyle Comp 2]] (5.2%), [[Gargoyle Comp 1]] (2.1%) | ||
|attacks= | |attacks= | ||
{{EnemyInfo/Attack |name_en=WideShot |name_jp=ワイドショット |name_tl=Wide Shot | |||
|attack=50 |emotion=20 |element=aqua | |||
}} | |||
{{EnemyInfo/Attack |name_en=BattleChip | |||
|info=Blinder ({{chance|2/16}}) | |||
}} | |||
|getdata= | |getdata= | ||
{{EnemyInfo/GetData |hp=Any |chip=WideSht1 |code=L |lv1= 9: 6.25% |lv2= 10: 50% |lv3= S: 100% }} | |||
{{EnemyInfo/GetData |hp=Any |chip=WideSht1 |code=M |lv1= 7: 25% |lv2= 8: 50% |lv3= 9: 46.875% |lv4= 10: 25% }} | |||
{{EnemyInfo/GetData |hp=High |zenny=400 |lv1= 7: 25% |lv2= 8: 50% |lv3= 9: 46.875% |lv4= 10: 25% }} | |||
{{EnemyInfo/GetData |hp=High |zenny=350 |lv1= 5: 50% |lv2= 6: 100% |lv3= 7: 50% }} | |||
{{EnemyInfo/GetData |hp=High |zenny=50 |lv1= 4-5: 50% }} | |||
{{EnemyInfo/GetData |hp=High |zenny=30 |lv1= 1-3: 100% |lv2= 4: 50% }} | |||
{{EnemyInfo/GetData |hp=Low |recov=300 |lv1= 1-6: 100% |lv2= 7: 75% |lv3= 8: 50% |lv4= 9: 46.875% |lv5= 10: 25% }} | |||
}} | }} | ||
| Line 715: | Line 1,360: | ||
|airshoes=y |shadowshoes= |floatshoes=y |statusguard= |superarmor= | |airshoes=y |shadowshoes= |floatshoes=y |statusguard= |superarmor= | ||
|info= | |info= | ||
|locations= | |locations='''Level 2:''' [[End Area 5]] (20.8%), [[Gargoyle Comp 1]] (19.8%), [[Gargoyle Comp 2]] (18.7%), [[Gargoyle Comp 4]] (15.6%), [[Gargoyle Comp 3]] (11.5%)<br/>'''Liberation Mission:''' [[Nebula Area 1 (Liberation Mission)|Nebula Area 1]] | ||
|attacks= | |attacks= | ||
{{EnemyInfo/Attack |name_en=WideShot |name_jp=ワイドショット |name_tl=Wide Shot | |||
|attack=80 |emotion=20 |element=aqua | |||
}} | |||
{{EnemyInfo/Attack |name_en=BattleChip | |||
|info=MetaGel ({{chance|2/16}}) | |||
}} | |||
|getdata= | |getdata= | ||
{{EnemyInfo/GetData |hp=Any |chip=WideSht2 |code=F |lv1= 9: 6.25% |lv2= 10: 50% |lv3= S: 100% }} | |||
{{EnemyInfo/GetData |hp=Any |chip=WideSht2 |code=G |lv1= 7: 25% |lv2= 8: 50% |lv3= 9: 46.875% |lv4= 10: 25% }} | |||
{{EnemyInfo/GetData |hp=High |zenny=500 |lv1= 7: 25% |lv2= 8: 50% |lv3= 9: 46.875% |lv4= 10: 25% }} | |||
{{EnemyInfo/GetData |hp=High |zenny=450 |lv1= 5: 50% |lv2= 6: 100% |lv3= 7: 50% }} | |||
{{EnemyInfo/GetData |hp=High |zenny=50 |lv1= 4-5: 50% }} | |||
{{EnemyInfo/GetData |hp=High |zenny=30 |lv1= 1-3: 100% |lv2= 4: 50% }} | |||
{{EnemyInfo/GetData |hp=Low |recov=400 |lv1= 1-6: 100% |lv2= 7: 75% |lv3= 8: 50% |lv4= 9: 46.875% |lv5= 10: 25% }} | |||
}} | }} | ||
| Line 726: | Line 1,384: | ||
|airshoes=y |shadowshoes= |floatshoes=y |statusguard= |superarmor= | |airshoes=y |shadowshoes= |floatshoes=y |statusguard= |superarmor= | ||
|info= | |info= | ||
|locations= | |locations='''Level 2:''' [[Pipe Comp (MMBN5)|Pipe Comp]] (20.8%), [[Undernet 2 (MMBN5)|Undernet 2]] (19.2%), [[Factory Comp 1 (MMBN5)|Factory Comp 1]] (13.9%), [[Undernet 3 (MMBN5)|Undernet 3]] (11.5%), [[SoulServer Comp]] (11.1%), [[Gargoyle Comp 4]] (8.3%), [[Gargoyle Comp 2]] (5.2%), [[Gargoyle Comp 1]] (2.1%)<br/>'''Liberation Mission:''' [[Nebula Area 1 (Liberation Mission)|Nebula Area 1]] | ||
|attacks= | |attacks= | ||
{{EnemyInfo/Attack |name_en=WideShot |name_jp=ワイドショット |name_tl=Wide Shot | |||
|attack=120 |emotion=20 |element=aqua | |||
}} | |||
{{EnemyInfo/Attack |name_en=BattleChip | |||
|info=Geddon1 ({{chance|2/16}}), AntiElec ({{chance|2/16}}) | |||
}} | |||
|getdata= | |getdata= | ||
{{EnemyInfo/GetData |hp=Any |chip=WideSht2 |code=E |lv1= 9: 6.25% |lv2= 10: 50% |lv3= S: 100% }} | |||
{{EnemyInfo/GetData |hp=Any |chip=WideSht2 |code=F |lv1= 7: 25% |lv2= 8: 50% |lv3= 9: 46.875% |lv4= 10: 25% }} | |||
{{EnemyInfo/GetData |hp=High |zenny=600 |lv1= 7: 25% |lv2= 8: 50% |lv3= 9: 46.875% |lv4= 10: 25% }} | |||
{{EnemyInfo/GetData |hp=High |zenny=550 |lv1= 5: 50% |lv2= 6: 100% |lv3= 7: 50% }} | |||
{{EnemyInfo/GetData |hp=High |zenny=50 |lv1= 4-5: 50% }} | |||
{{EnemyInfo/GetData |hp=High |zenny=30 |lv1= 1-3: 100% |lv2= 4: 50% }} | |||
{{EnemyInfo/GetData |hp=Low |recov=500 |lv1= 1-6: 100% |lv2= 7: 75% |lv3= 8: 50% |lv4= 9: 46.875% |lv5= 10: 25% }} | |||
}} | }} | ||
| Line 737: | Line 1,408: | ||
|airshoes=y |shadowshoes= |floatshoes=y |statusguard= |superarmor= | |airshoes=y |shadowshoes= |floatshoes=y |statusguard= |superarmor= | ||
|info= | |info= | ||
|locations= | |locations='''Level 3:''' [[End Area 5]] (20.8%), [[Gargoyle Comp 1]] (19.8%), [[Gargoyle Comp 2]] (18.7%), [[Gargoyle Comp 4]] (15.6%), [[Gargoyle Comp 3]] (11.5%)<br/>'''Liberation Mission:''' [[Nebula Area 3 (Liberation Mission)|Nebula Area 3]] | ||
|attacks= | |attacks= | ||
{{EnemyInfo/Attack |name_en=WideShot |name_jp=ワイドショット |name_tl=Wide Shot | |||
|attack=160 |emotion=20 |element=aqua | |||
}} | |||
{{EnemyInfo/Attack |name_en=BattleChip | |||
|info=Geddon1 ({{chance|2/16}}), MetaGel ({{chance|2/16}}) | |||
}} | |||
|getdata= | |getdata= | ||
{{EnemyInfo/GetData |hp=Any |chip=WideSht3 |code=T |lv1= 9: 6.25% |lv2= 10: 50% |lv3= S: 100% }} | |||
{{EnemyInfo/GetData |hp=Any |chip=WideSht3 |code=U |lv1= 7: 25% |lv2= 8: 50% |lv3= 9: 46.875% |lv4= 10: 25% }} | |||
{{EnemyInfo/GetData |hp=High |zenny=650 |lv1= 7: 25% |lv2= 8: 50% |lv3= 9: 46.875% |lv4= 10: 25% }} | |||
{{EnemyInfo/GetData |hp=High |zenny=600 |lv1= 5: 50% |lv2= 6: 100% |lv3= 7: 50% }} | |||
{{EnemyInfo/GetData |hp=High |zenny=50 |lv1= 4-5: 50% }} | |||
{{EnemyInfo/GetData |hp=High |zenny=30 |lv1= 1-3: 100% |lv2= 4: 50% }} | |||
{{EnemyInfo/GetData |hp=Low |recov=500 |lv1= 1-6: 100% |lv2= 7: 75% |lv3= 8: 50% |lv4= 9: 46.875% |lv5= 10: 25% }} | |||
}} | }} | ||
| Line 748: | Line 1,432: | ||
|airshoes=y |shadowshoes= |floatshoes=y |statusguard= |superarmor= | |airshoes=y |shadowshoes= |floatshoes=y |statusguard= |superarmor= | ||
|info= | |info= | ||
|locations= | |locations='''Level 3:''' [[Pipe Comp (MMBN5)|Pipe Comp]] (20.8%), [[Nebula Area 5]] (20.8%), [[Undernet 2 (MMBN5)|Undernet 2]] (19.2%), [[Factory Comp 1 (MMBN5)|Factory Comp 1]] (13.9%), [[Undernet 3 (MMBN5)|Undernet 3]] (11.5%), [[SoulServer Comp]] (11.1%), [[Gargoyle Comp 4]] (8.3%), [[Nebula Area 6]] (6.7%), [[Gargoyle Comp 2]] (5.2%), [[Gargoyle Comp 1]] (2.1%) | ||
|attacks= | |attacks= | ||
{{EnemyInfo/Attack |name_en=WideShot |name_jp=ワイドショット |name_tl=Wide Shot | |||
|attack=200 |emotion=20 |element=aqua | |||
}} | |||
{{EnemyInfo/Attack |name_en=BattleChip | |||
|info=Blinder ({{chance|1/16}}), Geddon1 ({{chance|1/16}}), AntiElec ({{chance|1/16}}), MetaGel ({{chance|1/16}}) | |||
}} | |||
|getdata= | |getdata= | ||
{{EnemyInfo/GetData |hp=Any |chip=WideSht3 |code=S |lv1= 9: 6.25% |lv2= 10: 50% |lv3= S: 100% }} | |||
{{EnemyInfo/GetData |hp=Any |chip=WideSht3 |code=T |lv1= 7: 25% |lv2= 8: 50% |lv3= 9: 46.875% |lv4= 10: 25% }} | |||
{{EnemyInfo/GetData |hp=High |zenny=750 |lv1= 7: 25% |lv2= 8: 50% |lv3= 9: 46.875% |lv4= 10: 25% }} | |||
{{EnemyInfo/GetData |hp=High |zenny=700 |lv1= 5: 50% |lv2= 6: 100% |lv3= 7: 50% }} | |||
{{EnemyInfo/GetData |hp=High |zenny=50 |lv1= 4-5: 50% }} | |||
{{EnemyInfo/GetData |hp=High |zenny=30 |lv1= 1-3: 100% |lv2= 4: 50% }} | |||
{{EnemyInfo/GetData |hp=Low |recov=max |lv1= 1-6: 100% |lv2= 7: 75% |lv3= 8: 50% |lv4= 9: 46.875% |lv5= 10: 25% }} | |||
}} | }} | ||
| Line 760: | Line 1,457: | ||
|airshoes= |shadowshoes= |floatshoes= |statusguard= |superarmor= | |airshoes= |shadowshoes= |floatshoes= |statusguard= |superarmor= | ||
|info= | |info= | ||
|locations= | |locations='''Level 1:''' [[Old Comp]] (21.4%), [[Ship Comp 4]] (20.8%), [[End Area 5]] (13.9%), [[Chip Maker Comp]] (8.3%)<br/>'''Liberation Mission:''' [[End Area 2 (Liberation Mission)|End Area 2]] | ||
|attacks= | |attacks= | ||
{{EnemyInfo/Attack |name_en=BoyBomb<ref name="BoyBomb">Listed as '''Boy's Bomb''' in Mega Man Battle Network 5 Official Strategy Guide</ref> |name_jp=ボーイズボム |name_tl=Boy's Bomb | |||
|attack=30 |emotion=30 |element=none | |||
|info=Bomb has 50 HP. | |||
}} | |||
|getdata= | |getdata= | ||
{{EnemyInfo/GetData |hp=Any |chip=BoyBomb1 |code=F |version=Team ProtoMan |lv1= 7: 25% |lv2= 8-S: 50% }} | |||
{{EnemyInfo/GetData |hp=Any |chip=BoyBomb1 |code=S |version=Team Colonel |lv1= 7: 25% |lv2= 8-S: 50% }} | |||
{{EnemyInfo/GetData |hp=Any |zenny=350 |lv1= 9: 3.125% |lv2= 10: 25% |lv3= S: 50% }} | |||
{{EnemyInfo/GetData |hp=Any |zenny=300 |lv1= 7: 25% |lv2= 8: 50% |lv3= 9: 46.875% |lv4= 10: 25% }} | |||
{{EnemyInfo/GetData |hp=Any |zenny=250 |lv1= 5: 50% |lv2= 6: 100% |lv3= 7: 50% }} | |||
{{EnemyInfo/GetData |hp=Any |zenny=50 |lv1= 4-5: 50% }} | |||
{{EnemyInfo/GetData |hp=Any |zenny=30 |lv1= 1-3: 100% |lv2= 4: 50% }} | |||
}} | }} | ||
| Line 771: | Line 1,479: | ||
|airshoes= |shadowshoes= |floatshoes= |statusguard= |superarmor= | |airshoes= |shadowshoes= |floatshoes= |statusguard= |superarmor= | ||
|info= | |info= | ||
|locations= | |locations='''Level 1:''' [[Chip Maker Comp]] (18.8%), [[Undernet 3 (MMBN5)|Undernet 3]] (15.4%), [[Factory Comp 3 (MMBN5)|Factory Comp 3]] (10.0%), [[Factory Comp 4 (MMBN5)|Factory Comp 4]] (10.0%) | ||
|attacks= | |attacks= | ||
{{EnemyInfo/Attack |name_en=BoyBomb<ref name="BoyBomb"/> |name_jp=ボーイズボム |name_tl=Boy's Bomb | |||
|attack=60 |emotion=30 |element=none | |||
|info=Bomb has 50 HP. | |||
}} | |||
|getdata= | |getdata= | ||
{{EnemyInfo/GetData |hp=Any |chip=BoyBomb1 |code=C |lv1= 7: 25% |lv2= 8-S: 50% }} | |||
{{EnemyInfo/GetData |hp=Any |zenny=450 |lv1= 9: 3.125% |lv2= 10: 25% |lv3= S: 50% }} | |||
{{EnemyInfo/GetData |hp=Any |zenny=400 |lv1= 7: 25% |lv2= 8: 50% |lv3= 9: 46.875% |lv4= 10: 25% }} | |||
{{EnemyInfo/GetData |hp=Any |zenny=350 |lv1= 5: 50% |lv2= 6: 100% |lv3= 7: 50% }} | |||
{{EnemyInfo/GetData |hp=Any |zenny=50 |lv1= 4-5: 50% }} | |||
{{EnemyInfo/GetData |hp=Any |zenny=30 |lv1= 1-3: 100% |lv2= 4: 50% }} | |||
}} | }} | ||
| Line 782: | Line 1,500: | ||
|airshoes= |shadowshoes= |floatshoes= |statusguard= |superarmor= | |airshoes= |shadowshoes= |floatshoes= |statusguard= |superarmor= | ||
|info= | |info= | ||
|locations= | |locations='''Level 2:''' [[Old Comp]] (21.4%), [[Ship Comp 4]] (20.8%), [[End Area 5]] (13.9%), [[Chip Maker Comp]] (8.3%) | ||
|attacks= | |attacks= | ||
{{EnemyInfo/Attack |name_en=BoyBomb<ref name="BoyBomb"/> |name_jp=ボーイズボム |name_tl=Boy's Bomb | |||
|attack=90 |emotion=30 |element=none | |||
|info=Bomb has 50 HP. | |||
}} | |||
|getdata= | |getdata= | ||
{{EnemyInfo/GetData |hp=Any |chip=BoyBomb2 |code=P |version=Team ProtoMan |lv1= 7: 25% |lv2= 8-S: 50% }} | |||
{{EnemyInfo/GetData |hp=Any |chip=BoyBomb2 |code=W |version=Team Colonel |lv1= 7: 25% |lv2= 8-S: 50% }} | |||
{{EnemyInfo/GetData |hp=Any |zenny=550 |lv1= 9: 3.125% |lv2= 10: 25% |lv3= S: 50% }} | |||
{{EnemyInfo/GetData |hp=Any |zenny=500 |lv1= 7: 25% |lv2= 8: 50% |lv3= 9: 46.875% |lv4= 10: 25% }} | |||
{{EnemyInfo/GetData |hp=Any |zenny=450 |lv1= 5: 50% |lv2= 6: 100% |lv3= 7: 50% }} | |||
{{EnemyInfo/GetData |hp=Any |zenny=50 |lv1= 4-5: 50% }} | |||
{{EnemyInfo/GetData |hp=Any |zenny=30 |lv1= 1-3: 100% |lv2= 4: 50% }} | |||
}} | }} | ||
| Line 793: | Line 1,522: | ||
|airshoes= |shadowshoes= |floatshoes= |statusguard= |superarmor= | |airshoes= |shadowshoes= |floatshoes= |statusguard= |superarmor= | ||
|info= | |info= | ||
|locations= | |locations='''Level 2:''' [[Chip Maker Comp]] (18.8%), [[Undernet 3 (MMBN5)|Undernet 3]] (15.4%), [[Factory Comp 3 (MMBN5)|Factory Comp 3]] (10.0%), [[Factory Comp 4 (MMBN5)|Factory Comp 4]] (10.0%) | ||
|attacks= | |attacks= | ||
{{EnemyInfo/Attack |name_en=BoyBomb<ref name="BoyBomb"/> |name_jp=ボーイズボム |name_tl=Boy's Bomb | |||
|attack=120 |emotion=30 |element=none | |||
|info=Bomb has 50 HP. | |||
}} | |||
|getdata= | |getdata= | ||
{{EnemyInfo/GetData |hp=Any |chip=BoyBomb2 |code=H |lv1= 7: 25% |lv2= 8-S: 50% }} | |||
{{EnemyInfo/GetData |hp=Any |zenny=650 |lv1= 9: 3.125% |lv2= 10: 25% |lv3= S: 50% }} | |||
{{EnemyInfo/GetData |hp=Any |zenny=600 |lv1= 7: 25% |lv2= 8: 50% |lv3= 9: 46.875% |lv4= 10: 25% }} | |||
{{EnemyInfo/GetData |hp=Any |zenny=550 |lv1= 5: 50% |lv2= 6: 100% |lv3= 7: 50% }} | |||
{{EnemyInfo/GetData |hp=Any |zenny=50 |lv1= 4-5: 50% }} | |||
{{EnemyInfo/GetData |hp=Any |zenny=30 |lv1= 1-3: 100% |lv2= 4: 50% }} | |||
}} | }} | ||
| Line 804: | Line 1,543: | ||
|airshoes= |shadowshoes= |floatshoes= |statusguard= |superarmor= | |airshoes= |shadowshoes= |floatshoes= |statusguard= |superarmor= | ||
|info= | |info= | ||
|locations= | |locations='''Level 3:''' [[Old Comp]] (21.4%), [[Ship Comp 4]] (20.8%), [[End Area 5]] (13.9%), [[Chip Maker Comp]] (8.3%) | ||
|attacks= | |attacks= | ||
{{EnemyInfo/Attack |name_en=BoyBomb<ref name="BoyBomb"/> |name_jp=ボーイズボム |name_tl=Boy's Bomb | |||
|attack=160 |emotion=30 |element=none | |||
|info=Bomb has 50 HP. | |||
}} | |||
|getdata= | |getdata= | ||
{{EnemyInfo/GetData |hp=Any |chip=BoyBomb3 |code=Q |version=Team ProtoMan |lv1= 7: 25% |lv2= 8-S: 50% }} | |||
{{EnemyInfo/GetData |hp=Any |chip=BoyBomb3 |code=Y |version=Team Colonel |lv1= 7: 25% |lv2= 8-S: 50% }} | |||
{{EnemyInfo/GetData |hp=Any |zenny=700 |lv1= 9: 3.125% |lv2= 10: 25% |lv3= S: 50% }} | |||
{{EnemyInfo/GetData |hp=Any |zenny=650 |lv1= 7: 25% |lv2= 8: 50% |lv3= 9: 46.875% |lv4= 10: 25% }} | |||
{{EnemyInfo/GetData |hp=Any |zenny=600 |lv1= 5: 50% |lv2= 6: 100% |lv3= 7: 50% }} | |||
{{EnemyInfo/GetData |hp=Any |zenny=50 |lv1= 4-5: 50% }} | |||
{{EnemyInfo/GetData |hp=Any |zenny=30 |lv1= 1-3: 100% |lv2= 4: 50% }} | |||
}} | }} | ||
| Line 815: | Line 1,565: | ||
|airshoes= |shadowshoes= |floatshoes= |statusguard= |superarmor= | |airshoes= |shadowshoes= |floatshoes= |statusguard= |superarmor= | ||
|info= | |info= | ||
|locations= | |locations='''Level 3:''' [[Chip Maker Comp]] (18.8%), [[Undernet 3 (MMBN5)|Undernet 3]] (15.4%), [[Factory Comp 3 (MMBN5)|Factory Comp 3]] (10.0%), [[Factory Comp 4 (MMBN5)|Factory Comp 4]] (10.0%)<br/>'''Liberation Mission:''' [[Nebula Area 5 (Liberation Mission)|Nebula Area 5]] | ||
|attacks= | |attacks= | ||
{{EnemyInfo/Attack |name_en=BoyBomb<ref name="BoyBomb"/> |name_jp=ボーイズボム |name_tl=Boy's Bomb | |||
|attack=200 |emotion=30 |element=none | |||
|info=Bomb has 50 HP. | |||
}} | |||
|getdata= | |getdata= | ||
{{EnemyInfo/GetData |hp=Any |chip=BoyBomb3 |code=B |lv1= 7: 25% |lv2= 8-S: 50% }} | |||
{{EnemyInfo/GetData |hp=Any |zenny=750 |lv1= 9: 3.125% |lv2= 10: 25% |lv3= S: 50% }} | |||
{{EnemyInfo/GetData |hp=Any |zenny=700 |lv1= 7: 25% |lv2= 8: 50% |lv3= 9: 46.875% |lv4= 10: 25% }} | |||
{{EnemyInfo/GetData |hp=Any |zenny=650 |lv1= 5: 50% |lv2= 6: 100% |lv3= 7: 50% }} | |||
{{EnemyInfo/GetData |hp=Any |zenny=50 |lv1= 4-5: 50% }} | |||
{{EnemyInfo/GetData |hp=Any |zenny=30 |lv1= 1-3: 100% |lv2= 4: 50% }} | |||
}} | }} | ||
| Line 827: | Line 1,587: | ||
|airshoes= |shadowshoes= |floatshoes= |statusguard= |superarmor= | |airshoes= |shadowshoes= |floatshoes= |statusguard= |superarmor= | ||
|info= | |info= | ||
|locations= | |locations='''Level 1:''' [[Gargoyle Comp 1]] (24.0%), [[Gargoyle Comp 2]] (16.7%), [[Gargoyle Comp 3]] (12.5%), [[Gargoyle Comp 4]] (11.5%)<br/>'''Liberation Mission:''' [[End Area 5 (Liberation Mission)|End Area 5]] | ||
|attacks= | |attacks= | ||
{{EnemyInfo/Attack |name_en=Swordplay<ref name="Swordplay">Mega Man Battle Network 5 Official Strategy Guide</ref> |name_jp=居合抜き |name_tl=Iainuki | |||
|attack=30 |emotion=10 |times=2 |element=none |noflash=y |sword=y | |||
}} | |||
{{EnemyInfo/Attack |name_en=BattleChip | |||
|info=AreaGrab ({{chance|16/16}}) | |||
}} | |||
|getdata= | |getdata= | ||
{{EnemyInfo/GetData |hp=Any |chip=Katana1 |code=H |lv1= 9: 6.25% |lv2= 10: 50% |lv3= S: 100% }} | |||
{{EnemyInfo/GetData |hp=Any |chip=Katana1 |code=S |lv1= 5: 25% |lv2= 6-8: 50% |lv3= 9: 46.875% |lv4= 10: 25% }} | |||
{{EnemyInfo/GetData |hp=Any |zenny=300 |lv1= 7: 25% |lv2= 8: 50% |lv3= 9: 46.875% |lv4= 10: 25% }} | |||
{{EnemyInfo/GetData |hp=Any |zenny=250 |lv1= 5: 25% |lv2= 6: 50% |lv3= 7: 25% }} | |||
{{EnemyInfo/GetData |hp=Any |zenny=50 |lv1= 4-5: 50% }} | |||
{{EnemyInfo/GetData |hp=Any |zenny=30 |lv1= 1-3: 100% |lv2= 4: 50% }} | |||
}} | }} | ||
| Line 838: | Line 1,610: | ||
|airshoes= |shadowshoes= |floatshoes= |statusguard= |superarmor= | |airshoes= |shadowshoes= |floatshoes= |statusguard= |superarmor= | ||
|info= | |info= | ||
|locations= | |locations='''Level 1:''' [[Undernet 3 (MMBN5)|Undernet 3]] (14.1%), [[Factory Comp 2 (MMBN5)|Factory Comp 2]] (9.7%), [[Gargoyle Comp 3]] (7.3%), [[Gargoyle Comp 1]] (3.1%) | ||
|attacks= | |attacks= | ||
{{EnemyInfo/Attack |name_en=Swordplay<ref name="Swordplay"/> |name_jp=居合抜き |name_tl=Iainuki | |||
|attack=60 |emotion=10 |times=2 |element=none |noflash=y |sword=y | |||
}} | |||
{{EnemyInfo/Attack |name_en=BattleChip | |||
|info=AreaGrab ({{chance|16/16}}) | |||
}} | |||
|getdata= | |getdata= | ||
{{EnemyInfo/GetData |hp=Any |chip=Katana1 |code=D |lv1= 9: 6.25% |lv2= 10: 50% |lv3= S: 100% }} | |||
{{EnemyInfo/GetData |hp=Any |chip=Katana1 |code=H |lv1= 7: 25% |lv2= 8: 50% |lv3= 9: 46.875% |lv4= 10: 25% }} | |||
{{EnemyInfo/GetData |hp=Any |zenny=350 |lv1= 7: 25% |lv2= 8: 50% |lv3= 9: 46.875% |lv4= 10: 25% }} | |||
{{EnemyInfo/GetData |hp=Any |zenny=300 |lv1= 5: 50% |lv2= 6: 100% |lv3= 7: 50% }} | |||
{{EnemyInfo/GetData |hp=Any |zenny=50 |lv1= 4-5: 50% }} | |||
{{EnemyInfo/GetData |hp=Any |zenny=30 |lv1= 1-3: 100% |lv2= 4: 50% }} | |||
}} | }} | ||
| Line 849: | Line 1,633: | ||
|airshoes= |shadowshoes= |floatshoes= |statusguard= |superarmor= | |airshoes= |shadowshoes= |floatshoes= |statusguard= |superarmor= | ||
|info= | |info= | ||
|locations= | |locations='''Level 2:''' [[Gargoyle Comp 1]] (24.0%), [[Gargoyle Comp 2]] (16.7%), [[Gargoyle Comp 3]] (12.5%), [[Gargoyle Comp 4]] (11.5%) | ||
|attacks= | |attacks= | ||
{{EnemyInfo/Attack |name_en=Swordplay<ref name="Swordplay"/> |name_jp=居合抜き |name_tl=Iainuki | |||
|attack=90 |emotion=10 |times=2 |element=none |noflash=y |sword=y | |||
}} | |||
{{EnemyInfo/Attack |name_en=BattleChip | |||
|info=AreaGrab ({{chance|16/16}}) | |||
}} | |||
|getdata= | |getdata= | ||
{{EnemyInfo/GetData |hp=Any |chip=Katana2 |code=R |version=Team ProtoMan |lv1= 9: 6.25% |lv2= 10: 50% |lv3= S: 100% }} | |||
{{EnemyInfo/GetData |hp=Any |chip=Katana2 |code=W |version=Team Colonel |lv1= 9: 6.25% |lv2= 10: 50% |lv3= S: 100% }} | |||
{{EnemyInfo/GetData |hp=Any |zenny=450 |lv1= 7: 50% |lv2= 8: 100% |lv3= 9: 93.75% |lv4= 10: 50% }} | |||
{{EnemyInfo/GetData |hp=Any |zenny=400 |lv1= 5: 50% |lv2= 6: 100% |lv3= 7: 50% }} | |||
{{EnemyInfo/GetData |hp=Any |zenny=50 |lv1= 4-5: 50% }} | |||
{{EnemyInfo/GetData |hp=Any |zenny=30 |lv1= 1-3: 100% |lv2= 4: 50% }} | |||
}} | }} | ||
| Line 860: | Line 1,656: | ||
|airshoes= |shadowshoes= |floatshoes= |statusguard= |superarmor= | |airshoes= |shadowshoes= |floatshoes= |statusguard= |superarmor= | ||
|info= | |info= | ||
|locations= | |locations='''Level 2:''' [[Undernet 3 (MMBN5)|Undernet 3]] (14.1%), [[Factory Comp 2 (MMBN5)|Factory Comp 2]] (9.7%), [[Gargoyle Comp 3]] (7.3%), [[Gargoyle Comp 1]] (3.1%) | ||
|attacks= | |attacks= | ||
{{EnemyInfo/Attack |name_en=Swordplay<ref name="Swordplay"/> |name_jp=居合抜き |name_tl=Iainuki | |||
|attack=120 |emotion=10 |times=2 |element=none |noflash=y |sword=y | |||
}} | |||
{{EnemyInfo/Attack |name_en=BattleChip | |||
|info=AreaGrab ({{chance|16/16}}) | |||
}} | |||
|getdata= | |getdata= | ||
{{EnemyInfo/GetData |hp=Any |chip=Katana2 |code=B |lv1= 9: 6.25% |lv2= 10: 50% |lv3= S: 100% }} | |||
{{EnemyInfo/GetData |hp=Any |zenny=550 |lv1= 7: 50% |lv2= 8: 100% |lv3= 9: 93.75% |lv4= 10: 50% }} | |||
{{EnemyInfo/GetData |hp=Any |zenny=500 |lv1= 5: 50% |lv2= 6: 100% |lv3= 7: 50% }} | |||
{{EnemyInfo/GetData |hp=Any |zenny=50 |lv1= 4-5: 50% }} | |||
{{EnemyInfo/GetData |hp=Any |zenny=30 |lv1= 1-3: 100% |lv2= 4: 50% }} | |||
}} | }} | ||
| Line 871: | Line 1,678: | ||
|airshoes= |shadowshoes= |floatshoes= |statusguard= |superarmor= | |airshoes= |shadowshoes= |floatshoes= |statusguard= |superarmor= | ||
|info= | |info= | ||
|locations= | |locations='''Level 3:''' [[Gargoyle Comp 1]] (24.0%), [[Gargoyle Comp 2]] (16.7%), [[Gargoyle Comp 3]] (12.5%), [[Gargoyle Comp 4]] (11.5%) | ||
|attacks= | |attacks= | ||
{{EnemyInfo/Attack |name_en=Swordplay<ref name="Swordplay"/> |name_jp=居合抜き |name_tl=Iainuki | |||
|attack=160 |emotion=10 |times=2 |element=none |noflash=y |sword=y | |||
}} | |||
{{EnemyInfo/Attack |name_en=BattleChip | |||
|info=AreaGrab ({{chance|16/16}}) | |||
}} | |||
|getdata= | |getdata= | ||
{{EnemyInfo/GetData |hp=Any |chip=Katana3 |code=J |version=Team ProtoMan |lv1= 9: 6.25% |lv2= 10: 50% |lv3= S: 100% }} | |||
{{EnemyInfo/GetData |hp=Any |chip=Katana3 |code=Z |version=Team Colonel |lv1= 9: 6.25% |lv2= 10: 50% |lv3= S: 100% }} | |||
{{EnemyInfo/GetData |hp=Any |zenny=650 |lv1= 7: 50% |lv2= 8: 100% |lv3= 9: 93.75% |lv4= 10: 50% }} | |||
{{EnemyInfo/GetData |hp=Any |zenny=600 |lv1= 5: 50% |lv2= 6: 100% |lv3= 7: 50% }} | |||
{{EnemyInfo/GetData |hp=Any |zenny=50 |lv1= 4-5: 50% }} | |||
{{EnemyInfo/GetData |hp=Any |zenny=30 |lv1= 1-3: 100% |lv2= 4: 50% }} | |||
}} | }} | ||
| Line 882: | Line 1,701: | ||
|airshoes= |shadowshoes= |floatshoes= |statusguard= |superarmor= | |airshoes= |shadowshoes= |floatshoes= |statusguard= |superarmor= | ||
|info= | |info= | ||
|locations= | |locations='''Level 3:''' [[Undernet 3 (MMBN5)|Undernet 3]] (14.1%), [[Factory Comp 2 (MMBN5)|Factory Comp 2]] (9.7%), [[Gargoyle Comp 3]] (7.3%), [[Gargoyle Comp 1]] (3.1%)<br/>'''Liberation Mission:''' [[Nebula Area 5 (Liberation Mission)|Nebula Area 5]] | ||
|attacks= | |attacks= | ||
{{EnemyInfo/Attack |name_en=Swordplay<ref name="Swordplay"/> |name_jp=居合抜き |name_tl=Iainuki | |||
|attack=200 |emotion=10 |times=2 |element=none |noflash=y |sword=y | |||
}} | |||
{{EnemyInfo/Attack |name_en=BattleChip | |||
|info=AreaGrab ({{chance|16/16}}) | |||
}} | |||
|getdata= | |getdata= | ||
{{EnemyInfo/GetData |hp=Any |chip=Katana3 |code=A |lv1= 9: 6.25% |lv2= 10: 50% |lv3= S: 100% }} | |||
{{EnemyInfo/GetData |hp=Any |zenny=750 |lv1= 7: 50% |lv2= 8: 100% |lv3= 9: 93.75% |lv4= 10: 50% }} | |||
{{EnemyInfo/GetData |hp=Any |zenny=700 |lv1= 5: 50% |lv2= 6: 100% |lv3= 7: 50% }} | |||
{{EnemyInfo/GetData |hp=Any |zenny=50 |lv1= 4-5: 50% }} | |||
{{EnemyInfo/GetData |hp=Any |zenny=30 |lv1= 1-3: 100% |lv2= 4: 50% }} | |||
}} | }} | ||
=== | ===CanGuard=== | ||
{{EnemyInfo | {{EnemyInfo | ||
|image={{BattleField |style=bn5 |nocol1=true |nocol2=true |nocol3=true |object52=canguard }} | |image={{BattleField |style=bn5 |nocol1=true |nocol2=true |nocol3=true |object52=canguard }} | ||
|name_en= | |name_en=CanGuard<ref name="CanGuard">Mega Man Battle Network Official Complete Works</ref> |name_jp=キャノガード |name_tl=Kyanogādo | ||
|hp=60 |contact=10 |emotion=10 |element=none | |hp=60 |contact=10 |emotion=10 |element=none | ||
|airshoes= |shadowshoes= |floatshoes= |statusguard= |superarmor= | |airshoes= |shadowshoes= |floatshoes= |statusguard= |superarmor= | ||
|info= | |info= | ||
|locations= | |locations='''Level 1:''' [[Dex's HP (MMBN5)|Dex's HP]] (53.3%), [[Terminal Comp]] (50.0%), [[Mayl's HP (MMBN5)|Mayl's HP]] (43.3%), [[Kitchen Comp]] (41.7%), [[Electric Lock Comp]] (33.3%), [[Sculpture Comp]] (33.3%), [[ACDC Area 1 (MMBN5)|ACDC Area 1]] (33.3%), [[ACDC Area 2 (MMBN5)|ACDC Area 2]] (31.9%), [[Dad's Comp]] (27.8%), [[Doghouse Comp (MMBN5)|Doghouse Comp]] (25.0%), [[ACDC Area 3 (MMBN5)|ACDC Area 3]] (24.4%), [[Crane Comp (MMBN5)|Crane Comp]] (23.8%), [[Elevator Comp (MMBN5)|Elevator Comp]] (23.8%), [[Main Comp 1]] (22.2%), [[Air Filter Comp]] (16.7%), [[Drill Comp 1]] (15.7%), [[Drill Comp 2]] (10.2%), [[Main Comp 2]] (5.6%), [[SciLab Area 2]] (5.6%)<br/>'''Liberation Mission:''' [[ACDC Area 3 (Liberation Mission)|ACDC Area]], [[Oran Area 3 (Liberation Mission)|Oran Area 3]] | ||
|attacks= | |attacks= | ||
{{EnemyInfo/Attack |name_en=Cannon |name_jp=キャノン |name_tl=Cannon | |||
|attack=10 |emotion=10 |element=none | |||
}} | |||
|getdata= | |getdata= | ||
{{EnemyInfo/GetData |hp=Any |chip=MrkCan1 |code=K |version=Team ProtoMan |lv1= 5: 25% |lv2= 6: 50% |lv3= 7: 75% |lv4= 8-S: 100% }} | |||
{{EnemyInfo/GetData |hp=Any |chip=MrkCan1 |code=S |version=Team Colonel |lv1= 5: 25% |lv2= 6: 50% |lv3= 7: 75% |lv4= 8-S: 100% }} | |||
{{EnemyInfo/GetData |hp=Any |zenny=100 |lv1= 5: 25% |lv2= 6: 50% |lv3= 7: 25% }} | |||
{{EnemyInfo/GetData |hp=Any |zenny=50 |lv1= 4-5: 50% }} | |||
{{EnemyInfo/GetData |hp=Any |zenny=30 |lv1= 1-3: 100% |lv2= 4: 50% }} | |||
}} | }} | ||
{{EnemyInfo | {{EnemyInfo | ||
|image={{BattleField |style=bn5 |nocol1=true |nocol2=true |nocol3=true |object52=canguardex }} | |image={{BattleField |style=bn5 |nocol1=true |nocol2=true |nocol3=true |object52=canguardex }} | ||
|name_en= | |name_en=CanGuardEX<ref name="CanGuard"/> |name_jp=キャノガードEX |name_tl=Kyanogādo EX | ||
|hp=120 |contact=30 |emotion=10 |element=none | |hp=120 |contact=30 |emotion=10 |element=none | ||
|airshoes= |shadowshoes= |floatshoes= |statusguard= |superarmor= | |airshoes= |shadowshoes= |floatshoes= |statusguard= |superarmor= | ||
|info= | |info= | ||
|locations= | |locations='''Level 1:''' [[SciLab HP]] (53.3%), [[Server Comp]] (41.7%), [[Air Conditioner Comp (MMBN5)|Air Conditioner Comp]] (33.3%), [[Engine Comp]] (33.3%), [[Old Terminal Comp]] (33.3%), [[Radar Comp]] (33.3%), [[Screw Comp]] (33.3%), [[SciLab Area 1]] (27.8%), [[Old Comp]] (21.4%), [[SciLab Area 2]] (19.4%), [[SciLab Area 4]] (19.2%), [[Ship Comp 1]] (18.1%), [[Ship Comp 2]] (18.1%), [[End Area 4]] (16.7%), [[SciLab Area 3]] (16.7%), [[Experiment Server Comp]] (14.6%), [[Ship Comp 3]] (12.5%), [[Furnace Comp]] (8.3%), [[Ship Comp 4]] (8.3%), [[Drill Comp 1]] (6.5%), [[Drill Comp 2]] (5.6%), [[Undernet 2 (MMBN5)|Undernet 2]] (5.1%)<br/>'''Liberation Mission:''' [[SciLab Area 3 (Liberation Mission)|SciLab Area 3]], [[End Area 2 (Liberation Mission)|End Area 2]], [[Undernet 4 (Liberation Mission)|Undernet 4]] | ||
|attacks= | |attacks= | ||
{{EnemyInfo/Attack |name_en=Cannon |name_jp=キャノン |name_tl=Cannon | |||
|attack=40 |emotion=10 |element=none | |||
}} | |||
|getdata= | |getdata= | ||
{{EnemyInfo/GetData |hp=Any |chip=MrkCan1 |code=K |version=Team ProtoMan |lv1= 7: 25% |lv2= 8: 50% |lv3= 9: 46.875% |lv4= 10: 25% }} | |||
{{EnemyInfo/GetData |hp=Any |chip=MrkCan1 |code=M |lv1= 9: 6.25% |lv2= 10: 50% |lv3= S: 100% }} | |||
{{EnemyInfo/GetData |hp=Any |chip=MrkCan1 |code=S |version=Team Colonel |lv1= 7: 25% |lv2= 8: 50% |lv3= 9: 46.875% |lv4= 10: 25% }} | |||
{{EnemyInfo/GetData |hp=Any |zenny=200 |lv1= 7: 25% |lv2= 8: 50% |lv3= 9: 46.875% |lv4= 10: 25% }} | |||
{{EnemyInfo/GetData |hp=Any |zenny=150 |lv1= 5: 50% |lv2= 6: 100% |lv3= 7: 50% }} | |||
{{EnemyInfo/GetData |hp=Any |zenny=50 |lv1= 4-5: 50% }} | |||
{{EnemyInfo/GetData |hp=Any |zenny=30 |lv1= 1-3: 100% |lv2= 4: 50% }} | |||
}} | }} | ||
| Line 916: | Line 1,764: | ||
|airshoes= |shadowshoes= |floatshoes= |statusguard= |superarmor= | |airshoes= |shadowshoes= |floatshoes= |statusguard= |superarmor= | ||
|info= | |info= | ||
|locations= | |locations='''Level 2:''' [[Dex's HP (MMBN5)|Dex's HP]] (53.3%), [[Terminal Comp]] (50.0%), [[Mayl's HP (MMBN5)|Mayl's HP]] (43.3%), [[Kitchen Comp]] (41.7%), [[Electric Lock Comp]] (33.3%), [[Sculpture Comp]] (33.3%), [[ACDC Area 1 (MMBN5)|ACDC Area 1]] (33.3%), [[ACDC Area 2 (MMBN5)|ACDC Area 2]] (31.9%), [[Dad's Comp]] (27.8%), [[Doghouse Comp (MMBN5)|Doghouse Comp]] (25.0%), [[ACDC Area 3 (MMBN5)|ACDC Area 3]] (24.4%), [[Crane Comp (MMBN5)|Crane Comp]] (23.8%), [[Elevator Comp (MMBN5)|Elevator Comp]] (23.8%), [[Main Comp 1]] (22.2%), [[Air Filter Comp]] (16.7%), [[Drill Comp 1]] (15.7%), [[Drill Comp 2]] (10.2%), [[Main Comp 2]] (5.6%), [[SciLab Area 2]] (5.6%) | ||
|attacks= | |attacks= | ||
{{EnemyInfo/Attack |name_en=Cannon |name_jp=キャノン |name_tl=Cannon | |||
|attack=70 |emotion=10 |element=none | |||
}} | |||
|getdata= | |getdata= | ||
{{EnemyInfo/GetData |hp=Any |chip=MrkCan2 |code=F |lv1= 7: 25% |lv2= 8: 50% |lv3= 9: 46.875% |lv4= 10: 25% }} | |||
{{EnemyInfo/GetData |hp=Any |chip=MrkCan2 |code=Z |lv1= 9: 6.25% |lv2= 10: 50% |lv3= S: 100% }} | |||
{{EnemyInfo/GetData |hp=Any |zenny=300 |lv1= 7: 25% |lv2= 8: 50% |lv3= 9: 46.875% |lv4= 10: 25% }} | |||
{{EnemyInfo/GetData |hp=Any |zenny=250 |lv1= 5: 50% |lv2= 6: 100% |lv3= 7: 50% }} | |||
{{EnemyInfo/GetData |hp=Any |zenny=50 |lv1= 4-5: 50% }} | |||
{{EnemyInfo/GetData |hp=Any |zenny=30 |lv1= 1-3: 100% |lv2= 4: 50% }} | |||
}} | }} | ||
| Line 927: | Line 1,784: | ||
|airshoes= |shadowshoes= |floatshoes= |statusguard= |superarmor= | |airshoes= |shadowshoes= |floatshoes= |statusguard= |superarmor= | ||
|info= | |info= | ||
|locations= | |locations='''Level 2:''' [[SciLab HP]] (53.3%), [[Server Comp]] (41.7%), [[Air Conditioner Comp (MMBN5)|Air Conditioner Comp]] (33.3%), [[Engine Comp]] (33.3%), [[Old Terminal Comp]] (33.3%), [[Radar Comp]] (33.3%), [[Screw Comp]] (33.3%), [[SciLab Area 1]] (27.8%), [[Old Comp]] (21.4%), [[SciLab Area 2]] (19.4%), [[SciLab Area 4]] (19.2%), [[Ship Comp 1]] (18.1%), [[Ship Comp 2]] (18.1%), [[End Area 4]] (16.7%), [[SciLab Area 3]] (16.7%), [[Experiment Server Comp]] (14.6%), [[Ship Comp 3]] (12.5%), [[Nebula Area 2]] (9.7%), [[Furnace Comp]] (8.3%), [[Ship Comp 4]] (8.3%), [[Drill Comp 1]] (6.5%), [[Drill Comp 2]] (5.6%), [[Undernet 2 (MMBN5)|Undernet 2]] (5.1%)<br/>'''Liberation Mission:''' [[Nebula Area 3 (Liberation Mission)|Nebula Area 3]] | ||
|attacks= | |attacks= | ||
{{EnemyInfo/Attack |name_en=Cannon |name_jp=キャノン |name_tl=Cannon | |||
|attack=100 |emotion=10 |element=none | |||
}} | |||
|getdata= | |getdata= | ||
{{EnemyInfo/GetData |hp=Any |chip=MrkCan2 |code=D |lv1= 9: 6.25% |lv2= 10: 50% |lv3= S: 100% }} | |||
{{EnemyInfo/GetData |hp=Any |chip=MrkCan2 |code=Z |lv1= 7: 25% |lv2= 8: 50% |lv3= 9: 46.875% |lv4= 10: 25% }} | |||
{{EnemyInfo/GetData |hp=Any |zenny=400 |lv1= 7: 25% |lv2= 8: 50% |lv3= 9: 46.875% |lv4= 10: 25% }} | |||
{{EnemyInfo/GetData |hp=Any |zenny=350 |lv1= 5: 50% |lv2= 6: 100% |lv3= 7: 50% }} | |||
{{EnemyInfo/GetData |hp=Any |zenny=50 |lv1= 4-5: 50% }} | |||
{{EnemyInfo/GetData |hp=Any |zenny=30 |lv1= 1-3: 100% |lv2= 4: 50% }} | |||
}} | }} | ||
| Line 938: | Line 1,804: | ||
|airshoes= |shadowshoes= |floatshoes= |statusguard= |superarmor= | |airshoes= |shadowshoes= |floatshoes= |statusguard= |superarmor= | ||
|info= | |info= | ||
|locations= | |locations='''Level 3:''' [[Dex's HP (MMBN5)|Dex's HP]] (53.3%), [[Terminal Comp]] (50.0%), [[Mayl's HP (MMBN5)|Mayl's HP]] (43.3%), [[Kitchen Comp]] (41.7%), [[Electric Lock Comp]] (33.3%), [[Sculpture Comp]] (33.3%), [[ACDC Area 1 (MMBN5)|ACDC Area 1]] (33.3%), [[ACDC Area 2 (MMBN5)|ACDC Area 2]] (31.9%), [[Dad's Comp]] (27.8%), [[Doghouse Comp (MMBN5)|Doghouse Comp]] (25.0%), [[ACDC Area 3 (MMBN5)|ACDC Area 3]] (24.4%), [[Crane Comp (MMBN5)|Crane Comp]] (23.8%), [[Elevator Comp (MMBN5)|Elevator Comp]] (23.8%), [[Main Comp 1]] (22.2%), [[Air Filter Comp]] (16.7%), [[Drill Comp 1]] (15.7%), [[Drill Comp 2]] (10.2%), [[Main Comp 2]] (5.6%), [[SciLab Area 2]] (5.6%) | ||
|attacks= | |attacks= | ||
{{EnemyInfo/Attack |name_en=Cannon |name_jp=キャノン |name_tl=Cannon | |||
|attack=150 |emotion=10 |element=none | |||
}} | |||
|getdata= | |getdata= | ||
{{EnemyInfo/GetData |hp=Any |chip=MrkCan3 |code=R |version=Team ProtoMan |lv1= 7: 25% |lv2= 8: 50% |lv3= 9: 53.125% |lv4= 10: 75% |lv5= S: 100% }} | |||
{{EnemyInfo/GetData |hp=Any |chip=MrkCan3 |code=Y |version=Team Colonel |lv1= 7: 25% |lv2= 8: 50% |lv3= 9: 53.125% |lv4= 10: 75% |lv5= S: 100% }} | |||
{{EnemyInfo/GetData |hp=Any |zenny=500 |lv1= 7: 25% |lv2= 8: 50% |lv3= 9: 46.875% |lv4= 10: 25% }} | |||
{{EnemyInfo/GetData |hp=Any |zenny=450 |lv1= 5: 50% |lv2= 6: 100% |lv3= 7: 50% }} | |||
{{EnemyInfo/GetData |hp=Any |zenny=50 |lv1= 4-5: 50% }} | |||
{{EnemyInfo/GetData |hp=Any |zenny=30 |lv1= 1-3: 100% |lv2= 4: 50% }} | |||
}} | }} | ||
| Line 949: | Line 1,824: | ||
|airshoes= |shadowshoes= |floatshoes= |statusguard= |superarmor= | |airshoes= |shadowshoes= |floatshoes= |statusguard= |superarmor= | ||
|info= | |info= | ||
|locations= | |locations='''Level 3:''' [[SciLab HP]] (53.3%), [[Server Comp]] (41.7%), [[Air Conditioner Comp (MMBN5)|Air Conditioner Comp]] (33.3%), [[Engine Comp]] (33.3%), [[Old Terminal Comp]] (33.3%), [[Radar Comp]] (33.3%), [[Screw Comp]] (33.3%), [[SciLab Area 1]] (27.8%), [[Old Comp]] (21.4%), [[SciLab Area 2]] (19.4%), [[SciLab Area 4]] (19.2%), [[Ship Comp 1]] (18.1%), [[Ship Comp 2]] (18.1%), [[End Area 4]] (16.7%), [[SciLab Area 3]] (16.7%), [[Experiment Server Comp]] (14.6%), [[Ship Comp 3]] (12.5%), [[Nebula Area 6]] (11.1%), [[Nebula Area 2]] (9.7%), [[Furnace Comp]] (8.3%), [[Ship Comp 4]] (8.3%), [[Drill Comp 1]] (6.5%), [[Drill Comp 2]] (5.6%), [[Undernet 2 (MMBN5)|Undernet 2]] (5.1%) | ||
|attacks= | |attacks= | ||
{{EnemyInfo/Attack |name_en=Cannon |name_jp=キャノン |name_tl=Cannon | |||
|attack=200 |emotion=10 |element=none | |||
}} | |||
|getdata= | |getdata= | ||
{{EnemyInfo/GetData |hp=Any |chip=MrkCan3 |code=E |lv1= 9: 6.25% |lv2= 10: 50% |lv3= S: 100% }} | |||
{{EnemyInfo/GetData |hp=Any |chip=MrkCan3 |code=R |version=Team ProtoMan |lv1= 7: 25% |lv2= 8: 50% |lv3= 9: 46.875% |lv4= 10: 25% }} | |||
{{EnemyInfo/GetData |hp=Any |chip=MrkCan3 |code=Y |version=Team Colonel |lv1= 7: 25% |lv2= 8: 50% |lv3= 9: 46.875% |lv4= 10: 25% }} | |||
{{EnemyInfo/GetData |hp=Any |zenny=600 |lv1= 7: 25% |lv2= 8: 50% |lv3= 9: 46.875% |lv4= 10: 25% }} | |||
{{EnemyInfo/GetData |hp=Any |zenny=550 |lv1= 5: 50% |lv2= 6: 100% |lv3= 7: 50% }} | |||
{{EnemyInfo/GetData |hp=Any |zenny=50 |lv1= 4-5: 50% }} | |||
{{EnemyInfo/GetData |hp=Any |zenny=30 |lv1= 1-3: 100% |lv2= 4: 50% }} | |||
}} | }} | ||
| Line 961: | Line 1,846: | ||
|airshoes= |shadowshoes= |floatshoes= |statusguard= |superarmor= | |airshoes= |shadowshoes= |floatshoes= |statusguard= |superarmor= | ||
|info= | |info= | ||
|locations= | |locations='''Level 1:''' [[Air Conditioner Comp (MMBN5)|Air Conditioner Comp]] (35.4%), [[Engine Comp]] (35.4%), [[Radar Comp]] (35.4%), [[Screw Comp]] (35.4%), [[SciLab Vision Burst]] (33.3%), [[SciLab Area 1]] (26.4%), [[Server Comp]] (20.8%), [[SciLab Area 3]] (20.5%), [[Old Terminal Comp]] (18.8%), [[SciLab Area 2]] (18.1%), [[SciLab Area 4]] (17.9%), [[Message Comp]] (16.7%), [[Ship Comp 2]] (16.7%), [[Ship Comp 3]] (13.9%), [[Ship Comp 4]] (12.5%), [[SciLab HP]] (6.7%)<br/>'''Liberation Mission:''' [[SciLab Area 3 (Liberation Mission)|SciLab Area 3]] | ||
|attacks= | |attacks= | ||
{{EnemyInfo/Attack |name_en=TankCannon<ref name="TankCan">Listed as '''TankCan''' in Mega Man Battle Network 5 Official Strategy Guide</ref> |name_jp=センシャホウ |name_tl=Tank Gun | |||
|attack=50 |emotion=10 |element=none | |||
|info=Knocks back all the way. | |||
}} | |||
|getdata= | |getdata= | ||
{{EnemyInfo/GetData |hp=Any |chip=TankCan1 |code=E |version=Team ProtoMan |lv1= 5: 25% |lv2= 6: 50% |lv3= 7: 75% |lv4= 8-S: 100% }} | |||
{{EnemyInfo/GetData |hp=Any |chip=TankCan1 |code=P |version=Team Colonel |lv1= 5: 25% |lv2= 6: 50% |lv3= 7: 75% |lv4= 8-S: 100% }} | |||
{{EnemyInfo/GetData |hp=Any |zenny=250 |lv1= 5: 25% |lv2= 6: 50% |lv3= 7: 25% }} | |||
{{EnemyInfo/GetData |hp=Any |zenny=50 |lv1= 4-5: 50% }} | |||
{{EnemyInfo/GetData |hp=Any |zenny=30 |lv1= 1-3: 100% |lv2= 4: 50% }} | |||
}} | }} | ||
| Line 972: | Line 1,866: | ||
|airshoes= |shadowshoes= |floatshoes= |statusguard= |superarmor= | |airshoes= |shadowshoes= |floatshoes= |statusguard= |superarmor= | ||
|info= | |info= | ||
|locations= | |locations='''Level 1:''' [[Chip Maker Comp]] (25.0%), [[Factory Comp 1 (MMBN5)|Factory Comp 1]] (15.3%), [[SoulServer Comp]] (15.3%), [[Experiment Server Comp]] (6.2%), [[Factory Comp 2 (MMBN5)|Factory Comp 2]] (2.8%)<br/>'''Liberation Mission:''' [[Undernet 4 (Liberation Mission)|Undernet 4]] | ||
|attacks= | |attacks= | ||
{{EnemyInfo/Attack |name_en=TankCannon<ref name="TankCan"/> |name_jp=センシャホウ |name_tl=Tank Gun | |||
|attack=70 |emotion=10 |element=none | |||
|info=Knocks back all the way. | |||
}} | |||
|getdata= | |getdata= | ||
{{EnemyInfo/GetData |hp=Any |chip=TankCan1 |code=A |lv1= 7: 25% |lv2= 8: 50% |lv3= 9: 53.125% |lv4= 10: 75% |lv5= S: 100% }} | |||
{{EnemyInfo/GetData |hp=Any |zenny=450 |lv1= 7: 25% |lv2= 8: 50% |lv3= 9: 46.875% |lv4= 10: 25% }} | |||
{{EnemyInfo/GetData |hp=Any |zenny=350 |lv1= 5: 50% |lv2= 6: 100% |lv3= 7: 50% }} | |||
{{EnemyInfo/GetData |hp=Any |zenny=50 |lv1= 4-5: 50% }} | |||
{{EnemyInfo/GetData |hp=Any |zenny=30 |lv1= 1-3: 100% |lv2= 4: 50% }} | |||
}} | }} | ||
| Line 983: | Line 1,886: | ||
|airshoes= |shadowshoes= |floatshoes= |statusguard= |superarmor= | |airshoes= |shadowshoes= |floatshoes= |statusguard= |superarmor= | ||
|info= | |info= | ||
|locations= | |locations='''Level 2:''' [[Air Conditioner Comp (MMBN5)|Air Conditioner Comp]] (35.4%), [[Engine Comp]] (35.4%), [[Radar Comp]] (35.4%), [[Screw Comp]] (35.4%), [[SciLab Vision Burst]] (33.3%), [[SciLab Area 1]] (26.4%), [[Server Comp]] (20.8%), [[SciLab Area 3]] (20.5%), [[Old Terminal Comp]] (18.8%), [[SciLab Area 2]] (18.1%), [[SciLab Area 4]] (17.9%), [[Message Comp]] (16.7%), [[Ship Comp 2]] (16.7%), [[Ship Comp 3]] (13.9%), [[Ship Comp 4]] (12.5%), [[SciLab HP]] (6.7%)<br/>'''Liberation Mission:''' [[Nebula Area 1 (Liberation Mission)|Nebula Area 1]] | ||
|attacks= | |attacks= | ||
{{EnemyInfo/Attack |name_en=TankCannon<ref name="TankCan"/> |name_jp=センシャホウ |name_tl=Tank Gun | |||
|attack=90 |emotion=10 |element=none | |||
|info=Knocks back all the way. | |||
}} | |||
|getdata= | |getdata= | ||
{{EnemyInfo/GetData |hp=Any |chip=TankCan2 |code=T |version=Team ProtoMan |lv1= 7: 25% |lv2= 8: 50% |lv3= 9: 53.125% |lv4= 10: 75% |lv5= S: 100% }} | |||
{{EnemyInfo/GetData |hp=Any |chip=TankCan2 |code=Y |version=Team Colonel |lv1= 7: 25% |lv2= 8: 50% |lv3= 9: 53.125% |lv4= 10: 75% |lv5= S: 100% }} | |||
{{EnemyInfo/GetData |hp=Any |zenny=550 |lv1= 7: 25% |lv2= 8: 50% |lv3= 9: 46.875% |lv4= 10: 25% }} | |||
{{EnemyInfo/GetData |hp=Any |zenny=450 |lv1= 5: 50% |lv2= 6: 100% |lv3= 7: 50% }} | |||
{{EnemyInfo/GetData |hp=Any |zenny=50 |lv1= 4-5: 50% }} | |||
{{EnemyInfo/GetData |hp=Any |zenny=30 |lv1= 1-3: 100% |lv2= 4: 50% }} | |||
}} | }} | ||
| Line 994: | Line 1,907: | ||
|airshoes= |shadowshoes= |floatshoes= |statusguard= |superarmor= | |airshoes= |shadowshoes= |floatshoes= |statusguard= |superarmor= | ||
|info= | |info= | ||
|locations= | |locations='''Level 2:''' [[Chip Maker Comp]] (25.0%), [[Factory Comp 1 (MMBN5)|Factory Comp 1]] (15.3%), [[SoulServer Comp]] (15.3%), [[Experiment Server Comp]] (6.2%), [[Factory Comp 2 (MMBN5)|Factory Comp 2]] (2.8%)<br/>'''Liberation Mission:''' [[Nebula Area 1 (Liberation Mission)|Nebula Area 1]], [[Nebula Area 3 (Liberation Mission)|Nebula Area 3]] | ||
|attacks= | |attacks= | ||
{{EnemyInfo/Attack |name_en=TankCannon<ref name="TankCan"/> |name_jp=センシャホウ |name_tl=Tank Gun | |||
|attack=120 |emotion=10 |element=none | |||
|info=Knocks back all the way. | |||
}} | |||
|getdata= | |getdata= | ||
{{EnemyInfo/GetData |hp=Any |chip=TankCan2 |code=B |lv1= 7: 25% |lv2= 8: 50% |lv3= 9: 53.125% |lv4= 10: 75% |lv5= S: 100% }} | |||
{{EnemyInfo/GetData |hp=Any |zenny=600 |lv1= 7: 25% |lv2= 8: 50% |lv3= 9: 46.875% |lv4= 10: 25% }} | |||
{{EnemyInfo/GetData |hp=Any |zenny=500 |lv1= 5: 50% |lv2= 6: 100% |lv3= 7: 50% }} | |||
{{EnemyInfo/GetData |hp=Any |zenny=50 |lv1= 4-5: 50% }} | |||
{{EnemyInfo/GetData |hp=Any |zenny=30 |lv1= 1-3: 100% |lv2= 4: 50% }} | |||
}} | }} | ||
| Line 1,005: | Line 1,927: | ||
|airshoes= |shadowshoes= |floatshoes= |statusguard= |superarmor= | |airshoes= |shadowshoes= |floatshoes= |statusguard= |superarmor= | ||
|info= | |info= | ||
|locations= | |locations='''Level 3:''' [[Air Conditioner Comp (MMBN5)|Air Conditioner Comp]] (35.4%), [[Engine Comp]] (35.4%), [[Radar Comp]] (35.4%), [[Screw Comp]] (35.4%), [[SciLab Vision Burst]] (33.3%), [[SciLab Area 1]] (26.4%), [[Server Comp]] (20.8%), [[SciLab Area 3]] (20.5%), [[Old Terminal Comp]] (18.8%), [[SciLab Area 2]] (18.1%), [[SciLab Area 4]] (17.9%), [[Message Comp]] (16.7%), [[Ship Comp 2]] (16.7%), [[Ship Comp 3]] (13.9%), [[Ship Comp 4]] (12.5%), [[SciLab HP]] (6.7%) | ||
|attacks= | |attacks= | ||
{{EnemyInfo/Attack |name_en=TankCannon<ref name="TankCan"/> |name_jp=センシャホウ |name_tl=Tank Gun | |||
|attack=160 |emotion=10 |element=none | |||
|info=Knocks back all the way. | |||
}} | |||
|getdata= | |getdata= | ||
{{EnemyInfo/GetData |hp=Any |chip=TankCan3 |code=M |version=Team ProtoMan |lv1= 7: 25% |lv2= 8: 50% |lv3= 9: 53.125% |lv4= 10: 75% |lv5= S: 100% }} | |||
{{EnemyInfo/GetData |hp=Any |chip=TankCan3 |code=R |version=Team Colonel |lv1= 7: 25% |lv2= 8: 50% |lv3= 9: 53.125% |lv4= 10: 75% |lv5= S: 100% }} | |||
{{EnemyInfo/GetData |hp=Any |zenny=650 |lv1= 7: 25% |lv2= 8: 50% |lv3= 9: 46.875% |lv4= 10: 25% }} | |||
{{EnemyInfo/GetData |hp=Any |zenny=550 |lv1= 5: 50% |lv2= 6: 100% |lv3= 7: 50% }} | |||
{{EnemyInfo/GetData |hp=Any |zenny=50 |lv1= 4-5: 50% }} | |||
{{EnemyInfo/GetData |hp=Any |zenny=30 |lv1= 1-3: 100% |lv2= 4: 50% }} | |||
}} | }} | ||
| Line 1,016: | Line 1,948: | ||
|airshoes= |shadowshoes= |floatshoes= |statusguard= |superarmor= | |airshoes= |shadowshoes= |floatshoes= |statusguard= |superarmor= | ||
|info= | |info= | ||
|locations= | |locations='''Level 3:''' [[Chip Maker Comp]] (25.0%), [[Factory Comp 1 (MMBN5)|Factory Comp 1]] (15.3%), [[SoulServer Comp]] (15.3%), [[Experiment Server Comp]] (6.2%), [[Factory Comp 2 (MMBN5)|Factory Comp 2]] (2.8%) | ||
|attacks= | |attacks= | ||
{{EnemyInfo/Attack |name_en=TankCannon<ref name="TankCan"/> |name_jp=センシャホウ |name_tl=Tank Gun | |||
|attack=200 |emotion=10 |element=none | |||
|info=Knocks back all the way. | |||
}} | |||
|getdata= | |getdata= | ||
{{EnemyInfo/GetData |hp=Any |chip=TankCan3 |code=F |lv1= 7: 25% |lv2= 8: 50% |lv3= 9: 53.125% |lv4= 10: 75% |lv5= S: 100% }} | |||
{{EnemyInfo/GetData |hp=Any |zenny=750 |lv1= 7: 25% |lv2= 8: 50% |lv3= 9: 46.875% |lv4= 10: 25% }} | |||
{{EnemyInfo/GetData |hp=Any |zenny=650 |lv1= 5: 50% |lv2= 6: 100% |lv3= 7: 50% }} | |||
{{EnemyInfo/GetData |hp=Any |zenny=50 |lv1= 4-5: 50% }} | |||
{{EnemyInfo/GetData |hp=Any |zenny=30 |lv1= 1-3: 100% |lv2= 4: 50% }} | |||
}} | }} | ||
| Line 1,028: | Line 1,969: | ||
|airshoes= |shadowshoes= |floatshoes= |statusguard= |superarmor= | |airshoes= |shadowshoes= |floatshoes= |statusguard= |superarmor= | ||
|info=Gains FloatShoes and AirShoes while attacking. | |info=Gains FloatShoes and AirShoes while attacking. | ||
|locations= | |locations='''Level 1:''' [[Wine Case Comp]] (38.9%), [[Drill Comp 2]] (30.6%), [[Drill Comp 3]] (26.9%), [[Squirrel Comps]] (25.0%), [[Air Conditioner Comp (MMBN5)|Air Conditioner Comp]] (18.8%), [[Engine Comp]] (18.8%), [[Radar Comp]] (18.8%), [[Screw Comp]] (18.8%), [[Dumpling Comp]] (16.7%), [[Drill Comp 4]] (15.7%), [[Oran Area 3]] (15.4%), [[NetBattle Comp (MMBN5)|NetBattle Comp]] (14.3%), [[Drill Comp 1]] (13.9%), [[SciLab Area 2]] (11.1%)<br/>'''Liberation Mission:''' [[Oran Area 3 (Liberation Mission)|Oran Area 3]], [[SciLab Area 3 (Liberation Mission)|SciLab Area 3]] | ||
|attacks= | |attacks= | ||
{{EnemyInfo/Attack |name_en=DigRoll |name_jp=ディグロール |name_tl=Dig Roll | |||
|attack=30 |emotion=10 |element=none |break=y | |||
}} | |||
|getdata= | |getdata= | ||
{{EnemyInfo/GetData |hp=Any |chip=DrilArm1 |code=J |version=Team ProtoMan |lv1= 7: 50% |lv2= 8-S: 100% }} | |||
{{EnemyInfo/GetData |hp=Any |chip=DrilArm1 |code=W |version=Team Colonel |lv1= 7: 50% |lv2= 8-S: 100% }} | |||
{{EnemyInfo/GetData |hp=Any |zenny=100 |lv1= 5: 50% |lv2= 6: 100% |lv3= 7: 50% }} | |||
{{EnemyInfo/GetData |hp=Any |zenny=50 |lv1= 4-5: 50% }} | |||
{{EnemyInfo/GetData |hp=Any |zenny=30 |lv1= 1-3: 100% |lv2= 4: 50% }} | |||
}} | }} | ||
| Line 1,039: | Line 1,988: | ||
|airshoes= |shadowshoes= |floatshoes= |statusguard= |superarmor= | |airshoes= |shadowshoes= |floatshoes= |statusguard= |superarmor= | ||
|info=Gains FloatShoes and AirShoes while attacking. | |info=Gains FloatShoes and AirShoes while attacking. | ||
|locations= | |locations='''Level 1:''' [[Oran Isle Vision Burst]] (36.1%), [[Gargoyle Comp 2]] (21.9%), [[Ship Comp 4]] (19.4%), [[Undernet 1 (MMBN5)|Undernet 1]] (16.7%), [[Ship Comp 2]] (15.3%), [[Ship Comp 3]] (13.9%), [[Ship Comp 1]] (13.9%), [[Factory Comp 4 (MMBN5)|Factory Comp 4]] (13.3%), [[Gargoyle Comp 4]] (12.5%), [[Factory Comp 3 (MMBN5)|Factory Comp 3]] (11.1%), [[Drill Comp 2]] (8.3%), [[Drill Comp 3]] (8.3%), [[Gargoyle Comp 3]] (7.3%), [[Drill Comp 1]] (5.6%), [[Drill Comp 4]] (4.6%), [[Undernet 2 (MMBN5)|Undernet 2]] (3.8%) | ||
|attacks= | |attacks= | ||
{{EnemyInfo/Attack |name_en=DigRoll |name_jp=ディグロール |name_tl=Dig Roll | |||
|attack=60 |emotion=10 |element=none |break=y | |||
}} | |||
|getdata= | |getdata= | ||
{{EnemyInfo/GetData |hp=Any |chip=DrilArm1 |code=A |lv1= 9: 6.25% |lv2= 10: 50% |lv3= S: 100% }} | |||
{{EnemyInfo/GetData |hp=Any |zenny=250 |lv1= 7: 50% |lv2= 8: 100% |lv3= 9: 93.75% |lv4= 10: 50% }} | |||
{{EnemyInfo/GetData |hp=Any |zenny=200 |lv1= 5: 50% |lv2= 6: 100% |lv3= 7: 50% }} | |||
{{EnemyInfo/GetData |hp=Any |zenny=50 |lv1= 4-5: 50% }} | |||
{{EnemyInfo/GetData |hp=Any |zenny=30 |lv1= 1-3: 100% |lv2= 4: 50% }} | |||
}} | }} | ||
| Line 1,050: | Line 2,007: | ||
|airshoes= |shadowshoes= |floatshoes= |statusguard= |superarmor= | |airshoes= |shadowshoes= |floatshoes= |statusguard= |superarmor= | ||
|info=Gains FloatShoes and AirShoes while attacking. | |info=Gains FloatShoes and AirShoes while attacking. | ||
|locations= | |locations='''Level 2:''' [[Wine Case Comp]] (38.9%), [[Drill Comp 2]] (30.6%), [[Drill Comp 3]] (26.9%), [[Squirrel Comps]] (25.0%), [[Air Conditioner Comp (MMBN5)|Air Conditioner Comp]] (18.8%), [[Engine Comp]] (18.8%), [[Radar Comp]] (18.8%), [[Screw Comp]] (18.8%), [[Dumpling Comp]] (16.7%), [[Drill Comp 4]] (15.7%), [[Oran Area 3]] (15.4%), [[NetBattle Comp (MMBN5)|NetBattle Comp]] (14.3%), [[Drill Comp 1]] (13.9%), [[SciLab Area 2]] (11.1%) | ||
|attacks= | |attacks= | ||
{{EnemyInfo/Attack |name_en=DigRoll |name_jp=ディグロール |name_tl=Dig Roll | |||
|attack=90 |emotion=10 |element=none |break=y | |||
}} | |||
|getdata= | |getdata= | ||
{{EnemyInfo/GetData |hp=Any |chip=DrilArm2 |code=L |version=Team ProtoMan |lv1= 9: 6.25% |lv2= 10: 50% |lv3= S: 100% }} | |||
{{EnemyInfo/GetData |hp=Any |chip=DrilArm2 |code=S |version=Team Colonel |lv1= 9: 6.25% |lv2= 10: 50% |lv3= S: 100% }} | |||
{{EnemyInfo/GetData |hp=Any |zenny=350 |lv1= 7: 50% |lv2= 8: 100% |lv3= 9: 93.75% |lv4= 10: 50% }} | |||
{{EnemyInfo/GetData |hp=Any |zenny=300 |lv1= 5: 50% |lv2= 6: 100% |lv3= 7: 50% }} | |||
{{EnemyInfo/GetData |hp=Any |zenny=50 |lv1= 4-5: 50% }} | |||
{{EnemyInfo/GetData |hp=Any |zenny=30 |lv1= 1-3: 100% |lv2= 4: 50% }} | |||
}} | }} | ||
| Line 1,061: | Line 2,027: | ||
|airshoes= |shadowshoes= |floatshoes= |statusguard= |superarmor= | |airshoes= |shadowshoes= |floatshoes= |statusguard= |superarmor= | ||
|info=Gains FloatShoes and AirShoes while attacking. | |info=Gains FloatShoes and AirShoes while attacking. | ||
|locations= | |locations='''Level 2:''' [[Oran Isle Vision Burst]] (36.1%), [[Gargoyle Comp 2]] (21.9%), [[Ship Comp 4]] (19.4%), [[Nebula Area 1]] (18.1%), [[Undernet 1 (MMBN5)|Undernet 1]] (16.7%), [[Ship Comp 2]] (15.3%), [[Ship Comp 3]] (13.9%), [[Ship Comp 1]] (13.9%), [[Factory Comp 4 (MMBN5)|Factory Comp 4]] (13.3%), [[Gargoyle Comp 4]] (12.5%), [[Factory Comp 3 (MMBN5)|Factory Comp 3]] (11.1%), [[Drill Comp 2]] (8.3%), [[Drill Comp 3]] (8.3%), [[Gargoyle Comp 3]] (7.3%), [[Drill Comp 1]] (5.6%), [[Drill Comp 4]] (4.6%), [[Undernet 2 (MMBN5)|Undernet 2]] (3.8%)<br/>'''Liberation Mission:''' [[Nebula Area 1 (Liberation Mission)|Nebula Area 1]], [[Nebula Area 3 (Liberation Mission)|Nebula Area 3]] | ||
|attacks= | |attacks= | ||
{{EnemyInfo/Attack |name_en=DigRoll |name_jp=ディグロール |name_tl=Dig Roll | |||
|attack=120 |emotion=10 |element=none |break=y | |||
}} | |||
|getdata= | |getdata= | ||
{{EnemyInfo/GetData |hp=Any |chip=DrilArm2 |code=D |lv1= 9: 6.25% |lv2= 10: 50% |lv3= S: 100% }} | |||
{{EnemyInfo/GetData |hp=Any |zenny=450 |lv1= 7: 50% |lv2= 8: 100% |lv3= 9: 93.75% |lv4= 10: 50% }} | |||
{{EnemyInfo/GetData |hp=Any |zenny=400 |lv1= 5: 50% |lv2= 6: 100% |lv3= 7: 50% }} | |||
{{EnemyInfo/GetData |hp=Any |zenny=50 |lv1= 4-5: 50% }} | |||
{{EnemyInfo/GetData |hp=Any |zenny=30 |lv1= 1-3: 100% |lv2= 4: 50% }} | |||
}} | }} | ||
| Line 1,072: | Line 2,046: | ||
|airshoes= |shadowshoes= |floatshoes= |statusguard= |superarmor= | |airshoes= |shadowshoes= |floatshoes= |statusguard= |superarmor= | ||
|info=Gains FloatShoes and AirShoes while attacking. | |info=Gains FloatShoes and AirShoes while attacking. | ||
|locations= | |locations='''Level 3:''' [[Wine Case Comp]] (38.9%), [[Drill Comp 2]] (30.6%), [[Drill Comp 3]] (26.9%), [[Squirrel Comps]] (25.0%), [[Air Conditioner Comp (MMBN5)|Air Conditioner Comp]] (18.8%), [[Engine Comp]] (18.8%), [[Radar Comp]] (18.8%), [[Screw Comp]] (18.8%), [[Dumpling Comp]] (16.7%), [[Drill Comp 4]] (15.7%), [[Oran Area 3]] (15.4%), [[NetBattle Comp (MMBN5)|NetBattle Comp]] (14.3%), [[Drill Comp 1]] (13.9%), [[SciLab Area 2]] (11.1%)<br/>'''Liberation Mission:''' [[Nebula Area 3 (Liberation Mission)|Nebula Area 3]] | ||
|attacks= | |attacks= | ||
{{EnemyInfo/Attack |name_en=DigRoll |name_jp=ディグロール |name_tl=Dig Roll | |||
|attack=160 |emotion=10 |element=none |break=y | |||
}} | |||
|getdata= | |getdata= | ||
{{EnemyInfo/GetData |hp=Any |chip=DrilArm3 |code=P |version=Team ProtoMan |lv1= 9: 6.25% |lv2= 10: 50% |lv3= S: 100% }} | |||
{{EnemyInfo/GetData |hp=Any |chip=DrilArm3 |code=Z |version=Team Colonel |lv1= 9: 6.25% |lv2= 10: 50% |lv3= S: 100% }} | |||
{{EnemyInfo/GetData |hp=Any |zenny=600 |lv1= 7: 50% |lv2= 8: 100% |lv3= 9: 93.75% |lv4= 10: 50% }} | |||
{{EnemyInfo/GetData |hp=Any |zenny=550 |lv1= 5: 50% |lv2= 6: 100% |lv3= 7: 50% }} | |||
{{EnemyInfo/GetData |hp=Any |zenny=50 |lv1= 4-5: 50% }} | |||
{{EnemyInfo/GetData |hp=Any |zenny=30 |lv1= 1-3: 100% |lv2= 4: 50% }} | |||
}} | }} | ||
| Line 1,083: | Line 2,066: | ||
|airshoes= |shadowshoes= |floatshoes= |statusguard= |superarmor= | |airshoes= |shadowshoes= |floatshoes= |statusguard= |superarmor= | ||
|info=Gains FloatShoes and AirShoes while attacking. | |info=Gains FloatShoes and AirShoes while attacking. | ||
|locations= | |locations='''Level 3:''' [[Oran Isle Vision Burst]] (36.1%), [[Gargoyle Comp 2]] (21.9%), [[Ship Comp 4]] (19.4%), [[Nebula Area 1]] (18.1%), [[Undernet 1 (MMBN5)|Undernet 1]] (16.7%), [[Ship Comp 2]] (15.3%), [[Ship Comp 3]] (13.9%), [[Ship Comp 1]] (13.9%), [[Factory Comp 4 (MMBN5)|Factory Comp 4]] (13.3%), [[Gargoyle Comp 4]] (12.5%), [[Factory Comp 3 (MMBN5)|Factory Comp 3]] (11.1%), [[Drill Comp 2]] (8.3%), [[Drill Comp 3]] (8.3%), [[Gargoyle Comp 3]] (7.3%), [[Drill Comp 1]] (5.6%), [[Drill Comp 4]] (4.6%), [[Undernet 2 (MMBN5)|Undernet 2]] (3.8%) | ||
|attacks= | |attacks= | ||
{{EnemyInfo/Attack |name_en=DigRoll |name_jp=ディグロール |name_tl=Dig Roll | |||
|attack=200 |emotion=10 |element=none |break=y | |||
}} | |||
|getdata= | |getdata= | ||
{{EnemyInfo/GetData |hp=Any |chip=DrilArm3 |code=I |lv1= 9: 6.25% |lv2= 10: 50% |lv3= S: 100% }} | |||
{{EnemyInfo/GetData |hp=Any |zenny=750 |lv1= 7: 50% |lv2= 8: 100% |lv3= 9: 93.75% |lv4= 10: 50% }} | |||
{{EnemyInfo/GetData |hp=Any |zenny=700 |lv1= 5: 50% |lv2= 6: 100% |lv3= 7: 50% }} | |||
{{EnemyInfo/GetData |hp=Any |zenny=50 |lv1= 4-5: 50% }} | |||
{{EnemyInfo/GetData |hp=Any |zenny=30 |lv1= 1-3: 100% |lv2= 4: 50% }} | |||
}} | }} | ||
| Line 1,095: | Line 2,086: | ||
|airshoes=y |shadowshoes= |floatshoes=y |statusguard= |superarmor= | |airshoes=y |shadowshoes= |floatshoes=y |statusguard= |superarmor= | ||
|info= | |info= | ||
|locations= | |locations='''Level 1:''' [[Armor Comp (MMBN5)|Armor Comp]] (45.2%), [[Helmet Comp]] (45.2%), [[Katana Comp]] (45.2%), [[Server Comp]] (37.5%), [[Gargoyle Castle HP]] (30.0%), [[Drill Comp 4]] (26.9%), [[End Area 2]] (20.8%), [[Old Terminal Comp]] (16.7%), [[Drill Comp 3]] (16.7%), [[End Area 1]] (16.7%), [[End Area 3]] (15.4%), [[Air Conditioner Comp (MMBN5)|Air Conditioner Comp]] (12.5%), [[Engine Comp]] (12.5%), [[Radar Comp]] (12.5%), [[Screw Comp]] (12.5%), [[Wind God Comp]] (12.5%), [[Oran Area 3]] (11.5%), [[End Area 5]] (11.1%)<br/>'''Liberation Mission:''' [[Oran Area 3 (Liberation Mission)|Oran Area 3]] | ||
|attacks= | |attacks= | ||
{{EnemyInfo/Attack |name_en=Pulsar<ref name="Pulsar">Mega Man Battle Network 5 Official Strategy Guide</ref> |name_jp=バッドチューン |name_tl=Bad Tune | |||
|attack=20 |emotion=10 |element=none |noflash=y | |||
}} | |||
|getdata= | |getdata= | ||
{{EnemyInfo/GetData |hp=Any |chip=Pulsar1 |code=P |version=Team ProtoMan |lv1= 5: 25% |lv2= 6-S: 50% }} | |||
{{EnemyInfo/GetData |hp=Any |chip=Pulsar1 |code=T |version=Team Colonel |lv1= 5: 25% |lv2= 6-S: 50% }} | |||
{{EnemyInfo/GetData |hp=High |zenny=200 |lv1= 9: 3.125% |lv2= 10: 25% |lv3= S: 50% }} | |||
{{EnemyInfo/GetData |hp=High |zenny=150 |lv1= 7: 25% |lv2= 8: 50% |lv3= 9: 46.875% |lv4= 10: 25% }} | |||
{{EnemyInfo/GetData |hp=High |zenny=100 |lv1= 5: 25% |lv2= 6: 50% |lv3= 7: 25% }} | |||
{{EnemyInfo/GetData |hp=High |zenny=50 |lv1= 4-5: 50% }} | |||
{{EnemyInfo/GetData |hp=High |zenny=30 |lv1= 1-3: 100% |lv2= 4: 50% }} | |||
{{EnemyInfo/GetData |hp=Low |recov=150 |lv1= 1-4: 100% |lv2= 5: 75% |lv3= 6-S: 50% }} | |||
}} | }} | ||
| Line 1,106: | Line 2,108: | ||
|airshoes=y |shadowshoes= |floatshoes=y |statusguard= |superarmor= | |airshoes=y |shadowshoes= |floatshoes=y |statusguard= |superarmor= | ||
|info= | |info= | ||
|locations= | |locations='''Level 1:''' [[Oran Isle Vision Burst]] (27.8%), [[Undernet 1 (MMBN5)|Undernet 1]] (26.4%), [[Gargoyle Comp 1]] (17.7%), [[Chip Maker Comp]] (14.6%), [[Old Terminal Comp]] (12.5%), [[Factory Comp 2 (MMBN5)|Factory Comp 2]] (11.1%), [[Gargoyle Comp 2]] (6.2%)<br/>'''Liberation Mission:''' [[End Area 5 (Liberation Mission)|End Area 5]] | ||
|attacks= | |attacks= | ||
{{EnemyInfo/Attack |name_en=Pulsar<ref name="Pulsar"/> |name_jp=バッドチューン |name_tl=Bad Tune | |||
|attack=50 |emotion=10 |element=none |noflash=y | |||
|info=Inflicts Paralyze LV. 1 (1.5 seconds) ({{chance|1/2}}) or Confuse LV. 1 (8 seconds) ({{chance|1/2}}). | |||
}} | |||
|getdata= | |getdata= | ||
{{EnemyInfo/GetData |hp=Any |chip=Pulsar1 |code=F |lv1= 7: 25% |lv2= 8-S: 50% }} | |||
{{EnemyInfo/GetData |hp=Any |chip=Pulsar1 |code=P |version=Team ProtoMan |lv1= 5: 25% |lv2= 6: 50% |lv3= 7: 25% }} | |||
{{EnemyInfo/GetData |hp=Any |chip=Pulsar1 |code=T |version=Team Colonel |lv1= 5: 25% |lv2= 6: 50% |lv3= 7: 25% }} | |||
{{EnemyInfo/GetData |hp=High |zenny=300 |lv1= 9: 3.125% |lv2= 10: 25% |lv3= S: 50% }} | |||
{{EnemyInfo/GetData |hp=High |zenny=250 |lv1= 7: 25% |lv2= 8: 50% |lv3= 9: 46.875% |lv4= 10: 25% }} | |||
{{EnemyInfo/GetData |hp=High |zenny=200 |lv1= 5: 25% |lv2= 6: 50% |lv3= 7: 25% }} | |||
{{EnemyInfo/GetData |hp=High |zenny=50 |lv1= 4-5: 50% }} | |||
{{EnemyInfo/GetData |hp=High |zenny=30 |lv1= 1-3: 100% |lv2= 4: 50% }} | |||
{{EnemyInfo/GetData |hp=Low |recov=300 |lv1= 1-4: 100% |lv2= 5: 75% |lv3= 6-S: 50% }} | |||
}} | }} | ||
| Line 1,117: | Line 2,132: | ||
|airshoes=y |shadowshoes= |floatshoes=y |statusguard= |superarmor= | |airshoes=y |shadowshoes= |floatshoes=y |statusguard= |superarmor= | ||
|info= | |info= | ||
|locations= | |locations='''Level 2:''' [[Armor Comp (MMBN5)|Armor Comp]] (45.2%), [[Helmet Comp]] (45.2%), [[Katana Comp]] (45.2%), [[Server Comp]] (37.5%), [[Gargoyle Castle HP]] (30.0%), [[Drill Comp 4]] (26.9%), [[End Area 2]] (20.8%), [[Old Terminal Comp]] (16.7%), [[Drill Comp 3]] (16.7%), [[End Area 1]] (16.7%), [[End Area 3]] (15.4%), [[Air Conditioner Comp (MMBN5)|Air Conditioner Comp]] (12.5%), [[Engine Comp]] (12.5%), [[Radar Comp]] (12.5%), [[Screw Comp]] (12.5%), [[Wind God Comp]] (12.5%), [[Oran Area 3]] (11.5%), [[End Area 5]] (11.1%) | ||
|attacks= | |attacks= | ||
{{EnemyInfo/Attack |name_en=Pulsar<ref name="Pulsar"/> |name_jp=バッドチューン |name_tl=Bad Tune | |||
|attack=80 |emotion=10 |element=none |noflash=y | |||
|info=Inflicts Paralyze LV. 1 (1.5 seconds) ({{chance|1/2}}) or Confuse LV. 1 (8 seconds) ({{chance|1/2}}). | |||
}} | |||
|getdata= | |getdata= | ||
{{EnemyInfo/GetData |hp=Any |chip=Pulsar2 |code=G |version=Team ProtoMan |lv1= 5: 25% |lv2= 6-S: 50% }} | |||
{{EnemyInfo/GetData |hp=Any |chip=Pulsar2 |code=M |version=Team Colonel |lv1= 5: 25% |lv2= 6-S: 50% }} | |||
{{EnemyInfo/GetData |hp=High |zenny=400 |lv1= 9: 3.125% |lv2= 10: 25% |lv3= S: 50% }} | |||
{{EnemyInfo/GetData |hp=High |zenny=350 |lv1= 7: 25% |lv2= 8: 50% |lv3= 9: 46.875% |lv4= 10: 25% }} | |||
{{EnemyInfo/GetData |hp=High |zenny=300 |lv1= 5: 25% |lv2= 6: 50% |lv3= 7: 25% }} | |||
{{EnemyInfo/GetData |hp=High |zenny=50 |lv1= 4-5: 50% }} | |||
{{EnemyInfo/GetData |hp=High |zenny=30 |lv1= 1-3: 100% |lv2= 4: 50% }} | |||
{{EnemyInfo/GetData |hp=Low |recov=400 |lv1= 1-4: 100% |lv2= 5: 75% |lv3= 6-S: 50% }} | |||
}} | }} | ||
| Line 1,128: | Line 2,155: | ||
|airshoes=y |shadowshoes= |floatshoes=y |statusguard= |superarmor= | |airshoes=y |shadowshoes= |floatshoes=y |statusguard= |superarmor= | ||
|info= | |info= | ||
|locations= | |locations='''Level 2:''' [[Oran Isle Vision Burst]] (27.8%), [[Nebula Area 1]] (27.8%), [[Undernet 1 (MMBN5)|Undernet 1]] (26.4%), [[Gargoyle Comp 1]] (17.7%), [[Chip Maker Comp]] (14.6%), [[Old Terminal Comp]] (12.5%), [[Factory Comp 2 (MMBN5)|Factory Comp 2]] (11.1%), [[Gargoyle Comp 2]] (6.2%)<br/>'''Liberation Mission:''' [[Nebula Area 3 (Liberation Mission)|Nebula Area 3]] | ||
|attacks= | |attacks= | ||
{{EnemyInfo/Attack |name_en=Pulsar<ref name="Pulsar"/> |name_jp=バッドチューン |name_tl=Bad Tune | |||
|attack=120 |emotion=10 |element=none |noflash=y | |||
|info=Inflicts Paralyze LV. 1 (1.5 seconds) ({{chance|1/2}}) or Confuse LV. 1 (8 seconds) ({{chance|1/2}}). | |||
}} | |||
|getdata= | |getdata= | ||
{{EnemyInfo/GetData |hp=Any |chip=Pulsar2 |code=E |lv1= 5: 25% |lv2= 6-S: 50% }} | |||
{{EnemyInfo/GetData |hp=High |zenny=500 |lv1= 9: 3.125% |lv2= 10: 25% |lv3= S: 50% }} | |||
{{EnemyInfo/GetData |hp=High |zenny=450 |lv1= 7: 25% |lv2= 8: 50% |lv3= 9: 46.875% |lv4= 10: 25% }} | |||
{{EnemyInfo/GetData |hp=High |zenny=400 |lv1= 5: 25% |lv2= 6: 50% |lv3= 7: 25% }} | |||
{{EnemyInfo/GetData |hp=High |zenny=50 |lv1= 4-5: 50% }} | |||
{{EnemyInfo/GetData |hp=High |zenny=30 |lv1= 1-3: 100% |lv2= 4: 50% }} | |||
{{EnemyInfo/GetData |hp=Low |recov=500 |lv1= 1-4: 100% |lv2= 5: 75% |lv3= 6-S: 50% }} | |||
}} | }} | ||
| Line 1,139: | Line 2,177: | ||
|airshoes=y |shadowshoes= |floatshoes=y |statusguard= |superarmor= | |airshoes=y |shadowshoes= |floatshoes=y |statusguard= |superarmor= | ||
|info= | |info= | ||
|locations= | |locations='''Level 3:''' [[Armor Comp (MMBN5)|Armor Comp]] (45.2%), [[Helmet Comp]] (45.2%), [[Katana Comp]] (45.2%), [[Server Comp]] (37.5%), [[Gargoyle Castle HP]] (30.0%), [[Drill Comp 4]] (26.9%), [[End Area 2]] (20.8%), [[Old Terminal Comp]] (16.7%), [[Drill Comp 3]] (16.7%), [[End Area 1]] (16.7%), [[End Area 3]] (15.4%), [[Air Conditioner Comp (MMBN5)|Air Conditioner Comp]] (12.5%), [[Engine Comp]] (12.5%), [[Radar Comp]] (12.5%), [[Screw Comp]] (12.5%), [[Wind God Comp]] (12.5%), [[Oran Area 3]] (11.5%), [[End Area 5]] (11.1%)<br/>'''Liberation Mission:''' [[Nebula Area 3 (Liberation Mission)|Nebula Area 3]] | ||
|attacks= | |attacks= | ||
{{EnemyInfo/Attack |name_en=Pulsar<ref name="Pulsar"/> |name_jp=バッドチューン |name_tl=Bad Tune | |||
|attack=160 |emotion=10 |element=none |noflash=y | |||
|info=Inflicts Paralyze LV. 1 (1.5 seconds) ({{chance|1/2}}) or Confuse LV. 1 (8 seconds) ({{chance|1/2}}). | |||
}} | |||
|getdata= | |getdata= | ||
{{EnemyInfo/GetData |hp=Any |chip=Pulsar3 |code=R |lv1= 5: 25% |lv2= 6-8: 50% |lv3= 9: 46.875% |lv4= 10: 25% }} | |||
{{EnemyInfo/GetData |hp=Any |chip=Pulsar3 |code=S |lv1= 9: 3.125% |lv2= 10: 25% |lv3= S: 50% }} | |||
{{EnemyInfo/GetData |hp=High |zenny=600 |lv1= 9: 3.125% |lv2= 10: 25% |lv3= S: 50% }} | |||
{{EnemyInfo/GetData |hp=High |zenny=550 |lv1= 7: 25% |lv2= 8: 50% |lv3= 9: 46.875% |lv4= 10: 25% }} | |||
{{EnemyInfo/GetData |hp=High |zenny=500 |lv1= 5: 25% |lv2= 6: 50% |lv3= 7: 25% }} | |||
{{EnemyInfo/GetData |hp=High |zenny=50 |lv1= 4-5: 50% }} | |||
{{EnemyInfo/GetData |hp=High |zenny=30 |lv1= 1-3: 100% |lv2= 4: 50% }} | |||
{{EnemyInfo/GetData |hp=Low |recov=500 |lv1= 1-4: 100% |lv2= 5: 75% |lv3= 6-S: 50% }} | |||
}} | }} | ||
| Line 1,150: | Line 2,200: | ||
|airshoes=y |shadowshoes= |floatshoes=y |statusguard= |superarmor= | |airshoes=y |shadowshoes= |floatshoes=y |statusguard= |superarmor= | ||
|info= | |info= | ||
|locations= | |locations='''Level 3:''' [[Oran Isle Vision Burst]] (27.8%), [[Nebula Area 1]] (27.8%), [[Undernet 1 (MMBN5)|Undernet 1]] (26.4%), [[Gargoyle Comp 1]] (17.7%), [[Chip Maker Comp]] (14.6%), [[Old Terminal Comp]] (12.5%), [[Factory Comp 2 (MMBN5)|Factory Comp 2]] (11.1%), [[Gargoyle Comp 2]] (6.2%), [[Nebula Area 6]] (4.4%) | ||
|attacks= | |attacks= | ||
{{EnemyInfo/Attack |name_en=Pulsar<ref name="Pulsar"/> |name_jp=バッドチューン |name_tl=Bad Tune | |||
|attack=200 |emotion=10 |element=none |noflash=y | |||
|info=Inflicts Paralyze LV. 1 (1.5 seconds) ({{chance|1/2}}) or Confuse LV. 1 (8 seconds) ({{chance|1/2}}). | |||
}} | |||
|getdata= | |getdata= | ||
{{EnemyInfo/GetData |hp=Any |chip=Pulsar3 |code=C |lv1= 7: 25% |lv2= 8-S: 50% }} | |||
{{EnemyInfo/GetData |hp=Any |chip=Pulsar3 |code=S |lv1= 5: 25% |lv2= 6: 50% |lv3= 7: 25% }} | |||
{{EnemyInfo/GetData |hp=High |zenny=750 |lv1= 9: 3.125% |lv2= 10: 25% |lv3= S: 50% }} | |||
{{EnemyInfo/GetData |hp=High |zenny=700 |lv1= 7: 25% |lv2= 8: 50% |lv3= 9: 46.875% |lv4= 10: 25% }} | |||
{{EnemyInfo/GetData |hp=High |zenny=650 |lv1= 5: 25% |lv2= 6: 50% |lv3= 7: 25% }} | |||
{{EnemyInfo/GetData |hp=High |zenny=50 |lv1= 4-5: 50% }} | |||
{{EnemyInfo/GetData |hp=High |zenny=30 |lv1= 1-3: 100% |lv2= 4: 50% }} | |||
{{EnemyInfo/GetData |hp=Low |recov=max |lv1= 1-4: 100% |lv2= 5: 75% |lv3= 6-S: 50% }} | |||
}} | }} | ||
| Line 1,162: | Line 2,224: | ||
|airshoes= |shadowshoes= |floatshoes= |statusguard= |superarmor= | |airshoes= |shadowshoes= |floatshoes= |statusguard= |superarmor= | ||
|info=Knocked down when hit by 10+ damage. Invulnerable while knocked down. | |info=Knocked down when hit by 10+ damage. Invulnerable while knocked down. | ||
|locations= | |locations='''Level 1:''' [[Undernet 1 (MMBN5)|Undernet 1]] (30.6%), [[Undernet 2 (MMBN5)|Undernet 2]] (9.0%), [[Factory Comp 4 (MMBN5)|Factory Comp 4]] (5.6%), [[Undernet 4 (MMBN5)|Undernet 4]] (5.1%)<br/>'''Liberation Mission:''' [[Undernet 4 (Liberation Mission)|Undernet 4]] | ||
|attacks= | |attacks= | ||
{{EnemyInfo/Attack |name_en=Skully<ref name="Skully">Listed as '''Skull Chain''' in Mega Man Battle Network 5 Official Strategy Guide</ref> |name_jp=スカルチェーン |name_tl=Skull Chain | |||
|attack=40 |emotion=10 |element=none | |||
}} | |||
|getdata= | |getdata= | ||
{{EnemyInfo/GetData |hp=Any |chip=Skully1 |code=K |version=Team ProtoMan |lv1= 5: 25% |lv2= 6-S: 50% }} | |||
{{EnemyInfo/GetData |hp=Any |chip=Skully1 |code=S |version=Team Colonel |lv1= 5: 25% |lv2= 6-S: 50% }} | |||
{{EnemyInfo/GetData |hp=Any |zenny=400 |lv1= 9: 3.125% |lv2= 10: 25% |lv3= S: 50% }} | |||
{{EnemyInfo/GetData |hp=Any |zenny=350 |lv1= 7: 25% |lv2= 8: 50% |lv3= 9: 46.875% |lv4= 10: 25% }} | |||
{{EnemyInfo/GetData |hp=Any |zenny=300 |lv1= 5: 25% |lv2= 6: 50% |lv3= 7: 25% }} | |||
{{EnemyInfo/GetData |hp=Any |zenny=50 |lv1= 4-5: 50% }} | |||
{{EnemyInfo/GetData |hp=Any |zenny=30 |lv1= 1-3: 100% |lv2= 4: 50% }} | |||
}} | }} | ||
| Line 1,173: | Line 2,245: | ||
|airshoes= |shadowshoes= |floatshoes= |statusguard= |superarmor= | |airshoes= |shadowshoes= |floatshoes= |statusguard= |superarmor= | ||
|info=Knocked down when hit by 10+ damage. Invulnerable while knocked down. | |info=Knocked down when hit by 10+ damage. Invulnerable while knocked down. | ||
|locations= | |locations='''Level 1:''' [[Undernet 4 (MMBN5)|Undernet 4]] (17.9%), [[Factory Comp 3 (MMBN5)|Factory Comp 3]] (15.6%), [[Factory Comp 4 (MMBN5)|Factory Comp 4]] (3.3%)<br/>'''Liberation Mission:''' [[Undernet 4 (Liberation Mission)|Undernet 4]] | ||
|attacks= | |attacks= | ||
{{EnemyInfo/Attack |name_en=Skully<ref name="Skully"/> |name_jp=スカルチェーン |name_tl=Skull Chain | |||
|attack=70 |emotion=10 |element=none | |||
}} | |||
{{EnemyInfo/Attack |name_en=BattleChip | |||
|info=Blinder ({{chance|2/16}}) | |||
}} | |||
|getdata= | |getdata= | ||
{{EnemyInfo/GetData |hp=Any |chip=Skully1 |code=C |lv1= 7: 25% |lv2= 8-S: 50% }} | |||
{{EnemyInfo/GetData |hp=Any |zenny=400 |lv1= 9: 3.125% |lv2= 10: 25% |lv3= S: 50% }} | |||
{{EnemyInfo/GetData |hp=Any |zenny=350 |lv1= 7: 25% |lv2= 8: 50% |lv3= 9: 46.875% |lv4= 10: 25% }} | |||
{{EnemyInfo/GetData |hp=Any |zenny=300 |lv1= 5: 50% |lv2= 6: 100% |lv3= 7: 50% }} | |||
{{EnemyInfo/GetData |hp=Any |zenny=50 |lv1= 4-5: 50% }} | |||
{{EnemyInfo/GetData |hp=Any |zenny=30 |lv1= 1-3: 100% |lv2= 4: 50% }} | |||
}} | }} | ||
| Line 1,184: | Line 2,268: | ||
|airshoes= |shadowshoes= |floatshoes= |statusguard= |superarmor= | |airshoes= |shadowshoes= |floatshoes= |statusguard= |superarmor= | ||
|info=Knocked down when hit by 10+ damage. Invulnerable while knocked down. | |info=Knocked down when hit by 10+ damage. Invulnerable while knocked down. | ||
|locations= | |locations='''Level 2:''' [[Undernet 1 (MMBN5)|Undernet 1]] (30.6%), [[Undernet 2 (MMBN5)|Undernet 2]] (9.0%), [[Factory Comp 4 (MMBN5)|Factory Comp 4]] (5.6%), [[Undernet 4 (MMBN5)|Undernet 4]] (5.1%) | ||
|attacks= | |attacks= | ||
{{EnemyInfo/Attack |name_en=Skully<ref name="Skully"/> |name_jp=スカルチェーン |name_tl=Skull Chain | |||
|attack=90 |emotion=10 |element=none | |||
}} | |||
{{EnemyInfo/Attack |name_en=BattleChip | |||
|info=Blinder ({{chance|1/16}}), AreaGrab ({{chance|1/16}}) | |||
}} | |||
|getdata= | |getdata= | ||
{{EnemyInfo/GetData |hp=Any |chip=Skully2 |code=H |version=Team ProtoMan |lv1= 7: 25% |lv2= 8-S: 50% }} | |||
{{EnemyInfo/GetData |hp=Any |chip=Skully2 |code=V |version=Team Colonel |lv1= 7: 25% |lv2= 8-S: 50% }} | |||
{{EnemyInfo/GetData |hp=Any |zenny=600 |lv1= 9: 3.125% |lv2= 10: 25% |lv3= S: 50% }} | |||
{{EnemyInfo/GetData |hp=Any |zenny=550 |lv1= 7: 25% |lv2= 8: 50% |lv3= 9: 46.875% |lv4= 10: 25% }} | |||
{{EnemyInfo/GetData |hp=Any |zenny=500 |lv1= 5: 50% |lv2= 6: 100% |lv3= 7: 50% }} | |||
{{EnemyInfo/GetData |hp=Any |zenny=50 |lv1= 4-5: 50% }} | |||
{{EnemyInfo/GetData |hp=Any |zenny=30 |lv1= 1-3: 100% |lv2= 4: 50% }} | |||
}} | }} | ||
| Line 1,195: | Line 2,292: | ||
|airshoes= |shadowshoes= |floatshoes= |statusguard= |superarmor= | |airshoes= |shadowshoes= |floatshoes= |statusguard= |superarmor= | ||
|info=Knocked down when hit by 10+ damage. Invulnerable while knocked down. | |info=Knocked down when hit by 10+ damage. Invulnerable while knocked down. | ||
|locations= | |locations='''Level 2:''' [[Nebula Area 1]] (29.2%), [[Nebula Area 2]] (26.4%), [[Undernet 4 (MMBN5)|Undernet 4]] (17.9%), [[Factory Comp 3 (MMBN5)|Factory Comp 3]] (15.6%), [[Factory Comp 4 (MMBN5)|Factory Comp 4]] (3.3%)<br/>'''Liberation Mission:''' [[Nebula Area 3 (Liberation Mission)|Nebula Area 3]] | ||
|attacks= | |attacks= | ||
{{EnemyInfo/Attack |name_en=Skully<ref name="Skully"/> |name_jp=スカルチェーン |name_tl=Skull Chain | |||
|attack=120 |emotion=10 |element=none | |||
}} | |||
{{EnemyInfo/Attack |name_en=BattleChip | |||
|info=AreaGrab ({{chance|2/16}}) | |||
}} | |||
|getdata= | |getdata= | ||
{{EnemyInfo/GetData |hp=Any |chip=Skully2 |code=A |lv1= 7: 25% |lv2= 8-S: 50% }} | |||
{{EnemyInfo/GetData |hp=Any |zenny=600 |lv1= 9: 3.125% |lv2= 10: 25% |lv3= S: 50% }} | |||
{{EnemyInfo/GetData |hp=Any |zenny=550 |lv1= 7: 25% |lv2= 8: 50% |lv3= 9: 46.875% |lv4= 10: 25% }} | |||
{{EnemyInfo/GetData |hp=Any |zenny=500 |lv1= 5: 50% |lv2= 6: 100% |lv3= 7: 50% }} | |||
{{EnemyInfo/GetData |hp=Any |zenny=50 |lv1= 4-5: 50% }} | |||
{{EnemyInfo/GetData |hp=Any |zenny=30 |lv1= 1-3: 100% |lv2= 4: 50% }} | |||
}} | }} | ||
| Line 1,206: | Line 2,315: | ||
|airshoes= |shadowshoes= |floatshoes= |statusguard= |superarmor= | |airshoes= |shadowshoes= |floatshoes= |statusguard= |superarmor= | ||
|info=Knocked down when hit by 10+ damage. Invulnerable while knocked down. | |info=Knocked down when hit by 10+ damage. Invulnerable while knocked down. | ||
|locations= | |locations='''Level 3:''' [[Undernet 1 (MMBN5)|Undernet 1]] (30.6%), [[Undernet 2 (MMBN5)|Undernet 2]] (9.0%), [[Factory Comp 4 (MMBN5)|Factory Comp 4]] (5.6%), [[Undernet 4 (MMBN5)|Undernet 4]] (5.1%)<br/>'''Liberation Mission:''' [[Nebula Area 3 (Liberation Mission)|Nebula Area 3]] | ||
|attacks= | |attacks= | ||
{{EnemyInfo/Attack |name_en=Skully<ref name="Skully"/> |name_jp=スカルチェーン |name_tl=Skull Chain | |||
|attack=160 |emotion=10 |element=none | |||
}} | |||
{{EnemyInfo/Attack |name_en=BattleChip | |||
|info=AreaGrab ({{chance|2/16}}) | |||
}} | |||
|getdata= | |getdata= | ||
{{EnemyInfo/GetData |hp=Any |chip=Skully3 |code=N |version=Team ProtoMan |lv1= 7: 25% |lv2= 8-S: 50% }} | |||
{{EnemyInfo/GetData |hp=Any |chip=Skully3 |code=U |version=Team Colonel |lv1= 7: 25% |lv2= 8-S: 50% }} | |||
{{EnemyInfo/GetData |hp=Any |zenny=750 |lv1= 9: 3.125% |lv2= 10: 25% |lv3= S: 50% }} | |||
{{EnemyInfo/GetData |hp=Any |zenny=700 |lv1= 7: 25% |lv2= 8: 50% |lv3= 9: 46.875% |lv4= 10: 25% }} | |||
{{EnemyInfo/GetData |hp=Any |zenny=650 |lv1= 5: 50% |lv2= 6: 100% |lv3= 7: 50% }} | |||
{{EnemyInfo/GetData |hp=Any |zenny=50 |lv1= 4-5: 50% }} | |||
{{EnemyInfo/GetData |hp=Any |zenny=30 |lv1= 1-3: 100% |lv2= 4: 50% }} | |||
}} | }} | ||
| Line 1,217: | Line 2,339: | ||
|airshoes= |shadowshoes= |floatshoes= |statusguard= |superarmor= | |airshoes= |shadowshoes= |floatshoes= |statusguard= |superarmor= | ||
|info=Knocked down when hit by 10+ damage. Invulnerable while knocked down. | |info=Knocked down when hit by 10+ damage. Invulnerable while knocked down. | ||
|locations= | |locations='''Level 3:''' [[Nebula Area 1]] (29.2%), [[Nebula Area 2]] (26.4%), [[Undernet 4 (MMBN5)|Undernet 4]] (17.9%), [[Factory Comp 3 (MMBN5)|Factory Comp 3]] (15.6%), [[Nebula Area 6]] (7.8%), [[Factory Comp 4 (MMBN5)|Factory Comp 4]] (3.3%) | ||
|attacks= | |attacks= | ||
{{EnemyInfo/Attack |name_en=Skully<ref name="Skully"/> |name_jp=スカルチェーン |name_tl=Skull Chain | |||
|attack=200 |emotion=10 |element=none | |||
}} | |||
{{EnemyInfo/Attack |name_en=BattleChip | |||
|info=AreaGrab ({{chance|2/16}}) | |||
}} | |||
|getdata= | |getdata= | ||
{{EnemyInfo/GetData |hp=Any |chip=Skully3 |code=G |lv1= 7: 25% |lv2= 8-S: 50% }} | |||
{{EnemyInfo/GetData |hp=Any |zenny=750 |lv1= 9: 3.125% |lv2= 10: 25% |lv3= S: 50% }} | |||
{{EnemyInfo/GetData |hp=Any |zenny=700 |lv1= 7: 25% |lv2= 8: 50% |lv3= 9: 46.875% |lv4= 10: 25% }} | |||
{{EnemyInfo/GetData |hp=Any |zenny=650 |lv1= 5: 50% |lv2= 6: 100% |lv3= 7: 50% }} | |||
{{EnemyInfo/GetData |hp=Any |zenny=50 |lv1= 4-5: 50% }} | |||
{{EnemyInfo/GetData |hp=Any |zenny=30 |lv1= 1-3: 100% |lv2= 4: 50% }} | |||
}} | }} | ||
| Line 1,229: | Line 2,363: | ||
|airshoes= |shadowshoes= |floatshoes=y |statusguard= |superarmor= | |airshoes= |shadowshoes= |floatshoes=y |statusguard= |superarmor= | ||
|info= | |info= | ||
|locations= | |locations='''Level 1:''' [[Furnace Comp]] (37.5%), [[Main Comp 1]] (25.0%), [[Main Comp 2]] (20.8%), [[Oran Area 1]] (11.9%), [[Oran Area 2]] (9.7%)<br/>'''Liberation Mission:''' [[ACDC Area 3 (Liberation Mission)|ACDC Area]] | ||
|attacks= | |attacks= | ||
{{EnemyInfo/Attack |name_en=FireHit<ref name="FireHit">Listed as '''Fire Punch''' in Mega Man Battle Network 5 Official Strategy Guide</ref> |name_jp=ファイアパンチ |name_tl=Fire Punch | |||
|attack=20 |emotion=20 |element=fire | |||
}} | |||
|getdata= | |getdata= | ||
{{EnemyInfo/GetData |hp=Any |chip=FireHit1 |code=P |lv1= 9: 6.25% |lv2= 10: 50% |lv3= S: 100% }} | |||
{{EnemyInfo/GetData |hp=Any |chip=FireHit1 |code=Q |lv1= 5: 25% |lv2= 6: 50% |lv3= 7: 75% |lv4= 8: 100% |lv5= 9: 93.75% |lv6= 10: 50% }} | |||
{{EnemyInfo/GetData |hp=High |zenny=150 |lv1= 5: 25% |lv2= 6: 50% |lv3= 7: 25% }} | |||
{{EnemyInfo/GetData |hp=High |zenny=50 |lv1= 4-5: 50% }} | |||
{{EnemyInfo/GetData |hp=High |zenny=30 |lv1= 1-3: 100% |lv2= 4: 50% }} | |||
{{EnemyInfo/GetData |hp=Low |recov=100 |lv1= 1-4: 100% |lv2= 5: 75% |lv3= 6: 50% |lv4= 7: 25% }} | |||
}} | }} | ||
| Line 1,240: | Line 2,383: | ||
|airshoes= |shadowshoes= |floatshoes=y |statusguard= |superarmor= | |airshoes= |shadowshoes= |floatshoes=y |statusguard= |superarmor= | ||
|info= | |info= | ||
|locations= | |locations='''Level 1:''' [[Dumpling Comp]] (43.8%), [[Squirrel Comps]] (27.8%), [[NetBattle Comp (MMBN5)|NetBattle Comp]] (21.4%), [[Furnace Comp]] (16.7%), [[Pipe Comp (MMBN5)|Pipe Comp]] (16.7%), [[Undernet 3 (MMBN5)|Undernet 3]] (11.5%), [[SciLab Area 3]] (10.3%), [[SciLab Area 4]] (10.3%), [[End Area 4]] (9.0%)<br/>'''Liberation Mission:''' [[End Area 5 (Liberation Mission)|End Area 5]], [[Undernet 4 (Liberation Mission)|Undernet 4]] | ||
|attacks= | |attacks= | ||
{{EnemyInfo/Attack |name_en=FireHit<ref name="DoubleFirePunch">Listed as '''Double Fire Punch''' in Mega Man Battle Network 5 Official Strategy Guide</ref> |name_jp=ファイアパンチ |name_tl=Fire Punch | |||
|attack=30 |emotion=20 |times=2 |element=fire | |||
}} | |||
{{EnemyInfo/Attack |name_en=BattleChip | |||
|info=Recov30 ({{chance|2/16}}) | |||
}} | |||
|getdata= | |getdata= | ||
{{EnemyInfo/GetData |hp=Any |chip=FireHit1 |code=O |lv1= 9: 6.25% |lv2= 10: 50% |lv3= S: 100% }} | |||
{{EnemyInfo/GetData |hp=Any |chip=FireHit1 |code=P |lv1= 7: 25% |lv2= 8: 50% |lv3= 9: 46.875% |lv4= 10: 25% }} | |||
{{EnemyInfo/GetData |hp=High |zenny=300 |lv1= 7: 25% |lv2= 8: 50% |lv3= 9: 46.875% |lv4= 10: 25% }} | |||
{{EnemyInfo/GetData |hp=High |zenny=250 |lv1= 5: 50% |lv2= 6: 100% |lv3= 7: 50% }} | |||
{{EnemyInfo/GetData |hp=High |zenny=50 |lv1= 4-5: 50% }} | |||
{{EnemyInfo/GetData |hp=High |zenny=30 |lv1= 1-3: 100% |lv2= 4: 50% }} | |||
{{EnemyInfo/GetData |hp=Low |recov=200 |lv1= 1-6: 100% |lv2= 7: 75% |lv3= 8: 50% |lv4= 9: 46.875% |lv5= 10: 25% }} | |||
}} | }} | ||
| Line 1,251: | Line 2,407: | ||
|airshoes= |shadowshoes= |floatshoes=y |statusguard= |superarmor= | |airshoes= |shadowshoes= |floatshoes=y |statusguard= |superarmor= | ||
|info= | |info= | ||
|locations= | |locations='''Level 2:''' [[Furnace Comp]] (37.5%), [[Main Comp 1]] (25.0%), [[Main Comp 2]] (20.8%), [[Oran Area 1]] (11.9%), [[Oran Area 2]] (9.7%) | ||
|attacks= | |attacks= | ||
{{EnemyInfo/Attack |name_en=FireHit<ref name="DoubleFirePunch"/> |name_jp=ファイアパンチ |name_tl=Fire Punch | |||
|attack=50 |emotion=20 |times=2 |element=fire | |||
}} | |||
{{EnemyInfo/Attack |name_en=BattleChip | |||
|info=Invisibl ({{chance|2/16}}) | |||
}} | |||
|getdata= | |getdata= | ||
{{EnemyInfo/GetData |hp=Any |chip=FireHit2 |code=I |lv1= 7: 25% |lv2= 8: 50% |lv3= 9: 46.875% |lv4= 10: 25% }} | |||
{{EnemyInfo/GetData |hp=Any |chip=FireHit2 |code=J |lv1= 9: 6.25% |lv2= 10: 50% |lv3= S: 100% }} | |||
{{EnemyInfo/GetData |hp=High |zenny=400 |lv1= 7: 25% |lv2= 8: 50% |lv3= 9: 46.875% |lv4= 10: 25% }} | |||
{{EnemyInfo/GetData |hp=High |zenny=350 |lv1= 5: 50% |lv2= 6: 100% |lv3= 7: 50% }} | |||
{{EnemyInfo/GetData |hp=High |zenny=50 |lv1= 4-5: 50% }} | |||
{{EnemyInfo/GetData |hp=High |zenny=30 |lv1= 1-3: 100% |lv2= 4: 50% }} | |||
{{EnemyInfo/GetData |hp=Low |recov=300 |lv1= 1-6: 100% |lv2= 7: 75% |lv3= 8: 50% |lv4= 9: 46.875% |lv5= 10: 25% }} | |||
}} | }} | ||
| Line 1,262: | Line 2,431: | ||
|airshoes= |shadowshoes= |floatshoes=y |statusguard= |superarmor= | |airshoes= |shadowshoes= |floatshoes=y |statusguard= |superarmor= | ||
|info= | |info= | ||
|locations= | |locations='''Level 2:''' [[Dumpling Comp]] (43.8%), [[Squirrel Comps]] (27.8%), [[Nebula Area 3]] (25.0%), [[NetBattle Comp (MMBN5)|NetBattle Comp]] (21.4%), [[Furnace Comp]] (16.7%), [[Pipe Comp (MMBN5)|Pipe Comp]] (16.7%), [[Undernet 3 (MMBN5)|Undernet 3]] (11.5%), [[SciLab Area 3]] (10.3%), [[SciLab Area 4]] (10.3%), [[End Area 4]] (9.0%)<br/>'''Liberation Mission:''' [[Nebula Area 3 (Liberation Mission)|Nebula Area 3]] | ||
|attacks= | |attacks= | ||
{{EnemyInfo/Attack |name_en=FireHit<ref name="DoubleFirePunch"/> |name_jp=ファイアパンチ |name_tl=Fire Punch | |||
|attack=70 |emotion=20 |times=2 |element=fire | |||
}} | |||
{{EnemyInfo/Attack |name_en=BattleChip | |||
|info=Invisibl ({{chance|2/16}}) | |||
}} | |||
|getdata= | |getdata= | ||
{{EnemyInfo/GetData |hp=Any |chip=FireHit2 |code=H |lv1= 9: 6.25% |lv2= 10: 50% |lv3= S: 100% }} | |||
{{EnemyInfo/GetData |hp=Any |chip=FireHit2 |code=J |lv1= 7: 25% |lv2= 8: 50% |lv3= 9: 46.875% |lv4= 10: 25% }} | |||
{{EnemyInfo/GetData |hp=High |zenny=550 |lv1= 7: 25% |lv2= 8: 50% |lv3= 9: 46.875% |lv4= 10: 25% }} | |||
{{EnemyInfo/GetData |hp=High |zenny=400 |lv1= 5: 50% |lv2= 6: 100% |lv3= 7: 50% }} | |||
{{EnemyInfo/GetData |hp=High |zenny=50 |lv1= 4-5: 50% }} | |||
{{EnemyInfo/GetData |hp=High |zenny=30 |lv1= 1-3: 100% |lv2= 4: 50% }} | |||
{{EnemyInfo/GetData |hp=Low |recov=400 |lv1= 1-6: 100% |lv2= 7: 75% |lv3= 8: 50% |lv4= 9: 46.875% |lv5= 10: 25% }} | |||
}} | }} | ||
| Line 1,273: | Line 2,455: | ||
|airshoes= |shadowshoes= |floatshoes=y |statusguard= |superarmor= | |airshoes= |shadowshoes= |floatshoes=y |statusguard= |superarmor= | ||
|info= | |info= | ||
|locations= | |locations='''Level 3:''' [[Furnace Comp]] (37.5%), [[Main Comp 1]] (25.0%), [[Main Comp 2]] (20.8%), [[Nebula Area 4]] (19.4%), [[Oran Area 1]] (11.9%), [[Oran Area 2]] (9.7%) | ||
|attacks= | |attacks= | ||
{{EnemyInfo/Attack |name_en=FireHit<ref name="DoubleFirePunch"/> |name_jp=ファイアパンチ |name_tl=Fire Punch | |||
|attack=100 |emotion=20 |times=2 |element=fire | |||
}} | |||
{{EnemyInfo/Attack |name_en=BattleChip | |||
|info=Invisibl ({{chance|2/16}}), Geddon1 ({{chance|2/16}}) | |||
}} | |||
|getdata= | |getdata= | ||
{{EnemyInfo/GetData |hp=Any |chip=FireHit3 |code=F |lv1= 7: 25% |lv2= 8: 50% |lv3= 9: 46.875% |lv4= 10: 25% }} | |||
{{EnemyInfo/GetData |hp=Any |chip=FireHit3 |code=G |lv1= 9: 6.25% |lv2= 10: 50% |lv3= S: 100% }} | |||
{{EnemyInfo/GetData |hp=High |zenny=600 |lv1= 7: 25% |lv2= 8: 50% |lv3= 9: 46.875% |lv4= 10: 25% }} | |||
{{EnemyInfo/GetData |hp=High |zenny=550 |lv1= 5: 50% |lv2= 6: 100% |lv3= 7: 50% }} | |||
{{EnemyInfo/GetData |hp=High |zenny=50 |lv1= 4-5: 50% }} | |||
{{EnemyInfo/GetData |hp=High |zenny=30 |lv1= 1-3: 100% |lv2= 4: 50% }} | |||
{{EnemyInfo/GetData |hp=Low |recov=500 |lv1= 1-6: 100% |lv2= 7: 75% |lv3= 8: 50% |lv4= 9: 46.875% |lv5= 10: 25% }} | |||
}} | }} | ||
| Line 1,284: | Line 2,479: | ||
|airshoes= |shadowshoes= |floatshoes=y |statusguard= |superarmor= | |airshoes= |shadowshoes= |floatshoes=y |statusguard= |superarmor= | ||
|info= | |info= | ||
|locations= | |locations='''Level 3:''' [[Dumpling Comp]] (43.8%), [[Squirrel Comps]] (27.8%), [[Nebula Area 3]] (25.0%), [[NetBattle Comp (MMBN5)|NetBattle Comp]] (21.4%), [[Furnace Comp]] (16.7%), [[Pipe Comp (MMBN5)|Pipe Comp]] (16.7%), [[Undernet 3 (MMBN5)|Undernet 3]] (11.5%), [[SciLab Area 3]] (10.3%), [[SciLab Area 4]] (10.3%), [[End Area 4]] (9.0%), [[Nebula Area 6]] (2.2%) | ||
|attacks= | |attacks= | ||
{{EnemyInfo/Attack |name_en=FireHit<ref name="DoubleFirePunch"/> |name_jp=ファイアパンチ |name_tl=Fire Punch | |||
|attack=130 |emotion=20 |times=2 |element=fire | |||
}} | |||
{{EnemyInfo/Attack |name_en=BattleChip | |||
|info=AntiWatr ({{chance|2/16}}) | |||
}} | |||
|getdata= | |getdata= | ||
{{EnemyInfo/GetData |hp=Any |chip=FireHit3 |code=E |lv1= 9: 6.25% |lv2= 10: 50% |lv3= S: 100% }} | |||
{{EnemyInfo/GetData |hp=Any |chip=FireHit3 |code=G |lv1= 7: 25% |lv2= 8: 50% |lv3= 9: 46.875% |lv4= 10: 25% }} | |||
{{EnemyInfo/GetData |hp=High |zenny=700 |lv1= 7: 25% |lv2= 8: 50% |lv3= 9: 46.875% |lv4= 10: 25% }} | |||
{{EnemyInfo/GetData |hp=High |zenny=650 |lv1= 5: 50% |lv2= 6: 100% |lv3= 7: 50% }} | |||
{{EnemyInfo/GetData |hp=High |zenny=50 |lv1= 4-5: 50% }} | |||
{{EnemyInfo/GetData |hp=High |zenny=30 |lv1= 1-3: 100% |lv2= 4: 50% }} | |||
{{EnemyInfo/GetData |hp=Low |recov=500 |lv1= 1-6: 100% |lv2= 7: 75% |lv3= 8: 50% |lv4= 9: 46.875% |lv5= 10: 25% }} | |||
}} | }} | ||
| Line 1,296: | Line 2,504: | ||
|airshoes= |shadowshoes= |floatshoes=y |statusguard= |superarmor= | |airshoes= |shadowshoes= |floatshoes=y |statusguard= |superarmor= | ||
|info= | |info= | ||
|locations= | |locations='''Level 1:''' [[Undernet 3 (MMBN5)|Undernet 3]] (24.4%), [[Undernet 4 (MMBN5)|Undernet 4]] (23.1%), [[Pipe Comp (MMBN5)|Pipe Comp]] (18.8%), [[Factory Comp 2 (MMBN5)|Factory Comp 2]] (13.9%)<br/>'''Liberation Mission:''' [[Undernet 4 (Liberation Mission)|Undernet 4]] | ||
|attacks= | |attacks= | ||
{{EnemyInfo/Attack |name_en=FireCircle<ref name="FireCircle">Mega Man Battle Network 5 Official Strategy Guide</ref> |name_jp=フレアサークル |name_tl=Flare Circle | |||
|attack=30 |emotion=10 |element=fire | |||
}} | |||
|getdata= | |getdata= | ||
{{EnemyInfo/GetData |hp=Any |chip=HotBody1 |code=F |version=Team ProtoMan |lv1= 7: 25% |lv2= 8-S: 50% }} | |||
{{EnemyInfo/GetData |hp=Any |chip=HotBody1 |code=P |version=Team Colonel |lv1= 7: 25% |lv2= 8-S: 50% }} | |||
{{EnemyInfo/GetData |hp=High |zenny=400 |lv1= 9: 3.125% |lv2= 10: 25% |lv3= S: 50% }} | |||
{{EnemyInfo/GetData |hp=High |zenny=350 |lv1= 7: 25% |lv2= 8: 50% |lv3= 9: 46.875% |lv4= 10: 25% }} | |||
{{EnemyInfo/GetData |hp=High |zenny=300 |lv1= 5: 50% |lv2= 6: 100% |lv3= 7: 50% }} | |||
{{EnemyInfo/GetData |hp=High |zenny=50 |lv1= 4-5: 50% }} | |||
{{EnemyInfo/GetData |hp=High |zenny=30 |lv1= 1-3: 100% |lv2= 4: 50% }} | |||
{{EnemyInfo/GetData |hp=Low |recov=300 |lv1= 1-6: 100% |lv2= 7: 75% |lv3= 8-S: 50% }} | |||
}} | }} | ||
| Line 1,307: | Line 2,526: | ||
|airshoes= |shadowshoes= |floatshoes=y |statusguard= |superarmor= | |airshoes= |shadowshoes= |floatshoes=y |statusguard= |superarmor= | ||
|info= | |info= | ||
|locations= | |locations='''Level 1:''' [[Undernet 4 (MMBN5)|Undernet 4]] (5.1%) | ||
|attacks= | |attacks= | ||
{{EnemyInfo/Attack |name_en=FireCircle<ref name="FireCircle"/> |name_jp=フレアサークル |name_tl=Flare Circle | |||
|attack=60 |emotion=10 |element=fire | |||
}} | |||
{{EnemyInfo/Attack |name_en=BattleChip | |||
|info=Recov50 ({{chance|2/16}}) | |||
}} | |||
|getdata= | |getdata= | ||
{{EnemyInfo/GetData |hp=Any |chip=HotBody1 |code=A |lv1= 7: 25% |lv2= 8-S: 50% }} | |||
{{EnemyInfo/GetData |hp=High |zenny=400 |lv1= 9: 3.125% |lv2= 10: 25% |lv3= S: 50% }} | |||
{{EnemyInfo/GetData |hp=High |zenny=350 |lv1= 7: 25% |lv2= 8: 50% |lv3= 9: 46.875% |lv4= 10: 25% }} | |||
{{EnemyInfo/GetData |hp=High |zenny=300 |lv1= 5: 50% |lv2= 6: 100% |lv3= 7: 50% }} | |||
{{EnemyInfo/GetData |hp=High |zenny=50 |lv1= 4-5: 50% }} | |||
{{EnemyInfo/GetData |hp=High |zenny=30 |lv1= 1-3: 100% |lv2= 4: 50% }} | |||
{{EnemyInfo/GetData |hp=Low |recov=300 |lv1= 1-6: 100% |lv2= 7: 75% |lv3= 8-S: 50% }} | |||
}} | }} | ||
| Line 1,318: | Line 2,550: | ||
|airshoes= |shadowshoes= |floatshoes=y |statusguard= |superarmor= | |airshoes= |shadowshoes= |floatshoes=y |statusguard= |superarmor= | ||
|info= | |info= | ||
|locations= | |locations='''Level 2:''' [[Undernet 3 (MMBN5)|Undernet 3]] (24.4%), [[Undernet 4 (MMBN5)|Undernet 4]] (23.1%), [[Pipe Comp (MMBN5)|Pipe Comp]] (18.8%), [[Factory Comp 2 (MMBN5)|Factory Comp 2]] (13.9%)<br/>'''Liberation Mission:''' [[Nebula Area 3 (Liberation Mission)|Nebula Area 3]] | ||
|attacks= | |attacks= | ||
{{EnemyInfo/Attack |name_en=FireCircle<ref name="FireCircle"/> |name_jp=フレアサークル |name_tl=Flare Circle | |||
|attack=100 |emotion=10 |element=fire | |||
}} | |||
{{EnemyInfo/Attack |name_en=BattleChip | |||
|info=Recov50 ({{chance|2/16}}) | |||
}} | |||
|getdata= | |getdata= | ||
{{EnemyInfo/GetData |hp=Any |chip=HotBody2 |code=R |version=Team ProtoMan |lv1= 7: 25% |lv2= 8-S: 50% }} | |||
{{EnemyInfo/GetData |hp=Any |chip=HotBody2 |code=W |version=Team Colonel |lv1= 7: 25% |lv2= 8-S: 50% }} | |||
{{EnemyInfo/GetData |hp=High |zenny=600 |lv1= 9: 3.125% |lv2= 10: 25% |lv3= S: 50% }} | |||
{{EnemyInfo/GetData |hp=High |zenny=550 |lv1= 7: 25% |lv2= 8: 50% |lv3= 9: 46.875% |lv4= 10: 25% }} | |||
{{EnemyInfo/GetData |hp=High |zenny=500 |lv1= 5: 50% |lv2= 6: 100% |lv3= 7: 50% }} | |||
{{EnemyInfo/GetData |hp=High |zenny=50 |lv1= 4-5: 50% }} | |||
{{EnemyInfo/GetData |hp=High |zenny=30 |lv1= 1-3: 100% |lv2= 4: 50% }} | |||
{{EnemyInfo/GetData |hp=Low |recov=500 |lv1= 1-6: 100% |lv2= 7: 75% |lv3= 8-S: 50% }} | |||
}} | }} | ||
| Line 1,329: | Line 2,575: | ||
|airshoes= |shadowshoes= |floatshoes=y |statusguard= |superarmor= | |airshoes= |shadowshoes= |floatshoes=y |statusguard= |superarmor= | ||
|info= | |info= | ||
|locations= | |locations='''Level 2:''' [[Undernet 4 (MMBN5)|Undernet 4]] (5.1%) | ||
|attacks= | |attacks= | ||
|getdata= | {{EnemyInfo/Attack |name_en=FireCircle<ref name="FireCircle"/> |name_jp=フレアサークル |name_tl=Flare Circle | ||
|attack=140 |emotion=10 |element=fire | |||
}} | |||
{{EnemyInfo/Attack |name_en=BattleChip | |||
|info=AntiWatr ({{chance|1/16}}) | |||
}} | |||
|getdata= | |||
{{EnemyInfo/GetData |hp=Any |chip=HotBody2 |code=C |lv1= 7: 25% |lv2= 8-S: 50% }} | |||
{{EnemyInfo/GetData |hp=High |zenny=600 |lv1= 9: 3.125% |lv2= 10: 25% |lv3= S: 50% }} | |||
{{EnemyInfo/GetData |hp=High |zenny=550 |lv1= 7: 25% |lv2= 8: 50% |lv3= 9: 46.875% |lv4= 10: 25% }} | |||
{{EnemyInfo/GetData |hp=High |zenny=500 |lv1= 5: 50% |lv2= 6: 100% |lv3= 7: 50% }} | |||
{{EnemyInfo/GetData |hp=High |zenny=50 |lv1= 4-5: 50% }} | |||
{{EnemyInfo/GetData |hp=High |zenny=30 |lv1= 1-3: 100% |lv2= 4: 50% }} | |||
{{EnemyInfo/GetData |hp=Low |recov=500 |lv1= 1-6: 100% |lv2= 7: 75% |lv3= 8-S: 50% }} | |||
}} | }} | ||
| Line 1,340: | Line 2,599: | ||
|airshoes= |shadowshoes= |floatshoes=y |statusguard= |superarmor= | |airshoes= |shadowshoes= |floatshoes=y |statusguard= |superarmor= | ||
|info= | |info= | ||
|locations= | |locations='''Level 3:''' [[Nebula Area 4]] (29.2%), [[Undernet 3 (MMBN5)|Undernet 3]] (24.4%), [[Undernet 4 (MMBN5)|Undernet 4]] (23.1%), [[Pipe Comp (MMBN5)|Pipe Comp]] (18.8%), [[Factory Comp 2 (MMBN5)|Factory Comp 2]] (13.9%) | ||
|attacks= | |attacks= | ||
{{EnemyInfo/Attack |name_en=FireCircle<ref name="FireCircle"/> |name_jp=フレアサークル |name_tl=Flare Circle | |||
|attack=180 |emotion=10 |element=fire | |||
}} | |||
{{EnemyInfo/Attack |name_en=BattleChip | |||
|info=AntiWatr ({{chance|2/16}}) | |||
}} | |||
|getdata= | |getdata= | ||
{{EnemyInfo/GetData |hp=Any |chip=HotBody3 |code=M |version=Team ProtoMan |lv1= 7: 25% |lv2= 8-S: 50% }} | |||
{{EnemyInfo/GetData |hp=Any |chip=HotBody3 |code=S |version=Team Colonel |lv1= 7: 25% |lv2= 8-S: 50% }} | |||
{{EnemyInfo/GetData |hp=High |zenny=750 |lv1= 9: 3.125% |lv2= 10: 25% |lv3= S: 50% }} | |||
{{EnemyInfo/GetData |hp=High |zenny=700 |lv1= 7: 25% |lv2= 8: 50% |lv3= 9: 46.875% |lv4= 10: 25% }} | |||
{{EnemyInfo/GetData |hp=High |zenny=650 |lv1= 5: 50% |lv2= 6: 100% |lv3= 7: 50% }} | |||
{{EnemyInfo/GetData |hp=High |zenny=50 |lv1= 4-5: 50% }} | |||
{{EnemyInfo/GetData |hp=High |zenny=30 |lv1= 1-3: 100% |lv2= 4: 50% }} | |||
{{EnemyInfo/GetData |hp=Low |recov=max |lv1= 1-6: 100% |lv2= 7: 75% |lv3= 8-S: 50% }} | |||
}} | }} | ||
| Line 1,351: | Line 2,624: | ||
|airshoes= |shadowshoes= |floatshoes=y |statusguard= |superarmor= | |airshoes= |shadowshoes= |floatshoes=y |statusguard= |superarmor= | ||
|info= | |info= | ||
|locations= | |locations='''Level 3:''' [[Undernet 4 (MMBN5)|Undernet 4]] (5.1%), [[Nebula Area 6]] (4.4%) | ||
|attacks= | |attacks= | ||
{{EnemyInfo/Attack |name_en=FireCircle<ref name="FireCircle"/> |name_jp=フレアサークル |name_tl=Flare Circle | |||
|attack=220 |emotion=10 |element=fire | |||
}} | |||
{{EnemyInfo/Attack |name_en=BattleChip | |||
|info=AntiWatr ({{chance|2/16}}) | |||
}} | |||
|getdata= | |getdata= | ||
{{EnemyInfo/GetData |hp=Any |chip=HotBody3 |code=J |lv1= 7: 25% |lv2= 8-S: 50% }} | |||
{{EnemyInfo/GetData |hp=High |zenny=750 |lv1= 9: 3.125% |lv2= 10: 25% |lv3= S: 50% }} | |||
{{EnemyInfo/GetData |hp=High |zenny=700 |lv1= 7: 25% |lv2= 8: 50% |lv3= 9: 46.875% |lv4= 10: 25% }} | |||
{{EnemyInfo/GetData |hp=High |zenny=650 |lv1= 5: 50% |lv2= 6: 100% |lv3= 7: 50% }} | |||
{{EnemyInfo/GetData |hp=High |zenny=50 |lv1= 4-5: 50% }} | |||
{{EnemyInfo/GetData |hp=High |zenny=30 |lv1= 1-3: 100% |lv2= 4: 50% }} | |||
{{EnemyInfo/GetData |hp=Low |recov=max |lv1= 1-6: 100% |lv2= 7: 75% |lv3= 8-S: 50% }} | |||
}} | }} | ||
| Line 1,363: | Line 2,649: | ||
|airshoes=y |shadowshoes= |floatshoes=y |statusguard= |superarmor= | |airshoes=y |shadowshoes= |floatshoes=y |statusguard= |superarmor= | ||
|info= | |info= | ||
|locations= | |locations='''Level 1:''' [[Gargoyle Castle HP]] (56.7%), [[Wine Case Comp]] (33.3%), [[Ship Comp 1]] (29.2%), [[End Area 1]] (26.4%), [[End Area 3]] (24.4%), [[Armor Comp (MMBN5)|Armor Comp]] (23.8%), [[Helmet Comp]] (23.8%), [[Katana Comp]] (23.8%), [[End Area 2]] (22.2%), [[Ship Comp 2]] (20.8%), [[Ship Comp 3]] (16.7%), [[End Area 4]] (16.7%), [[NetBattle Comp (MMBN5)|NetBattle Comp]] (14.3%), [[End Area 5]] (11.1%)<br/>'''Liberation Mission:''' [[End Area 2 (Liberation Mission)|End Area 2]] | ||
|attacks= | |attacks= | ||
{{EnemyInfo/Attack |name_en=AquaWhirl<ref name="AquaWhirl">Listed as '''AqWhirll''' in Mega Man Battle Network 5 Official Strategy Guide</ref> |name_jp=アクアワール |name_tl=Aqua Whirl | |||
|attack=20 |emotion=10 |element=aqua |guard=y | |||
}} | |||
|getdata= | |getdata= | ||
{{EnemyInfo/GetData |hp=Any |chip=AqWhirl1 |code=F |version=Team ProtoMan |lv1= 7: 50% |lv2= 8-S: 100% }} | |||
{{EnemyInfo/GetData |hp=Any |chip=AqWhirl1 |code=N |version=Team Colonel |lv1= 7: 50% |lv2= 8-S: 100% }} | |||
{{EnemyInfo/GetData |hp=High |zenny=300 |lv1= 5: 50% |lv2= 6: 100% |lv3= 7: 50% }} | |||
{{EnemyInfo/GetData |hp=High |zenny=50 |lv1= 4-5: 50% }} | |||
{{EnemyInfo/GetData |hp=High |zenny=30 |lv1= 1-3: 100% |lv2= 4: 50% }} | |||
{{EnemyInfo/GetData |hp=Low |recov=200 |lv1= 1-6: 100% |lv2= 7: 50% }} | |||
}} | }} | ||
| Line 1,374: | Line 2,669: | ||
|airshoes=y |shadowshoes= |floatshoes=y |statusguard= |superarmor= | |airshoes=y |shadowshoes= |floatshoes=y |statusguard= |superarmor= | ||
|info= | |info= | ||
|locations= | |locations='''Level 1:''' [[Undernet 1 (MMBN5)|Undernet 1]] (16.7%), [[Pipe Comp (MMBN5)|Pipe Comp]] (14.6%) | ||
|attacks= | |attacks= | ||
{{EnemyInfo/Attack |name_en=AquaWhirl<ref name="AquaWhirl"/> |name_jp=アクアワール |name_tl=Aqua Whirl | |||
|attack=50 |emotion=10 |element=aqua |guard=y | |||
}} | |||
{{EnemyInfo/Attack |name_en=BattleChip | |||
|info=MetaGel ({{chance|2/16}}) | |||
}} | |||
|getdata= | |getdata= | ||
{{EnemyInfo/GetData |hp=Any |chip=AqWhirl1 |code=B |lv1= 9: 6.25% |lv2= 10: 50% |lv3= S: 100% }} | |||
{{EnemyInfo/GetData |hp=Any |chip=AqWhirl1 |code=F |version=Team ProtoMan |lv1= 7: 25% |lv2= 8: 50% |lv3= 9: 46.875% |lv4= 10: 25% }} | |||
{{EnemyInfo/GetData |hp=Any |chip=AqWhirl1 |code=N |version=Team Colonel |lv1= 7: 25% |lv2= 8: 50% |lv3= 9: 46.875% |lv4= 10: 25% }} | |||
{{EnemyInfo/GetData |hp=High |zenny=400 |lv1= 7: 25% |lv2= 8: 50% |lv3= 9: 46.875% |lv4= 10: 25% }} | |||
{{EnemyInfo/GetData |hp=High |zenny=350 |lv1= 5: 50% |lv2= 6: 100% |lv3= 7: 50% }} | |||
{{EnemyInfo/GetData |hp=High |zenny=50 |lv1= 4-5: 50% }} | |||
{{EnemyInfo/GetData |hp=High |zenny=30 |lv1= 1-3: 100% |lv2= 4: 50% }} | |||
{{EnemyInfo/GetData |hp=Low |recov=300 |lv1= 1-6: 100% |lv2= 7: 75% |lv3= 8: 50% |lv4= 9: 46.875% |lv5= 10: 25% }} | |||
}} | }} | ||
| Line 1,385: | Line 2,694: | ||
|airshoes=y |shadowshoes= |floatshoes=y |statusguard= |superarmor= | |airshoes=y |shadowshoes= |floatshoes=y |statusguard= |superarmor= | ||
|info= | |info= | ||
|locations= | |locations='''Level 2:''' [[Gargoyle Castle HP]] (56.7%), [[Wine Case Comp]] (33.3%), [[Ship Comp 1]] (29.2%), [[End Area 1]] (26.4%), [[End Area 3]] (24.4%), [[Armor Comp (MMBN5)|Armor Comp]] (23.8%), [[Helmet Comp]] (23.8%), [[Katana Comp]] (23.8%), [[End Area 2]] (22.2%), [[Ship Comp 2]] (20.8%), [[Ship Comp 3]] (16.7%), [[End Area 4]] (16.7%), [[NetBattle Comp (MMBN5)|NetBattle Comp]] (14.3%), [[End Area 5]] (11.1%) | ||
|attacks= | |attacks= | ||
{{EnemyInfo/Attack |name_en=AquaWhirl<ref name="AquaWhirl"/> |name_jp=アクアワール |name_tl=Aqua Whirl | |||
|attack=80 |emotion=10 |element=aqua |guard=y | |||
}} | |||
{{EnemyInfo/Attack |name_en=BattleChip | |||
|info=MetaGel ({{chance|2/16}}) | |||
}} | |||
|getdata= | |getdata= | ||
{{EnemyInfo/GetData |hp=Any |chip=AqWhirl2 |code=H |version=Team ProtoMan |lv1= 7: 25% |lv2= 8: 50% |lv3= 9: 53.125% |lv4= 10: 75% |lv5= S: 100% }} | |||
{{EnemyInfo/GetData |hp=Any |chip=AqWhirl2 |code=O |version=Team Colonel |lv1= 7: 25% |lv2= 8: 50% |lv3= 9: 53.125% |lv4= 10: 75% |lv5= S: 100% }} | |||
{{EnemyInfo/GetData |hp=High |zenny=500 |lv1= 7: 25% |lv2= 8: 50% |lv3= 9: 46.875% |lv4= 10: 25% }} | |||
{{EnemyInfo/GetData |hp=High |zenny=450 |lv1= 5: 50% |lv2= 6: 100% |lv3= 7: 50% }} | |||
{{EnemyInfo/GetData |hp=High |zenny=50 |lv1= 4-5: 50% }} | |||
{{EnemyInfo/GetData |hp=High |zenny=30 |lv1= 1-3: 100% |lv2= 4: 50% }} | |||
{{EnemyInfo/GetData |hp=Low |recov=400 |lv1= 1-6: 100% |lv2= 7: 75% |lv3= 8: 50% |lv4= 9: 46.875% |lv5= 10: 25% }} | |||
}} | }} | ||
| Line 1,396: | Line 2,718: | ||
|airshoes=y |shadowshoes= |floatshoes=y |statusguard= |superarmor= | |airshoes=y |shadowshoes= |floatshoes=y |statusguard= |superarmor= | ||
|info= | |info= | ||
|locations= | |locations='''Level 2:''' [[Undernet 1 (MMBN5)|Undernet 1]] (16.7%), [[Pipe Comp (MMBN5)|Pipe Comp]] (14.6%) | ||
|attacks= | |attacks= | ||
{{EnemyInfo/Attack |name_en=AquaWhirl<ref name="AquaWhirl"/> |name_jp=アクアワール |name_tl=Aqua Whirl | |||
|attack=140 |emotion=10 |element=aqua |guard=y | |||
}} | |||
{{EnemyInfo/Attack |name_en=BattleChip | |||
|info=MetaGel ({{chance|2/16}}) | |||
}} | |||
|getdata= | |getdata= | ||
{{EnemyInfo/GetData |hp=Any |chip=AqWhirl2 |code=A |lv1= 9: 6.25% |lv2= 10: 50% |lv3= S: 100% }} | |||
{{EnemyInfo/GetData |hp=Any |chip=AqWhirl2 |code=H |version=Team ProtoMan |lv1= 7: 25% |lv2= 8: 50% |lv3= 9: 46.875% |lv4= 10: 25% }} | |||
{{EnemyInfo/GetData |hp=Any |chip=AqWhirl2 |code=O |version=Team Colonel |lv1= 7: 25% |lv2= 8: 50% |lv3= 9: 46.875% |lv4= 10: 25% }} | |||
{{EnemyInfo/GetData |hp=High |zenny=600 |lv1= 7: 25% |lv2= 8: 50% |lv3= 9: 46.875% |lv4= 10: 25% }} | |||
{{EnemyInfo/GetData |hp=High |zenny=550 |lv1= 5: 50% |lv2= 6: 100% |lv3= 7: 50% }} | |||
{{EnemyInfo/GetData |hp=High |zenny=50 |lv1= 4-5: 50% }} | |||
{{EnemyInfo/GetData |hp=High |zenny=30 |lv1= 1-3: 100% |lv2= 4: 50% }} | |||
{{EnemyInfo/GetData |hp=Low |recov=500 |lv1= 1-6: 100% |lv2= 7: 75% |lv3= 8: 50% |lv4= 9: 46.875% |lv5= 10: 25% }} | |||
}} | }} | ||
| Line 1,407: | Line 2,743: | ||
|airshoes=y |shadowshoes= |floatshoes=y |statusguard= |superarmor= | |airshoes=y |shadowshoes= |floatshoes=y |statusguard= |superarmor= | ||
|info= | |info= | ||
|locations= | |locations='''Level 3:''' [[Gargoyle Castle HP]] (56.7%), [[Wine Case Comp]] (33.3%), [[Ship Comp 1]] (29.2%), [[End Area 1]] (26.4%), [[End Area 3]] (24.4%), [[Armor Comp (MMBN5)|Armor Comp]] (23.8%), [[Helmet Comp]] (23.8%), [[Katana Comp]] (23.8%), [[End Area 2]] (22.2%), [[Ship Comp 2]] (20.8%), [[Ship Comp 3]] (16.7%), [[End Area 4]] (16.7%), [[NetBattle Comp (MMBN5)|NetBattle Comp]] (14.3%), [[End Area 5]] (11.1%)<br/>'''Liberation Mission:''' [[Nebula Area 3 (Liberation Mission)|Nebula Area 3]] | ||
|attacks= | |attacks= | ||
{{EnemyInfo/Attack |name_en=AquaWhirl<ref name="AquaWhirl"/> |name_jp=アクアワール |name_tl=Aqua Whirl | |||
|attack=200 |emotion=10 |element=aqua |guard=y | |||
}} | |||
{{EnemyInfo/Attack |name_en=BattleChip | |||
|info=MetaGel ({{chance|2/16}}) | |||
}} | |||
|getdata= | |getdata= | ||
{{EnemyInfo/GetData |hp=Any |chip=AqWhirl3 |code=I |version=Team ProtoMan |lv1= 7: 25% |lv2= 8: 50% |lv3= 9: 53.125% |lv4= 10: 75% |lv5= S: 100% }} | |||
{{EnemyInfo/GetData |hp=Any |chip=AqWhirl3 |code=R |version=Team Colonel |lv1= 7: 25% |lv2= 8: 50% |lv3= 9: 53.125% |lv4= 10: 75% |lv5= S: 100% }} | |||
{{EnemyInfo/GetData |hp=High |zenny=650 |lv1= 7: 25% |lv2= 8: 50% |lv3= 9: 46.875% |lv4= 10: 25% }} | |||
{{EnemyInfo/GetData |hp=High |zenny=600 |lv1= 5: 50% |lv2= 6: 100% |lv3= 7: 50% }} | |||
{{EnemyInfo/GetData |hp=High |zenny=50 |lv1= 4-5: 50% }} | |||
{{EnemyInfo/GetData |hp=High |zenny=30 |lv1= 1-3: 100% |lv2= 4: 50% }} | |||
{{EnemyInfo/GetData |hp=Low |recov=500 |lv1= 1-6: 100% |lv2= 7: 75% |lv3= 8: 50% |lv4= 9: 46.875% |lv5= 10: 25% }} | |||
}} | }} | ||
| Line 1,418: | Line 2,767: | ||
|airshoes=y |shadowshoes= |floatshoes=y |statusguard= |superarmor= | |airshoes=y |shadowshoes= |floatshoes=y |statusguard= |superarmor= | ||
|info= | |info= | ||
|locations= | |locations='''Level 3:''' [[Undernet 1 (MMBN5)|Undernet 1]] (16.7%), [[Nebula Area 5]] (15.3%), [[Pipe Comp (MMBN5)|Pipe Comp]] (14.6%), [[Nebula Area 6]] (5.6%)<br/>'''Liberation Mission:''' [[Nebula Area 5 (Liberation Mission)|Nebula Area 5]] | ||
|attacks= | |attacks= | ||
{{EnemyInfo/Attack |name_en=AquaWhirl<ref name="AquaWhirl"/> |name_jp=アクアワール |name_tl=Aqua Whirl | |||
|attack=250 |emotion=10 |element=aqua |guard=y | |||
}} | |||
{{EnemyInfo/Attack |name_en=BattleChip | |||
|info=MetaGel ({{chance|2/16}}) | |||
}} | |||
|getdata= | |getdata= | ||
{{EnemyInfo/GetData |hp=Any |chip=AqWhirl3 |code=D |lv1= 9: 6.25% |lv2= 10: 50% |lv3= S: 100% }} | |||
{{EnemyInfo/GetData |hp=Any |chip=AqWhirl3 |code=I |version=Team ProtoMan |lv1= 7: 25% |lv2= 8: 50% |lv3= 9: 46.875% |lv4= 10: 25% }} | |||
{{EnemyInfo/GetData |hp=Any |chip=AqWhirl3 |code=R |version=Team Colonel |lv1= 7: 25% |lv2= 8: 50% |lv3= 9: 46.875% |lv4= 10: 25% }} | |||
{{EnemyInfo/GetData |hp=High |zenny=650 |lv1= 7: 25% |lv2= 8: 50% |lv3= 9: 46.875% |lv4= 10: 25% }} | |||
{{EnemyInfo/GetData |hp=High |zenny=600 |lv1= 5: 50% |lv2= 6: 100% |lv3= 7: 50% }} | |||
{{EnemyInfo/GetData |hp=High |zenny=50 |lv1= 4-5: 50% }} | |||
{{EnemyInfo/GetData |hp=High |zenny=30 |lv1= 1-3: 100% |lv2= 4: 50% }} | |||
{{EnemyInfo/GetData |hp=Low |recov=max |lv1= 1-6: 100% |lv2= 7: 75% |lv3= 8: 50% |lv4= 9: 46.875% |lv5= 10: 25% }} | |||
}} | }} | ||
| Line 1,430: | Line 2,793: | ||
|airshoes= |shadowshoes= |floatshoes=y |statusguard= |superarmor= | |airshoes= |shadowshoes= |floatshoes=y |statusguard= |superarmor= | ||
|info=Hides underground when on water panel. | |info=Hides underground when on water panel. | ||
|locations= | |locations='''Level 1:''' [[Message Comp]] (38.9%), [[Ship Comp 1]] (38.9%), [[Ship Comp 2]] (29.2%), [[SciLab Vision Burst]] (25.0%), [[Ship Comp 3]] (22.2%), [[Ship Comp 4]] (19.4%), [[End Area 3]] (19.2%), [[Pipe Comp (MMBN5)|Pipe Comp]] (16.7%), [[End Area 4]] (11.5%)<br/>'''Liberation Mission:''' [[End Area 2 (Liberation Mission)|End Area 2]] | ||
|attacks= | |attacks= | ||
{{EnemyInfo/Attack |name_en=Bubblin' Missile<ref name="BubblinMissile">Mega Man Battle Network 5 Official Strategy Guide</ref> |name_jp=バブリンミサイル |name_tl=Bubbling Missile | |||
|attack=30 |emotion=10 |element=aqua | |||
|info=Bubble has 1 HP. | |||
}} | |||
|getdata= | |getdata= | ||
{{EnemyInfo/GetData |hp=Any |chip=SideBub1 |code=Q |version=Team ProtoMan |lv1= 7: 25% |lv2= 8: 50% |lv3= 9: 53.125% |lv4= 10: 75% |lv5= S: 100% }} | |||
{{EnemyInfo/GetData |hp=Any |chip=SideBub1 |code=S |version=Team Colonel |lv1= 7: 25% |lv2= 8: 50% |lv3= 9: 53.125% |lv4= 10: 75% |lv5= S: 100% }} | |||
{{EnemyInfo/GetData |hp=Any |zenny=250 |lv1= 7: 25% |lv2= 8: 50% |lv3= 9: 46.875% |lv4= 10: 25% }} | |||
{{EnemyInfo/GetData |hp=Any |zenny=200 |lv1= 5: 50% |lv2= 6: 100% |lv3= 7: 50% }} | |||
{{EnemyInfo/GetData |hp=Any |zenny=50 |lv1= 4-5: 50% }} | |||
{{EnemyInfo/GetData |hp=Any |zenny=30 |lv1= 1-3: 100% |lv2= 4: 50% }} | |||
}} | }} | ||
| Line 1,441: | Line 2,814: | ||
|airshoes= |shadowshoes= |floatshoes=y |statusguard= |superarmor= | |airshoes= |shadowshoes= |floatshoes=y |statusguard= |superarmor= | ||
|info=Hides underground when on water panel. | |info=Hides underground when on water panel. | ||
|locations= | |locations='''Level 1:''' [[Experiment Server Comp]] (33.3%), [[Chip Maker Comp]] (20.8%), [[Factory Comp 3 (MMBN5)|Factory Comp 3]] (13.3%), [[Factory Comp 4 (MMBN5)|Factory Comp 4]] (13.3%), [[SoulServer Comp]] (11.1%) | ||
|attacks= | |attacks= | ||
{{EnemyInfo/Attack |name_en=Bubblin' Missile<ref name="BubblinMissile"/> |name_jp=バブリンミサイル |name_tl=Bubbling Missile | |||
|attack=50 |emotion=10 |element=aqua | |||
|info=Bubble has 1 HP. | |||
}} | |||
|getdata= | |getdata= | ||
{{EnemyInfo/GetData |hp=Any |chip=SideBub1 |code=D |lv1= 9: 6.25% |lv2= 10: 50% |lv3= S: 100% }} | |||
{{EnemyInfo/GetData |hp=Any |zenny=350 |lv1= 7: 50% |lv2= 8: 100% |lv3= 9: 93.75% |lv4= 10: 50% }} | |||
{{EnemyInfo/GetData |hp=Any |zenny=300 |lv1= 5: 50% |lv2= 6: 100% |lv3= 7: 50% }} | |||
{{EnemyInfo/GetData |hp=Any |zenny=50 |lv1= 4-5: 50% }} | |||
{{EnemyInfo/GetData |hp=Any |zenny=30 |lv1= 1-3: 100% |lv2= 4: 50% }} | |||
}} | }} | ||
| Line 1,452: | Line 2,834: | ||
|airshoes= |shadowshoes= |floatshoes=y |statusguard= |superarmor= | |airshoes= |shadowshoes= |floatshoes=y |statusguard= |superarmor= | ||
|info=Hides underground when on water panel. | |info=Hides underground when on water panel. | ||
|locations= | |locations='''Level 2:''' [[Message Comp]] (38.9%), [[Ship Comp 1]] (38.9%), [[Ship Comp 2]] (29.2%), [[SciLab Vision Burst]] (25.0%), [[Ship Comp 3]] (22.2%), [[Ship Comp 4]] (19.4%), [[End Area 3]] (19.2%), [[Pipe Comp (MMBN5)|Pipe Comp]] (16.7%), [[End Area 4]] (11.5%) | ||
|attacks= | |attacks= | ||
{{EnemyInfo/Attack |name_en=Bubblin' Missile<ref name="BubblinMissile"/> |name_jp=バブリンミサイル |name_tl=Bubbling Missile | |||
|attack=80 |emotion=10 |element=aqua | |||
|info=Bubble has 1 HP. | |||
}} | |||
|getdata= | |getdata= | ||
{{EnemyInfo/GetData |hp=Any |chip=SideBub2 |code=L |version=Team ProtoMan |lv1= 9: 6.25% |lv2= 10: 50% |lv3= S: 100% }} | |||
{{EnemyInfo/GetData |hp=Any |chip=SideBub2 |code=W |version=Team Colonel |lv1= 9: 6.25% |lv2= 10: 50% |lv3= S: 100% }} | |||
{{EnemyInfo/GetData |hp=Any |zenny=400 |lv1= 7: 50% |lv2= 8: 100% |lv3= 9: 93.75% |lv4= 10: 50% }} | |||
{{EnemyInfo/GetData |hp=Any |zenny=350 |lv1= 5: 50% |lv2= 6: 100% |lv3= 7: 50% }} | |||
{{EnemyInfo/GetData |hp=Any |zenny=50 |lv1= 4-5: 50% }} | |||
{{EnemyInfo/GetData |hp=Any |zenny=30 |lv1= 1-3: 100% |lv2= 4: 50% }} | |||
}} | }} | ||
| Line 1,463: | Line 2,855: | ||
|airshoes= |shadowshoes= |floatshoes=y |statusguard= |superarmor= | |airshoes= |shadowshoes= |floatshoes=y |statusguard= |superarmor= | ||
|info=Hides underground when on water panel. | |info=Hides underground when on water panel. | ||
|locations= | |locations='''Level 2:''' [[Experiment Server Comp]] (33.3%), [[Chip Maker Comp]] (20.8%), [[Factory Comp 3 (MMBN5)|Factory Comp 3]] (13.3%), [[Factory Comp 4 (MMBN5)|Factory Comp 4]] (13.3%), [[SoulServer Comp]] (11.1%) | ||
|attacks= | |attacks= | ||
{{EnemyInfo/Attack |name_en=Bubblin' Missile<ref name="BubblinMissile"/> |name_jp=バブリンミサイル |name_tl=Bubbling Missile | |||
|attack=120 |emotion=10 |element=aqua | |||
|info=Bubble has 1 HP. | |||
}} | |||
|getdata= | |getdata= | ||
{{EnemyInfo/GetData |hp=Any |chip=SideBub2 |code=H |lv1= 9: 6.25% |lv2= 10: 50% |lv3= S: 100% }} | |||
{{EnemyInfo/GetData |hp=Any |zenny=500 |lv1= 7: 50% |lv2= 8: 100% |lv3= 9: 93.75% |lv4= 10: 50% }} | |||
{{EnemyInfo/GetData |hp=Any |zenny=450 |lv1= 5: 50% |lv2= 6: 100% |lv3= 7: 50% }} | |||
{{EnemyInfo/GetData |hp=Any |zenny=50 |lv1= 4-5: 50% }} | |||
{{EnemyInfo/GetData |hp=Any |zenny=30 |lv1= 1-3: 100% |lv2= 4: 50% }} | |||
}} | }} | ||
| Line 1,474: | Line 2,875: | ||
|airshoes= |shadowshoes= |floatshoes=y |statusguard= |superarmor= | |airshoes= |shadowshoes= |floatshoes=y |statusguard= |superarmor= | ||
|info=Hides underground when on water panel. | |info=Hides underground when on water panel. | ||
|locations= | |locations='''Level 3:''' [[Message Comp]] (38.9%), [[Ship Comp 1]] (38.9%), [[Ship Comp 2]] (29.2%), [[SciLab Vision Burst]] (25.0%), [[Ship Comp 3]] (22.2%), [[Ship Comp 4]] (19.4%), [[End Area 3]] (19.2%), [[Pipe Comp (MMBN5)|Pipe Comp]] (16.7%), [[End Area 4]] (11.5%) | ||
|attacks= | |attacks= | ||
{{EnemyInfo/Attack |name_en=Bubblin' Missile<ref name="BubblinMissile"/> |name_jp=バブリンミサイル |name_tl=Bubbling Missile | |||
|attack=160 |emotion=10 |element=aqua | |||
|info=Bubble has 1 HP. | |||
}} | |||
|getdata= | |getdata= | ||
{{EnemyInfo/GetData |hp=Any |chip=SideBub3 |code=N |version=Team ProtoMan |lv1= 9: 6.25% |lv2= 10: 50% |lv3= S: 100% }} | |||
{{EnemyInfo/GetData |hp=Any |chip=SideBub3 |code=P |version=Team Colonel |lv1= 9: 6.25% |lv2= 10: 50% |lv3= S: 100% }} | |||
{{EnemyInfo/GetData |hp=Any |zenny=550 |lv1= 7: 50% |lv2= 8: 100% |lv3= 9: 93.75% |lv4= 10: 50% }} | |||
{{EnemyInfo/GetData |hp=Any |zenny=500 |lv1= 5: 50% |lv2= 6: 100% |lv3= 7: 50% }} | |||
{{EnemyInfo/GetData |hp=Any |zenny=50 |lv1= 4-5: 50% }} | |||
{{EnemyInfo/GetData |hp=Any |zenny=30 |lv1= 1-3: 100% |lv2= 4: 50% }} | |||
}} | }} | ||
| Line 1,485: | Line 2,896: | ||
|airshoes= |shadowshoes= |floatshoes=y |statusguard= |superarmor= | |airshoes= |shadowshoes= |floatshoes=y |statusguard= |superarmor= | ||
|info=Hides underground when on water panel. | |info=Hides underground when on water panel. | ||
|locations= | |locations='''Level 3:''' [[Experiment Server Comp]] (33.3%), [[Chip Maker Comp]] (20.8%), [[Nebula Area 5]] (20.8%), [[Factory Comp 3 (MMBN5)|Factory Comp 3]] (13.3%), [[Factory Comp 4 (MMBN5)|Factory Comp 4]] (13.3%), [[SoulServer Comp]] (11.1%), [[Nebula Area 6]] (10.0%)<br/>'''Liberation Mission:''' [[Nebula Area 5 (Liberation Mission)|Nebula Area 5]] | ||
|attacks= | |attacks= | ||
{{EnemyInfo/Attack |name_en=Bubblin' Missile<ref name="BubblinMissile"/> |name_jp=バブリンミサイル |name_tl=Bubbling Missile | |||
|attack=200 |emotion=10 |element=aqua | |||
|info=Bubble has 1 HP. | |||
}} | |||
|getdata= | |getdata= | ||
{{EnemyInfo/GetData |hp=Any |chip=SideBub3 |code=E |lv1= 9: 6.25% |lv2= 10: 50% |lv3= S: 100% }} | |||
{{EnemyInfo/GetData |hp=Any |zenny=650 |lv1= 7: 50% |lv2= 8: 100% |lv3= 9: 93.75% |lv4= 10: 50% }} | |||
{{EnemyInfo/GetData |hp=Any |zenny=600 |lv1= 5: 50% |lv2= 6: 100% |lv3= 7: 50% }} | |||
{{EnemyInfo/GetData |hp=Any |zenny=50 |lv1= 4-5: 50% }} | |||
{{EnemyInfo/GetData |hp=Any |zenny=30 |lv1= 1-3: 100% |lv2= 4: 50% }} | |||
}} | }} | ||
| Line 1,497: | Line 2,917: | ||
|airshoes= |shadowshoes= |floatshoes=y |statusguard= |superarmor= | |airshoes= |shadowshoes= |floatshoes=y |statusguard= |superarmor= | ||
|info= | |info= | ||
|locations= | |locations='''Level 1:''' [[Factory Comp 1 (MMBN5)|Factory Comp 1]] (18.1%), [[Factory Comp 3 (MMBN5)|Factory Comp 3]] (12.2%), [[Factory Comp 4 (MMBN5)|Factory Comp 4]] (12.2%), [[SoulServer Comp]] (4.2%) | ||
|attacks= | |attacks= | ||
{{EnemyInfo/Attack |name_en=Overflash |name_jp=オーバーフラッシュ |name_tl=Overflash | |||
|attack=30 |emotion=10 |element=elec | |||
|info=Inflicts Paralyze LV. 1 (1.5 seconds). | |||
}} | |||
|getdata= | |getdata= | ||
{{EnemyInfo/GetData |hp=Any |chip=Voltz1 |code=K |lv1= 9: 6.25% |lv2= 10: 50% |lv3= S: 100% }} | |||
{{EnemyInfo/GetData |hp=Any |chip=Voltz1 |code=O |lv1= 7: 50% |lv2= 8: 100% |lv3= 9: 93.75% |lv4= 10: 50% }} | |||
{{EnemyInfo/GetData |hp=Any |zenny=400 |lv1= 5: 50% |lv2= 6: 100% |lv3= 7: 50% }} | |||
{{EnemyInfo/GetData |hp=Any |zenny=50 |lv1= 4-5: 50% }} | |||
{{EnemyInfo/GetData |hp=Any |zenny=30 |lv1= 1-3: 100% |lv2= 4: 50% }} | |||
}} | }} | ||
| Line 1,508: | Line 2,937: | ||
|airshoes= |shadowshoes= |floatshoes=y |statusguard= |superarmor= | |airshoes= |shadowshoes= |floatshoes=y |statusguard= |superarmor= | ||
|info= | |info= | ||
|locations= | |locations='''Level 1:''' [[SoulServer Comp]] (19.4%) | ||
|attacks= | |attacks= | ||
{{EnemyInfo/Attack |name_en=Overflash |name_jp=オーバーフラッシュ |name_tl=Overflash | |||
|attack=60 |emotion=10 |element=elec | |||
|info=Inflicts Paralyze LV. 1 (1.5 seconds). | |||
}} | |||
|getdata= | |getdata= | ||
{{EnemyInfo/GetData |hp=Any |chip=Voltz1 |code=K |lv1= 7: 50% |lv2= 8: 100% |lv3= 9: 93.75% |lv4= 10: 50% }} | |||
{{EnemyInfo/GetData |hp=Any |chip=Voltz1 |code=Y |lv1= 9: 6.25% |lv2= 10: 50% |lv3= S: 100% }} | |||
{{EnemyInfo/GetData |hp=Any |zenny=400 |lv1= 5: 50% |lv2= 6: 100% |lv3= 7: 50% }} | |||
{{EnemyInfo/GetData |hp=Any |zenny=50 |lv1= 4-5: 50% }} | |||
{{EnemyInfo/GetData |hp=Any |zenny=30 |lv1= 1-3: 100% |lv2= 4: 50% }} | |||
}} | }} | ||
| Line 1,519: | Line 2,957: | ||
|airshoes= |shadowshoes= |floatshoes=y |statusguard= |superarmor= | |airshoes= |shadowshoes= |floatshoes=y |statusguard= |superarmor= | ||
|info= | |info= | ||
|locations= | |locations='''Level 2:''' [[Factory Comp 1 (MMBN5)|Factory Comp 1]] (18.1%), [[Factory Comp 3 (MMBN5)|Factory Comp 3]] (12.2%), [[Factory Comp 4 (MMBN5)|Factory Comp 4]] (12.2%), [[SoulServer Comp]] (4.2%) | ||
|attacks= | |attacks= | ||
{{EnemyInfo/Attack |name_en=Overflash |name_jp=オーバーフラッシュ |name_tl=Overflash | |||
|attack=90 |emotion=10 |element=elec | |||
|info=Inflicts Paralyze LV. 1 (1.5 seconds). | |||
}} | |||
|getdata= | |getdata= | ||
{{EnemyInfo/GetData |hp=Any |chip=Voltz2 |code=U |lv1= 9: 6.25% |lv2= 10: 50% |lv3= S: 100% }} | |||
{{EnemyInfo/GetData |hp=Any |chip=Voltz2 |code=Z |lv1= 7: 25% |lv2= 8: 50% |lv3= 9: 46.875% |lv4= 10: 25% }} | |||
{{EnemyInfo/GetData |hp=Any |zenny=600 |lv1= 7: 25% |lv2= 8: 50% |lv3= 9: 46.875% |lv4= 10: 25% }} | |||
{{EnemyInfo/GetData |hp=Any |zenny=550 |lv1= 5: 50% |lv2= 6: 100% |lv3= 7: 50% }} | |||
{{EnemyInfo/GetData |hp=Any |zenny=50 |lv1= 4-5: 50% }} | |||
{{EnemyInfo/GetData |hp=Any |zenny=30 |lv1= 1-3: 100% |lv2= 4: 50% }} | |||
}} | }} | ||
| Line 1,530: | Line 2,978: | ||
|airshoes= |shadowshoes= |floatshoes=y |statusguard= |superarmor= | |airshoes= |shadowshoes= |floatshoes=y |statusguard= |superarmor= | ||
|info= | |info= | ||
|locations= | |locations='''Level 2:''' [[SoulServer Comp]] (19.4%), [[Nebula Area 3]] (16.7%) | ||
|attacks= | |attacks= | ||
{{EnemyInfo/Attack |name_en=Overflash |name_jp=オーバーフラッシュ |name_tl=Overflash | |||
|attack=120 |emotion=10 |element=elec | |||
|info=Inflicts Paralyze LV. 1 (1.5 seconds). | |||
}} | |||
|getdata= | |getdata= | ||
{{EnemyInfo/GetData |hp=Any |chip=Voltz2 |code=J |lv1= 7: 25% |lv2= 8: 50% |lv3= 9: 53.125% |lv4= 10: 75% |lv5= S: 100% }} | |||
{{EnemyInfo/GetData |hp=Any |zenny=650 |lv1= 7: 25% |lv2= 8: 50% |lv3= 9: 46.875% |lv4= 10: 25% }} | |||
{{EnemyInfo/GetData |hp=Any |zenny=600 |lv1= 5: 50% |lv2= 6: 100% |lv3= 7: 50% }} | |||
{{EnemyInfo/GetData |hp=Any |zenny=50 |lv1= 4-5: 50% }} | |||
{{EnemyInfo/GetData |hp=Any |zenny=30 |lv1= 1-3: 100% |lv2= 4: 50% }} | |||
}} | }} | ||
| Line 1,541: | Line 2,998: | ||
|airshoes= |shadowshoes= |floatshoes=y |statusguard= |superarmor= | |airshoes= |shadowshoes= |floatshoes=y |statusguard= |superarmor= | ||
|info= | |info= | ||
|locations= | |locations='''Level 3:''' [[Factory Comp 1 (MMBN5)|Factory Comp 1]] (18.1%), [[Nebula Area 4]] (12.5%), [[Factory Comp 3 (MMBN5)|Factory Comp 3]] (12.2%), [[Factory Comp 4 (MMBN5)|Factory Comp 4]] (12.2%), [[SoulServer Comp]] (4.2%) | ||
|attacks= | |attacks= | ||
{{EnemyInfo/Attack |name_en=Overflash |name_jp=オーバーフラッシュ |name_tl=Overflash | |||
|attack=160 |emotion=10 |element=elec | |||
|info=Inflicts Paralyze LV. 1 (1.5 seconds). | |||
}} | |||
|getdata= | |getdata= | ||
{{EnemyInfo/GetData |hp=Any |chip=Voltz3 |code=H |lv1= 9: 6.25% |lv2= 10: 50% |lv3= S: 100% }} | |||
{{EnemyInfo/GetData |hp=Any |chip=Voltz3 |code=V |lv1= 7: 50% |lv2= 8: 100% |lv3= 9: 93.75% |lv4= 10: 50% }} | |||
{{EnemyInfo/GetData |hp=Any |zenny=650 |lv1= 5: 50% |lv2= 6: 100% |lv3= 7: 50% }} | |||
{{EnemyInfo/GetData |hp=Any |zenny=50 |lv1= 4-5: 50% }} | |||
{{EnemyInfo/GetData |hp=Any |zenny=30 |lv1= 1-3: 100% |lv2= 4: 50% }} | |||
}} | }} | ||
| Line 1,552: | Line 3,018: | ||
|airshoes= |shadowshoes= |floatshoes=y |statusguard= |superarmor= | |airshoes= |shadowshoes= |floatshoes=y |statusguard= |superarmor= | ||
|info= | |info= | ||
|locations= | |locations='''Level 3:''' [[SoulServer Comp]] (19.4%), [[Nebula Area 3]] (16.7%)<br/>'''Liberation Mission:''' [[Nebula Area 5 (Liberation Mission)|Nebula Area 5]] | ||
|attacks= | |attacks= | ||
{{EnemyInfo/Attack |name_en=Overflash |name_jp=オーバーフラッシュ |name_tl=Overflash | |||
|attack=200 |emotion=10 |element=elec | |||
|info=Inflicts Paralyze LV. 1 (1.5 seconds). | |||
}} | |||
|getdata= | |getdata= | ||
{{EnemyInfo/GetData |hp=Any |chip=Voltz3 |code=A |lv1= 9: 6.25% |lv2= 10: 50% |lv3= S: 100% }} | |||
{{EnemyInfo/GetData |hp=Any |zenny=750 |lv1= 7: 50% |lv2= 8: 100% |lv3= 9: 93.75% |lv4= 10: 50% }} | |||
{{EnemyInfo/GetData |hp=Any |zenny=700 |lv1= 5: 50% |lv2= 6: 100% |lv3= 7: 50% }} | |||
{{EnemyInfo/GetData |hp=Any |zenny=50 |lv1= 4-5: 50% }} | |||
{{EnemyInfo/GetData |hp=Any |zenny=30 |lv1= 1-3: 100% |lv2= 4: 50% }} | |||
}} | }} | ||
| Line 1,564: | Line 3,039: | ||
|airshoes= |shadowshoes= |floatshoes=y |statusguard= |superarmor= | |airshoes= |shadowshoes= |floatshoes=y |statusguard= |superarmor= | ||
|info= | |info= | ||
|locations= | |locations='''Level 1:''' [[SciLab Vision Burst]] (25.0%), [[Gargoyle Comp 4]] (15.6%), [[Gargoyle Comp 3]] (12.5%) | ||
|attacks= | |attacks= | ||
{{EnemyInfo/Attack |name_en=ElecReel |name_jp=エレキリール |name_tl=Elec Reel | |||
|attack=30 |emotion=10 |element=elec | |||
}} | |||
|getdata= | |getdata= | ||
{{EnemyInfo/GetData |hp=Any |chip=ElcReel1 |code=V |version=Team ProtoMan |lv1= 5: 25% |lv2= 6-S: 50% }} | |||
{{EnemyInfo/GetData |hp=Any |chip=ElcReel1 |code=Z |version=Team Colonel |lv1= 5: 25% |lv2= 6-S: 50% }} | |||
{{EnemyInfo/GetData |hp=Any |zenny=350 |lv1= 9: 3.125% |lv2= 10: 25% |lv3= S: 50% }} | |||
{{EnemyInfo/GetData |hp=Any |zenny=300 |lv1= 7: 25% |lv2= 8: 50% |lv3= 9: 46.875% |lv4= 10: 25% }} | |||
{{EnemyInfo/GetData |hp=Any |zenny=250 |lv1= 5: 25% |lv2= 6: 50% |lv3= 7: 25% }} | |||
{{EnemyInfo/GetData |hp=Any |zenny=50 |lv1= 4-5: 50% }} | |||
{{EnemyInfo/GetData |hp=Any |zenny=30 |lv1= 1-3: 100% |lv2= 4: 50% }} | |||
}} | }} | ||
| Line 1,575: | Line 3,060: | ||
|airshoes= |shadowshoes= |floatshoes=y |statusguard= |superarmor= | |airshoes= |shadowshoes= |floatshoes=y |statusguard= |superarmor= | ||
|info= | |info= | ||
|locations= | |locations='''Level 1:''' [[Experiment Server Comp]] (20.8%), [[SoulServer Comp]] (16.7%), [[Factory Comp 1 (MMBN5)|Factory Comp 1]] (15.3%), [[Undernet 2 (MMBN5)|Undernet 2]] (12.8%), [[Factory Comp 2 (MMBN5)|Factory Comp 2]] (12.5%), [[Undernet 4 (MMBN5)|Undernet 4]] (11.5%), [[Undernet 3 (MMBN5)|Undernet 3]] (7.7%), [[Gargoyle Comp 4]] (4.2%) | ||
|attacks= | |attacks= | ||
{{EnemyInfo/Attack |name_en=ElecReel |name_jp=エレキリール |name_tl=Elec Reel | |||
|attack=60 |emotion=10 |element=elec | |||
}} | |||
|getdata= | |getdata= | ||
{{EnemyInfo/GetData |hp=Any |chip=ElcReel1 |code=C |lv1= 7: 25% |lv2= 8-S: 50% }} | |||
{{EnemyInfo/GetData |hp=Any |chip=ElcReel1 |code=V |version=Team ProtoMan |lv1= 5: 25% |lv2= 6: 50% |lv3= 7: 25% }} | |||
{{EnemyInfo/GetData |hp=Any |chip=ElcReel1 |code=Z |version=Team Colonel |lv1= 5: 25% |lv2= 6: 50% |lv3= 7: 25% }} | |||
{{EnemyInfo/GetData |hp=Any |zenny=400 |lv1= 9: 3.125% |lv2= 10: 25% |lv3= S: 50% }} | |||
{{EnemyInfo/GetData |hp=Any |zenny=350 |lv1= 7: 25% |lv2= 8: 50% |lv3= 9: 46.875% |lv4= 10: 25% }} | |||
{{EnemyInfo/GetData |hp=Any |zenny=300 |lv1= 5: 25% |lv2= 6: 50% |lv3= 7: 25% }} | |||
{{EnemyInfo/GetData |hp=Any |zenny=50 |lv1= 4-5: 50% }} | |||
{{EnemyInfo/GetData |hp=Any |zenny=30 |lv1= 1-3: 100% |lv2= 4: 50% }} | |||
}} | }} | ||
| Line 1,586: | Line 3,082: | ||
|airshoes= |shadowshoes= |floatshoes=y |statusguard= |superarmor= | |airshoes= |shadowshoes= |floatshoes=y |statusguard= |superarmor= | ||
|info= | |info= | ||
|locations= | |locations='''Level 2:''' [[SciLab Vision Burst]] (25.0%), [[Gargoyle Comp 4]] (15.6%), [[Gargoyle Comp 3]] (12.5%) | ||
|attacks= | |attacks= | ||
{{EnemyInfo/Attack |name_en=ElecReel |name_jp=エレキリール |name_tl=Elec Reel | |||
|attack=100 |emotion=10 |element=elec | |||
}} | |||
|getdata= | |getdata= | ||
{{EnemyInfo/GetData |hp=Any |chip=ElcReel2 |code=Q |version=Team ProtoMan |lv1= 5: 25% |lv2= 6-S: 50% }} | |||
{{EnemyInfo/GetData |hp=Any |chip=ElcReel2 |code=Y |version=Team Colonel |lv1= 5: 25% |lv2= 6-S: 50% }} | |||
{{EnemyInfo/GetData |hp=Any |zenny=450 |lv1= 9: 3.125% |lv2= 10: 25% |lv3= S: 50% }} | |||
{{EnemyInfo/GetData |hp=Any |zenny=400 |lv1= 7: 25% |lv2= 8: 50% |lv3= 9: 46.875% |lv4= 10: 25% }} | |||
{{EnemyInfo/GetData |hp=Any |zenny=350 |lv1= 5: 25% |lv2= 6: 50% |lv3= 7: 25% }} | |||
{{EnemyInfo/GetData |hp=Any |zenny=50 |lv1= 4-5: 50% }} | |||
{{EnemyInfo/GetData |hp=Any |zenny=30 |lv1= 1-3: 100% |lv2= 4: 50% }} | |||
}} | }} | ||
| Line 1,597: | Line 3,103: | ||
|airshoes= |shadowshoes= |floatshoes=y |statusguard= |superarmor= | |airshoes= |shadowshoes= |floatshoes=y |statusguard= |superarmor= | ||
|info= | |info= | ||
|locations= | |locations='''Level 2:''' [[Experiment Server Comp]] (20.8%), [[SoulServer Comp]] (16.7%), [[Factory Comp 1 (MMBN5)|Factory Comp 1]] (15.3%), [[Undernet 2 (MMBN5)|Undernet 2]] (12.8%), [[Factory Comp 2 (MMBN5)|Factory Comp 2]] (12.5%), [[Undernet 4 (MMBN5)|Undernet 4]] (11.5%), [[Nebula Area 3]] (9.7%), [[Undernet 3 (MMBN5)|Undernet 3]] (7.7%), [[Gargoyle Comp 4]] (4.2%) | ||
|attacks= | |attacks= | ||
{{EnemyInfo/Attack |name_en=ElecReel |name_jp=エレキリール |name_tl=Elec Reel | |||
|attack=140 |emotion=10 |element=elec | |||
}} | |||
|getdata= | |getdata= | ||
{{EnemyInfo/GetData |hp=Any |chip=ElcReel2 |code=B |lv1= 7: 25% |lv2= 8-S: 50% }} | |||
{{EnemyInfo/GetData |hp=Any |chip=ElcReel2 |code=Q |version=Team ProtoMan |lv1= 5: 25% |lv2= 6: 50% |lv3= 7: 25% }} | |||
{{EnemyInfo/GetData |hp=Any |chip=ElcReel2 |code=Y |version=Team Colonel |lv1= 5: 25% |lv2= 6: 50% |lv3= 7: 25% }} | |||
{{EnemyInfo/GetData |hp=Any |zenny=500 |lv1= 9: 3.125% |lv2= 10: 25% |lv3= S: 50% }} | |||
{{EnemyInfo/GetData |hp=Any |zenny=450 |lv1= 7: 25% |lv2= 8: 50% |lv3= 9: 46.875% |lv4= 10: 25% }} | |||
{{EnemyInfo/GetData |hp=Any |zenny=400 |lv1= 5: 25% |lv2= 6: 50% |lv3= 7: 25% }} | |||
{{EnemyInfo/GetData |hp=Any |zenny=50 |lv1= 4-5: 50% }} | |||
{{EnemyInfo/GetData |hp=Any |zenny=30 |lv1= 1-3: 100% |lv2= 4: 50% }} | |||
}} | }} | ||
| Line 1,608: | Line 3,125: | ||
|airshoes= |shadowshoes= |floatshoes=y |statusguard= |superarmor= | |airshoes= |shadowshoes= |floatshoes=y |statusguard= |superarmor= | ||
|info= | |info= | ||
|locations= | |locations='''Level 3:''' [[SciLab Vision Burst]] (25.0%), [[Gargoyle Comp 4]] (15.6%), [[Gargoyle Comp 3]] (12.5%), [[Nebula Area 4]] (9.7%) | ||
|attacks= | |attacks= | ||
{{EnemyInfo/Attack |name_en=ElecReel |name_jp=エレキリール |name_tl=Elec Reel | |||
|attack=190 |emotion=10 |element=elec | |||
}} | |||
|getdata= | |getdata= | ||
{{EnemyInfo/GetData |hp=Any |chip=ElcReel3 |code=L |version=Team ProtoMan |lv1= 5: 25% |lv2= 6-S: 50% }} | |||
{{EnemyInfo/GetData |hp=Any |chip=ElcReel3 |code=R |version=Team Colonel |lv1= 5: 25% |lv2= 6-S: 50% }} | |||
{{EnemyInfo/GetData |hp=Any |zenny=600 |lv1= 9: 3.125% |lv2= 10: 25% |lv3= S: 50% }} | |||
{{EnemyInfo/GetData |hp=Any |zenny=550 |lv1= 7: 25% |lv2= 8: 50% |lv3= 9: 46.875% |lv4= 10: 25% }} | |||
{{EnemyInfo/GetData |hp=Any |zenny=500 |lv1= 5: 25% |lv2= 6: 50% |lv3= 7: 25% }} | |||
{{EnemyInfo/GetData |hp=Any |zenny=50 |lv1= 4-5: 50% }} | |||
{{EnemyInfo/GetData |hp=Any |zenny=30 |lv1= 1-3: 100% |lv2= 4: 50% }} | |||
}} | }} | ||
| Line 1,619: | Line 3,146: | ||
|airshoes= |shadowshoes= |floatshoes=y |statusguard= |superarmor= | |airshoes= |shadowshoes= |floatshoes=y |statusguard= |superarmor= | ||
|info= | |info= | ||
|locations= | |locations='''Level 3:''' [[Experiment Server Comp]] (20.8%), [[SoulServer Comp]] (16.7%), [[Factory Comp 1 (MMBN5)|Factory Comp 1]] (15.3%), [[Undernet 2 (MMBN5)|Undernet 2]] (12.8%), [[Factory Comp 2 (MMBN5)|Factory Comp 2]] (12.5%), [[Undernet 4 (MMBN5)|Undernet 4]] (11.5%), [[Nebula Area 3]] (9.7%), [[Undernet 3 (MMBN5)|Undernet 3]] (7.7%), [[Nebula Area 6]] (6.7%), [[Gargoyle Comp 4]] (4.2%)<br/>'''Liberation Mission:''' [[Nebula Area 5 (Liberation Mission)|Nebula Area 5]] | ||
|attacks= | |attacks= | ||
{{EnemyInfo/Attack |name_en=ElecReel |name_jp=エレキリール |name_tl=Elec Reel | |||
|attack=230 |emotion=10 |element=elec | |||
}} | |||
|getdata= | |getdata= | ||
{{EnemyInfo/GetData |hp=Any |chip=ElcReel3 |code=E |lv1= 7: 25% |lv2= 8-S: 50% }} | |||
{{EnemyInfo/GetData |hp=Any |chip=ElcReel3 |code=L |version=Team ProtoMan |lv1= 5: 25% |lv2= 6: 50% |lv3= 7: 25% }} | |||
{{EnemyInfo/GetData |hp=Any |chip=ElcReel3 |code=R |version=Team Colonel |lv1= 5: 25% |lv2= 6: 50% |lv3= 7: 25% }} | |||
{{EnemyInfo/GetData |hp=Any |zenny=700 |lv1= 9: 3.125% |lv2= 10: 25% |lv3= S: 50% }} | |||
{{EnemyInfo/GetData |hp=Any |zenny=650 |lv1= 7: 25% |lv2= 8: 50% |lv3= 9: 46.875% |lv4= 10: 25% }} | |||
{{EnemyInfo/GetData |hp=Any |zenny=600 |lv1= 5: 25% |lv2= 6: 50% |lv3= 7: 25% }} | |||
{{EnemyInfo/GetData |hp=Any |zenny=50 |lv1= 4-5: 50% }} | |||
{{EnemyInfo/GetData |hp=Any |zenny=30 |lv1= 1-3: 100% |lv2= 4: 50% }} | |||
}} | }} | ||
| Line 1,631: | Line 3,169: | ||
|airshoes= |shadowshoes= |floatshoes= |statusguard= |superarmor= | |airshoes= |shadowshoes= |floatshoes= |statusguard= |superarmor= | ||
|info=Contact damage doubled on first contact and after attacking. | |info=Contact damage doubled on first contact and after attacking. | ||
|locations= | |locations='''Level 1:''' [[Oran Area 2]] (31.9%), [[Oran Area 1]] (27.4%), [[Main Comp 2]] (26.4%), [[Electric Lock Comp]] (22.2%), [[Oran Area 3]] (21.8%), [[Drill Comp 4]] (17.6%), [[Drill Comp 3]] (14.8%), [[Squirrel Comps]] (13.9%), [[Furnace Comp]] (12.5%)<br/>'''Liberation Mission:''' [[ACDC Area 3 (Liberation Mission)|ACDC Area]], [[Oran Area 3 (Liberation Mission)|Oran Area 3]] | ||
|attacks= | |attacks= | ||
{{EnemyInfo/Attack |name_en=CactusBall<ref name="CactusBall">Listed as '''SpikeBall''' in Mega Man Battle Network 5 Official Strategy Guide</ref> |name_jp=サボテンボール |name_tl=Saboten Ball | |||
|attack=20 |emotion=10 |element=wood |guard=y | |||
}} | |||
|getdata= | |getdata= | ||
{{EnemyInfo/GetData |hp=Any |chip=CactBal1 |code=I |lv1= 9: 6.25% |lv2= 10: 50% |lv3= S: 100% }} | |||
{{EnemyInfo/GetData |hp=Any |chip=CactBal1 |code=J |lv1= 5: 25% |lv2= 6: 50% |lv3= 7: 75% |lv4= 8: 100% |lv5= 9: 93.75% |lv6= 10: 50% }} | |||
{{EnemyInfo/GetData |hp=High |zenny=100 |lv1= 5: 25% |lv2= 6: 50% |lv3= 7: 25% }} | |||
{{EnemyInfo/GetData |hp=High |zenny=50 |lv1= 4-5: 50% }} | |||
{{EnemyInfo/GetData |hp=High |zenny=30 |lv1= 1-3: 100% |lv2= 4: 50% }} | |||
{{EnemyInfo/GetData |hp=Low |recov=150 |lv1= 1-4: 100% |lv2= 5: 75% |lv3= 6: 50% |lv4= 7: 25% }} | |||
}} | }} | ||
| Line 1,642: | Line 3,189: | ||
|airshoes= |shadowshoes= |floatshoes= |statusguard= |superarmor= | |airshoes= |shadowshoes= |floatshoes= |statusguard= |superarmor= | ||
|info=Contact damage doubled on first contact and after attacking. | |info=Contact damage doubled on first contact and after attacking. | ||
|locations= | |locations='''Level 1:''' [[ACDC Town Vision Burst]] (46.7%), [[Wind God Comp]] (29.2%), [[Oran Isle Vision Burst]] (16.7%), [[End Area 2]] (15.3%), [[End Area 3]] (14.1%), [[End Area 1]] (12.5%), [[Gargoyle Comp 3]] (12.5%)<br/>'''Liberation Mission:''' [[End Area 5 (Liberation Mission)|End Area 5]] | ||
|attacks= | |attacks= | ||
{{EnemyInfo/Attack |name_en=CactusBall<ref name="CactusBall"/> |name_jp=サボテンボール |name_tl=Saboten Ball | |||
|attack=40 |emotion=10 |element=wood |guard=y | |||
}} | |||
|getdata= | |getdata= | ||
{{EnemyInfo/GetData |hp=Any |chip=CactBal1 |code=H |lv1= 9: 6.25% |lv2= 10: 50% |lv3= S: 100% }} | |||
{{EnemyInfo/GetData |hp=Any |chip=CactBal1 |code=I |lv1= 7: 25% |lv2= 8: 50% |lv3= 9: 46.875% |lv4= 10: 25% }} | |||
{{EnemyInfo/GetData |hp=High |zenny=300 |lv1= 7: 25% |lv2= 8: 50% |lv3= 9: 46.875% |lv4= 10: 25% }} | |||
{{EnemyInfo/GetData |hp=High |zenny=250 |lv1= 5: 50% |lv2= 6: 100% |lv3= 7: 50% }} | |||
{{EnemyInfo/GetData |hp=High |zenny=50 |lv1= 4-5: 50% }} | |||
{{EnemyInfo/GetData |hp=High |zenny=30 |lv1= 1-3: 100% |lv2= 4: 50% }} | |||
{{EnemyInfo/GetData |hp=Low |recov=200 |lv1= 1-6: 100% |lv2= 7: 75% |lv3= 8: 50% |lv4= 9: 46.875% |lv5= 10: 25% }} | |||
}} | }} | ||
| Line 1,653: | Line 3,210: | ||
|airshoes= |shadowshoes= |floatshoes= |statusguard= |superarmor= | |airshoes= |shadowshoes= |floatshoes= |statusguard= |superarmor= | ||
|info=Contact damage doubled on first contact and after attacking. | |info=Contact damage doubled on first contact and after attacking. | ||
|locations= | |locations='''Level 2:''' [[Oran Area 2]] (31.9%), [[Oran Area 1]] (27.4%), [[Main Comp 2]] (26.4%), [[Electric Lock Comp]] (22.2%), [[Oran Area 3]] (21.8%), [[Drill Comp 4]] (17.6%), [[Drill Comp 3]] (14.8%), [[Squirrel Comps]] (13.9%), [[Furnace Comp]] (12.5%)<br/>'''Liberation Mission:''' [[Nebula Area 1 (Liberation Mission)|Nebula Area 1]] | ||
|attacks= | |attacks= | ||
{{EnemyInfo/Attack |name_en=CactusBall<ref name="CactusBall"/> |name_jp=サボテンボール |name_tl=Saboten Ball | |||
|attack=70 |emotion=10 |element=wood |guard=y | |||
}} | |||
|getdata= | |getdata= | ||
{{EnemyInfo/GetData |hp=Any |chip=CactBal2 |code=R |lv1= 9: 6.25% |lv2= 10: 50% |lv3= S: 100% }} | |||
{{EnemyInfo/GetData |hp=Any |chip=CactBal2 |code=S |lv1= 7: 25% |lv2= 8: 50% |lv3= 9: 46.875% |lv4= 10: 25% }} | |||
{{EnemyInfo/GetData |hp=High |zenny=350 |lv1= 7: 25% |lv2= 8: 50% |lv3= 9: 46.875% |lv4= 10: 25% }} | |||
{{EnemyInfo/GetData |hp=High |zenny=300 |lv1= 5: 50% |lv2= 6: 100% |lv3= 7: 50% }} | |||
{{EnemyInfo/GetData |hp=High |zenny=50 |lv1= 4-5: 50% }} | |||
{{EnemyInfo/GetData |hp=High |zenny=30 |lv1= 1-3: 100% |lv2= 4: 50% }} | |||
{{EnemyInfo/GetData |hp=Low |recov=300 |lv1= 1-6: 100% |lv2= 7: 75% |lv3= 8: 50% |lv4= 9: 46.875% |lv5= 10: 25% }} | |||
}} | }} | ||
| Line 1,664: | Line 3,231: | ||
|airshoes= |shadowshoes= |floatshoes= |statusguard= |superarmor= | |airshoes= |shadowshoes= |floatshoes= |statusguard= |superarmor= | ||
|info=Contact damage doubled on first contact and after attacking. | |info=Contact damage doubled on first contact and after attacking. | ||
|locations= | |locations='''Level 2:''' [[ACDC Town Vision Burst]] (46.7%), [[Wind God Comp]] (29.2%), [[Oran Isle Vision Burst]] (16.7%), [[End Area 2]] (15.3%), [[End Area 3]] (14.1%), [[End Area 1]] (12.5%), [[Gargoyle Comp 3]] (12.5%) | ||
|attacks= | |attacks= | ||
{{EnemyInfo/Attack |name_en=CactusBall<ref name="CactusBall"/> |name_jp=サボテンボール |name_tl=Saboten Ball | |||
|attack=100 |emotion=10 |element=wood |guard=y | |||
}} | |||
|getdata= | |getdata= | ||
{{EnemyInfo/GetData |hp=Any |chip=CactBal2 |code=Q |lv1= 9: 6.25% |lv2= 10: 50% |lv3= S: 100% }} | |||
{{EnemyInfo/GetData |hp=Any |chip=CactBal2 |code=R |lv1= 7: 25% |lv2= 8: 50% |lv3= 9: 46.875% |lv4= 10: 25% }} | |||
{{EnemyInfo/GetData |hp=High |zenny=500 |lv1= 7: 25% |lv2= 8: 50% |lv3= 9: 46.875% |lv4= 10: 25% }} | |||
{{EnemyInfo/GetData |hp=High |zenny=450 |lv1= 5: 50% |lv2= 6: 100% |lv3= 7: 50% }} | |||
{{EnemyInfo/GetData |hp=High |zenny=50 |lv1= 4-5: 50% }} | |||
{{EnemyInfo/GetData |hp=High |zenny=30 |lv1= 1-3: 100% |lv2= 4: 50% }} | |||
{{EnemyInfo/GetData |hp=Low |recov=400 |lv1= 1-6: 100% |lv2= 7: 75% |lv3= 8: 50% |lv4= 9: 46.875% |lv5= 10: 25% }} | |||
}} | }} | ||
| Line 1,675: | Line 3,252: | ||
|airshoes= |shadowshoes= |floatshoes= |statusguard= |superarmor= | |airshoes= |shadowshoes= |floatshoes= |statusguard= |superarmor= | ||
|info=Contact damage doubled on first contact and after attacking. | |info=Contact damage doubled on first contact and after attacking. | ||
|locations= | |locations='''Level 3:''' [[Oran Area 2]] (31.9%), [[Oran Area 1]] (27.4%), [[Main Comp 2]] (26.4%), [[Electric Lock Comp]] (22.2%), [[Oran Area 3]] (21.8%), [[Drill Comp 4]] (17.6%), [[Drill Comp 3]] (14.8%), [[Squirrel Comps]] (13.9%), [[Furnace Comp]] (12.5%) | ||
|attacks= | |attacks= | ||
{{EnemyInfo/Attack |name_en=CactusBall<ref name="CactusBall"/> |name_jp=サボテンボール |name_tl=Saboten Ball | |||
|attack=150 |emotion=10 |element=wood |guard=y | |||
}} | |||
|getdata= | |getdata= | ||
{{EnemyInfo/GetData |hp=Any |chip=CactBal3 |code=M |lv1= 9: 6.25% |lv2= 10: 50% |lv3= S: 100% }} | |||
{{EnemyInfo/GetData |hp=Any |chip=CactBal3 |code=N |lv1= 7: 25% |lv2= 8: 50% |lv3= 9: 46.875% |lv4= 10: 25% }} | |||
{{EnemyInfo/GetData |hp=High |zenny=600 |lv1= 7: 25% |lv2= 8: 50% |lv3= 9: 46.875% |lv4= 10: 25% }} | |||
{{EnemyInfo/GetData |hp=High |zenny=550 |lv1= 5: 50% |lv2= 6: 100% |lv3= 7: 50% }} | |||
{{EnemyInfo/GetData |hp=High |zenny=50 |lv1= 4-5: 50% }} | |||
{{EnemyInfo/GetData |hp=High |zenny=30 |lv1= 1-3: 100% |lv2= 4: 50% }} | |||
{{EnemyInfo/GetData |hp=Low |recov=500 |lv1= 1-6: 100% |lv2= 7: 75% |lv3= 8: 50% |lv4= 9: 46.875% |lv5= 10: 25% }} | |||
}} | }} | ||
| Line 1,686: | Line 3,273: | ||
|airshoes= |shadowshoes= |floatshoes= |statusguard= |superarmor= | |airshoes= |shadowshoes= |floatshoes= |statusguard= |superarmor= | ||
|info=Contact damage doubled on first contact and after attacking. | |info=Contact damage doubled on first contact and after attacking. | ||
|locations= | |locations='''Level 3:''' [[ACDC Town Vision Burst]] (46.7%), [[Wind God Comp]] (29.2%), [[Nebula Area 5]] (20.8%), [[Oran Isle Vision Burst]] (16.7%), [[End Area 2]] (15.3%), [[End Area 3]] (14.1%), [[End Area 1]] (12.5%), [[Gargoyle Comp 3]] (12.5%), [[Nebula Area 6]] (7.8%) | ||
|attacks= | |attacks= | ||
{{EnemyInfo/Attack |name_en=CactusBall<ref name="CactusBall"/> |name_jp=サボテンボール |name_tl=Saboten Ball | |||
|attack=200 |emotion=10 |element=wood |guard=y | |||
}} | |||
|getdata= | |getdata= | ||
{{EnemyInfo/GetData |hp=Any |chip=CactBal3 |code=L |lv1= 9: 6.25% |lv2= 10: 50% |lv3= S: 100% }} | |||
{{EnemyInfo/GetData |hp=Any |chip=CactBal3 |code=M |lv1= 7: 25% |lv2= 8: 50% |lv3= 9: 46.875% |lv4= 10: 25% }} | |||
{{EnemyInfo/GetData |hp=High |zenny=700 |lv1= 7: 25% |lv2= 8: 50% |lv3= 9: 46.875% |lv4= 10: 25% }} | |||
{{EnemyInfo/GetData |hp=High |zenny=650 |lv1= 5: 50% |lv2= 6: 100% |lv3= 7: 50% }} | |||
{{EnemyInfo/GetData |hp=High |zenny=50 |lv1= 4-5: 50% }} | |||
{{EnemyInfo/GetData |hp=High |zenny=30 |lv1= 1-3: 100% |lv2= 4: 50% }} | |||
{{EnemyInfo/GetData |hp=Low |recov=max |lv1= 1-6: 100% |lv2= 7: 75% |lv3= 8: 50% |lv4= 9: 46.875% |lv5= 10: 25% }} | |||
}} | }} | ||
| Line 1,698: | Line 3,295: | ||
|airshoes= |shadowshoes= |floatshoes= |statusguard= |superarmor= | |airshoes= |shadowshoes= |floatshoes= |statusguard= |superarmor= | ||
|info= | |info= | ||
|locations= | |locations='''Level 1:''' [[Wind God Comp]] (25.0%), [[ACDC Town Vision Burst]] (16.7%), [[End Area 5]] (13.9%), [[Armor Comp (MMBN5)|Armor Comp]] (11.9%), [[Helmet Comp]] (11.9%), [[Katana Comp]] (11.9%), [[Gargoyle Comp 4]] (11.5%), [[Oran Isle Vision Burst]] (11.1%), [[End Area 4]] (10.3%)<br/>'''Liberation Mission:''' [[End Area 5 (Liberation Mission)|End Area 5]] | ||
|attacks= | |attacks= | ||
{{EnemyInfo/Attack |name_en=WoodNose<ref name="WoodNose">Mega Man Battle Network 5 Official Strategy Guide</ref> |name_jp=ウッディノーズ |name_tl=Woody Nose | |||
|attack=20 |emotion=10 |element=wood | |||
|info=Bushes have 1 HP. | |||
}} | |||
|getdata= | |getdata= | ||
{{EnemyInfo/GetData |hp=Any |chip=WoodNos1 |code=R |version=Team ProtoMan |lv1= 7: 25% |lv2= 8: 50% |lv3= 9: 53.125% |lv4= 10: 75% |lv5= S: 100% }} | |||
{{EnemyInfo/GetData |hp=Any |chip=WoodNos1 |code=W |version=Team Colonel |lv1= 7: 25% |lv2= 8: 50% |lv3= 9: 53.125% |lv4= 10: 75% |lv5= S: 100% }} | |||
{{EnemyInfo/GetData |hp=High |zenny=350 |lv1= 7: 25% |lv2= 8: 50% |lv3= 9: 46.875% |lv4= 10: 25% }} | |||
{{EnemyInfo/GetData |hp=High |zenny=300 |lv1= 5: 50% |lv2= 6: 100% |lv3= 7: 50% }} | |||
{{EnemyInfo/GetData |hp=High |zenny=50 |lv1= 4-5: 50% }} | |||
{{EnemyInfo/GetData |hp=High |zenny=30 |lv1= 1-3: 100% |lv2= 4: 50% }} | |||
{{EnemyInfo/GetData |hp=Low |recov=200 |lv1= 1-6: 100% |lv2= 7: 75% |lv3= 8: 50% |lv4= 9: 46.875% |lv5= 10: 25% }} | |||
}} | }} | ||
| Line 1,709: | Line 3,317: | ||
|airshoes= |shadowshoes= |floatshoes= |statusguard= |superarmor= | |airshoes= |shadowshoes= |floatshoes= |statusguard= |superarmor= | ||
|info= | |info= | ||
|locations= | |locations='''Level 1:''' [[Undernet 4 (MMBN5)|Undernet 4]] (12.8%), [[Undernet 2 (MMBN5)|Undernet 2]] (10.3%), [[Factory Comp 2 (MMBN5)|Factory Comp 2]] (9.7%), [[Oran Isle Vision Burst]] (8.3%), [[Gargoyle Comp 4]] (7.3%), [[Undernet 3 (MMBN5)|Undernet 3]] (5.1%) | ||
|attacks= | |attacks= | ||
{{EnemyInfo/Attack |name_en=WoodNose<ref name="WoodNose"/> |name_jp=ウッディノーズ |name_tl=Woody Nose | |||
|attack=50 |emotion=10 |element=wood | |||
|info=Bushes have 1 HP. | |||
}} | |||
|getdata= | |getdata= | ||
{{EnemyInfo/GetData |hp=Any |chip=WoodNos1 |code=F |lv1= 7: 25% |lv2= 8: 50% |lv3= 9: 53.125% |lv4= 10: 75% |lv5= S: 100% }} | |||
{{EnemyInfo/GetData |hp=High |zenny=450 |lv1= 7: 25% |lv2= 8: 50% |lv3= 9: 46.875% |lv4= 10: 25% }} | |||
{{EnemyInfo/GetData |hp=High |zenny=400 |lv1= 5: 50% |lv2= 6: 100% |lv3= 7: 50% }} | |||
{{EnemyInfo/GetData |hp=High |zenny=50 |lv1= 4-5: 50% }} | |||
{{EnemyInfo/GetData |hp=High |zenny=30 |lv1= 1-3: 100% |lv2= 4: 50% }} | |||
{{EnemyInfo/GetData |hp=Low |recov=300 |lv1= 1-6: 100% |lv2= 7: 75% |lv3= 8: 50% |lv4= 9: 46.875% |lv5= 10: 25% }} | |||
}} | }} | ||
| Line 1,720: | Line 3,338: | ||
|airshoes= |shadowshoes= |floatshoes= |statusguard= |superarmor= | |airshoes= |shadowshoes= |floatshoes= |statusguard= |superarmor= | ||
|info= | |info= | ||
|locations= | |locations='''Level 2:''' [[Wind God Comp]] (25.0%), [[ACDC Town Vision Burst]] (16.7%), [[End Area 5]] (13.9%), [[Armor Comp (MMBN5)|Armor Comp]] (11.9%), [[Helmet Comp]] (11.9%), [[Katana Comp]] (11.9%), [[Gargoyle Comp 4]] (11.5%), [[Oran Isle Vision Burst]] (11.1%), [[End Area 4]] (10.3%) | ||
|attacks= | |attacks= | ||
{{EnemyInfo/Attack |name_en=WoodNose<ref name="WoodNose"/> |name_jp=ウッディノーズ |name_tl=Woody Nose | |||
|attack=80 |emotion=10 |element=wood | |||
|info=Bushes have 1 HP. | |||
}} | |||
|getdata= | |getdata= | ||
{{EnemyInfo/GetData |hp=Any |chip=WoodNos2 |code=T |version=Team ProtoMan |lv1= 9: 6.25% |lv2= 10: 50% |lv3= S: 100% }} | |||
{{EnemyInfo/GetData |hp=Any |chip=WoodNos2 |code=Z |version=Team Colonel |lv1= 9: 6.25% |lv2= 10: 50% |lv3= S: 100% }} | |||
{{EnemyInfo/GetData |hp=High |zenny=550 |lv1= 7: 50% |lv2= 8: 100% |lv3= 9: 93.75% |lv4= 10: 50% }} | |||
{{EnemyInfo/GetData |hp=High |zenny=500 |lv1= 5: 50% |lv2= 6: 100% |lv3= 7: 50% }} | |||
{{EnemyInfo/GetData |hp=High |zenny=50 |lv1= 4-5: 50% }} | |||
{{EnemyInfo/GetData |hp=High |zenny=30 |lv1= 1-3: 100% |lv2= 4: 50% }} | |||
{{EnemyInfo/GetData |hp=Low |recov=400 |lv1= 1-8: 100% |lv2= 9: 93.75% |lv3= 10: 50% }} | |||
}} | }} | ||
| Line 1,731: | Line 3,360: | ||
|airshoes= |shadowshoes= |floatshoes= |statusguard= |superarmor= | |airshoes= |shadowshoes= |floatshoes= |statusguard= |superarmor= | ||
|info= | |info= | ||
|locations= | |locations='''Level 2:''' [[Undernet 4 (MMBN5)|Undernet 4]] (12.8%), [[Undernet 2 (MMBN5)|Undernet 2]] (10.3%), [[Factory Comp 2 (MMBN5)|Factory Comp 2]] (9.7%), [[Oran Isle Vision Burst]] (8.3%), [[Gargoyle Comp 4]] (7.3%), [[Undernet 3 (MMBN5)|Undernet 3]] (5.1%) | ||
|attacks= | |attacks= | ||
{{EnemyInfo/Attack |name_en=WoodNose<ref name="WoodNose"/> |name_jp=ウッディノーズ |name_tl=Woody Nose | |||
|attack=120 |emotion=10 |element=wood | |||
|info=Bushes have 1 HP. | |||
}} | |||
|getdata= | |getdata= | ||
{{EnemyInfo/GetData |hp=Any |chip=WoodNos2 |code=J |lv1= 9: 6.25% |lv2= 10: 50% |lv3= S: 100% }} | |||
{{EnemyInfo/GetData |hp=High |zenny=650 |lv1= 7: 50% |lv2= 8: 100% |lv3= 9: 93.75% |lv4= 10: 50% }} | |||
{{EnemyInfo/GetData |hp=High |zenny=600 |lv1= 5: 50% |lv2= 6: 100% |lv3= 7: 50% }} | |||
{{EnemyInfo/GetData |hp=High |zenny=50 |lv1= 4-5: 50% }} | |||
{{EnemyInfo/GetData |hp=High |zenny=30 |lv1= 1-3: 100% |lv2= 4: 50% }} | |||
{{EnemyInfo/GetData |hp=Low |recov=500 |lv1= 1-8: 100% |lv2= 9: 93.75% |lv3= 10: 50% }} | |||
}} | }} | ||
| Line 1,742: | Line 3,381: | ||
|airshoes= |shadowshoes= |floatshoes= |statusguard= |superarmor= | |airshoes= |shadowshoes= |floatshoes= |statusguard= |superarmor= | ||
|info= | |info= | ||
|locations= | |locations='''Level 3:''' [[Wind God Comp]] (25.0%), [[ACDC Town Vision Burst]] (16.7%), [[End Area 5]] (13.9%), [[Armor Comp (MMBN5)|Armor Comp]] (11.9%), [[Helmet Comp]] (11.9%), [[Katana Comp]] (11.9%), [[Gargoyle Comp 4]] (11.5%), [[Oran Isle Vision Burst]] (11.1%), [[End Area 4]] (10.3%) | ||
|attacks= | |attacks= | ||
{{EnemyInfo/Attack |name_en=WoodNose<ref name="WoodNose"/> |name_jp=ウッディノーズ |name_tl=Woody Nose | |||
|attack=160 |emotion=10 |element=wood | |||
|info=Bushes have 1 HP. | |||
}} | |||
|getdata= | |getdata= | ||
{{EnemyInfo/GetData |hp=Any |chip=WoodNos3 |code=S |version=Team ProtoMan |lv1= 9: 6.25% |lv2= 10: 50% |lv3= S: 100% }} | |||
{{EnemyInfo/GetData |hp=Any |chip=WoodNos3 |code=V |version=Team Colonel |lv1= 9: 6.25% |lv2= 10: 50% |lv3= S: 100% }} | |||
{{EnemyInfo/GetData |hp=High |zenny=750 |lv1= 7: 50% |lv2= 8: 100% |lv3= 9: 93.75% |lv4= 10: 50% }} | |||
{{EnemyInfo/GetData |hp=High |zenny=700 |lv1= 5: 50% |lv2= 6: 100% |lv3= 7: 50% }} | |||
{{EnemyInfo/GetData |hp=High |zenny=50 |lv1= 4-5: 50% }} | |||
{{EnemyInfo/GetData |hp=High |zenny=30 |lv1= 1-3: 100% |lv2= 4: 50% }} | |||
{{EnemyInfo/GetData |hp=Low |recov=max |lv1= 1-8: 100% |lv2= 9: 93.75% |lv3= 10: 50% }} | |||
}} | }} | ||
| Line 1,753: | Line 3,403: | ||
|airshoes= |shadowshoes= |floatshoes= |statusguard= |superarmor= | |airshoes= |shadowshoes= |floatshoes= |statusguard= |superarmor= | ||
|info= | |info= | ||
|locations= | |locations='''Level 3:''' [[Nebula Area 5]] (13.9%), [[Undernet 4 (MMBN5)|Undernet 4]] (12.8%), [[Undernet 2 (MMBN5)|Undernet 2]] (10.3%), [[Factory Comp 2 (MMBN5)|Factory Comp 2]] (9.7%), [[Oran Isle Vision Burst]] (8.3%), [[Gargoyle Comp 4]] (7.3%), [[Undernet 3 (MMBN5)|Undernet 3]] (5.1%), [[Nebula Area 6]] (4.4%)<br/>'''Liberation Mission:''' [[Nebula Area 5 (Liberation Mission)|Nebula Area 5]] | ||
|attacks= | |attacks= | ||
{{EnemyInfo/Attack |name_en=WoodNose<ref name="WoodNose"/> |name_jp=ウッディノーズ |name_tl=Woody Nose | |||
|attack=200 |emotion=10 |element=wood | |||
|info=Bushes have 1 HP. | |||
}} | |||
|getdata= | |getdata= | ||
{{EnemyInfo/GetData |hp=Any |chip=WoodNos3 |code=I |lv1= 9: 6.25% |lv2= 10: 50% |lv3= S: 100% }} | |||
{{EnemyInfo/GetData |hp=High |zenny=750 |lv1= 7: 50% |lv2= 8: 100% |lv3= 9: 93.75% |lv4= 10: 50% }} | |||
{{EnemyInfo/GetData |hp=High |zenny=700 |lv1= 5: 50% |lv2= 6: 100% |lv3= 7: 50% }} | |||
{{EnemyInfo/GetData |hp=High |zenny=50 |lv1= 4-5: 50% }} | |||
{{EnemyInfo/GetData |hp=High |zenny=30 |lv1= 1-3: 100% |lv2= 4: 50% }} | |||
{{EnemyInfo/GetData |hp=Low |recov=max |lv1= 1-8: 100% |lv2= 9: 93.75% |lv3= 10: 50% }} | |||
}} | }} | ||
| Line 1,761: | Line 3,421: | ||
{{EnemyInfo | {{EnemyInfo | ||
|image={{BattleField |style=bn5 |nocol1=true |nocol2=true |nocol3=true |object52=appley }} | |image={{BattleField |style=bn5 |nocol1=true |nocol2=true |nocol3=true |object52=appley }} | ||
|name_en=Appley |name_jp=アップルサム |name_tl= | |name_en=Appley |name_jp=アップルサム |name_tl=Apple Sam | ||
|hp=150 |contact=30 |emotion=10 |element=wood | |hp=150 |contact=30 |emotion=10 |element=wood | ||
|airshoes= |shadowshoes= |floatshoes= |statusguard= |superarmor= | |airshoes= |shadowshoes= |floatshoes= |statusguard= |superarmor= | ||
|info=Immune to damage while | |info=Immune to non-Fire Elemental damage and poison while inside the apple. When deleted, recovers an ally's HP to max. | ||
|locations= | |locations='''Level 1:''' [[Factory Comp 2 (MMBN5)|Factory Comp 2]] (19.4%), [[Factory Comp 3 (MMBN5)|Factory Comp 3]] (7.8%) | ||
|attacks= | |attacks= | ||
{{EnemyInfo/Attack |name_en=SeedKiss<ref name="SeedKiss">Mega Man Battle Network 5 Official Strategy Guide</ref> |name_jp=キッズシード |name_tl=Kids Seed | |||
|attack=30 |emotion=10 |element=wood | |||
|info=Changes panel to grass when it misses. | |||
}} | |||
|getdata= | |getdata= | ||
{{EnemyInfo/GetData |hp=Any |chip=RedFrut1 |code=K |version=Team ProtoMan |lv1= 9: 6.25% |lv2= 10: 50% |lv3= S: 100% }} | |||
{{EnemyInfo/GetData |hp=Any |chip=RedFrut1 |code=Z |version=Team Colonel |lv1= 9: 6.25% |lv2= 10: 50% |lv3= S: 100% }} | |||
{{EnemyInfo/GetData |hp=High |zenny=400 |lv1= 7: 50% |lv2= 8: 100% |lv3= 9: 93.75% |lv4= 10: 50% }} | |||
{{EnemyInfo/GetData |hp=High |zenny=300 |lv1= 5: 50% |lv2= 6: 100% |lv3= 7: 50% }} | |||
{{EnemyInfo/GetData |hp=High |zenny=50 |lv1= 4-5: 50% }} | |||
{{EnemyInfo/GetData |hp=High |zenny=30 |lv1= 1-3: 100% |lv2= 4: 50% }} | |||
{{EnemyInfo/GetData |hp=Low |recov=400 |lv1= 1-8: 100% |lv2= 9: 93.75% |lv3= 10: 50% }} | |||
}} | }} | ||
{{EnemyInfo | {{EnemyInfo | ||
|image={{BattleField |style=bn5 |nocol1=true |nocol2=true |nocol3=true |object52=appleyex }} | |image={{BattleField |style=bn5 |nocol1=true |nocol2=true |nocol3=true |object52=appleyex }} | ||
|name_en=AppleyEX |name_jp=アップルサムEX |name_tl= | |name_en=AppleyEX |name_jp=アップルサムEX |name_tl=Apple Sam EX | ||
|hp=180 |contact=60 |emotion=10 |element=wood | |hp=180 |contact=60 |emotion=10 |element=wood | ||
|airshoes= |shadowshoes= |floatshoes= |statusguard= |superarmor= | |airshoes= |shadowshoes= |floatshoes= |statusguard= |superarmor= | ||
|info=Immune to damage while | |info=Immune to non-Fire Elemental damage and poison while inside the apple. When deleted, recovers an ally's HP to max. | ||
|locations= | |locations='''Level 1:''' [[Factory Comp 4 (MMBN5)|Factory Comp 4]] (10.0%) | ||
|attacks= | |attacks= | ||
{{EnemyInfo/Attack |name_en=SeedKiss<ref name="SeedKiss"/> |name_jp=キッズシード |name_tl=Kids Seed | |||
|attack=60 |emotion=10 |element=wood | |||
|info=Changes panel to grass when it misses. | |||
}} | |||
|getdata= | |getdata= | ||
{{EnemyInfo/GetData |hp=Any |chip=RedFrut1 |code=E |lv1= 9: 6.25% |lv2= 10: 50% |lv3= S: 100% }} | |||
{{EnemyInfo/GetData |hp=High |zenny=500 |lv1= 7: 50% |lv2= 8: 100% |lv3= 9: 93.75% |lv4= 10: 50% }} | |||
{{EnemyInfo/GetData |hp=High |zenny=400 |lv1= 5: 50% |lv2= 6: 100% |lv3= 7: 50% }} | |||
{{EnemyInfo/GetData |hp=High |zenny=50 |lv1= 4-5: 50% }} | |||
{{EnemyInfo/GetData |hp=High |zenny=30 |lv1= 1-3: 100% |lv2= 4: 50% }} | |||
{{EnemyInfo/GetData |hp=Low |recov=500 |lv1= 1-8: 100% |lv2= 9: 93.75% |lv3= 10: 50% }} | |||
}} | }} | ||
{{EnemyInfo | {{EnemyInfo | ||
|image={{BattleField |style=bn5 |nocol1=true |nocol2=true |nocol3=true |object52=applez }} | |image={{BattleField |style=bn5 |nocol1=true |nocol2=true |nocol3=true |object52=applez }} | ||
|name_en=Applez |name_jp=アップルトム |name_tl= | |name_en=Applez |name_jp=アップルトム |name_tl=Apple Tom | ||
|hp=210 |contact=90 |emotion=10 |element=wood | |hp=210 |contact=90 |emotion=10 |element=wood | ||
|airshoes= |shadowshoes= |floatshoes= |statusguard= |superarmor= | |airshoes= |shadowshoes= |floatshoes= |statusguard= |superarmor= | ||
|info=Immune to damage while | |info=Immune to non-Fire Elemental damage and poison while inside the apple. When deleted, recovers an ally's HP to max. | ||
|locations= | |locations='''Level 2:''' [[Factory Comp 2 (MMBN5)|Factory Comp 2]] (19.4%), [[Factory Comp 3 (MMBN5)|Factory Comp 3]] (7.8%) | ||
|attacks= | |attacks= | ||
{{EnemyInfo/Attack |name_en=SeedKiss<ref name="SeedKiss"/> |name_jp=キッズシード |name_tl=Kids Seed | |||
|attack=90 |emotion=10 |element=wood | |||
|info=Changes panel to grass when it misses. | |||
}} | |||
|getdata= | |getdata= | ||
{{EnemyInfo/GetData |hp=Any |chip=RedFrut2 |code=T |version=Team ProtoMan |lv1= 9: 6.25% |lv2= 10: 50% |lv3= S: 100% }} | |||
{{EnemyInfo/GetData |hp=Any |chip=RedFrut2 |code=W |version=Team Colonel |lv1= 9: 6.25% |lv2= 10: 50% |lv3= S: 100% }} | |||
{{EnemyInfo/GetData |hp=High |zenny=600 |lv1= 7: 50% |lv2= 8: 100% |lv3= 9: 93.75% |lv4= 10: 50% }} | |||
{{EnemyInfo/GetData |hp=High |zenny=500 |lv1= 5: 50% |lv2= 6: 100% |lv3= 7: 50% }} | |||
{{EnemyInfo/GetData |hp=High |zenny=50 |lv1= 4-5: 50% }} | |||
{{EnemyInfo/GetData |hp=High |zenny=30 |lv1= 1-3: 100% |lv2= 4: 50% }} | |||
{{EnemyInfo/GetData |hp=Low |recov=max |lv1= 1-8: 100% |lv2= 9: 93.75% |lv3= 10: 50% }} | |||
}} | }} | ||
{{EnemyInfo | {{EnemyInfo | ||
|image={{BattleField |style=bn5 |nocol1=true |nocol2=true |nocol3=true |object52=applezex }} | |image={{BattleField |style=bn5 |nocol1=true |nocol2=true |nocol3=true |object52=applezex }} | ||
|name_en=ApplezEX |name_jp=アップルトムEX |name_tl= | |name_en=ApplezEX |name_jp=アップルトムEX |name_tl=Apple Tom EX | ||
|hp=250 |contact=120 |emotion=10 |element=wood | |hp=250 |contact=120 |emotion=10 |element=wood | ||
|airshoes= |shadowshoes= |floatshoes= |statusguard= |superarmor= | |airshoes= |shadowshoes= |floatshoes= |statusguard= |superarmor= | ||
|info=Immune to damage while | |info=Immune to non-Fire Elemental damage and poison while inside the apple. When deleted, recovers an ally's HP to max. | ||
|locations= | |locations='''Level 2:''' [[Factory Comp 4 (MMBN5)|Factory Comp 4]] (10.0%) | ||
|attacks= | |attacks= | ||
{{EnemyInfo/Attack |name_en=SeedKiss<ref name="SeedKiss"/> |name_jp=キッズシード |name_tl=Kids Seed | |||
|attack=120 |emotion=10 |element=wood | |||
|info=Changes panel to grass when it misses. | |||
}} | |||
|getdata= | |getdata= | ||
{{EnemyInfo/GetData |hp=Any |chip=RedFrut2 |code=F |lv1= 9: 6.25% |lv2= 10: 50% |lv3= S: 100% }} | |||
{{EnemyInfo/GetData |hp=High |zenny=650 |lv1= 7: 50% |lv2= 8: 100% |lv3= 9: 93.75% |lv4= 10: 50% }} | |||
{{EnemyInfo/GetData |hp=High |zenny=600 |lv1= 5: 50% |lv2= 6: 100% |lv3= 7: 50% }} | |||
{{EnemyInfo/GetData |hp=High |zenny=50 |lv1= 4-5: 50% }} | |||
{{EnemyInfo/GetData |hp=High |zenny=30 |lv1= 1-3: 100% |lv2= 4: 50% }} | |||
{{EnemyInfo/GetData |hp=Low |recov=max |lv1= 1-8: 100% |lv2= 9: 93.75% |lv3= 10: 50% }} | |||
}} | }} | ||
{{EnemyInfo | {{EnemyInfo | ||
|image={{BattleField |style=bn5 |nocol1=true |nocol2=true |nocol3=true |object52=appull }} | |image={{BattleField |style=bn5 |nocol1=true |nocol2=true |nocol3=true |object52=appull }} | ||
|name_en=Appull |name_jp=アップルジム |name_tl= | |name_en=Appull |name_jp=アップルジム |name_tl=Apple Jim | ||
|hp=290 |contact=160 |emotion=10 |element=wood | |hp=290 |contact=160 |emotion=10 |element=wood | ||
|airshoes= |shadowshoes= |floatshoes= |statusguard= |superarmor= | |airshoes= |shadowshoes= |floatshoes= |statusguard= |superarmor= | ||
|info=Immune to damage while | |info=Immune to non-Fire Elemental damage and poison while inside the apple. When deleted, recovers an ally's HP to max. | ||
|locations= | |locations='''Level 3:''' [[Factory Comp 2 (MMBN5)|Factory Comp 2]] (19.4%), [[Factory Comp 3 (MMBN5)|Factory Comp 3]] (7.8%)<br/>'''Liberation Mission:''' [[Nebula Area 3 (Liberation Mission)|Nebula Area 3]] | ||
|attacks= | |attacks= | ||
{{EnemyInfo/Attack |name_en=SeedKiss<ref name="SeedKiss"/> |name_jp=キッズシード |name_tl=Kids Seed | |||
|attack=160 |emotion=10 |element=wood | |||
|info=Changes panel to grass when it misses. | |||
}} | |||
|getdata= | |getdata= | ||
{{EnemyInfo/GetData |hp=Any |chip=RedFrut3 |code=O |version=Team ProtoMan |lv1= 9: 6.25% |lv2= 10: 50% |lv3= S: 100% }} | |||
{{EnemyInfo/GetData |hp=Any |chip=RedFrut3 |code=U |version=Team Colonel |lv1= 9: 6.25% |lv2= 10: 50% |lv3= S: 100% }} | |||
{{EnemyInfo/GetData |hp=High |zenny=700 |lv1= 7: 50% |lv2= 8: 100% |lv3= 9: 93.75% |lv4= 10: 50% }} | |||
{{EnemyInfo/GetData |hp=High |zenny=650 |lv1= 5: 50% |lv2= 6: 100% |lv3= 7: 50% }} | |||
{{EnemyInfo/GetData |hp=High |zenny=50 |lv1= 4-5: 50% }} | |||
{{EnemyInfo/GetData |hp=High |zenny=30 |lv1= 1-3: 100% |lv2= 4: 50% }} | |||
{{EnemyInfo/GetData |hp=Low |recov=max |lv1= 1-8: 100% |lv2= 9: 93.75% |lv3= 10: 50% }} | |||
}} | }} | ||
{{EnemyInfo | {{EnemyInfo | ||
|image={{BattleField |style=bn5 |nocol1=true |nocol2=true |nocol3=true |object52=appullex }} | |image={{BattleField |style=bn5 |nocol1=true |nocol2=true |nocol3=true |object52=appullex }} | ||
|name_en=AppullEX |name_jp=アップルジムEX |name_tl= | |name_en=AppullEX |name_jp=アップルジムEX |name_tl=Apple Jim EX | ||
|hp=330 |contact=200 |emotion=10 |element=wood | |hp=330 |contact=200 |emotion=10 |element=wood | ||
|airshoes= |shadowshoes= |floatshoes= |statusguard= |superarmor= | |airshoes= |shadowshoes= |floatshoes= |statusguard= |superarmor= | ||
|info=Immune to damage while | |info=Immune to non-Fire Elemental damage and poison while inside the apple. When deleted, recovers an ally's HP to max. | ||
|locations= | |locations='''Level 3:''' [[Factory Comp 4 (MMBN5)|Factory Comp 4]] (10.0%), [[Nebula Area 6]] (2.2%)<br/>'''Liberation Mission:''' [[Nebula Area 5 (Liberation Mission)|Nebula Area 5]] | ||
|attacks= | |attacks= | ||
{{EnemyInfo/Attack |name_en=SeedKiss<ref name="SeedKiss"/> |name_jp=キッズシード |name_tl=Kids Seed | |||
|attack=200 |emotion=10 |element=wood | |||
|info=Changes panel to grass when it misses. | |||
}} | |||
|getdata= | |getdata= | ||
{{EnemyInfo/GetData |hp=Any |chip=RedFrut3 |code=H |lv1= 9: 6.25% |lv2= 10: 50% |lv3= S: 100% }} | |||
{{EnemyInfo/GetData |hp=High |zenny=750 |lv1= 7: 50% |lv2= 8: 100% |lv3= 9: 93.75% |lv4= 10: 50% }} | |||
{{EnemyInfo/GetData |hp=High |zenny=700 |lv1= 5: 50% |lv2= 6: 100% |lv3= 7: 50% }} | |||
{{EnemyInfo/GetData |hp=High |zenny=50 |lv1= 4-5: 50% }} | |||
{{EnemyInfo/GetData |hp=High |zenny=30 |lv1= 1-3: 100% |lv2= 4: 50% }} | |||
{{EnemyInfo/GetData |hp=Low |recov=max |lv1= 1-8: 100% |lv2= 9: 93.75% |lv3= 10: 50% }} | |||
}} | }} | ||
| Line 1,832: | Line 3,555: | ||
|airshoes= |shadowshoes= |floatshoes= |statusguard= |superarmor= | |airshoes= |shadowshoes= |floatshoes= |statusguard= |superarmor= | ||
|info= | |info= | ||
|locations= | |locations='''Liberation Mission:''' [[ACDC Area 3 (Liberation Mission)|ACDC Area]], [[Oran Area 3 (Liberation Mission)|Oran Area 3]] | ||
|attacks= | |attacks= | ||
| | {{EnemyInfo/Attack |name_en=Crossfire<ref name="Crossfire">Mega Man Battle Network 5 Official Strategy Guide</ref> |name_jp=クロスファイア |name_tl=Cross Fire | ||
|attack=30 |emotion=10 |element=fire | |||
}} | |||
}} | }} | ||
| Line 1,843: | Line 3,568: | ||
|airshoes= |shadowshoes= |floatshoes= |statusguard= |superarmor= | |airshoes= |shadowshoes= |floatshoes= |statusguard= |superarmor= | ||
|info= | |info= | ||
|locations= | |locations='''Liberation Mission:''' [[SciLab Area 3 (Liberation Mission)|SciLab Area 3]], [[End Area 2 (Liberation Mission)|End Area 2]], [[End Area 5 (Liberation Mission)|End Area 5]] | ||
|attacks= | |attacks= | ||
| | {{EnemyInfo/Attack |name_en=Crossfire<ref name="Crossfire"/> |name_jp=クロスファイア |name_tl=Cross Fire | ||
|attack=60 |emotion=10 |element=fire | |||
}} | |||
}} | }} | ||
| Line 1,854: | Line 3,581: | ||
|airshoes= |shadowshoes= |floatshoes= |statusguard= |superarmor= | |airshoes= |shadowshoes= |floatshoes= |statusguard= |superarmor= | ||
|info= | |info= | ||
|locations= | |locations='''Liberation Mission:''' [[Undernet 4 (Liberation Mission)|Undernet 4]] | ||
|attacks= | |attacks= | ||
| | {{EnemyInfo/Attack |name_en=Crossfire<ref name="Crossfire"/> |name_jp=クロスファイア |name_tl=Cross Fire | ||
|attack=90 |emotion=10 |element=fire | |||
}} | |||
}} | }} | ||
| Line 1,865: | Line 3,594: | ||
|airshoes= |shadowshoes= |floatshoes= |statusguard= |superarmor= | |airshoes= |shadowshoes= |floatshoes= |statusguard= |superarmor= | ||
|info= | |info= | ||
|locations= | |locations='''Liberation Mission:''' [[Nebula Area 1 (Liberation Mission)|Nebula Area 1]] | ||
|attacks= | |attacks= | ||
| | {{EnemyInfo/Attack |name_en=Crossfire<ref name="Crossfire"/> |name_jp=クロスファイア |name_tl=Cross Fire | ||
|attack=130 |emotion=10 |element=fire | |||
}} | |||
}} | }} | ||
| Line 1,876: | Line 3,607: | ||
|airshoes= |shadowshoes= |floatshoes= |statusguard= |superarmor= | |airshoes= |shadowshoes= |floatshoes= |statusguard= |superarmor= | ||
|info= | |info= | ||
|locations= | |locations='''Liberation Mission:''' [[Nebula Area 3 (Liberation Mission)|Nebula Area 3]] | ||
|attacks= | |attacks= | ||
| | {{EnemyInfo/Attack |name_en=Crossfire<ref name="Crossfire"/> |name_jp=クロスファイア |name_tl=Cross Fire | ||
|attack=170 |emotion=10 |element=fire | |||
}} | |||
}} | }} | ||
| Line 1,887: | Line 3,620: | ||
|airshoes= |shadowshoes= |floatshoes= |statusguard= |superarmor= | |airshoes= |shadowshoes= |floatshoes= |statusguard= |superarmor= | ||
|info= | |info= | ||
|locations= | |locations='''Liberation Mission:''' [[Nebula Area 5 (Liberation Mission)|Nebula Area 5]] | ||
|attacks= | |attacks= | ||
| | {{EnemyInfo/Attack |name_en=Crossfire<ref name="Crossfire"/> |name_jp=クロスファイア |name_tl=Cross Fire | ||
|attack=200 |emotion=10 |element=fire | |||
}} | |||
}} | }} | ||
| Line 1,899: | Line 3,634: | ||
|airshoes=y |shadowshoes= |floatshoes=y |statusguard= |superarmor= | |airshoes=y |shadowshoes= |floatshoes=y |statusguard= |superarmor= | ||
|info= | |info= | ||
|locations= | |locations='''Liberation Mission:''' [[Oran Area 3 (Liberation Mission)|Oran Area 3]], [[SciLab Area 3 (Liberation Mission)|SciLab Area 3]] | ||
|attacks= | |attacks= | ||
| | {{EnemyInfo/Attack |name_en=DeathCapture |name_jp=デスキャプチャー |name_tl=Death Capture | ||
|attack=30 |emotion=10 |element=none |break=y | |||
|info=Attack on leftmost panel only pierces guard rather than breaking. | |||
}} | |||
}} | }} | ||
| Line 1,910: | Line 3,648: | ||
|airshoes=y |shadowshoes= |floatshoes=y |statusguard= |superarmor= | |airshoes=y |shadowshoes= |floatshoes=y |statusguard= |superarmor= | ||
|info= | |info= | ||
|locations= | |locations='''Liberation Mission:''' [[End Area 2 (Liberation Mission)|End Area 2]], [[End Area 5 (Liberation Mission)|End Area 5]] | ||
|attacks= | |attacks= | ||
| | {{EnemyInfo/Attack |name_en=DeathCapture |name_jp=デスキャプチャー |name_tl=Death Capture | ||
|attack=50 |emotion=10 |element=none |break=y | |||
|info=Attack on leftmost panel only pierces guard rather than breaking. | |||
}} | |||
}} | }} | ||
| Line 1,921: | Line 3,662: | ||
|airshoes=y |shadowshoes= |floatshoes=y |statusguard= |superarmor= | |airshoes=y |shadowshoes= |floatshoes=y |statusguard= |superarmor= | ||
|info= | |info= | ||
|locations= | |locations='''Liberation Mission:''' [[Undernet 4 (Liberation Mission)|Undernet 4]] | ||
|attacks= | |attacks= | ||
| | {{EnemyInfo/Attack |name_en=DeathCapture |name_jp=デスキャプチャー |name_tl=Death Capture | ||
|attack=70 |emotion=10 |element=none |break=y | |||
|info=Attack on leftmost panel only pierces guard rather than breaking. | |||
}} | |||
}} | }} | ||
| Line 1,932: | Line 3,676: | ||
|airshoes=y |shadowshoes= |floatshoes=y |statusguard= |superarmor= | |airshoes=y |shadowshoes= |floatshoes=y |statusguard= |superarmor= | ||
|info= | |info= | ||
|locations= | |locations='''Liberation Mission:''' [[Nebula Area 1 (Liberation Mission)|Nebula Area 1]] | ||
|attacks= | |attacks= | ||
| | {{EnemyInfo/Attack |name_en=DeathCapture |name_jp=デスキャプチャー |name_tl=Death Capture | ||
|attack=90 |emotion=10 |element=none |break=y | |||
|info=Attack on leftmost panel only pierces guard rather than breaking. | |||
}} | |||
}} | }} | ||
| Line 1,943: | Line 3,690: | ||
|airshoes=y |shadowshoes= |floatshoes=y |statusguard= |superarmor= | |airshoes=y |shadowshoes= |floatshoes=y |statusguard= |superarmor= | ||
|info= | |info= | ||
|locations= | |locations='''Liberation Mission:''' [[Nebula Area 3 (Liberation Mission)|Nebula Area 3]] | ||
|attacks= | |attacks= | ||
| | {{EnemyInfo/Attack |name_en=DeathCapture |name_jp=デスキャプチャー |name_tl=Death Capture | ||
|attack=120 |emotion=10 |element=none |break=y | |||
|info=Attack on leftmost panel only pierces guard rather than breaking. | |||
}} | |||
}} | }} | ||
| Line 1,954: | Line 3,704: | ||
|airshoes=y |shadowshoes= |floatshoes=y |statusguard= |superarmor= | |airshoes=y |shadowshoes= |floatshoes=y |statusguard= |superarmor= | ||
|info= | |info= | ||
|locations= | |locations='''Liberation Mission:''' [[Nebula Area 5 (Liberation Mission)|Nebula Area 5]] | ||
|attacks= | |attacks= | ||
| | {{EnemyInfo/Attack |name_en=DeathCapture |name_jp=デスキャプチャー |name_tl=Death Capture | ||
|attack=150 |emotion=10 |element=none |break=y | |||
|info=Attack on leftmost panel only pierces guard rather than breaking. | |||
}} | |||
}} | }} | ||
| Line 1,966: | Line 3,719: | ||
|airshoes= |shadowshoes= |floatshoes=y |statusguard= |superarmor= | |airshoes= |shadowshoes= |floatshoes=y |statusguard= |superarmor= | ||
|info= | |info= | ||
|locations= | |locations='''Liberation Mission:''' [[End Area 2 (Liberation Mission)|End Area 2]] | ||
|attacks= | |attacks= | ||
| | {{EnemyInfo/Attack |name_en=DarkSlash |name_jp=ダークスラッシュ |name_tl=Dark Slash | ||
|attack=50 |emotion=10 |element=none |break=y |sword=y |ground=y | |||
|info=Changes non-hole panels to cracked. | |||
}} | |||
}} | }} | ||
| Line 1,977: | Line 3,733: | ||
|airshoes= |shadowshoes= |floatshoes=y |statusguard= |superarmor= | |airshoes= |shadowshoes= |floatshoes=y |statusguard= |superarmor= | ||
|info= | |info= | ||
|locations= | |locations='''Liberation Mission:''' [[End Area 5 (Liberation Mission)|End Area 5]] | ||
|attacks= | |attacks= | ||
| | {{EnemyInfo/Attack |name_en=DarkSlash |name_jp=ダークスラッシュ |name_tl=Dark Slash | ||
|attack=80 |emotion=10 |element=none |break=y |sword=y |ground=y | |||
|info=Changes non-hole panels to cracked. | |||
}} | |||
}} | }} | ||
| Line 1,988: | Line 3,747: | ||
|airshoes= |shadowshoes= |floatshoes=y |statusguard= |superarmor= | |airshoes= |shadowshoes= |floatshoes=y |statusguard= |superarmor= | ||
|info= | |info= | ||
|locations= | |locations='''Liberation Mission:''' [[Undernet 4 (Liberation Mission)|Undernet 4]] | ||
|attacks= | |attacks= | ||
| | {{EnemyInfo/Attack |name_en=DarkSlash |name_jp=ダークスラッシュ |name_tl=Dark Slash | ||
|attack=120 |emotion=10 |element=none |break=y |sword=y |ground=y | |||
|info=Changes non-hole panels to cracked. | |||
}} | |||
}} | }} | ||
| Line 1,999: | Line 3,761: | ||
|airshoes= |shadowshoes= |floatshoes=y |statusguard= |superarmor= | |airshoes= |shadowshoes= |floatshoes=y |statusguard= |superarmor= | ||
|info= | |info= | ||
|locations= | |locations='''Liberation Mission:''' [[Nebula Area 1 (Liberation Mission)|Nebula Area 1]] | ||
|attacks= | |attacks= | ||
| | {{EnemyInfo/Attack |name_en=DarkSlash |name_jp=ダークスラッシュ |name_tl=Dark Slash | ||
|attack=160 |emotion=10 |element=none |break=y |sword=y |ground=y | |||
|info=Changes non-hole panels to cracked. | |||
}} | |||
}} | }} | ||
| Line 2,010: | Line 3,775: | ||
|airshoes= |shadowshoes= |floatshoes=y |statusguard= |superarmor= | |airshoes= |shadowshoes= |floatshoes=y |statusguard= |superarmor= | ||
|info= | |info= | ||
|locations= | |locations='''Liberation Mission:''' [[Nebula Area 3 (Liberation Mission)|Nebula Area 3]] | ||
|attacks= | |attacks= | ||
| | {{EnemyInfo/Attack |name_en=DarkSlash |name_jp=ダークスラッシュ |name_tl=Dark Slash | ||
|attack=200 |emotion=10 |element=none |break=y |sword=y |ground=y | |||
|info=Changes non-hole panels to cracked. | |||
}} | |||
}} | }} | ||
| Line 2,021: | Line 3,789: | ||
|airshoes= |shadowshoes= |floatshoes=y |statusguard= |superarmor= | |airshoes= |shadowshoes= |floatshoes=y |statusguard= |superarmor= | ||
|info= | |info= | ||
|locations= | |locations='''Liberation Mission:''' [[Nebula Area 5 (Liberation Mission)|Nebula Area 5]] | ||
| | |||
|attacks= | |attacks= | ||
| | {{EnemyInfo/Attack |name_en=DarkSlash |name_jp=ダークスラッシュ |name_tl=Dark Slash | ||
|attack=250 |emotion=10 |element=none |break=y |sword=y |ground=y | |||
|info=Changes non-hole panels to cracked. | |||
}} | }} | ||
}} | }} | ||
Revision as of 01:22, 20 March 2023
This page lists every enemy which can appear in battle in Mega Man Battle Network 5.
In this game, FloatShoes protects against the effects of cracked, swamp, magnet, ice, lava and water panels. It does not prevent Evil MegaMan from erasing Holy panels.
Get Data is dependent on the player's remaining HP % when they finish the battle:
| Name | HP range | Example for 1000 HP |
|---|---|---|
| High | HP ≥ 37.5 % | 375 – 1000 |
| Low | HP < 37.5 % | 1 – 374 |
Viruses
Mettaur
Powie
Bugtank
 |
||
|---|---|---|
 |
||
|---|---|---|
 |
||
|---|---|---|
 |
||
|---|---|---|
 |
||
|---|---|---|
 |
||
|---|---|---|
Handi
 |
||
|---|---|---|
 |
||
|---|---|---|
 |
||
|---|---|---|
 |
||
|---|---|---|
 |
||
|---|---|---|
 |
||
|---|---|---|
Dominerd
MetFire
Shakey
Trumpy
NinJoy
WindBox
Lark
BomBoy
Zomon
CanGuard
Catack
Drixol
 |
||
|---|---|---|
 |
||
|---|---|---|
 |
||
|---|---|---|
 |
||
|---|---|---|
 |
||
|---|---|---|
 |
||
|---|---|---|
Batty
 |
||
|---|---|---|
 |
||
|---|---|---|
 |
||
|---|---|---|
 |
||
|---|---|---|
 |
||
|---|---|---|
 |
||
|---|---|---|
Skarab
Champy
Draggin
Whirly
Marina
 |
||
|---|---|---|
 |
||
|---|---|---|
 |
||
|---|---|---|
 |
||
|---|---|---|
 |
||
|---|---|---|
 |
||
|---|---|---|
Flashy
Eleogre
Cactikil
WuNote
Appley
BigBrute
 |
||
|---|---|---|
 |
||
|---|---|---|
 |
||
|---|---|---|
 |
||
|---|---|---|
 |
||
|---|---|---|
 |
||
|---|---|---|
TinHawk
 |
||
|---|---|---|
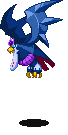 |
||
|---|---|---|
 |
||
|---|---|---|
 |
||
|---|---|---|
 |
||
|---|---|---|
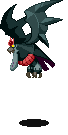 |
||
|---|---|---|
Bladia
 |
||
|---|---|---|
 |
||
|---|---|---|
 |
||
|---|---|---|
 |
||
|---|---|---|
 |
||
|---|---|---|
 |
||
|---|---|---|
References
- ↑ 1.0 1.1 1.2 1.3 1.4 1.5 Derived from "All Helmet"; Interview with TOM-PON
- ↑ 2.0 2.1 2.2 2.3 2.4 2.5 Mega Man Battle Network 5 Official Strategy Guide
- ↑ 3.0 3.1 3.2 3.3 3.4 3.5 Listed as Earthquake in Mega Man Battle Network 5 Official Strategy Guide
- ↑ 4.0 4.1 Mega Man Battle Network 5 Official Strategy Guide
- ↑ 5.0 5.1 5.2 5.3 5.4 Mega Man Battle Network 5 Official Strategy Guide
- ↑ 6.0 6.1 6.2 6.3 6.4 6.5 Mega Man Battle Network 5 Official Strategy Guide
- ↑ 7.0 7.1 7.2 7.3 7.4 7.5 Mega Man Battle Network 5 Official Strategy Guide
- ↑ In the Japanese version of 5GBA, this enemy is named Wind Box 3 (ウインドボックス3). This was corrected in the Japanese version of 5DS.
- ↑ 9.0 9.1 9.2 9.3 9.4 9.5 Listed as Boy's Bomb in Mega Man Battle Network 5 Official Strategy Guide
- ↑ 10.0 10.1 10.2 10.3 10.4 10.5 Mega Man Battle Network 5 Official Strategy Guide
- ↑ 11.0 11.1 Mega Man Battle Network Official Complete Works
- ↑ 12.0 12.1 12.2 12.3 12.4 12.5 Listed as TankCan in Mega Man Battle Network 5 Official Strategy Guide
- ↑ 13.0 13.1 13.2 13.3 13.4 13.5 Mega Man Battle Network 5 Official Strategy Guide
- ↑ 14.0 14.1 14.2 14.3 14.4 14.5 Listed as Skull Chain in Mega Man Battle Network 5 Official Strategy Guide
- ↑ Listed as Fire Punch in Mega Man Battle Network 5 Official Strategy Guide
- ↑ 16.0 16.1 16.2 16.3 16.4 Listed as Double Fire Punch in Mega Man Battle Network 5 Official Strategy Guide
- ↑ 17.0 17.1 17.2 17.3 17.4 17.5 Mega Man Battle Network 5 Official Strategy Guide
- ↑ 18.0 18.1 18.2 18.3 18.4 18.5 Listed as AqWhirll in Mega Man Battle Network 5 Official Strategy Guide
- ↑ 19.0 19.1 19.2 19.3 19.4 19.5 Mega Man Battle Network 5 Official Strategy Guide
- ↑ 20.0 20.1 20.2 20.3 20.4 20.5 Listed as SpikeBall in Mega Man Battle Network 5 Official Strategy Guide
- ↑ 21.0 21.1 21.2 21.3 21.4 21.5 Mega Man Battle Network 5 Official Strategy Guide
- ↑ 22.0 22.1 22.2 22.3 22.4 22.5 Mega Man Battle Network 5 Official Strategy Guide
- ↑ 23.0 23.1 23.2 23.3 23.4 23.5 Mega Man Battle Network 5 Official Strategy Guide