Enemies in MMBN1: Difference between revisions
From The Rockman EXE Zone Wiki
m (Text replacement - "Hougan" to "Hōgan") |
|||
| (47 intermediate revisions by 3 users not shown) | |||
| Line 1: | Line 1: | ||
This page lists every enemy which can appear in battle in [[Mega Man Battle Network 1]]. | |||
==Viruses== | ==Viruses== | ||
===Mettool=== | ===Mettool=== | ||
{{EnemyInfo | {{EnemyInfo | ||
|image={{BattleField |style=bn1 |nocol1=true |nocol2=true |nocol3=true |object52=mettaur }} | |image={{BattleField |style=bn1 |nocol1=true |nocol2=true |nocol3=true |object52=mettaur }} | ||
|name_en=Mettool |name_jp=メットール |name_tl= | |name_en=Mettool |name_jp=メットール |name_tl=Metall<ref name="Metall">Derived from "All Helmet"; [https://www.youtube.com/watch?v=qwaTPXS4XtU Interview with TOM-PON]</ref> | ||
|hp=40 |contact=32 |element=none | |hp=40 |contact=32 |element=none | ||
|airshoes= |superarmor= | |airshoes= |superarmor= | ||
| Line 9: | Line 11: | ||
|locations=[[Oven Comp 1]] (72.1%), [[Doghouse Comp (MMBN1)|Doghouse Comp]] (62.5%), [[Oven Comp 2]] (51.4%), [[Internet 1 (MMBN1)|Internet 1]] (40.6%), [[Dex's PC Comp]] (39.6%), [[Lan's PC Comp]] (37.5%), [[School Comp 1 (MMBN1)|School Comp 1]] (26.4%), [[Telephone Comp (MMBN1)|Telephone Comp]] (25.0%), [[School Comp 3 (MMBN1)|School Comp 3]] (19.7%), [[School Comp 2 (MMBN1)|School Comp 2]] (18.4%), [[Internet 2 (MMBN1)|Internet 2]] (14.3%), [[School Comp 5]] (10.4%), [[School Comp 4]] (6.2%), [[Undernet 9]] (2.1%) | |locations=[[Oven Comp 1]] (72.1%), [[Doghouse Comp (MMBN1)|Doghouse Comp]] (62.5%), [[Oven Comp 2]] (51.4%), [[Internet 1 (MMBN1)|Internet 1]] (40.6%), [[Dex's PC Comp]] (39.6%), [[Lan's PC Comp]] (37.5%), [[School Comp 1 (MMBN1)|School Comp 1]] (26.4%), [[Telephone Comp (MMBN1)|Telephone Comp]] (25.0%), [[School Comp 3 (MMBN1)|School Comp 3]] (19.7%), [[School Comp 2 (MMBN1)|School Comp 2]] (18.4%), [[Internet 2 (MMBN1)|Internet 2]] (14.3%), [[School Comp 5]] (10.4%), [[School Comp 4]] (6.2%), [[Undernet 9]] (2.1%) | ||
|attacks= | |attacks= | ||
{{EnemyInfo/Attack |name_en= | {{EnemyInfo/Attack |name_en=ShockWave |name_jp=ショックウェーブ |name_tl=Shock Wave | ||
|attack=10 |element=none | |attack=10 |element=none | ||
|info= | |||
}} | }} | ||
|getdata= | |getdata= | ||
| Line 26: | Line 29: | ||
{{EnemyInfo | {{EnemyInfo | ||
|image={{BattleField |style=bn1 |nocol1=true |nocol2=true |nocol3=true |object52=mettaur2 }} | |image={{BattleField |style=bn1 |nocol1=true |nocol2=true |nocol3=true |object52=mettaur2 }} | ||
|name_en=Mettool2 |name_jp=メットール2nd |name_tl= | |name_en=Mettool2 |name_jp=メットール2nd |name_tl=Metall 2nd<ref name="Metall"/> | ||
|hp=60 |contact=32 |element=none | |hp=60 |contact=32 |element=none | ||
|airshoes= |superarmor= | |airshoes= |superarmor= | ||
| Line 32: | Line 35: | ||
|locations=[[Car Comp (MMBN1)|Car Comp]] (71.0%), [[Traffic Light Comp 2]] (41.6%), [[Dex's PC Comp]] (37.7%), [[New Game Machine Comp]] (35.7%), [[Big Vase Comp]] (31.1%), [[Traffic Light Comp 1]] (29.6%), [[Internet 3 (MMBN1)|Internet 3]] (25.9%), [[Traffic Light Comp 3]] (20.3%), [[Doghouse Comp (MMBN1)|Doghouse Comp]] (12.5%), [[Undernet 9]] (2.1%) | |locations=[[Car Comp (MMBN1)|Car Comp]] (71.0%), [[Traffic Light Comp 2]] (41.6%), [[Dex's PC Comp]] (37.7%), [[New Game Machine Comp]] (35.7%), [[Big Vase Comp]] (31.1%), [[Traffic Light Comp 1]] (29.6%), [[Internet 3 (MMBN1)|Internet 3]] (25.9%), [[Traffic Light Comp 3]] (20.3%), [[Doghouse Comp (MMBN1)|Doghouse Comp]] (12.5%), [[Undernet 9]] (2.1%) | ||
|attacks= | |attacks= | ||
{{EnemyInfo/Attack |name_en= | {{EnemyInfo/Attack |name_en=SonicWave |name_jp=ソニックウェーブ |name_tl=Sonic Wave | ||
|attack=40 |element=none | |attack=40 |element=none | ||
|info= | |||
}} | }} | ||
{{EnemyInfo/Attack |name_en= | {{EnemyInfo/Attack |name_en=MetGuard |name_jp=メットガード |name_tl=Met Guard | ||
|info=Used when a different Mettool is attacking. | |||
}} | }} | ||
|getdata= | |getdata= | ||
| Line 50: | Line 55: | ||
{{EnemyInfo | {{EnemyInfo | ||
|image={{BattleField |style=bn1 |nocol1=true |nocol2=true |nocol3=true |object52=mettaur3 }} | |image={{BattleField |style=bn1 |nocol1=true |nocol2=true |nocol3=true |object52=mettaur3 }} | ||
|name_en=Mettool3 |name_jp=メットール3rd |name_tl= | |name_en=Mettool3 |name_jp=メットール3rd |name_tl=Metall 3rd<ref name="Metall"/> | ||
|hp=100 |contact=32 |element=none | |hp=100 |contact=32 |element=none | ||
|airshoes= |superarmor= | |airshoes= |superarmor= | ||
| Line 56: | Line 61: | ||
|locations=[[Traffic Light Comp 4]] (53.3%), [[Undernet 3 (MMBN1)|Undernet 3]] (27.3%), [[Undernet 1 (MMBN1)|Undernet 1]] (24.0%), [[Undernet 2 (MMBN1)|Undernet 2]] (21.9%), [[Big Vase Comp]] (18.8%), [[Traffic Light Comp 5]] (14.6%), [[Traffic Light Comp 3]] (12.4%), [[Undernet 9]] (11.3%), [[Undernet 4 (MMBN1)|Undernet 4]] (9.4%) | |locations=[[Traffic Light Comp 4]] (53.3%), [[Undernet 3 (MMBN1)|Undernet 3]] (27.3%), [[Undernet 1 (MMBN1)|Undernet 1]] (24.0%), [[Undernet 2 (MMBN1)|Undernet 2]] (21.9%), [[Big Vase Comp]] (18.8%), [[Traffic Light Comp 5]] (14.6%), [[Traffic Light Comp 3]] (12.4%), [[Undernet 9]] (11.3%), [[Undernet 4 (MMBN1)|Undernet 4]] (9.4%) | ||
|attacks= | |attacks= | ||
{{EnemyInfo/Attack |name_en= | {{EnemyInfo/Attack |name_en=DynaWave |name_jp=ダイナウェーブ |name_tl=Dyna Wave | ||
|attack=100 |element=none | |attack=100 |element=none | ||
|info= | |||
}} | }} | ||
{{EnemyInfo/Attack |name_en= | {{EnemyInfo/Attack |name_en=MetGuard |name_jp=メットガード |name_tl=Met Guard | ||
|info=Used when a different Mettool is attacking. | |||
}} | }} | ||
|getdata= | |getdata= | ||
| Line 76: | Line 83: | ||
{{EnemyInfo | {{EnemyInfo | ||
|image={{BattleField |style=bn1 |nocol1=true |nocol2=true |nocol3=true |object52=canodumb }} | |image={{BattleField |style=bn1 |nocol1=true |nocol2=true |nocol3=true |object52=canodumb }} | ||
|name_en=Canodumb |name_jp=キャノーダム |name_tl= | |name_en=Canodumb<ref name="Canodumb">Mega Man Battle Network 2</ref> |name_jp=キャノーダム |name_tl=Kyanōdamu | ||
|hp=50 |contact=32 |element=none | |hp=50 |contact=32 |element=none | ||
|airshoes= |superarmor= | |airshoes= |superarmor= | ||
| Line 82: | Line 89: | ||
|locations=[[Yai's Portrait Comp]] (54.2%), [[Oven Comp 2]] (30.2%), [[Internet 1 (MMBN1)|Internet 1]] (27.9%), [[Oven Comp 1]] (27.9%), [[Doghouse Comp (MMBN1)|Doghouse Comp]] (25.0%), [[New Game Machine Comp]] (25.0%), [[School Comp 1 (MMBN1)|School Comp 1]] (15.4%), [[School Comp 3 (MMBN1)|School Comp 3]] (14.3%), [[School Comp 2 (MMBN1)|School Comp 2]] (10.6%), [[School Comp 4]] (9.4%), [[School Comp 5]] (7.3%), [[Traffic Light Comp 4]] (3.1%), [[Undernet 9]] (2.1%) | |locations=[[Yai's Portrait Comp]] (54.2%), [[Oven Comp 2]] (30.2%), [[Internet 1 (MMBN1)|Internet 1]] (27.9%), [[Oven Comp 1]] (27.9%), [[Doghouse Comp (MMBN1)|Doghouse Comp]] (25.0%), [[New Game Machine Comp]] (25.0%), [[School Comp 1 (MMBN1)|School Comp 1]] (15.4%), [[School Comp 3 (MMBN1)|School Comp 3]] (14.3%), [[School Comp 2 (MMBN1)|School Comp 2]] (10.6%), [[School Comp 4]] (9.4%), [[School Comp 5]] (7.3%), [[Traffic Light Comp 4]] (3.1%), [[Undernet 9]] (2.1%) | ||
|attacks= | |attacks= | ||
{{EnemyInfo/Attack |name_en=Cannon |name_jp=キャノン |name_tl= | {{EnemyInfo/Attack |name_en=Cannon |name_jp=キャノン |name_tl=Cannon | ||
|attack=10 |element=none | |attack=10 |element=none | ||
}} | }} | ||
| Line 98: | Line 105: | ||
{{EnemyInfo | {{EnemyInfo | ||
|image={{BattleField |style=bn1 |nocol1=true |nocol2=true |nocol3=true |object52=canodumb2 }} | |image={{BattleField |style=bn1 |nocol1=true |nocol2=true |nocol3=true |object52=canodumb2 }} | ||
|name_en=Canodumb2 |name_jp=キャノーダム2nd |name_tl= | |name_en=Canodumb2<ref name="Canodumb"/> |name_jp=キャノーダム2nd |name_tl=Kyanōdamu 2nd | ||
|hp=80 |contact=32 |element=none | |hp=80 |contact=32 |element=none | ||
|airshoes= |superarmor= | |airshoes= |superarmor= | ||
| Line 104: | Line 111: | ||
|locations=[[Power Plant Comp 1]] (34.5%), [[Internet 3 (MMBN1)|Internet 3]] (15.6%), [[Power Plant Comp 3]] (10.2%), [[Power Plant Comp 2]] (7.8%), [[New Game Machine Comp]] (4.0%), [[Waterworks Comp 5]] (3.9%), [[Waterworks Comp 6]] (2.3%), [[Undernet 9]] (2.1%) | |locations=[[Power Plant Comp 1]] (34.5%), [[Internet 3 (MMBN1)|Internet 3]] (15.6%), [[Power Plant Comp 3]] (10.2%), [[Power Plant Comp 2]] (7.8%), [[New Game Machine Comp]] (4.0%), [[Waterworks Comp 5]] (3.9%), [[Waterworks Comp 6]] (2.3%), [[Undernet 9]] (2.1%) | ||
|attacks= | |attacks= | ||
{{EnemyInfo/Attack |name_en= | {{EnemyInfo/Attack |name_en=HighCannon |name_jp=ハイキャノン |name_tl=High Cannon | ||
|attack=40 |element=none | |attack=40 |element=none | ||
}} | }} | ||
| Line 120: | Line 127: | ||
{{EnemyInfo | {{EnemyInfo | ||
|image={{BattleField |style=bn1 |nocol1=true |nocol2=true |nocol3=true |object52=canodumb3 }} | |image={{BattleField |style=bn1 |nocol1=true |nocol2=true |nocol3=true |object52=canodumb3 }} | ||
|name_en=Canodumb3 |name_jp=キャノーダム3rd |name_tl= | |name_en=Canodumb3<ref name="Canodumb"/> |name_jp=キャノーダム3rd |name_tl=Kyanōdamu 3rd | ||
|hp=100 |contact=32 |element=none | |hp=100 |contact=32 |element=none | ||
|airshoes= |superarmor= | |airshoes= |superarmor= | ||
| Line 126: | Line 133: | ||
|locations=[[Undernet 9]] (15.6%), [[Power Plant Comp 4]] (11.5%), [[Traffic Light Comp 5]] (2.1%) | |locations=[[Undernet 9]] (15.6%), [[Power Plant Comp 4]] (11.5%), [[Traffic Light Comp 5]] (2.1%) | ||
|attacks= | |attacks= | ||
{{EnemyInfo/Attack |name_en= | {{EnemyInfo/Attack |name_en=MegaCannon |name_jp=メガキャノン |name_tl=Mega Cannon | ||
|attack=100 |element=none | |attack=100 |element=none | ||
}} | }} | ||
| Line 143: | Line 150: | ||
{{EnemyInfo | {{EnemyInfo | ||
|image={{BattleField |style=bn1 |nocol1=true |nocol2=true |nocol3=true |object52=volgear }} | |image={{BattleField |style=bn1 |nocol1=true |nocol2=true |nocol3=true |object52=volgear }} | ||
|name_en=VolGear |name_jp=ボルケルギア |name_tl=Borukerugia | |name_en=VolGear<ref name="VolGear">Mega Man Battle Network 4</ref> |name_jp=ボルケルギア |name_tl=Borukerugia | ||
|hp=80 |contact=32 |element=fire | |hp=80 |contact=32 |element=fire | ||
|airshoes= |superarmor= | |airshoes= |superarmor= | ||
| Line 149: | Line 156: | ||
|locations=[[SciLab Vending Machine Comp]] (50.2%), [[Traffic Light Comp 1]] (18.6%), [[Oven Comp 2]] (18.4%), [[Traffic Light Comp 2]] (14.1%), [[Internet 2 (MMBN1)|Internet 2]] (13.5%), [[Traffic Light Comp 4]] (10.4%), [[Traffic Light Comp 3]] (8.5%), [[Traffic Light Comp 5]] (6.2%), [[Undernet 6 (MMBN1)|Undernet 6]] (6.1%) | |locations=[[SciLab Vending Machine Comp]] (50.2%), [[Traffic Light Comp 1]] (18.6%), [[Oven Comp 2]] (18.4%), [[Traffic Light Comp 2]] (14.1%), [[Internet 2 (MMBN1)|Internet 2]] (13.5%), [[Traffic Light Comp 4]] (10.4%), [[Traffic Light Comp 3]] (8.5%), [[Traffic Light Comp 5]] (6.2%), [[Undernet 6 (MMBN1)|Undernet 6]] (6.1%) | ||
|attacks= | |attacks= | ||
{{EnemyInfo/Attack |name_en= | {{EnemyInfo/Attack |name_en=FireTower |name_jp=フレイムタワー |name_tl=Flame Tower | ||
|attack=15 |element=fire | |attack=15 |element=fire | ||
}} | }} | ||
| Line 164: | Line 171: | ||
{{EnemyInfo | {{EnemyInfo | ||
|image={{BattleField |style=bn1 |nocol1=true |nocol2=true |nocol3=true |object52=volgear2 }} | |image={{BattleField |style=bn1 |nocol1=true |nocol2=true |nocol3=true |object52=volgear2 }} | ||
|name_en=VolGear2 |name_jp=ウォルタルギア |name_tl=Worutarugia | |name_en=VolGear2<ref name="VolGear2">Not officially named in English</ref> |name_jp=ウォルタルギア |name_tl=Worutarugia | ||
|hp=120 |contact=32 |element=aqua | |hp=120 |contact=32 |element=aqua | ||
|airshoes= |superarmor= | |airshoes= |superarmor= | ||
| Line 170: | Line 177: | ||
|locations=[[SciLab Vending Machine Comp]] (49.8%), [[Waterworks Comp 1]] (30.1%), [[Traffic Light Comp 1]] (25.0%), [[Waterworks Comp 2]] (19.4%), [[Traffic Light Comp 2]] (17.2%), [[Waterworks Comp 5]] (13.3%), [[Waterworks Comp 4]] (10.2%), [[Waterworks Comp 6]] (9.6%), [[Traffic Light Comp 5]] (8.3%), [[Waterworks Comp 3]] (7.8%), [[Traffic Light Comp 3]] (7.0%), [[Traffic Light Comp 4]] (3.1%) | |locations=[[SciLab Vending Machine Comp]] (49.8%), [[Waterworks Comp 1]] (30.1%), [[Traffic Light Comp 1]] (25.0%), [[Waterworks Comp 2]] (19.4%), [[Traffic Light Comp 2]] (17.2%), [[Waterworks Comp 5]] (13.3%), [[Waterworks Comp 4]] (10.2%), [[Waterworks Comp 6]] (9.6%), [[Traffic Light Comp 5]] (8.3%), [[Waterworks Comp 3]] (7.8%), [[Traffic Light Comp 3]] (7.0%), [[Traffic Light Comp 4]] (3.1%) | ||
|attacks= | |attacks= | ||
{{EnemyInfo/Attack |name_en= | {{EnemyInfo/Attack |name_en=AquaTower |name_jp=アクアタワー |name_tl=Aqua Tower | ||
|attack=50 |element=aqua | |attack=50 |element=aqua | ||
}} | }} | ||
| Line 187: | Line 194: | ||
{{EnemyInfo | {{EnemyInfo | ||
|image={{BattleField |style=bn1 |nocol1=true |nocol2=true |nocol3=true |object52=spooky }} | |image={{BattleField |style=bn1 |nocol1=true |nocol2=true |nocol3=true |object52=spooky }} | ||
|name_en=Spooky |name_jp=ゴースラー |name_tl= | |name_en=Spooky<ref name="Spooky">Mega Man Battle Network 2, Mega Man Battle Network 3; named '''Ghost''' in Mega Man Battle Network 5 (internal text data for e-Reader cards)</ref> |name_jp=ゴースラー |name_tl=Gōsurā | ||
|hp=50 |contact=15 |element=none | |hp=50 |contact=15 |element=none | ||
|airshoes= |superarmor= | |airshoes= |superarmor= | ||
| Line 195: | Line 202: | ||
{{EnemyInfo/Attack |name_en= |name_jp=舌攻撃 |name_tl=Tongue Attack | {{EnemyInfo/Attack |name_en= |name_jp=舌攻撃 |name_tl=Tongue Attack | ||
|attack=15 |element=none | |attack=15 |element=none | ||
|info=Can appear on hole panels. | |||
}} | }} | ||
|getdata= | |getdata= | ||
| Line 210: | Line 218: | ||
{{EnemyInfo | {{EnemyInfo | ||
|image={{BattleField |style=bn1 |nocol1=true |nocol2=true |nocol3=true |object52=spooky2 }} | |image={{BattleField |style=bn1 |nocol1=true |nocol2=true |nocol3=true |object52=spooky2 }} | ||
|name_en=Spooky2 |name_jp=ゴースラー2nd |name_tl= | |name_en=Spooky2<ref name="Spooky"/> |name_jp=ゴースラー2nd |name_tl=Gōsurā 2nd | ||
|hp=100 |contact=60 |element=none | |hp=100 |contact=60 |element=none | ||
|airshoes= |superarmor= | |airshoes= |superarmor= | ||
| Line 218: | Line 226: | ||
{{EnemyInfo/Attack |name_en= |name_jp=舌攻撃 |name_tl=Tongue Attack | {{EnemyInfo/Attack |name_en= |name_jp=舌攻撃 |name_tl=Tongue Attack | ||
|attack=60 |element=none | |attack=60 |element=none | ||
|info=Can appear on hole panels. | |||
}} | }} | ||
{{EnemyInfo/Attack |name_en= | {{EnemyInfo/Attack |name_en=Recover50 |name_jp=リカバリー50 |name_tl=Recovery 50 | ||
|info=Used when itself or any ally HP < 30. Can be used 1 time. | |||
}} | }} | ||
|getdata= | |getdata= | ||
| Line 234: | Line 244: | ||
{{EnemyInfo | {{EnemyInfo | ||
|image={{BattleField |style=bn1 |nocol1=true |nocol2=true |nocol3=true |object52=spooky3 }} | |image={{BattleField |style=bn1 |nocol1=true |nocol2=true |nocol3=true |object52=spooky3 }} | ||
|name_en=Spooky3 |name_jp=ゴースラー3rd |name_tl= | |name_en=Spooky3<ref name="Spooky"/> |name_jp=ゴースラー3rd |name_tl=Gōsurā 3rd | ||
|hp=120 |contact=120 |element=none | |hp=120 |contact=120 |element=none | ||
|airshoes= |superarmor= | |airshoes= |superarmor= | ||
| Line 242: | Line 252: | ||
{{EnemyInfo/Attack |name_en= |name_jp=舌攻撃 |name_tl=Tongue Attack | {{EnemyInfo/Attack |name_en= |name_jp=舌攻撃 |name_tl=Tongue Attack | ||
|attack=120 |element=none | |attack=120 |element=none | ||
|info=Can appear on hole panels. | |||
}} | }} | ||
{{EnemyInfo/Attack |name_en= | {{EnemyInfo/Attack |name_en=Recover150 |name_jp=リカバリー150 |name_tl=Recovery 150 | ||
|info=Used when itself or any ally HP < 30. Can be used 1 time. | |||
}} | }} | ||
|getdata= | |getdata= | ||
| Line 261: | Line 273: | ||
{{EnemyInfo | {{EnemyInfo | ||
|image={{BattleField |style=bn1 |nocol1=true |nocol2=true |nocol3=true |object52=beetank }} | |image={{BattleField |style=bn1 |nocol1=true |nocol2=true |nocol3=true |object52=beetank }} | ||
|name_en=Beetank |name_jp=カブタンク |name_tl= | |name_en=Beetank<ref name="Beetank">Mega Man Battle Network 2; named '''BugTank''' in Mega Man Battle Network 5</ref> |name_jp=カブタンク |name_tl=Kabutanku | ||
|hp=80 |contact=25 |element=none | |hp=80 |contact=25 |element=none | ||
|airshoes= |superarmor= | |airshoes= |superarmor= | ||
| Line 267: | Line 279: | ||
|locations=[[School Comp 3 (MMBN1)|School Comp 3]] (28.8%), [[School Comp 2 (MMBN1)|School Comp 2]] (24.4%), [[Dex's PC Comp]] (22.7%), [[School Comp 1 (MMBN1)|School Comp 1]] (18.6%), [[School Comp 4]] (17.2%), [[School Comp 5]] (12.0%) | |locations=[[School Comp 3 (MMBN1)|School Comp 3]] (28.8%), [[School Comp 2 (MMBN1)|School Comp 2]] (24.4%), [[Dex's PC Comp]] (22.7%), [[School Comp 1 (MMBN1)|School Comp 1]] (18.6%), [[School Comp 4]] (17.2%), [[School Comp 5]] (12.0%) | ||
|attacks= | |attacks= | ||
{{EnemyInfo/Attack |name_en= | {{EnemyInfo/Attack |name_en=LilBomb |name_jp=スモールボム |name_tl=Small Bomb | ||
|attack=15 |element=none | |attack=15 |element=none | ||
}} | }} | ||
| Line 283: | Line 295: | ||
{{EnemyInfo | {{EnemyInfo | ||
|image={{BattleField |style=bn1 |nocol1=true |nocol2=true |nocol3=true |object52=beetank2 }} | |image={{BattleField |style=bn1 |nocol1=true |nocol2=true |nocol3=true |object52=beetank2 }} | ||
|name_en=Beetank2 |name_jp=カブタンク2nd |name_tl= | |name_en=Beetank2<ref name="Beetank"/> |name_jp=カブタンク2nd |name_tl=Kabutanku 2nd | ||
|hp=120 |contact=25 |element=none | |hp=120 |contact=25 |element=none | ||
|airshoes= |superarmor= | |airshoes= |superarmor= | ||
| Line 289: | Line 301: | ||
|locations=[[Internet 3 (MMBN1)|Internet 3]] (27.3%) | |locations=[[Internet 3 (MMBN1)|Internet 3]] (27.3%) | ||
|attacks= | |attacks= | ||
{{EnemyInfo/Attack |name_en= | {{EnemyInfo/Attack |name_en=CrossBomb |name_jp=クロスボム |name_tl=Cross Bomb | ||
|attack=80 |element=none | |attack=80 |element=none | ||
}} | }} | ||
| Line 305: | Line 317: | ||
{{EnemyInfo | {{EnemyInfo | ||
|image={{BattleField |style=bn1 |nocol1=true |nocol2=true |nocol3=true |object52=beetank3 }} | |image={{BattleField |style=bn1 |nocol1=true |nocol2=true |nocol3=true |object52=beetank3 }} | ||
|name_en=Beetank3 |name_jp=カブタンク3rd |name_tl= | |name_en=Beetank3<ref name="Beetank"/> |name_jp=カブタンク3rd |name_tl=Kabutanku 3rd | ||
|hp=150 |contact=25 |element=none | |hp=150 |contact=25 |element=none | ||
|airshoes= |superarmor= | |airshoes= |superarmor= | ||
| Line 311: | Line 323: | ||
|locations=[[WWW Comp 3 (MMBN1)|WWW Comp 3]] (27.1%), [[Undernet 1 (MMBN1)|Undernet 1]] (17.7%), [[Undernet 2 (MMBN1)|Undernet 2]] (16.7%), [[Undernet 9]] (15.4%), [[Rocket Comp (MMBN1)|Rocket Comp]] (12.5%), [[Undernet 3 (MMBN1)|Undernet 3]] (8.3%), [[Undernet 4 (MMBN1)|Undernet 4]] (2.9%) | |locations=[[WWW Comp 3 (MMBN1)|WWW Comp 3]] (27.1%), [[Undernet 1 (MMBN1)|Undernet 1]] (17.7%), [[Undernet 2 (MMBN1)|Undernet 2]] (16.7%), [[Undernet 9]] (15.4%), [[Rocket Comp (MMBN1)|Rocket Comp]] (12.5%), [[Undernet 3 (MMBN1)|Undernet 3]] (8.3%), [[Undernet 4 (MMBN1)|Undernet 4]] (2.9%) | ||
|attacks= | |attacks= | ||
{{EnemyInfo/Attack |name_en= | {{EnemyInfo/Attack |name_en=BigBomb |name_jp=ビッグボム |name_tl=Big Bomb | ||
|attack=140 |element=none | |attack=140 |element=none | ||
}} | }} | ||
| Line 328: | Line 340: | ||
{{EnemyInfo | {{EnemyInfo | ||
|image={{BattleField |style=bn1 |nocol1=true |nocol2=true |nocol3=true |object52=handy-bn1 }} | |image={{BattleField |style=bn1 |nocol1=true |nocol2=true |nocol3=true |object52=handy-bn1 }} | ||
|name_en=Handy |name_jp=ハンディース |name_tl= | |name_en=Handy<ref name="Handy">Mega Man Battle Network 2; named '''Handi''' in Mega Man Battle Network 5</ref> |name_jp=ハンディース |name_tl=Handīsu | ||
|hp=80 |contact=30 |element=none | |hp=80 |contact=30 |element=none | ||
|airshoes= |superarmor= | |airshoes= |superarmor= | ||
| Line 334: | Line 346: | ||
|locations=[[School Comp 4]] (21.0%), [[School Comp 5]] (18.4%), [[WWW Comp 2 (MMBN1)|WWW Comp 2]] (4.2%) | |locations=[[School Comp 4]] (21.0%), [[School Comp 5]] (18.4%), [[WWW Comp 2 (MMBN1)|WWW Comp 2]] (4.2%) | ||
|attacks= | |attacks= | ||
{{EnemyInfo/Attack |name_en= | {{EnemyInfo/Attack |name_en=TimeBomb1 |name_jp=カウントボム1 |name_tl=Count Bomb 1 | ||
|attack=30 |element=none | |attack=30 |element=none | ||
|info=TimeBomb has 10 HP. If placed on top of player, knocks back 1 square. | |||
}} | }} | ||
|getdata= | |getdata= | ||
| Line 349: | Line 362: | ||
{{EnemyInfo | {{EnemyInfo | ||
|image={{BattleField |style=bn1 |nocol1=true |nocol2=true |nocol3=true |object52=handy2-bn1 }} | |image={{BattleField |style=bn1 |nocol1=true |nocol2=true |nocol3=true |object52=handy2-bn1 }} | ||
|name_en=Handy2 |name_jp=ハンディース2nd |name_tl= | |name_en=Handy2<ref name="Handy"/> |name_jp=ハンディース2nd |name_tl=Handīsu 2nd | ||
|hp=200 |contact=30 |element=none | |hp=200 |contact=30 |element=none | ||
|airshoes= |superarmor= | |airshoes= |superarmor= | ||
| Line 355: | Line 368: | ||
|locations=[[Large Monitor Comp]] (62.5%), [[Internet 4 (MMBN1)|Internet 4]] (22.1%) | |locations=[[Large Monitor Comp]] (62.5%), [[Internet 4 (MMBN1)|Internet 4]] (22.1%) | ||
|attacks= | |attacks= | ||
{{EnemyInfo/Attack |name_en= | {{EnemyInfo/Attack |name_en=TimeBomb2 |name_jp=カウントボム2 |name_tl=Count Bomb 2 | ||
|attack=100 |element=none | |attack=100 |element=none | ||
|info=TimeBomb has 10 HP. If placed on top of player, knocks back 1 square. | |||
}} | }} | ||
|getdata= | |getdata= | ||
| Line 370: | Line 384: | ||
{{EnemyInfo | {{EnemyInfo | ||
|image={{BattleField |style=bn1 |nocol1=true |nocol2=true |nocol3=true |object52=handy3-bn1 }} | |image={{BattleField |style=bn1 |nocol1=true |nocol2=true |nocol3=true |object52=handy3-bn1 }} | ||
|name_en=Handy3 |name_jp=ハンディース3rd |name_tl= | |name_en=Handy3<ref name="Handy"/> |name_jp=ハンディース3rd |name_tl=Handīsu 3rd | ||
|hp=300 |contact=30 |element=none | |hp=300 |contact=30 |element=none | ||
|airshoes= |superarmor= | |airshoes= |superarmor= | ||
| Line 376: | Line 390: | ||
|locations=[[WWW Comp 1 (MMBN1)|WWW Comp 1]] (29.2%), [[WWW Comp 2 (MMBN1)|WWW Comp 2]] (10.4%), [[WWW Comp 4 (MMBN1)|WWW Comp 4]] (5.2%) | |locations=[[WWW Comp 1 (MMBN1)|WWW Comp 1]] (29.2%), [[WWW Comp 2 (MMBN1)|WWW Comp 2]] (10.4%), [[WWW Comp 4 (MMBN1)|WWW Comp 4]] (5.2%) | ||
|attacks= | |attacks= | ||
{{EnemyInfo/Attack |name_en= | {{EnemyInfo/Attack |name_en=TimeBomb3 |name_jp=カウントボム3 |name_tl=Count Bomb 3 | ||
|attack=200 |element=none | |attack=200 |element=none | ||
|info=TimeBomb has 10 HP. If placed on top of player, knocks back 1 square. | |||
}} | }} | ||
|getdata= | |getdata= | ||
| Line 393: | Line 408: | ||
{{EnemyInfo | {{EnemyInfo | ||
|image={{BattleField |style=bn1 |nocol1=true |nocol2=true |nocol3=true |object52=flappy }} | |image={{BattleField |style=bn1 |nocol1=true |nocol2=true |nocol3=true |object52=flappy }} | ||
|name_en=Flappy |name_jp= | |name_en=Flappy<ref name="Flappy">Mega Man Battle Network 2; named '''Powie''' in Mega Man Battle Network 5</ref> |name_jp=ポワルド |name_tl=Powarudo | ||
|hp=60 |contact=20 |element=none | |hp=60 |contact=20 |element=none | ||
|airshoes= |superarmor= | |airshoes= |superarmor= | ||
| Line 399: | Line 414: | ||
|locations=[[Lan's PC Comp]] (43.8%), [[School Comp 1 (MMBN1)|School Comp 1]] (39.6%), [[Servbot Comp]] (37.3%), [[School Comp 5]] (25.1%), [[School Comp 4]] (25.1%), [[New Game Machine Comp]] (22.8%), [[School Comp 2 (MMBN1)|School Comp 2]] (16.5%), [[School Comp 3 (MMBN1)|School Comp 3]] (15.0%) | |locations=[[Lan's PC Comp]] (43.8%), [[School Comp 1 (MMBN1)|School Comp 1]] (39.6%), [[Servbot Comp]] (37.3%), [[School Comp 5]] (25.1%), [[School Comp 4]] (25.1%), [[New Game Machine Comp]] (22.8%), [[School Comp 2 (MMBN1)|School Comp 2]] (16.5%), [[School Comp 3 (MMBN1)|School Comp 3]] (15.0%) | ||
|attacks= | |attacks= | ||
{{EnemyInfo/Attack |name_en= | {{EnemyInfo/Attack |name_en=Quake1 |name_jp=ースクェイクア1 |name_tl=Earthquake 1 | ||
|attack=20 |element=none | |attack=20 |element=none | ||
|info=Cracks panel that Flappy lands on. | |||
}} | }} | ||
|getdata= | |getdata= | ||
| Line 415: | Line 431: | ||
{{EnemyInfo | {{EnemyInfo | ||
|image={{BattleField |style=bn1 |nocol1=true |nocol2=true |nocol3=true |object52=flappy2 }} | |image={{BattleField |style=bn1 |nocol1=true |nocol2=true |nocol3=true |object52=flappy2 }} | ||
|name_en=Flappy2 |name_jp= | |name_en=Flappy2<ref name="Flappy"/> |name_jp=ポワルド2nd |name_tl=Powarudo 2nd | ||
|hp=120 |contact=60 |element=none | |hp=120 |contact=60 |element=none | ||
|airshoes= |superarmor= | |airshoes= |superarmor= | ||
| Line 421: | Line 437: | ||
|locations=[[Traffic Light Comp 3]] (21.7%), [[Traffic Light Comp 5]] (9.4%) | |locations=[[Traffic Light Comp 3]] (21.7%), [[Traffic Light Comp 5]] (9.4%) | ||
|attacks= | |attacks= | ||
{{EnemyInfo/Attack |name_en= | {{EnemyInfo/Attack |name_en=Quake2 |name_jp=ースクェイクア2 |name_tl=Earthquake 2 | ||
|attack=60 |element=none | |attack=60 |element=none | ||
|info=Cracks panel that Flappy2 lands on. | |||
}} | }} | ||
|getdata= | |getdata= | ||
| Line 437: | Line 454: | ||
{{EnemyInfo | {{EnemyInfo | ||
|image={{BattleField |style=bn1 |nocol1=true |nocol2=true |nocol3=true |object52=flappy3 }} | |image={{BattleField |style=bn1 |nocol1=true |nocol2=true |nocol3=true |object52=flappy3 }} | ||
|name_en=Flappy3 |name_jp= | |name_en=Flappy3<ref name="Flappy"/> |name_jp=ポワルド3rd |name_tl=Powarudo 3rd | ||
|hp=150 |contact=100 |element=none | |hp=150 |contact=100 |element=none | ||
|airshoes= |superarmor= | |airshoes= |superarmor= | ||
| Line 443: | Line 460: | ||
|locations=[[Internet 4 (MMBN1)|Internet 4]] (29.2%), [[WWW Comp 2 (MMBN1)|WWW Comp 2]] (24.8%) | |locations=[[Internet 4 (MMBN1)|Internet 4]] (29.2%), [[WWW Comp 2 (MMBN1)|WWW Comp 2]] (24.8%) | ||
|attacks= | |attacks= | ||
{{EnemyInfo/Attack |name_en= | {{EnemyInfo/Attack |name_en=Quake3 |name_jp=ースクェイクア3 |name_tl=Earthquake 3 | ||
|attack=100 |element=none | |attack=100 |element=none | ||
|info=Cracks panel that Flappy3 lands on. | |||
}} | }} | ||
|getdata= | |getdata= | ||
| Line 460: | Line 478: | ||
{{EnemyInfo | {{EnemyInfo | ||
|image={{BattleField |style=bn1 |nocol1=true |nocol2=true |nocol3=true |object52=froshell }} | |image={{BattleField |style=bn1 |nocol1=true |nocol2=true |nocol3=true |object52=froshell }} | ||
|name_en=Froshell |name_jp=フロシェル |name_tl= | |name_en=Froshell<ref name="Froshell">Mega Man Battle Network 5 (internal text data for e-Reader cards); named '''Floshell''' in Mega Man Battle Network Official Complete Works</ref> |name_jp=フロシェル |name_tl=Furosheru | ||
|hp=120 |contact=30 |element=none | |hp=120 |contact=30 |element=none | ||
|airshoes= |superarmor= | |airshoes= |superarmor= | ||
|info= | |info=Blocks attacks with a 40 HP shield. | ||
|locations=[[WWW Comp 1 (MMBN1)|WWW Comp 1]] (20.8%), [[WWW Comp 2 (MMBN1)|WWW Comp 2]] (14.6%), [[Rocket Comp (MMBN1)|Rocket Comp]] (12.1%) | |locations=[[WWW Comp 1 (MMBN1)|WWW Comp 1]] (20.8%), [[WWW Comp 2 (MMBN1)|WWW Comp 2]] (14.6%), [[Rocket Comp (MMBN1)|Rocket Comp]] (12.1%) | ||
|attacks= | |attacks= | ||
{{EnemyInfo/Attack |name_en= | {{EnemyInfo/Attack |name_en=MiniBomb |name_jp=ミニボム |name_tl=Mini Bomb | ||
|attack=40 |element=none | |attack=40 |element=none | ||
}} | }} | ||
| Line 484: | Line 502: | ||
{{EnemyInfo | {{EnemyInfo | ||
|image={{BattleField |style=bn1 |nocol1=true |nocol2=true |nocol3=true |object52=froshell2 }} | |image={{BattleField |style=bn1 |nocol1=true |nocol2=true |nocol3=true |object52=froshell2 }} | ||
|name_en=Froshell2 |name_jp=フロシェル2nd |name_tl= | |name_en=Froshell2<ref name="Froshell"/> |name_jp=フロシェル2nd |name_tl=Furosheru 2nd | ||
|hp=200 |contact=30 |element=none | |hp=200 |contact=30 |element=none | ||
|airshoes= |superarmor= | |airshoes= |superarmor= | ||
|info= | |info=Blocks attacks with a 60 HP shield. | ||
|locations= | |locations= | ||
|attacks= | |attacks= | ||
{{EnemyInfo/Attack |name_en= | {{EnemyInfo/Attack |name_en=MiniBomb |name_jp=ミニボム |name_tl=Mini Bomb | ||
|attack=40 |element=none | |attack=40 |element=none | ||
}} | }} | ||
| Line 499: | Line 517: | ||
{{EnemyInfo | {{EnemyInfo | ||
|image={{BattleField |style=bn1 |nocol1=true |nocol2=true |nocol3=true |object52=froshell3 }} | |image={{BattleField |style=bn1 |nocol1=true |nocol2=true |nocol3=true |object52=froshell3 }} | ||
|name_en=Froshell3 |name_jp=フロシェル3rd |name_tl= | |name_en=Froshell3<ref name="Froshell"/> |name_jp=フロシェル3rd |name_tl=Furosheru 3rd | ||
|hp=250 |contact=30 |element=none | |hp=250 |contact=30 |element=none | ||
|airshoes= |superarmor= | |airshoes= |superarmor= | ||
|info= | |info=Blocks attacks with a 200 HP shield. | ||
|locations= | |locations= | ||
|attacks= | |attacks= | ||
{{EnemyInfo/Attack |name_en= | {{EnemyInfo/Attack |name_en=MiniBomb |name_jp=ミニボム |name_tl=Mini Bomb | ||
|attack=40 |element=none | |attack=40 |element=none | ||
}} | }} | ||
| Line 515: | Line 533: | ||
{{EnemyInfo | {{EnemyInfo | ||
|image={{BattleField |style=bn1 |nocol1=true |nocol2=true |nocol3=true |object52=hardhead }} | |image={{BattleField |style=bn1 |nocol1=true |nocol2=true |nocol3=true |object52=hardhead }} | ||
|name_en=HardHead |name_jp=ハルドボルズ |name_tl= | |name_en=HardHead<ref name="HardHead">Mega Man Battle Network 2</ref> |name_jp=ハルドボルズ |name_tl=Harudoboruzu | ||
|hp=60 |contact=30 |element=none | |hp=60 |contact=30 |element=none | ||
|airshoes= |superarmor= | |airshoes= |superarmor= | ||
|info= | |info=Guards when not attacking. | ||
|locations=[[Recycled PET Comp]] (43.8%), [[WWW Comp 2 (MMBN1)|WWW Comp 2]] (19.1%), [[Internet 2 (MMBN1)|Internet 2]] (12.9%) | |locations=[[Recycled PET Comp]] (43.8%), [[WWW Comp 2 (MMBN1)|WWW Comp 2]] (19.1%), [[Internet 2 (MMBN1)|Internet 2]] (12.9%) | ||
|attacks= | |attacks= | ||
{{EnemyInfo/Attack |name_en=Howitzer |name_jp=ホウガン |name_tl= | {{EnemyInfo/Attack |name_en=Howitzer |name_jp=ホウガン |name_tl=Hōgan | ||
|attack=30 |element=none | |attack=30 |element=none | ||
|info=If it hits an empty panel, breaks it. | |||
}} | }} | ||
|getdata= | |getdata= | ||
| Line 535: | Line 554: | ||
{{EnemyInfo | {{EnemyInfo | ||
|image={{BattleField |style=bn1 |nocol1=true |nocol2=true |nocol3=true |object52=hardhead2 }} | |image={{BattleField |style=bn1 |nocol1=true |nocol2=true |nocol3=true |object52=hardhead2 }} | ||
|name_en=HardHead2 |name_jp=ハルドボルズ2nd |name_tl= | |name_en=HardHead2<ref name="HardHead"/> |name_jp=ハルドボルズ2nd |name_tl=Harudoboruzu 2nd | ||
|hp=70 |contact=30 |element=none | |hp=70 |contact=30 |element=none | ||
|airshoes= |superarmor= | |airshoes= |superarmor= | ||
|info= | |info=Guards when not attacking. | ||
|locations= | |locations= | ||
|attacks= | |attacks= | ||
{{EnemyInfo/Attack |name_en=Howitzer |name_jp=ホウガン |name_tl= | {{EnemyInfo/Attack |name_en=Howitzer |name_jp=ホウガン |name_tl=Hōgan | ||
|attack=30 |element=none | |attack=30 |element=none | ||
|info=If it hits an empty panel, breaks it. | |||
}} | }} | ||
|getdata= | |getdata= | ||
| Line 550: | Line 570: | ||
{{EnemyInfo | {{EnemyInfo | ||
|image={{BattleField |style=bn1 |nocol1=true |nocol2=true |nocol3=true |object52=hardhead3 }} | |image={{BattleField |style=bn1 |nocol1=true |nocol2=true |nocol3=true |object52=hardhead3 }} | ||
|name_en=HardHead3 |name_jp=ハルドボルズ3rd |name_tl= | |name_en=HardHead3<ref name="HardHead"/> |name_jp=ハルドボルズ3rd |name_tl=Harudoboruzu 3rd | ||
|hp=80 |contact=30 |element=none | |hp=80 |contact=30 |element=none | ||
|airshoes= |superarmor= | |airshoes= |superarmor= | ||
|info= | |info=Guards when not attacking. | ||
|locations= | |locations= | ||
|attacks= | |attacks= | ||
{{EnemyInfo/Attack |name_en=Howitzer |name_jp=ホウガン |name_tl= | {{EnemyInfo/Attack |name_en=Howitzer |name_jp=ホウガン |name_tl=Hōgan | ||
|attack=30 |element=none | |attack=30 |element=none | ||
|info=If it hits an empty panel, breaks it. | |||
}} | }} | ||
|getdata= | |getdata= | ||
| Line 566: | Line 587: | ||
{{EnemyInfo | {{EnemyInfo | ||
|image={{BattleField |style=bn1 |nocol1=true |nocol2=true |nocol3=true |object52=swordy }} | |image={{BattleField |style=bn1 |nocol1=true |nocol2=true |nocol3=true |object52=swordy }} | ||
|name_en=Swordy |name_jp=スウォーディン |name_tl= | |name_en=Swordy<ref name="Swordy">Mega Man Battle Network 2</ref> |name_jp=スウォーディン |name_tl=Suwōdin | ||
|hp=90 |contact=30 |element=none | |hp=90 |contact=30 |element=none | ||
|airshoes= |superarmor= | |airshoes= |superarmor= | ||
| Line 572: | Line 593: | ||
|locations=[[Internet 2 (MMBN1)|Internet 2]] (25.0%), [[Undernet 3 (MMBN1)|Undernet 3]] (18.9%), [[Telephone Comp (MMBN1)|Telephone Comp]] (18.4%), [[Undernet 4 (MMBN1)|Undernet 4]] (7.3%), [[Undernet 9]] (2.1%) | |locations=[[Internet 2 (MMBN1)|Internet 2]] (25.0%), [[Undernet 3 (MMBN1)|Undernet 3]] (18.9%), [[Telephone Comp (MMBN1)|Telephone Comp]] (18.4%), [[Undernet 4 (MMBN1)|Undernet 4]] (7.3%), [[Undernet 9]] (2.1%) | ||
|attacks= | |attacks= | ||
{{EnemyInfo/Attack |name_en=Sword |name_jp=ソード |name_tl= | {{EnemyInfo/Attack |name_en=Sword |name_jp=ソード |name_tl=Sword | ||
|attack=40 |element=none | |attack=40 |element=none | ||
}} | }} | ||
{{EnemyInfo/Attack |name_en= | {{EnemyInfo/Attack |name_en=LongSword |name_jp=ロングソード |name_tl=Long Sword | ||
|attack=60 |element=none | |attack=60 |element=none | ||
|info=Hits with FighterSword range. | |||
}} | }} | ||
{{EnemyInfo/Attack |name_en=Steal |name_jp=エリアスチール |name_tl=Area Steal | {{EnemyInfo/Attack |name_en=Steal |name_jp=エリアスチール |name_tl=Area Steal | ||
|attack=10 |element=none | |||
|info=Can be used 2 times. | |||
}} | }} | ||
|getdata= | |getdata= | ||
{{EnemyInfo/GetData |chip=LongSwrd |code=D |lv1= 5: 25% |lv2= 6: 50% |lv3= 7: 25% }} | {{EnemyInfo/GetData |chip=LongSwrd |code=D |lv1= 5: 25% |lv2= 6: 50% |lv3= 7: 25% }} | ||
{{EnemyInfo/GetData |chip=LongSwrd |code=S |lv1= 7: 25% |lv2= 8: 50% |lv3= 9: 46.875% |lv4= 10: 25% }} | {{EnemyInfo/GetData |chip=LongSwrd |code=S |lv1= 7: 25% |lv2= 8: 50% |lv3= 9: 46.875% |lv4= 10: 25% }} | ||
{{EnemyInfo/GetData |chip=WideSwrd |code=S |lv1= 9: 3.125% |lv2= 10: 25% |lv3= S: 50% }} | |||
{{EnemyInfo/GetData |zenny=300 |lv1= 9: 3.125% |lv2= 10: 25% |lv3= S: 50% }} | {{EnemyInfo/GetData |zenny=300 |lv1= 9: 3.125% |lv2= 10: 25% |lv3= S: 50% }} | ||
{{EnemyInfo/GetData |zenny=250 |lv1= 7: 25% |lv2= 8: 50% |lv3= 9: 46.875% |lv4= 10: 25% }} | {{EnemyInfo/GetData |zenny=250 |lv1= 7: 25% |lv2= 8: 50% |lv3= 9: 46.875% |lv4= 10: 25% }} | ||
| Line 593: | Line 617: | ||
{{EnemyInfo | {{EnemyInfo | ||
|image={{BattleField |style=bn1 |nocol1=true |nocol2=true |nocol3=true |object52=swordy2 }} | |image={{BattleField |style=bn1 |nocol1=true |nocol2=true |nocol3=true |object52=swordy2 }} | ||
|name_en=Swordy2 |name_jp=スウォードラ |name_tl= | |name_en=Swordy2<ref name="Sword2">Mega Man Battle Network 2</ref> |name_jp=スウォードラ |name_tl=Suwōdora | ||
|hp=120 |contact=30 |element=fire | |hp=120 |contact=30 |element=fire | ||
|airshoes= |superarmor= | |airshoes= |superarmor= | ||
| Line 599: | Line 623: | ||
|locations=[[Traffic Light Comp 3]] (15.8%), [[Internet 2 (MMBN1)|Internet 2]] (15.6%), [[Traffic Light Comp 5]] (9.4%), [[Undernet 9]] (5.2%) | |locations=[[Traffic Light Comp 3]] (15.8%), [[Internet 2 (MMBN1)|Internet 2]] (15.6%), [[Traffic Light Comp 5]] (9.4%), [[Undernet 9]] (5.2%) | ||
|attacks= | |attacks= | ||
{{EnemyInfo/Attack |name_en= | {{EnemyInfo/Attack |name_en=LongSword |name_jp=ロングソード |name_tl=Long Sword | ||
|attack=60 |element=none | |attack=60 |element=none | ||
|info=Hits with FighterSword range. | |||
}} | }} | ||
{{EnemyInfo/Attack |name_en= | {{EnemyInfo/Attack |name_en=FireSword |name_jp=フレイムソード |name_tl=Flame Sword | ||
|attack=60 |element=fire | |attack=60 |element=fire | ||
}} | }} | ||
{{EnemyInfo/Attack |name_en=Steal |name_jp=エリアスチール |name_tl=Area Steal | {{EnemyInfo/Attack |name_en=Steal |name_jp=エリアスチール |name_tl=Area Steal | ||
|attack=10 |element=none | |||
|info=Can be used 5 times. | |||
}} | }} | ||
|getdata= | |getdata= | ||
| Line 620: | Line 647: | ||
{{EnemyInfo | {{EnemyInfo | ||
|image={{BattleField |style=bn1 |nocol1=true |nocol2=true |nocol3=true |object52=swordy3 }} | |image={{BattleField |style=bn1 |nocol1=true |nocol2=true |nocol3=true |object52=swordy3 }} | ||
|name_en=Swordy3 |name_jp=スウォータル |name_tl= | |name_en=Swordy3<ref name="Swordy3">Mega Man Battle Network 2</ref> |name_jp=スウォータル |name_tl=Suwōtaru | ||
|hp=200 |contact=30 |element=aqua | |hp=200 |contact=30 |element=aqua | ||
|airshoes= |superarmor= | |airshoes= |superarmor= | ||
| Line 626: | Line 653: | ||
|locations=[[Waterworks Comp 5]] (43.9%), [[Waterworks Comp 6]] (39.8%), [[Undernet 9]] (14.6%), [[Traffic Light Comp 3]] (12.7%), [[Traffic Light Comp 5]] (9.4%) | |locations=[[Waterworks Comp 5]] (43.9%), [[Waterworks Comp 6]] (39.8%), [[Undernet 9]] (14.6%), [[Traffic Light Comp 3]] (12.7%), [[Traffic Light Comp 5]] (9.4%) | ||
|attacks= | |attacks= | ||
{{EnemyInfo/Attack |name_en= | {{EnemyInfo/Attack |name_en=LongSword |name_jp=ロングソード |name_tl=Long Sword | ||
|attack=80 |element=none | |attack=80 |element=none | ||
|info=Hits with FighterSword range. | |||
}} | }} | ||
{{EnemyInfo/Attack |name_en= | {{EnemyInfo/Attack |name_en=AquaSword |name_jp=アクアソード |name_tl=Aqua Sword | ||
|attack=80 |element=aqua | |attack=80 |element=aqua | ||
}} | }} | ||
{{EnemyInfo/Attack |name_en=Steal |name_jp=エリアスチール |name_tl=Area Steal | {{EnemyInfo/Attack |name_en=Steal |name_jp=エリアスチール |name_tl=Area Steal | ||
|attack=10 |element=none | |||
|info=Can be used 5 times. | |||
}} | }} | ||
|getdata= | |getdata= | ||
| Line 648: | Line 678: | ||
{{EnemyInfo | {{EnemyInfo | ||
|image={{BattleField |style=bn1 |nocol1=true |nocol2=true |nocol3=true |object52=fishy }} | |image={{BattleField |style=bn1 |nocol1=true |nocol2=true |nocol3=true |object52=fishy }} | ||
|name_en=Fishy |name_jp=キオルシン |name_tl= | |name_en=Fishy<ref name="Fishy">Mega Man Battle Network 2</ref> |name_jp=キオルシン |name_tl=Kiorushin | ||
|hp=80 |contact=30 |element=none | |hp=80 |contact=30 |element=none | ||
|airshoes=y |superarmor= | |airshoes=y |superarmor= | ||
| Line 654: | Line 684: | ||
|locations=[[Telephone Comp (MMBN1)|Telephone Comp]] (56.6%), [[Yai's Portrait Comp]] (45.8%), [[Waterworks Comp 2]] (26.6%), [[Internet 1 (MMBN1)|Internet 1]] (25.2%), [[Waterworks Comp 4]] (20.3%), [[Waterworks Comp 1]] (19.3%), [[Waterworks Comp 3]] (15.6%), [[Internet 2 (MMBN1)|Internet 2]] (9.2%), [[Internet 3 (MMBN1)|Internet 3]] (8.3%), [[Waterworks Comp 6]] (7.6%), [[Waterworks Comp 5]] (7.0%) | |locations=[[Telephone Comp (MMBN1)|Telephone Comp]] (56.6%), [[Yai's Portrait Comp]] (45.8%), [[Waterworks Comp 2]] (26.6%), [[Internet 1 (MMBN1)|Internet 1]] (25.2%), [[Waterworks Comp 4]] (20.3%), [[Waterworks Comp 1]] (19.3%), [[Waterworks Comp 3]] (15.6%), [[Internet 2 (MMBN1)|Internet 2]] (9.2%), [[Internet 3 (MMBN1)|Internet 3]] (8.3%), [[Waterworks Comp 6]] (7.6%), [[Waterworks Comp 5]] (7.0%) | ||
|attacks= | |attacks= | ||
{{EnemyInfo/Attack |name_en= | {{EnemyInfo/Attack |name_en= |name_jp=突進 |name_tl=Rush | ||
|attack=30 |element=none | |attack=30 |element=none | ||
}} | }} | ||
| Line 670: | Line 700: | ||
{{EnemyInfo | {{EnemyInfo | ||
|image={{BattleField |style=bn1 |nocol1=true |nocol2=true |nocol3=true |object52=fishy2 }} | |image={{BattleField |style=bn1 |nocol1=true |nocol2=true |nocol3=true |object52=fishy2 }} | ||
|name_en=Fishy2 |name_jp=バドラフト |name_tl= | |name_en=Fishy2<ref name="Fishy2">Mega Man Battle Network 2</ref> |name_jp=バドラフト |name_tl=Badorafuto | ||
|hp=150 |contact=150 |element=fire | |hp=150 |contact=150 |element=fire | ||
|airshoes=y |superarmor= | |airshoes=y |superarmor= | ||
|info= | |info= | ||
|locations=[[Blackboard Comp (MMBN1)|Blackboard Comp]] (47.9%), [[ | |locations=[[Blackboard Comp (MMBN1)|Blackboard Comp]] (47.9%), [[Undernet 10]] (28.5%), [[Undernet 5 (MMBN1)|Undernet 5]] (27.9%), [[Undernet 12]] (9.1%) | ||
|attacks= | |attacks= | ||
{{EnemyInfo/Attack |name_en= | {{EnemyInfo/Attack |name_en= |name_jp=突進 |name_tl=Rush | ||
|attack=150 |element=fire | |attack=150 |element=fire | ||
|info=Leaves flames on ground. | |||
}} | }} | ||
{{EnemyInfo/Attack |name_en= |name_jp=地面の炎 |name_tl=Flames on | {{EnemyInfo/Attack |name_en= |name_jp=地面の炎 |name_tl=Flames on ground | ||
|attack=30 |element=fire | |attack=30 |element=fire | ||
}} | }} | ||
| Line 695: | Line 726: | ||
{{EnemyInfo | {{EnemyInfo | ||
|image={{BattleField |style=bn1 |nocol1=true |nocol2=true |nocol3=true |object52=piranha }} | |image={{BattleField |style=bn1 |nocol1=true |nocol2=true |nocol3=true |object52=piranha }} | ||
|name_en=Piranha |name_jp=アーバルボーイ |name_tl= | |name_en=Piranha<ref name="Piranha">Mega Man Battle Network 5 (internal text data for e-Reader cards), Mega Man Battle Network 6</ref> |name_jp=アーバルボーイ |name_tl=Ābarubōi | ||
|hp=100 |contact=30 |element=aqua | |hp=100 |contact=30 |element=aqua | ||
|airshoes= |superarmor= | |airshoes= |superarmor= | ||
| Line 701: | Line 732: | ||
|locations=[[Control Equipment Comp]] (50.3%), [[Waterworks Comp 2]] (41.7%), [[Waterworks Comp 1]] (39.8%), [[Waterworks Comp 6]] (21.9%), [[Waterworks Comp 4]] (16.9%), [[Waterworks Comp 5]] (13.1%), [[Waterworks Comp 3]] (10.2%) | |locations=[[Control Equipment Comp]] (50.3%), [[Waterworks Comp 2]] (41.7%), [[Waterworks Comp 1]] (39.8%), [[Waterworks Comp 6]] (21.9%), [[Waterworks Comp 4]] (16.9%), [[Waterworks Comp 5]] (13.1%), [[Waterworks Comp 3]] (10.2%) | ||
|attacks= | |attacks= | ||
{{EnemyInfo/Attack |name_en= | {{EnemyInfo/Attack |name_en=TripleArrow |name_jp=トリプルアロー |name_tl=Triple Arrow | ||
|attack=50 |element=none | |attack=50 |element=none | ||
}} | }} | ||
| Line 717: | Line 748: | ||
{{EnemyInfo | {{EnemyInfo | ||
|image={{BattleField |style=bn1 |nocol1=true |nocol2=true |nocol3=true |object52=piranha2 }} | |image={{BattleField |style=bn1 |nocol1=true |nocol2=true |nocol3=true |object52=piranha2 }} | ||
|name_en=Piranha2 |name_jp=アーバルボーイ2nd |name_tl= | |name_en=Piranha2<ref name="Piranha"/> |name_jp=アーバルボーイ2nd |name_tl=Ābarubōi 2nd | ||
|hp=150 |contact=30 |element=aqua | |hp=150 |contact=30 |element=aqua | ||
|airshoes= |superarmor= | |airshoes= |superarmor= | ||
| Line 723: | Line 754: | ||
|locations=[[Control Equipment Comp]] (49.7%), [[Fish Cart Comp]] (37.2%), [[WWW Comp 3 (MMBN1)|WWW Comp 3]] (26.0%), [[Undernet 4 (MMBN1)|Undernet 4]] (23.3%) | |locations=[[Control Equipment Comp]] (49.7%), [[Fish Cart Comp]] (37.2%), [[WWW Comp 3 (MMBN1)|WWW Comp 3]] (26.0%), [[Undernet 4 (MMBN1)|Undernet 4]] (23.3%) | ||
|attacks= | |attacks= | ||
{{EnemyInfo/Attack |name_en= | {{EnemyInfo/Attack |name_en=TripleSpear |name_jp=トリプルスピア |name_tl=Triple Spear | ||
|attack=70 |element=none | |attack=70 |element=none | ||
}} | }} | ||
| Line 739: | Line 770: | ||
{{EnemyInfo | {{EnemyInfo | ||
|image={{BattleField |style=bn1 |nocol1=true |nocol2=true |nocol3=true |object52=piranha3 }} | |image={{BattleField |style=bn1 |nocol1=true |nocol2=true |nocol3=true |object52=piranha3 }} | ||
|name_en=Piranha3 |name_jp=アーバルボーイ3rd |name_tl= | |name_en=Piranha3<ref name="Piranha"/> |name_jp=アーバルボーイ3rd |name_tl=Ābarubōi 3rd | ||
|hp=200 |contact=30 |element=aqua | |hp=200 |contact=30 |element=aqua | ||
|airshoes= |superarmor= | |airshoes= |superarmor= | ||
| Line 745: | Line 776: | ||
|locations=[[Undernet 7 (MMBN1)|Undernet 7]] (25.8%) | |locations=[[Undernet 7 (MMBN1)|Undernet 7]] (25.8%) | ||
|attacks= | |attacks= | ||
{{EnemyInfo/Attack |name_en= | {{EnemyInfo/Attack |name_en=TripleLance |name_jp=トリプルランス |name_tl=Triple Lance | ||
|attack=120 |element=none | |attack=120 |element=none | ||
}} | }} | ||
| Line 762: | Line 793: | ||
{{EnemyInfo | {{EnemyInfo | ||
|image={{BattleField |style=bn1 |nocol1=true |nocol2=true |nocol3=true |object52=puffy }} | |image={{BattleField |style=bn1 |nocol1=true |nocol2=true |nocol3=true |object52=puffy }} | ||
|name_en=Puffy |name_jp=プクール |name_tl= | |name_en=Puffy<ref name="Puffy">Mega Man Battle Network 2</ref> |name_jp=プクール |name_tl=Pukūru | ||
|hp=100 |contact=30 |element=aqua | |hp=100 |contact=30 |element=aqua | ||
|airshoes= |superarmor= | |airshoes= |superarmor= | ||
| Line 770: | Line 801: | ||
{{EnemyInfo/Attack |name_en=Bubbler |name_jp=バブルスプレッド |name_tl=Bubble Spread | {{EnemyInfo/Attack |name_en=Bubbler |name_jp=バブルスプレッド |name_tl=Bubble Spread | ||
|attack=30 |element=aqua | |attack=30 |element=aqua | ||
|info=Bubble has 40 HP. | |||
}} | }} | ||
|getdata= | |getdata= | ||
| Line 784: | Line 816: | ||
{{EnemyInfo | {{EnemyInfo | ||
|image={{BattleField |style=bn1 |nocol1=true |nocol2=true |nocol3=true |object52=buffy }} | |image={{BattleField |style=bn1 |nocol1=true |nocol2=true |nocol3=true |object52=buffy }} | ||
|name_en=Buffy |name_jp=プクールボウ |name_tl= | |name_en=Buffy<ref name="Buffy">Mega Man Battle Network 2</ref> |name_jp=プクールボウ |name_tl=Pukūrubō | ||
|hp=100 |contact=30 |element=fire | |hp=100 |contact=30 |element=fire | ||
|airshoes= |superarmor= | |airshoes= |superarmor= | ||
| Line 792: | Line 824: | ||
{{EnemyInfo/Attack |name_en=Heater |name_jp=ヒートスプレッド |name_tl=Heat Spread | {{EnemyInfo/Attack |name_en=Heater |name_jp=ヒートスプレッド |name_tl=Heat Spread | ||
|attack=30 |element=fire | |attack=30 |element=fire | ||
|info=Bubble has 40 HP. | |||
}} | }} | ||
|getdata= | |getdata= | ||
| Line 807: | Line 840: | ||
{{EnemyInfo | {{EnemyInfo | ||
|image={{BattleField |style=bn1 |nocol1=true |nocol2=true |nocol3=true |object52=coldbear }} | |image={{BattleField |style=bn1 |nocol1=true |nocol2=true |nocol3=true |object52=coldbear }} | ||
|name_en=ColdBear |name_jp=コルドベアア |name_tl= | |name_en=ColdBear<ref name="ColdBear">Mega Man Network Transmission Official Strategy Guide; named '''PolarBear''' in MegaMan NT Warrior MegaHandbook</ref> |name_jp=コルドベアア |name_tl=Cold Bear | ||
|hp=200 |contact=30 |element=aqua | |hp=200 |contact=30 |element=aqua | ||
|airshoes= |superarmor= | |airshoes= |superarmor= | ||
| Line 813: | Line 846: | ||
|locations=[[Undernet 6 (MMBN1)|Undernet 6]] (25.4%), [[WWW Comp 3 (MMBN1)|WWW Comp 3]] (22.3%), [[Undernet 9]] (14.6%), [[Undernet 7 (MMBN1)|Undernet 7]] (9.6%) | |locations=[[Undernet 6 (MMBN1)|Undernet 6]] (25.4%), [[WWW Comp 3 (MMBN1)|WWW Comp 3]] (22.3%), [[Undernet 9]] (14.6%), [[Undernet 7 (MMBN1)|Undernet 7]] (9.6%) | ||
|attacks= | |attacks= | ||
{{EnemyInfo/Attack |name_en= | {{EnemyInfo/Attack |name_en=IceCube |name_jp=イスキューブア |name_tl=Ice Cube | ||
|attack=100 |element=aqua | |attack=100 |element=aqua | ||
|info=IceCube has 60 HP. Knocks back 1 square. | |||
}} | }} | ||
|getdata= | |getdata= | ||
| Line 829: | Line 863: | ||
{{EnemyInfo | {{EnemyInfo | ||
|image={{BattleField |style=bn1 |nocol1=true |nocol2=true |nocol3=true |object52=coldbear2 }} | |image={{BattleField |style=bn1 |nocol1=true |nocol2=true |nocol3=true |object52=coldbear2 }} | ||
|name_en=ColdBear2 |name_jp=コルドベアア2nd |name_tl= | |name_en=ColdBear2<ref name="ColdBear"/> |name_jp=コルドベアア2nd |name_tl=Cold Bear 2nd | ||
|hp=250 |contact=30 |element=aqua | |hp=250 |contact=30 |element=aqua | ||
|airshoes= |superarmor= | |airshoes= |superarmor= | ||
| Line 835: | Line 869: | ||
|locations= | |locations= | ||
|attacks= | |attacks= | ||
{{EnemyInfo/Attack |name_en= | {{EnemyInfo/Attack |name_en=IceCube |name_jp=イスキューブア |name_tl=Ice Cube | ||
|attack=60 |element=aqua | |attack=60 |element=aqua | ||
|info=IceCube has 60 HP. Knocks back 1 square. | |||
}} | }} | ||
|getdata= | |getdata= | ||
| Line 844: | Line 879: | ||
{{EnemyInfo | {{EnemyInfo | ||
|image={{BattleField |style=bn1 |nocol1=true |nocol2=true |nocol3=true |object52=coldbear3 }} | |image={{BattleField |style=bn1 |nocol1=true |nocol2=true |nocol3=true |object52=coldbear3 }} | ||
|name_en=ColdBear3 |name_jp=コルドベアア3rd |name_tl= | |name_en=ColdBear3<ref name="ColdBear"/> |name_jp=コルドベアア3rd |name_tl=Cold Bear 3rd | ||
|hp=300 |contact=30 |element=aqua | |hp=300 |contact=30 |element=aqua | ||
|airshoes= |superarmor= | |airshoes= |superarmor= | ||
| Line 850: | Line 885: | ||
|locations= | |locations= | ||
|attacks= | |attacks= | ||
{{EnemyInfo/Attack |name_en= | {{EnemyInfo/Attack |name_en=IceCube |name_jp=イスキューブア |name_tl=Ice Cube | ||
|attack=60 |element=aqua | |attack=60 |element=aqua | ||
|info=IceCube has 60 HP. Knocks back 1 square. | |||
}} | }} | ||
|getdata= | |getdata= | ||
| Line 860: | Line 896: | ||
{{EnemyInfo | {{EnemyInfo | ||
|image={{BattleField |style=bn1 |nocol1=true |nocol2=true |nocol3=true |object52=cloudy }} | |image={{BattleField |style=bn1 |nocol1=true |nocol2=true |nocol3=true |object52=cloudy }} | ||
|name_en=Cloudy |name_jp=クモンペ |name_tl= | |name_en=Cloudy<ref name="Cloudy">Mega Man Battle Network 2</ref> |name_jp=クモンペ |name_tl=Kumonpe | ||
|hp=120 |contact=30 |element=aqua | |hp=120 |contact=30 |element=aqua | ||
|airshoes= |superarmor= | |airshoes= |superarmor= | ||
| Line 866: | Line 902: | ||
|locations=[[TV Comp (MMBN1)|TV Comp]] (37.9%), [[Waterworks Comp 2]] (12.3%), [[Waterworks Comp 1]] (10.7%), [[Waterworks Comp 3]] (7.6%), [[Waterworks Comp 5]] (6.2%), [[Waterworks Comp 6]] (6.2%), [[Waterworks Comp 4]] (6.1%) | |locations=[[TV Comp (MMBN1)|TV Comp]] (37.9%), [[Waterworks Comp 2]] (12.3%), [[Waterworks Comp 1]] (10.7%), [[Waterworks Comp 3]] (7.6%), [[Waterworks Comp 5]] (6.2%), [[Waterworks Comp 6]] (6.2%), [[Waterworks Comp 4]] (6.1%) | ||
|attacks= | |attacks= | ||
{{EnemyInfo/Attack |name_en=Cloud |name_jp=クラウド |name_tl= | {{EnemyInfo/Attack |name_en=Cloud |name_jp=クラウド |name_tl=Cloud | ||
|attack=30 |element=aqua | |attack=30 |element=aqua | ||
}} | }} | ||
| Line 882: | Line 918: | ||
{{EnemyInfo | {{EnemyInfo | ||
|image={{BattleField |style=bn1 |nocol1=true |nocol2=true |nocol3=true |object52=cloudy2 }} | |image={{BattleField |style=bn1 |nocol1=true |nocol2=true |nocol3=true |object52=cloudy2 }} | ||
|name_en=Cloudy2 |name_jp=クモンペ2nd |name_tl= | |name_en=Cloudy2<ref name="Cloudy"/> |name_jp=クモンペ2nd |name_tl=Kumonpe 2nd | ||
|hp=140 |contact=30 |element=aqua | |hp=140 |contact=30 |element=aqua | ||
|airshoes= |superarmor= | |airshoes= |superarmor= | ||
|info= | |info= | ||
|locations=[[ | |locations=[[Lunch Stand Comp]] (16.7%), [[Undernet 7 (MMBN1)|Undernet 7]] (15.6%), [[WWW Comp 3 (MMBN1)|WWW Comp 3]] (8.3%) | ||
|attacks= | |attacks= | ||
{{EnemyInfo/Attack |name_en=Cloudier |name_jp=モアクラウド |name_tl=More Cloud | {{EnemyInfo/Attack |name_en=Cloudier |name_jp=モアクラウド |name_tl=More Cloud | ||
| Line 904: | Line 940: | ||
{{EnemyInfo | {{EnemyInfo | ||
|image={{BattleField |style=bn1 |nocol1=true |nocol2=true |nocol3=true |object52=cloudy3 }} | |image={{BattleField |style=bn1 |nocol1=true |nocol2=true |nocol3=true |object52=cloudy3 }} | ||
|name_en=Cloudy3 |name_jp=クモンペ3rd |name_tl= | |name_en=Cloudy3<ref name="Cloudy"/> |name_jp=クモンペ3rd |name_tl=Kumonpe 3rd | ||
|hp=160 |contact=30 |element=aqua | |hp=160 |contact=30 |element=aqua | ||
|airshoes= |superarmor= | |airshoes= |superarmor= | ||
|info= | |info= | ||
|locations=[[ | |locations=[[Undernet 10]] (9.4%) | ||
|attacks= | |attacks= | ||
{{EnemyInfo/Attack |name_en= | {{EnemyInfo/Attack |name_en=Cloudest |name_jp=モストクラウド |name_tl=Most Cloud | ||
|attack=120 |element=aqua | |attack=120 |element=aqua | ||
}} | }} | ||
| Line 927: | Line 963: | ||
{{EnemyInfo | {{EnemyInfo | ||
|image={{BattleField |style=bn1 |nocol1=true |nocol2=true |nocol3=true |object52=ratty }} | |image={{BattleField |style=bn1 |nocol1=true |nocol2=true |nocol3=true |object52=ratty }} | ||
|name_en=Ratty |name_jp=チュートン |name_tl= | |name_en=Ratty<ref name="Ratty">Mega Man Battle Network 2</ref> |name_jp=チュートン |name_tl=Chūton | ||
|hp=60 |contact=30 |element=none | |hp=60 |contact=30 |element=none | ||
|airshoes= |superarmor= | |airshoes= |superarmor= | ||
|info= | |info=Speeds up when HP < 50 %. | ||
|locations=[[TV Comp (MMBN1)|TV Comp]] (62.1%), [[Large Monitor Comp]] (37.5%), [[Power Plant Comp 1]] (31.9%), [[Power Plant Comp 3]] (14.8%), [[Power Plant Comp 2]] (10.9%), [[Power Plant Comp 4]] (6.2%) | |locations=[[TV Comp (MMBN1)|TV Comp]] (62.1%), [[Large Monitor Comp]] (37.5%), [[Power Plant Comp 1]] (31.9%), [[Power Plant Comp 3]] (14.8%), [[Power Plant Comp 2]] (10.9%), [[Power Plant Comp 4]] (6.2%) | ||
|attacks= | |attacks= | ||
{{EnemyInfo/Attack |name_en= | {{EnemyInfo/Attack |name_en=Ratton1 |name_jp=ラットン1 |name_tl=Ratton 1 | ||
|attack=70 |element=none | |attack=70 |element=none | ||
|info=Ratton has 20 HP. | |||
}} | }} | ||
|getdata= | |getdata= | ||
| Line 949: | Line 986: | ||
{{EnemyInfo | {{EnemyInfo | ||
|image={{BattleField |style=bn1 |nocol1=true |nocol2=true |nocol3=true |object52=ratty2 }} | |image={{BattleField |style=bn1 |nocol1=true |nocol2=true |nocol3=true |object52=ratty2 }} | ||
|name_en=Ratty2 |name_jp=チュートン2nd |name_tl= | |name_en=Ratty2<ref name="Ratty"/> |name_jp=チュートン2nd |name_tl=Chūton 2nd | ||
|hp=80 |contact=30 |element=none | |hp=80 |contact=30 |element=none | ||
|airshoes= |superarmor= | |airshoes= |superarmor= | ||
|info= | |info=Speeds up when HP < 50 %. | ||
|locations=[[Undernet 6 (MMBN1)|Undernet 6]] (17.7%) | |locations=[[Undernet 6 (MMBN1)|Undernet 6]] (17.7%) | ||
|attacks= | |attacks= | ||
{{EnemyInfo/Attack |name_en= | {{EnemyInfo/Attack |name_en=Ratton2 |name_jp=ラットン2 |name_tl=Ratton 2 | ||
|attack=85 |element=none | |attack=85 |element=none | ||
|info=Ratton has 30 HP. | |||
}} | }} | ||
|getdata= | |getdata= | ||
| Line 971: | Line 1,009: | ||
{{EnemyInfo | {{EnemyInfo | ||
|image={{BattleField |style=bn1 |nocol1=true |nocol2=true |nocol3=true |object52=ratty3 }} | |image={{BattleField |style=bn1 |nocol1=true |nocol2=true |nocol3=true |object52=ratty3 }} | ||
|name_en=Ratty3 |name_jp=チュートン3rd |name_tl= | |name_en=Ratty3<ref name="Ratty"/> |name_jp=チュートン3rd |name_tl=Chūton 3rd | ||
|hp=100 |contact=30 |element=none | |hp=100 |contact=30 |element=none | ||
|airshoes= |superarmor= | |airshoes= |superarmor= | ||
|info= | |info=Speeds up when HP < 50 %. | ||
|locations=[[ | |locations=[[Undernet 12]] (22.9%) | ||
|attacks= | |attacks= | ||
{{EnemyInfo/Attack |name_en= | {{EnemyInfo/Attack |name_en=Ratton3 |name_jp=ラットン3 |name_tl=Ratton 3 | ||
|attack=100 |element=none | |attack=100 |element=none | ||
|info=Ratton has 40 HP. | |||
}} | }} | ||
|getdata= | |getdata= | ||
| Line 993: | Line 1,032: | ||
{{EnemyInfo | {{EnemyInfo | ||
|image={{BattleField |style=bn1 |nocol1=true |nocol2=true |nocol3=true |object52=miney }} | |image={{BattleField |style=bn1 |nocol1=true |nocol2=true |nocol3=true |object52=miney }} | ||
|name_en=Miney |name_jp=ジーラ |name_tl= | |name_en=Miney<ref name="Miney">Mega Man Battle Network Official Complete Works</ref> |name_jp=ジーラ |name_tl=Jīra | ||
|hp=100 |contact=30 |element=none | |hp=100 |contact=30 |element=none | ||
|airshoes= |superarmor= | |airshoes= |superarmor= | ||
| Line 999: | Line 1,038: | ||
|locations=[[Undernet 2 (MMBN1)|Undernet 2]] (24.3%), [[Undernet 5 (MMBN1)|Undernet 5]] (9.4%), [[Internet 2 (MMBN1)|Internet 2]] (9.4%), [[Undernet 3 (MMBN1)|Undernet 3]] (7.0%) | |locations=[[Undernet 2 (MMBN1)|Undernet 2]] (24.3%), [[Undernet 5 (MMBN1)|Undernet 5]] (9.4%), [[Internet 2 (MMBN1)|Internet 2]] (9.4%), [[Undernet 3 (MMBN1)|Undernet 3]] (7.0%) | ||
|attacks= | |attacks= | ||
{{EnemyInfo/Attack |name_en= | {{EnemyInfo/Attack |name_en=Mine1 |name_jp=ステルスマイン1 |name_tl=Stealth Mine 1 | ||
|attack=100 |element=none | |attack=100 |element=none | ||
}} | }} | ||
| Line 1,014: | Line 1,053: | ||
{{EnemyInfo | {{EnemyInfo | ||
|image={{BattleField |style=bn1 |nocol1=true |nocol2=true |nocol3=true |object52=miney2 }} | |image={{BattleField |style=bn1 |nocol1=true |nocol2=true |nocol3=true |object52=miney2 }} | ||
|name_en=Miney2 |name_jp=ジーラ2nd |name_tl= | |name_en=Miney2<ref name="Miney"/> |name_jp=ジーラ2nd |name_tl=Jīra 2nd | ||
|hp=120 |contact=30 |element=none | |hp=120 |contact=30 |element=none | ||
|airshoes= |superarmor= | |airshoes= |superarmor= | ||
| Line 1,020: | Line 1,059: | ||
|locations=[[Undernet 7 (MMBN1)|Undernet 7]] (13.6%) | |locations=[[Undernet 7 (MMBN1)|Undernet 7]] (13.6%) | ||
|attacks= | |attacks= | ||
{{EnemyInfo/Attack |name_en= | {{EnemyInfo/Attack |name_en=Mine2 |name_jp=ステルスマイン2 |name_tl=Stealth Mine 2 | ||
|attack=180 |element=none | |attack=180 |element=none | ||
}} | }} | ||
{{EnemyInfo/Attack |name_en=Steal |name_jp=エリアスチール |name_tl=Area Steal | {{EnemyInfo/Attack |name_en=Steal |name_jp=エリアスチール |name_tl=Area Steal | ||
|attack=10 |element=none | |||
|info=Can be used 1 time. | |||
}} | }} | ||
|getdata= | |getdata= | ||
| Line 1,038: | Line 1,079: | ||
{{EnemyInfo | {{EnemyInfo | ||
|image={{BattleField |style=bn1 |nocol1=true |nocol2=true |nocol3=true |object52=miney3 }} | |image={{BattleField |style=bn1 |nocol1=true |nocol2=true |nocol3=true |object52=miney3 }} | ||
|name_en=Miney3 |name_jp=ジーラ3rd |name_tl= | |name_en=Miney3<ref name="Miney"/> |name_jp=ジーラ3rd |name_tl=Jīra 3rd | ||
|hp=140 |contact=30 |element=none | |hp=140 |contact=30 |element=none | ||
|airshoes= |superarmor= | |airshoes= |superarmor= | ||
| Line 1,044: | Line 1,085: | ||
|locations=[[Undernet 8]] (11.3%) | |locations=[[Undernet 8]] (11.3%) | ||
|attacks= | |attacks= | ||
{{EnemyInfo/Attack |name_en= | {{EnemyInfo/Attack |name_en=Mine3 |name_jp=ステルスマイン3 |name_tl=Stealth Mine 3 | ||
|attack=300 |element=none | |attack=300 |element=none | ||
}} | }} | ||
{{EnemyInfo/Attack |name_en=Steal |name_jp=エリアスチール |name_tl=Area Steal | {{EnemyInfo/Attack |name_en=Steal |name_jp=エリアスチール |name_tl=Area Steal | ||
|attack=10 |element=none | |||
|info=Can be used 2 times. | |||
}} | }} | ||
|getdata= | |getdata= | ||
| Line 1,063: | Line 1,106: | ||
{{EnemyInfo | {{EnemyInfo | ||
|image={{BattleField |style=bn1 |nocol1=true |nocol2=true |nocol3=true |object52=ammonicule }} | |image={{BattleField |style=bn1 |nocol1=true |nocol2=true |nocol3=true |object52=ammonicule }} | ||
|name_en=Ammonicule |name_jp=アモナキュール |name_tl= | |name_en=Ammonicule<ref name="Ammonicule">Mega Man Battle Network Official Complete Works</ref> |name_jp=アモナキュール |name_tl=Amonakyūru | ||
|hp=60 |contact=30 |element=aqua | |hp=60 |contact=30 |element=aqua | ||
|airshoes= |superarmor= | |airshoes= |superarmor= | ||
|info= | |info=Blocks attacks with a 10 HP BubbleWrap. | ||
|locations=[[Traffic Light Comp 4]] (21.9%), [[Traffic Light Comp 5]] (7.2%) | |locations=[[Traffic Light Comp 4]] (21.9%), [[Traffic Light Comp 5]] (7.2%) | ||
|attacks= | |attacks= | ||
| Line 1,084: | Line 1,127: | ||
{{EnemyInfo | {{EnemyInfo | ||
|image={{BattleField |style=bn1 |nocol1=true |nocol2=true |nocol3=true |object52=ammonicule2 }} | |image={{BattleField |style=bn1 |nocol1=true |nocol2=true |nocol3=true |object52=ammonicule2 }} | ||
|name_en=Ammonicule2 |name_jp=アモナキュール2nd |name_tl= | |name_en=Ammonicule2<ref name="Ammonicule"/> |name_jp=アモナキュール2nd |name_tl=Amonakyūru 2nd | ||
|hp=90 |contact=30 |element=aqua | |hp=90 |contact=30 |element=aqua | ||
|airshoes= |superarmor= | |airshoes= |superarmor= | ||
|info= | |info=Blocks attacks with a 20 HP BubbleWrap. | ||
|locations=[[Undernet 6 (MMBN1)|Undernet 6]] (24.0%) | |locations=[[Undernet 6 (MMBN1)|Undernet 6]] (24.0%) | ||
|attacks= | |attacks= | ||
| Line 1,105: | Line 1,148: | ||
{{EnemyInfo | {{EnemyInfo | ||
|image={{BattleField |style=bn1 |nocol1=true |nocol2=true |nocol3=true |object52=ammonicule3 }} | |image={{BattleField |style=bn1 |nocol1=true |nocol2=true |nocol3=true |object52=ammonicule3 }} | ||
|name_en=Ammonicule3 |name_jp=アモナキュール3rd |name_tl= | |name_en=Ammonicule3<ref name="Ammonicule"/> |name_jp=アモナキュール3rd |name_tl=Amonakyūru 3rd | ||
|hp=150 |contact=30 |element=aqua | |hp=150 |contact=30 |element=aqua | ||
|airshoes= |superarmor= | |airshoes= |superarmor= | ||
|info= | |info=Blocks attacks with a 40 HP BubbleWrap. | ||
|locations=[[WWW Comp 5]] (20.8%) | |locations=[[WWW Comp 5]] (20.8%) | ||
|attacks= | |attacks= | ||
| Line 1,127: | Line 1,170: | ||
{{EnemyInfo | {{EnemyInfo | ||
|image={{BattleField |style=bn1 |nocol1=true |nocol2=true |nocol3=true |object52=jelly }} | |image={{BattleField |style=bn1 |nocol1=true |nocol2=true |nocol3=true |object52=jelly }} | ||
|name_en=Jelly |name_jp=ジェリー |name_tl= | |name_en=Jelly<ref name="Jelly">Mega Man Battle Network 3</ref> |name_jp=ジェリー |name_tl=Jerī | ||
|hp=120 |contact=30 |element=aqua | |hp=120 |contact=30 |element=aqua | ||
|airshoes=y |superarmor= | |airshoes=y |superarmor= | ||
| Line 1,147: | Line 1,190: | ||
{{EnemyInfo | {{EnemyInfo | ||
|image={{BattleField |style=bn1 |nocol1=true |nocol2=true |nocol3=true |object52=heatjelly }} | |image={{BattleField |style=bn1 |nocol1=true |nocol2=true |nocol3=true |object52=heatjelly }} | ||
|name_en=HeatJelly |name_jp=ジェリーヒート |name_tl= | |name_en=HeatJelly<ref name="HeatJelly">Mega Man Battle Network 3</ref> |name_jp=ジェリーヒート |name_tl=Jerī Heat | ||
|hp=150 |contact=30 |element=fire | |hp=150 |contact=30 |element=fire | ||
|airshoes=y |superarmor= | |airshoes=y |superarmor= | ||
| Line 1,153: | Line 1,196: | ||
|locations=[[Traffic Light Comp 2]] (15.0%), [[Traffic Light Comp 5]] (7.4%), [[Traffic Light Comp 4]] (4.0%), [[Traffic Light Comp 3]] (1.6%) | |locations=[[Traffic Light Comp 2]] (15.0%), [[Traffic Light Comp 5]] (7.4%), [[Traffic Light Comp 4]] (4.0%), [[Traffic Light Comp 3]] (1.6%) | ||
|attacks= | |attacks= | ||
{{EnemyInfo/Attack |name_en= | {{EnemyInfo/Attack |name_en=RedWave |name_jp=アカツナミ |name_tl=Red Tsunami | ||
|attack=200 |element=fire | |attack=200 |element=fire | ||
}} | }} | ||
| Line 1,167: | Line 1,210: | ||
{{EnemyInfo | {{EnemyInfo | ||
|image={{BattleField |style=bn1 |nocol1=true |nocol2=true |nocol3=true |object52=earthjelly }} | |image={{BattleField |style=bn1 |nocol1=true |nocol2=true |nocol3=true |object52=earthjelly }} | ||
|name_en=BigJelly |name_jp=ビッグジェリー |name_tl= | |name_en=BigJelly |name_jp=ビッグジェリー |name_tl=Big Jerī | ||
|hp=200 |contact=30 |element=aqua | |hp=200 |contact=30 |element=aqua | ||
|airshoes=y |superarmor= | |airshoes=y |superarmor= | ||
| Line 1,173: | Line 1,216: | ||
|locations=[[Rocket Comp (MMBN1)|Rocket Comp]] (25.0%), [[WWW Comp 4 (MMBN1)|WWW Comp 4]] (22.9%), [[WWW Comp 5]] (5.2%) | |locations=[[Rocket Comp (MMBN1)|Rocket Comp]] (25.0%), [[WWW Comp 4 (MMBN1)|WWW Comp 4]] (22.9%), [[WWW Comp 5]] (5.2%) | ||
|attacks= | |attacks= | ||
{{EnemyInfo/Attack |name_en= | {{EnemyInfo/Attack |name_en=BigWave |name_jp=オオツナミ |name_tl=Big Tsunami | ||
|attack=300 |element=aqua | |attack=300 |element=aqua | ||
}} | }} | ||
| Line 1,188: | Line 1,231: | ||
{{EnemyInfo | {{EnemyInfo | ||
|image={{BattleField |style=bn1 |nocol1=true |nocol2=true |nocol3=true |object52=gaia }} | |image={{BattleField |style=bn1 |nocol1=true |nocol2=true |nocol3=true |object52=gaia }} | ||
|name_en=Gaia |name_jp=ガイアント |name_tl= | |name_en=Gaia<ref name="Gaia">Mega Man Battle Network 4</ref> |name_jp=ガイアント |name_tl=Gaianto | ||
|hp=150 |contact=200 |element=none | |hp=150 |contact=200 |element=none | ||
|airshoes= |superarmor= | |airshoes= |superarmor= | ||
|info= | |info=Guards while not attacking. | ||
|locations=[[Undernet 1 (MMBN1)|Undernet 1]] (24.2%), [[Undernet 4 (MMBN1)|Undernet 4]] (14.4%), [[Undernet 5 (MMBN1)|Undernet 5]] (12.9%), [[Undernet 3 (MMBN1)|Undernet 3]] (9.4%) | |locations=[[Undernet 1 (MMBN1)|Undernet 1]] (24.2%), [[Undernet 4 (MMBN1)|Undernet 4]] (14.4%), [[Undernet 5 (MMBN1)|Undernet 5]] (12.9%), [[Undernet 3 (MMBN1)|Undernet 3]] (9.4%) | ||
|attacks= | |attacks= | ||
{{EnemyInfo/Attack |name_en= | {{EnemyInfo/Attack |name_en=Gaia1 |name_jp=ガイアハンマー1 |name_tl=Gaia Hammer 1 | ||
|attack=200 |element=none | |attack=200 |element=none | ||
}} | }} | ||
| Line 1,210: | Line 1,253: | ||
{{EnemyInfo | {{EnemyInfo | ||
|image={{BattleField |style=bn1 |nocol1=true |nocol2=true |nocol3=true |object52=gaia2 }} | |image={{BattleField |style=bn1 |nocol1=true |nocol2=true |nocol3=true |object52=gaia2 }} | ||
|name_en=Gaia2 |name_jp=ガイアント2nd |name_tl= | |name_en=Gaia2<ref name="Gaia"/> |name_jp=ガイアント2nd |name_tl=Gaianto 2nd | ||
|hp=200 |contact=300 |element=none | |hp=200 |contact=300 |element=none | ||
|airshoes= |superarmor= | |airshoes= |superarmor= | ||
|info= | |info=Guards while not attacking. | ||
|locations=[[Undernet 8]] (24.3%) | |locations=[[Undernet 8]] (24.3%) | ||
|attacks= | |attacks= | ||
{{EnemyInfo/Attack |name_en= | {{EnemyInfo/Attack |name_en=Gaia2 |name_jp=ガイアハンマー2 |name_tl=Gaia Hammer 2 | ||
|attack=300 |element=none | |attack=300 |element=none | ||
}} | }} | ||
| Line 1,232: | Line 1,275: | ||
{{EnemyInfo | {{EnemyInfo | ||
|image={{BattleField |style=bn1 |nocol1=true |nocol2=true |nocol3=true |object52=gaia3 }} | |image={{BattleField |style=bn1 |nocol1=true |nocol2=true |nocol3=true |object52=gaia3 }} | ||
|name_en=Gaia3 |name_jp=ガイアント3rd |name_tl= | |name_en=Gaia3<ref name="Gaia"/> |name_jp=ガイアント3rd |name_tl=Gaianto 3rd | ||
|hp=300 |contact=400 |element=none | |hp=300 |contact=400 |element=none | ||
|airshoes= |superarmor= | |airshoes= |superarmor= | ||
|info= | |info=Guards while not attacking. | ||
|locations=[[ | |locations=[[Undernet 12]] (14.8%) | ||
|attacks= | |attacks= | ||
{{EnemyInfo/Attack |name_en= | {{EnemyInfo/Attack |name_en=Gaia3 |name_jp=ガイアハンマー3 |name_tl=Gaia Hammer 3 | ||
|attack=400 |element=none | |attack=400 |element=none | ||
}} | }} | ||
| Line 1,254: | Line 1,297: | ||
{{EnemyInfo | {{EnemyInfo | ||
|image={{BattleField |style=bn1 |nocol1=true |nocol2=true |nocol3=true |object52=popper }} | |image={{BattleField |style=bn1 |nocol1=true |nocol2=true |nocol3=true |object52=popper }} | ||
|name_en=Popper |name_jp=ミノゴロモン |name_tl= | |name_en=Popper<ref name="Popper">Mega Man Battle Network 2</ref> |name_jp=ミノゴロモン |name_tl=Minogoromon | ||
|hp=100 |contact=100 |element=wood | |hp=100 |contact=100 |element=wood | ||
|airshoes= |superarmor= | |airshoes= |shadowshoes=y |superarmor= | ||
|info= | |info= | ||
|locations=[[ | |locations=[[Lunch Stand Comp]] (66.8%), [[Undernet 1 (MMBN1)|Undernet 1]] (16.7%), [[Undernet 5 (MMBN1)|Undernet 5]] (15.6%), [[Undernet 3 (MMBN1)|Undernet 3]] (13.4%), [[Undernet 2 (MMBN1)|Undernet 2]] (9.4%), [[Undernet 4 (MMBN1)|Undernet 4]] (3.1%) | ||
|attacks= | |attacks= | ||
{{EnemyInfo/Attack |name_en= | {{EnemyInfo/Attack |name_en=WoodTower |name_jp=ウッディタワー |name_tl=Woody Tower | ||
|attack=100 |element=wood | |attack=100 |element=wood | ||
}} | }} | ||
| Line 1,276: | Line 1,319: | ||
{{EnemyInfo | {{EnemyInfo | ||
|image={{BattleField |style=bn1 |nocol1=true |nocol2=true |nocol3=true |object52=popper2 }} | |image={{BattleField |style=bn1 |nocol1=true |nocol2=true |nocol3=true |object52=popper2 }} | ||
|name_en=Popper2 |name_jp=ミノゴロモン2nd |name_tl= | |name_en=Popper2<ref name="Popper"/> |name_jp=ミノゴロモン2nd |name_tl=Minogoromon 2nd | ||
|hp=250 |contact=140 |element=wood | |hp=250 |contact=140 |element=wood | ||
|airshoes= |superarmor= | |airshoes= |shadowshoes=y |superarmor= | ||
|info= | |info= | ||
|locations=[[ | |locations=[[Undernet 11]] (12.9%), [[Undernet 10]] (6.2%) | ||
|attacks= | |attacks= | ||
{{EnemyInfo/Attack |name_en= | {{EnemyInfo/Attack |name_en=WoodTower |name_jp=ウッディタワー |name_tl=Woody Tower | ||
|attack=140 |element=wood | |attack=140 |element=wood | ||
}} | }} | ||
| Line 1,296: | Line 1,339: | ||
{{EnemyInfo | {{EnemyInfo | ||
|image={{BattleField |style=bn1 |nocol1=true |nocol2=true |nocol3=true |object52=popper3 }} | |image={{BattleField |style=bn1 |nocol1=true |nocol2=true |nocol3=true |object52=popper3 }} | ||
|name_en=Popper3 |name_jp=ミノゴロモン3rd |name_tl= | |name_en=Popper3<ref name="Popper"/> |name_jp=ミノゴロモン3rd |name_tl=Minogoromon 3rd | ||
|hp=120 |contact=180 |element=wood | |hp=120 |contact=180 |element=wood | ||
|airshoes= |superarmor= | |airshoes= |shadowshoes=y |superarmor= | ||
|info= | |info= | ||
|locations=[[ | |locations=[[Undernet 11]] (12.5%) | ||
|attacks= | |attacks= | ||
{{EnemyInfo/Attack |name_en= | {{EnemyInfo/Attack |name_en=WoodTower |name_jp=ウッディタワー |name_tl=Woody Tower | ||
|attack=180 |element=wood | |attack=180 |element=wood | ||
}} | }} | ||
{{EnemyInfo/Attack |name_en= | {{EnemyInfo/Attack |name_en=Recover120 |name_jp=リカバリー120 |name_tl=Recovery 120 | ||
|info=Used when HP ≤ 75 %. Can be used 8 times. | |||
}} | }} | ||
|getdata= | |getdata= | ||
| Line 1,319: | Line 1,363: | ||
{{EnemyInfo | {{EnemyInfo | ||
|image={{BattleField |style=bn1 |nocol1=true |nocol2=true |nocol3=true |object52=satella }} | |image={{BattleField |style=bn1 |nocol1=true |nocol2=true |nocol3=true |object52=satella }} | ||
|name_en=Satella |name_jp=サテラ |name_tl= | |name_en=Satella<ref name="Satella">Mega Man Battle Network Official Complete Works</ref> |name_jp=サテラ |name_tl=Satera | ||
|hp=200 |contact=60 |element=none | |hp=200 |contact=60 |element=none | ||
|airshoes= |superarmor= | |airshoes= |superarmor= | ||
| Line 1,325: | Line 1,369: | ||
|locations=[[WWW Comp 4 (MMBN1)|WWW Comp 4]] (27.9%), [[WWW Comp 5]] (12.9%) | |locations=[[WWW Comp 4 (MMBN1)|WWW Comp 4]] (27.9%), [[WWW Comp 5]] (12.9%) | ||
|attacks= | |attacks= | ||
{{EnemyInfo/Attack |name_en= | {{EnemyInfo/Attack |name_en=Lockon1 |name_jp=ロックオン1 |name_tl=Lockon 1 | ||
|attack=60 |element=none | |attack=60 |element=none | ||
}} | }} | ||
| Line 1,341: | Line 1,385: | ||
{{EnemyInfo | {{EnemyInfo | ||
|image={{BattleField |style=bn1 |nocol1=true |nocol2=true |nocol3=true |object52=satella2 }} | |image={{BattleField |style=bn1 |nocol1=true |nocol2=true |nocol3=true |object52=satella2 }} | ||
|name_en=Satella2 |name_jp=サテラ2nd |name_tl= | |name_en=Satella2<ref name="Satella"/> |name_jp=サテラ2nd |name_tl=Satera 2nd | ||
|hp=240 |contact=100 |element=none | |hp=240 |contact=100 |element=none | ||
|airshoes= |superarmor= | |airshoes= |superarmor= | ||
|info= | |info= | ||
|locations=[[Undernet 6 (MMBN1)|Undernet 6]] (26.9%), [[ | |locations=[[Undernet 6 (MMBN1)|Undernet 6]] (26.9%), [[Undernet 10]] (3.1%) | ||
|attacks= | |attacks= | ||
{{EnemyInfo/Attack |name_en= | {{EnemyInfo/Attack |name_en=Lockon2 |name_jp=ロックオン2 |name_tl=Lockon 2 | ||
|attack=100 |element=none | |attack=100 |element=none | ||
}} | }} | ||
| Line 1,363: | Line 1,407: | ||
{{EnemyInfo | {{EnemyInfo | ||
|image={{BattleField |style=bn1 |nocol1=true |nocol2=true |nocol3=true |object52=satella3 }} | |image={{BattleField |style=bn1 |nocol1=true |nocol2=true |nocol3=true |object52=satella3 }} | ||
|name_en=Satella3 |name_jp=サテラ3rd |name_tl= | |name_en=Satella3<ref name="Satella"/> |name_jp=サテラ3rd |name_tl=Satera 3rd | ||
|hp=300 |contact=160 |element=none | |hp=300 |contact=160 |element=none | ||
|airshoes= |superarmor= | |airshoes= |superarmor= | ||
|info= | |info= | ||
|locations=[[ | |locations=[[Undernet 12]] (18.8%) | ||
|attacks= | |attacks= | ||
{{EnemyInfo/Attack |name_en= | {{EnemyInfo/Attack |name_en=Lockon3 |name_jp=ロックオン3 |name_tl=Lockon 3 | ||
|attack=160 |element=none | |attack=160 |element=none | ||
}} | }} | ||
| Line 1,383: | Line 1,427: | ||
}} | }} | ||
=== | ===Fan=== | ||
{{EnemyInfo | {{EnemyInfo | ||
|image={{BattleField |style=bn1 |nocol1=true |nocol2=true |nocol3=true |object52=fanner }} | |image={{BattleField |style=bn1 |nocol1=true |nocol2=true |nocol3=true |object52=fanner }} | ||
|name_en=Fanner |name_jp=ファンカー |name_tl= | |name_en=Fan<ref name="Fan"> Mega Man Battle Network 5 (internal text data for e-Reader cards); named '''Fanner''' in Mega Man Battle Network Official Complete Works</ref> |name_jp=ファンカー |name_tl=Fankā | ||
|hp=100 |contact=80 |element=none | |hp=100 |contact=80 |element=none | ||
|airshoes= |superarmor= | |airshoes= |superarmor= | ||
| Line 1,408: | Line 1,452: | ||
{{EnemyInfo | {{EnemyInfo | ||
|image={{BattleField |style=bn1 |nocol1=true |nocol2=true |nocol3=true |object52=fanner2 }} | |image={{BattleField |style=bn1 |nocol1=true |nocol2=true |nocol3=true |object52=fanner2 }} | ||
|name_en= | |name_en=Fan2<ref name="Fan"/> |name_jp=ファンカー2nd |name_tl=Fankā 2nd | ||
|hp=140 |contact=120 |element=none | |hp=140 |contact=120 |element=none | ||
|airshoes= |superarmor= | |airshoes= |superarmor= | ||
| Line 1,430: | Line 1,474: | ||
{{EnemyInfo | {{EnemyInfo | ||
|image={{BattleField |style=bn1 |nocol1=true |nocol2=true |nocol3=true |object52=fanner3 }} | |image={{BattleField |style=bn1 |nocol1=true |nocol2=true |nocol3=true |object52=fanner3 }} | ||
|name_en= | |name_en=Fan3<ref name="Fan"/> |name_jp=ファンカー3rd |name_tl=Fankā 3rd | ||
|hp=180 |contact=160 |element=none | |hp=180 |contact=160 |element=none | ||
|airshoes= |superarmor= | |airshoes= |superarmor= | ||
|info= | |info= | ||
|locations=[[ | |locations=[[Undernet 11]] (18.7%), [[WWW Comp 5]] (9.4%) | ||
|attacks= | |attacks= | ||
{{EnemyInfo/Attack |name_en= |name_jp=竜巻 |name_tl=Tornado | {{EnemyInfo/Attack |name_en= |name_jp=竜巻 |name_tl=Tornado | ||
| Line 1,453: | Line 1,497: | ||
{{EnemyInfo | {{EnemyInfo | ||
|image={{BattleField |style=bn1 |nocol1=true |nocol2=true |nocol3=true |object52=twisty |object42=remobit }} | |image={{BattleField |style=bn1 |nocol1=true |nocol2=true |nocol3=true |object52=twisty |object42=remobit }} | ||
|name_en=Twisty & Remobit |name_jp=パララ&リモコゴロー |name_tl= | |name_en=Twisty<ref name="Twisty">Mega Man Battle Network 2</ref> & Remobit |name_jp=パララ&リモコゴロー |name_tl=Parara & Rimokogorō | ||
|hp=80 |contact=30 |element=elec | |hp=80 |contact=30 |element=elec | ||
|airshoes= |superarmor= | |airshoes= |superarmor= | ||
| Line 1,459: | Line 1,503: | ||
|locations=[[Power Plant Comp 3]] (29.9%), [[Car Comp (MMBN1)|Car Comp]] (29.0%), [[Power Plant Comp 4]] (16.7%), [[Undernet 2 (MMBN1)|Undernet 2]] (6.2%), [[WWW Comp 5]] (2.1%) | |locations=[[Power Plant Comp 3]] (29.9%), [[Car Comp (MMBN1)|Car Comp]] (29.0%), [[Power Plant Comp 4]] (16.7%), [[Undernet 2 (MMBN1)|Undernet 2]] (6.2%), [[WWW Comp 5]] (2.1%) | ||
|attacks= | |attacks= | ||
{{EnemyInfo/Attack |name_en= | {{EnemyInfo/Attack |name_en=Remobit1 |name_jp=リモコゴロー1 |name_tl=Rimokogorō 1 | ||
|attack=100 |element=elec | |attack=100 |element=elec | ||
|info=If it hits an empty panel, breaks it. Inflicts Numb (10s). | |||
}} | }} | ||
|getdata= | |getdata= | ||
| Line 1,475: | Line 1,520: | ||
{{EnemyInfo | {{EnemyInfo | ||
|image={{BattleField |style=bn1 |nocol1=true |nocol2=true |nocol3=true |object52=twisty2 |object42=remobit2 }} | |image={{BattleField |style=bn1 |nocol1=true |nocol2=true |nocol3=true |object52=twisty2 |object42=remobit2 }} | ||
|name_en=Twisty2 & Remobit2 |name_jp=パララ&リモコゴロー2nd |name_tl= | |name_en=Twisty2<ref name="Twisty"/> & Remobit2 |name_jp=パララ&リモコゴロー2nd |name_tl=Parara & Rimokogorō 2nd | ||
|hp=100 |contact=30 |element=elec | |hp=100 |contact=30 |element=elec | ||
|airshoes= |superarmor= | |airshoes= |superarmor= | ||
| Line 1,481: | Line 1,526: | ||
|locations=[[Undernet 5 (MMBN1)|Undernet 5]] (12.5%), [[WWW Comp 5]] (6.2%) | |locations=[[Undernet 5 (MMBN1)|Undernet 5]] (12.5%), [[WWW Comp 5]] (6.2%) | ||
|attacks= | |attacks= | ||
{{EnemyInfo/Attack |name_en= | {{EnemyInfo/Attack |name_en=Remobit2 |name_jp=リモコゴロー2 |name_tl=Rimokogorō 2 | ||
|attack=150 |element=elec | |attack=150 |element=elec | ||
|info=If it hits an empty panel, breaks it. Inflicts Numb (10s). | |||
}} | }} | ||
|getdata= | |getdata= | ||
| Line 1,497: | Line 1,543: | ||
{{EnemyInfo | {{EnemyInfo | ||
|image={{BattleField |style=bn1 |nocol1=true |nocol2=true |nocol3=true |object52=twisty3 |object42=remobit3 }} | |image={{BattleField |style=bn1 |nocol1=true |nocol2=true |nocol3=true |object52=twisty3 |object42=remobit3 }} | ||
|name_en=Twisty3 & Remobit3 |name_jp=パララ&リモコゴロー3rd |name_tl= | |name_en=Twisty3<ref name="Twisty"/> & Remobit3 |name_jp=パララ&リモコゴロー3rd |name_tl=Parara & Rimokogorō 3rd | ||
|hp=120 |contact=30 |element=elec | |hp=120 |contact=30 |element=elec | ||
|airshoes= |superarmor= | |airshoes= |superarmor= | ||
|info= | |info= | ||
|locations=[[ | |locations=[[Undernet 10]] (12.5%) | ||
|attacks= | |attacks= | ||
{{EnemyInfo/Attack |name_en= | {{EnemyInfo/Attack |name_en=Remobit3 |name_jp=リモコゴロー3 |name_tl=Rimokogorō 3 | ||
|attack=200 |element=elec | |attack=200 |element=elec | ||
|info=If it hits an empty panel, breaks it. Inflicts Numb (10s). | |||
}} | }} | ||
|getdata= | |getdata= | ||
| Line 1,520: | Line 1,567: | ||
{{EnemyInfo | {{EnemyInfo | ||
|image={{BattleField |style=bn1 |nocol1=true |nocol2=true |nocol3=true |object52=billy }} | |image={{BattleField |style=bn1 |nocol1=true |nocol2=true |nocol3=true |object52=billy }} | ||
|name_en=Billy |name_jp=ビリー |name_tl= | |name_en=Billy<ref name="Billy">Mega Man Battle Network 4</ref> |name_jp=ビリー |name_tl=Birī | ||
|hp=100 |contact=30 |element=elec | |hp=100 |contact=30 |element=elec | ||
|airshoes= |superarmor= | |airshoes= |superarmor= | ||
| Line 1,526: | Line 1,573: | ||
|locations=[[Power Plant Comp 1]] (33.6%), [[Power Plant Comp 4]] (18.5%), [[Power Plant Comp 2]] (16.8%), [[Internet 3 (MMBN1)|Internet 3]] (16.5%), [[Power Plant Comp 3]] (8.6%) | |locations=[[Power Plant Comp 1]] (33.6%), [[Power Plant Comp 4]] (18.5%), [[Power Plant Comp 2]] (16.8%), [[Internet 3 (MMBN1)|Internet 3]] (16.5%), [[Power Plant Comp 3]] (8.6%) | ||
|attacks= | |attacks= | ||
{{EnemyInfo/Attack |name_en= | {{EnemyInfo/Attack |name_en=Thunder1 |name_jp=サンダーボール1 |name_tl=Thunder Ball 1 | ||
|attack=100 |element=elec | |attack=100 |element=elec | ||
|info=Inflicts Numb (10s). | |||
}} | }} | ||
|getdata= | |getdata= | ||
| Line 1,542: | Line 1,590: | ||
{{EnemyInfo | {{EnemyInfo | ||
|image={{BattleField |style=bn1 |nocol1=true |nocol2=true |nocol3=true |object52=silly }} | |image={{BattleField |style=bn1 |nocol1=true |nocol2=true |nocol3=true |object52=silly }} | ||
|name_en=Billy2 |name_jp=ビリー2nd |name_tl= | |name_en=Billy2<ref name="Billy"/> |name_jp=ビリー2nd |name_tl=Birī 2nd | ||
|hp=150 |contact=30 |element=elec | |hp=150 |contact=30 |element=elec | ||
|airshoes= |superarmor= | |airshoes= |superarmor= | ||
| Line 1,548: | Line 1,596: | ||
|locations=[[Recycled PET Comp]] (56.2%), [[WWW Comp 5]] (15.6%), [[WWW Comp 4 (MMBN1)|WWW Comp 4]] (8.3%) | |locations=[[Recycled PET Comp]] (56.2%), [[WWW Comp 5]] (15.6%), [[WWW Comp 4 (MMBN1)|WWW Comp 4]] (8.3%) | ||
|attacks= | |attacks= | ||
{{EnemyInfo/Attack |name_en= | {{EnemyInfo/Attack |name_en=Thunder2 |name_jp=サンダーボール2 |name_tl=Thunder Ball 2 | ||
|attack=140 |element=elec | |attack=140 |element=elec | ||
|info=Inflicts Numb (10s). | |||
}} | }} | ||
|getdata= | |getdata= | ||
| Line 1,564: | Line 1,613: | ||
{{EnemyInfo | {{EnemyInfo | ||
|image={{BattleField |style=bn1 |nocol1=true |nocol2=true |nocol3=true |object52=killy }} | |image={{BattleField |style=bn1 |nocol1=true |nocol2=true |nocol3=true |object52=killy }} | ||
|name_en=Billy3 |name_jp=ビリー3rd |name_tl= | |name_en=Billy3<ref name="Billy"/> |name_jp=ビリー3rd |name_tl=Birī 3rd | ||
|hp=200 |contact=30 |element=elec | |hp=200 |contact=30 |element=elec | ||
|airshoes= |superarmor= | |airshoes= |superarmor= | ||
|info= | |info= | ||
|locations=[[ | |locations=[[Undernet 10]] (15.6%) | ||
|attacks= | |attacks= | ||
{{EnemyInfo/Attack |name_en= | {{EnemyInfo/Attack |name_en=Thunder3 |name_jp=サンダーボール3 |name_tl=Thunder Ball 3 | ||
|attack=180 |element=elec | |attack=180 |element=elec | ||
|info=Inflicts Numb (10s). | |||
}} | }} | ||
|getdata= | |getdata= | ||
| Line 1,587: | Line 1,637: | ||
{{EnemyInfo | {{EnemyInfo | ||
|image={{BattleField |style=bn1 |nocol1=true |nocol2=true |nocol3=true |object52=prog }} | |image={{BattleField |style=bn1 |nocol1=true |nocol2=true |nocol3=true |object52=prog }} | ||
|name_en=ProgMk1 |name_jp=プログ・マークワン |name_tl= | |name_en=ProgMk1<ref name="ProgMk">Not officially named in English</ref> |name_jp=プログ・マークワン |name_tl=Prog Mark One | ||
|hp=150 |contact=30 |element=elec | |hp=150 |contact=30 |element=elec | ||
|airshoes= |superarmor= | |airshoes= |superarmor= | ||
| Line 1,593: | Line 1,643: | ||
|locations=[[Power Plant Comp 2]] (29.3%), [[Power Plant Comp 3]] (6.8%) | |locations=[[Power Plant Comp 2]] (29.3%), [[Power Plant Comp 3]] (6.8%) | ||
|attacks= | |attacks= | ||
{{EnemyInfo/Attack |name_en= | {{EnemyInfo/Attack |name_en=RingZap1 |name_jp=エレキサークル1 |name_tl=Elec Circle 1 | ||
|attack=100 |element=elec | |attack=100 |element=elec | ||
|info=Reduces own HP by 5. Inflicts Numb (10s). | |||
}} | }} | ||
{{EnemyInfo/Attack |name_en=Steal |name_jp=エリアスチール |name_tl=Area Steal | {{EnemyInfo/Attack |name_en=Steal |name_jp=エリアスチール |name_tl=Area Steal | ||
|attack=10 |element=none | |||
|info=Can be used 2 times. | |||
}} | }} | ||
|getdata= | |getdata= | ||
| Line 1,611: | Line 1,664: | ||
{{EnemyInfo | {{EnemyInfo | ||
|image={{BattleField |style=bn1 |nocol1=true |nocol2=true |nocol3=true |object52=prog2 }} | |image={{BattleField |style=bn1 |nocol1=true |nocol2=true |nocol3=true |object52=prog2 }} | ||
|name_en=ProgMk2 |name_jp=プログ・マークツー |name_tl= | |name_en=ProgMk2<ref name="ProgMk"/> |name_jp=プログ・マークツー |name_tl=Prog Mark Two | ||
|hp=200 |contact=30 |element=elec | |hp=200 |contact=30 |element=elec | ||
|airshoes= |superarmor= | |airshoes= |superarmor= | ||
| Line 1,617: | Line 1,670: | ||
|locations=[[Power Plant Comp 3]] (21.5%), [[Power Plant Comp 4]] (6.2%) | |locations=[[Power Plant Comp 3]] (21.5%), [[Power Plant Comp 4]] (6.2%) | ||
|attacks= | |attacks= | ||
{{EnemyInfo/Attack |name_en= | {{EnemyInfo/Attack |name_en=RingZap2 |name_jp=エレキサークル2 |name_tl=Elec Circle 2 | ||
|attack=100 |element=elec | |attack=100 |element=elec | ||
|info=Reduces own HP by 5. Inflicts Numb (10s). | |||
}} | }} | ||
{{EnemyInfo/Attack |name_en=Steal |name_jp=エリアスチール |name_tl=Area Steal | {{EnemyInfo/Attack |name_en=Steal |name_jp=エリアスチール |name_tl=Area Steal | ||
|attack=10 |element=none | |||
|info=Can be used 2 times. | |||
}} | }} | ||
|getdata= | |getdata= | ||
| Line 1,634: | Line 1,690: | ||
{{EnemyInfo | {{EnemyInfo | ||
|image={{BattleField |style=bn1 |nocol1=true |nocol2=true |nocol3=true |object52=prog3 }} | |image={{BattleField |style=bn1 |nocol1=true |nocol2=true |nocol3=true |object52=prog3 }} | ||
|name_en=ProgMk3 |name_jp=プログ・マークスリー |name_tl= | |name_en=ProgMk3<ref name="ProgMk"/> |name_jp=プログ・マークスリー |name_tl=Prog Mark Three | ||
|hp=250 |contact=30 |element=elec | |hp=250 |contact=30 |element=elec | ||
|airshoes= |superarmor= | |airshoes= |superarmor= | ||
| Line 1,640: | Line 1,696: | ||
|locations=[[Power Plant Comp 4]] (18.1%) | |locations=[[Power Plant Comp 4]] (18.1%) | ||
|attacks= | |attacks= | ||
{{EnemyInfo/Attack |name_en= | {{EnemyInfo/Attack |name_en=RingZap3 |name_jp=エレキサークル3 |name_tl=Elec Circle 3 | ||
|attack=100 |element=elec | |attack=100 |element=elec | ||
|info=Reduces own HP by 5. Inflicts Numb (10s). | |||
}} | }} | ||
{{EnemyInfo/Attack |name_en=Steal |name_jp=エリアスチール |name_tl=Area Steal | {{EnemyInfo/Attack |name_en=Steal |name_jp=エリアスチール |name_tl=Area Steal | ||
|attack=10 |element=none | |||
|info=Can be used 2 times. | |||
}} | }} | ||
|getdata= | |getdata= | ||
| Line 1,658: | Line 1,717: | ||
{{EnemyInfo | {{EnemyInfo | ||
|image={{BattleField |style=bn1 |nocol1=true |nocol2=true |nocol3=true |object52=megaliana }} | |image={{BattleField |style=bn1 |nocol1=true |nocol2=true |nocol3=true |object52=megaliana }} | ||
|name_en=Megalian |name_jp=メガリア |name_tl= | |name_en=Megalian<ref name="Megalian">Mega Man Battle Network 2; named '''Heady''' in Mega Man Battle Network 6 </ref> |name_jp=メガリア |name_tl=Megaria | ||
|hp=200 |contact=30 |element=none | |hp=200 |contact=30 |element=none | ||
|airshoes= |superarmor= | |airshoes= |superarmor= | ||
|info= | |info=Has a 10 HP AquaAura. | ||
|locations=[[WWW Comp 3 (MMBN1)|WWW Comp 3]] (16.3%), [[Undernet 5 (MMBN1)|Undernet 5]] (15.4%), [[WWW Comp 4 (MMBN1)|WWW Comp 4]] (12.5%), [[ | |locations=[[WWW Comp 3 (MMBN1)|WWW Comp 3]] (16.3%), [[Undernet 5 (MMBN1)|Undernet 5]] (15.4%), [[WWW Comp 4 (MMBN1)|WWW Comp 4]] (12.5%), [[Undernet 12]] (5.2%) | ||
|attacks= | |attacks= | ||
{{EnemyInfo/Attack |name_en= | {{EnemyInfo/Attack |name_en=FaceAttack |name_jp=フェイスアタック |name_tl=Face Attack | ||
|attack=100 |element=none | |attack=100 |element=none | ||
}} | }} | ||
| Line 1,679: | Line 1,738: | ||
{{EnemyInfo | {{EnemyInfo | ||
|image={{BattleField |style=bn1 |nocol1=true |nocol2=true |nocol3=true |object52=megalianh }} | |image={{BattleField |style=bn1 |nocol1=true |nocol2=true |nocol3=true |object52=megalianh }} | ||
|name_en=Megalian2 |name_jp=メガリア2nd |name_tl= | |name_en=Megalian2<ref name="Megalian"/> |name_jp=メガリア2nd |name_tl=Megaria 2nd | ||
|hp=250 |contact=30 |element=none | |hp=250 |contact=30 |element=none | ||
|airshoes= |superarmor= | |airshoes= |superarmor= | ||
|info= | |info=Has a 40 HP FireAura. | ||
|locations=[[WWW Comp 2 (MMBN1)|WWW Comp 2]] (26.9%), [[ | |locations=[[WWW Comp 2 (MMBN1)|WWW Comp 2]] (26.9%), [[Undernet 11]] (21.9%), [[WWW Comp 4 (MMBN1)|WWW Comp 4]] (19.8%), [[Undernet 12]] (8.3%) | ||
|attacks= | |attacks= | ||
{{EnemyInfo/Attack |name_en= | {{EnemyInfo/Attack |name_en=FaceAttack |name_jp=フェイスアタック |name_tl=Face Attack | ||
|attack=160 |element=none | |attack=160 |element=none | ||
}} | }} | ||
| Line 1,699: | Line 1,758: | ||
{{EnemyInfo | {{EnemyInfo | ||
|image={{BattleField |style=bn1 |nocol1=true |nocol2=true |nocol3=true |object52=megalianw }} | |image={{BattleField |style=bn1 |nocol1=true |nocol2=true |nocol3=true |object52=megalianw }} | ||
|name_en=Megalian3 |name_jp=メガリア3rd |name_tl= | |name_en=Megalian3<ref name="Megalian"/> |name_jp=メガリア3rd |name_tl=Megaria 3rd | ||
|hp=300 |contact=30 |element=none | |hp=300 |contact=30 |element=none | ||
|airshoes= |superarmor= | |airshoes= |superarmor= | ||
|info= | |info=Has an 80 HP WoodAura. | ||
|locations=[[Rocket Comp (MMBN1)|Rocket Comp]] (25.0%), [[ | |locations=[[Rocket Comp (MMBN1)|Rocket Comp]] (25.0%), [[Undernet 12]] (14.6%) | ||
|attacks= | |attacks= | ||
{{EnemyInfo/Attack |name_en= | {{EnemyInfo/Attack |name_en=FaceAttack |name_jp=フェイスアタック |name_tl=Face Attack | ||
|attack=240 |element=none | |attack=240 |element=none | ||
}} | }} | ||
| Line 1,720: | Line 1,779: | ||
{{EnemyInfo | {{EnemyInfo | ||
|image={{BattleField |style=bn1 |nocol1=true |nocol2=true |nocol3=true |object52=candevil |object62=candevil-candle }} | |image={{BattleField |style=bn1 |nocol1=true |nocol2=true |nocol3=true |object52=candevil |object62=candevil-candle }} | ||
|name_en=CanDevil |name_jp=キャンデービル |name_tl= | |name_en=CanDevil<ref name="CanDevil">Mega Man Battle Network 2; named '''Candela''' in Mega Man Battle Network 5 (internal text data for e-Reader cards)</ref> |name_jp=キャンデービル |name_tl=Kyandēbiru | ||
|hp=160 |contact=100 |element=fire | |hp=160 |contact=100 |element=fire | ||
|airshoes= |superarmor= | |airshoes= |superarmor= | ||
| Line 1,729: | Line 1,788: | ||
|attack=100 |element=fire | |attack=100 |element=fire | ||
}} | }} | ||
{{EnemyInfo/Attack |name_en= | {{EnemyInfo/Attack |name_en=Candle1 |name_jp=リモローソク1 |name_tl=Rimorōsoku 1 | ||
|info=Candle has 20 HP, non-elemental. Recovers 1 HP every 30 frames. | |||
}} | }} | ||
|getdata= | |getdata= | ||
| Line 1,743: | Line 1,803: | ||
{{EnemyInfo | {{EnemyInfo | ||
|image={{BattleField |style=bn1 |nocol1=true |nocol2=true |nocol3=true |object52=candevil2 |object62=candevil2-candle }} | |image={{BattleField |style=bn1 |nocol1=true |nocol2=true |nocol3=true |object52=candevil2 |object62=candevil2-candle }} | ||
|name_en=CanDevil2 |name_jp=キャンデービル2nd |name_tl= | |name_en=CanDevil2<ref name="CanDevil"/> |name_jp=キャンデービル2nd |name_tl=Kyandēbiru 2nd | ||
|hp=200 |contact=150 |element=fire | |hp=200 |contact=150 |element=fire | ||
|airshoes= |superarmor= | |airshoes= |superarmor= | ||
|info= | |info= | ||
|locations=[[WWW Comp 1 (MMBN1)|WWW Comp 1]] (30.9%), [[ | |locations=[[WWW Comp 1 (MMBN1)|WWW Comp 1]] (30.9%), [[Undernet 11]] (12.5%), [[WWW Comp 5]] (9.4%), [[WWW Comp 4 (MMBN1)|WWW Comp 4]] (3.3%) | ||
|attacks= | |attacks= | ||
{{EnemyInfo/Attack |name_en= |name_jp=火の玉 |name_tl=Fireball | {{EnemyInfo/Attack |name_en= |name_jp=火の玉 |name_tl=Fireball | ||
|attack=150 |element=fire | |attack=150 |element=fire | ||
}} | }} | ||
{{EnemyInfo/Attack |name_en= | {{EnemyInfo/Attack |name_en=Candle2 |name_jp=リモローソク2 |name_tl=Rimorōsoku 2 | ||
|info=Candle has 50 HP, non-elemental. Recovers 1 HP every 12 frames. | |||
}} | }} | ||
|getdata= | |getdata= | ||
| Line 1,766: | Line 1,827: | ||
{{EnemyInfo | {{EnemyInfo | ||
|image={{BattleField |style=bn1 |nocol1=true |nocol2=true |nocol3=true |object52=candevil3 |object62=candevil3-candle }} | |image={{BattleField |style=bn1 |nocol1=true |nocol2=true |nocol3=true |object52=candevil3 |object62=candevil3-candle }} | ||
|name_en=CanDevil3 |name_jp=キャンデービル3rd |name_tl= | |name_en=CanDevil3<ref name="CanDevil"/> |name_jp=キャンデービル3rd |name_tl=Kyandēbiru 3rd | ||
|hp=300 |contact=200 |element=fire | |hp=300 |contact=200 |element=fire | ||
|airshoes= |superarmor= | |airshoes= |superarmor= | ||
| Line 1,775: | Line 1,836: | ||
|attack=200 |element=fire | |attack=200 |element=fire | ||
}} | }} | ||
{{EnemyInfo/Attack |name_en= | {{EnemyInfo/Attack |name_en=Candle3 |name_jp=リモローソク3 |name_tl=Rimorōsoku 3 | ||
|info=Candle has 10 HP, non-elemental. Recovers 1 HP every 8 frames. | |||
}} | }} | ||
|getdata= | |getdata= | ||
| Line 1,790: | Line 1,852: | ||
{{EnemyInfo | {{EnemyInfo | ||
|image={{BattleField |style=bn1 |nocol1=true |nocol2=true |nocol3=true |object52=anaconda-head |object62=anaconda-tail |object63=anaconda-tail }} | |image={{BattleField |style=bn1 |nocol1=true |nocol2=true |nocol3=true |object52=anaconda-head |object62=anaconda-tail |object63=anaconda-tail }} | ||
|name_en=Anaconda |name_jp=ダイジャン |name_tl= | |name_en=Anaconda<ref name="Anaconda">Mega Man Battle Network 5 (internal text data for e-Reader cards); named '''BigSnake''' in Mega Man Battle Network Official Complete Works</ref> |name_jp=ダイジャン |name_tl=Daijan | ||
|hp=200 |contact=200 |element=wood | |hp=200 |contact=200 |element=wood | ||
|airshoes= |superarmor= | |airshoes= |superarmor= | ||
|info= | |info= | ||
|locations=[[Rocket Comp (MMBN1)|Rocket Comp]] (12.5%), [[Undernet 8]] (12.5%), [[ | |locations=[[Rocket Comp (MMBN1)|Rocket Comp]] (12.5%), [[Undernet 8]] (12.5%), [[Undernet 10]] (6.2%) | ||
|attacks= | |attacks= | ||
{{EnemyInfo/Attack |name_en= | {{EnemyInfo/Attack |name_en=DynaWave |name_jp=ダイナウェーブ |name_tl=Dyna Wave | ||
|attack=200 |element=wood | |attack=200 |element=wood | ||
}} | }} | ||
{{EnemyInfo/Attack |name_en= | {{EnemyInfo/Attack |name_en=Snakegg1 |name_jp=エッグスネーク1 |name_tl=Egg Snake 1 | ||
|attack=200 |element=wood | |attack=200 |element=wood | ||
|info=Used when HP ≤ 50 %. Snake has 30 HP. | |||
}} | }} | ||
|getdata= | |getdata= | ||
| Line 1,815: | Line 1,878: | ||
{{EnemyInfo | {{EnemyInfo | ||
|image={{BattleField |style=bn1 |nocol1=true |nocol2=true |nocol3=true |object52=anaconda2-head |object62=anaconda2-tail |object63=anaconda2-tail }} | |image={{BattleField |style=bn1 |nocol1=true |nocol2=true |nocol3=true |object52=anaconda2-head |object62=anaconda2-tail |object63=anaconda2-tail }} | ||
|name_en=Anaconda2 |name_jp=ダイジャンボルト |name_tl= | |name_en=Anaconda2<ref name="Anaconda2">Not officially named in English</ref> |name_jp=ダイジャンボルト |name_tl=Daijan Bolt | ||
|hp=250 |contact=200 |element=elec | |hp=250 |contact=200 |element=elec | ||
|airshoes= |superarmor= | |airshoes= |superarmor= | ||
|info= | |info= | ||
|locations=[[WWW Comp 5]] (18.4%), [[ | |locations=[[WWW Comp 5]] (18.4%), [[Undernet 10]] (6.2%) | ||
|attacks= | |attacks= | ||
{{EnemyInfo/Attack |name_en= | {{EnemyInfo/Attack |name_en= |name_jp=電磁弾 |name_tl=Electromagnetic Bullet | ||
|attack=200 |element=elec | |attack=200 |element=elec | ||
|info=Inflicts Numb (10s). | |||
}} | }} | ||
{{EnemyInfo/Attack |name_en= | {{EnemyInfo/Attack |name_en=Snakegg2 |name_jp=エッグスネーク2 |name_tl=Egg Snake 2 | ||
|attack=200 |element=elec | |attack=200 |element=elec | ||
|info=Used when HP ≤ 50 %. Snake has 30 HP. Inflicts Numb (10s). | |||
}} | }} | ||
|getdata= | |getdata= | ||
| Line 1,839: | Line 1,904: | ||
{{EnemyInfo | {{EnemyInfo | ||
|image={{BattleField |style=bn1 |nocol1=true |nocol2=true |nocol3=true |object52=anaconda3-head |object62=anaconda3-tail |object63=anaconda3-tail }} | |image={{BattleField |style=bn1 |nocol1=true |nocol2=true |nocol3=true |object52=anaconda3-head |object62=anaconda3-tail |object63=anaconda3-tail }} | ||
|name_en=Anaconda3 |name_jp=ダイジャンメラル |name_tl= | |name_en=Anaconda3<ref name="Anaconda3">Not officially named in English</ref> |name_jp=ダイジャンメラル |name_tl=Daijan Meraru | ||
|hp=300 |contact=200 |element=fire | |hp=300 |contact=200 |element=fire | ||
|airshoes= |superarmor= | |airshoes= |superarmor= | ||
| Line 1,848: | Line 1,913: | ||
|attack=200 |element=fire | |attack=200 |element=fire | ||
}} | }} | ||
{{EnemyInfo/Attack |name_en= | {{EnemyInfo/Attack |name_en=Snakegg3 |name_jp=エッグスネーク3 |name_tl=Egg Snake 3 | ||
|attack=200 |element=fire | |attack=200 |element=fire | ||
|info=Used when HP ≤ 50 %. Snake has 30 HP. Leaves flames on ground. | |||
}} | }} | ||
{{EnemyInfo/Attack |name_en= |name_jp=地面の炎 |name_tl=Flames on | {{EnemyInfo/Attack |name_en= |name_jp=地面の炎 |name_tl=Flames on ground | ||
|attack=100 |element=fire | |attack=100 |element=fire | ||
}} | }} | ||
| Line 1,864: | Line 1,930: | ||
}} | }} | ||
=== | ===Drain=== | ||
{{EnemyInfo | {{EnemyInfo | ||
|image={{BattleField |style=bn1 |nocol1=true |nocol2=true |nocol3=true |object52=mosqurito }} | |image={{BattleField |style=bn1 |nocol1=true |nocol2=true |nocol3=true |object52=mosqurito }} | ||
|name_en=Mosqurito |name_jp=チクリート |name_tl= | |name_en=Drain<ref name="Drain">Mega Man Battle Network 5 (internal text data for e-Reader cards); named '''Mosqurito''' in Mega Man Battle Network Official Complete Works</ref> |name_jp=チクリート |name_tl=Chikurīto | ||
|hp=200 |contact=50 |element=none | |hp=200 |contact=50 |element=none | ||
|airshoes=y |superarmor= | |airshoes=y |superarmor= | ||
| Line 1,873: | Line 1,939: | ||
|locations=[[Antique Comp]] (43.7%), [[Undernet 1 (MMBN1)|Undernet 1]] (17.5%), [[Undernet 2 (MMBN1)|Undernet 2]] (15.6%), [[Undernet 4 (MMBN1)|Undernet 4]] (15.6%) | |locations=[[Antique Comp]] (43.7%), [[Undernet 1 (MMBN1)|Undernet 1]] (17.5%), [[Undernet 2 (MMBN1)|Undernet 2]] (15.6%), [[Undernet 4 (MMBN1)|Undernet 4]] (15.6%) | ||
|attacks= | |attacks= | ||
{{EnemyInfo/Attack |name_en= | {{EnemyInfo/Attack |name_en=Drain1 |name_jp=モスキート1 |name_tl=Mosquito 1 | ||
|attack=50 |element=none | |attack=50 |element=none | ||
|info=Recovers 50 HP if it hits. | |||
}} | }} | ||
|getdata= | |getdata= | ||
| Line 1,889: | Line 1,956: | ||
{{EnemyInfo | {{EnemyInfo | ||
|image={{BattleField |style=bn1 |nocol1=true |nocol2=true |nocol3=true |object52=mosqurito2 }} | |image={{BattleField |style=bn1 |nocol1=true |nocol2=true |nocol3=true |object52=mosqurito2 }} | ||
|name_en= | |name_en=Drain2<ref name="Drain"/> |name_jp=チクリート2nd |name_tl=Chikurīto 2nd | ||
|hp=200 |contact=100 |element=none | |hp=200 |contact=100 |element=none | ||
|airshoes=y |superarmor= | |airshoes=y |superarmor= | ||
| Line 1,895: | Line 1,962: | ||
|locations=[[Undernet 7 (MMBN1)|Undernet 7]] (29.2%) | |locations=[[Undernet 7 (MMBN1)|Undernet 7]] (29.2%) | ||
|attacks= | |attacks= | ||
{{EnemyInfo/Attack |name_en= | {{EnemyInfo/Attack |name_en=Drain2 |name_jp=モスキート2 |name_tl=Mosquito 2 | ||
|attack=100 |element=none | |attack=100 |element=none | ||
|info=Recovers 100 HP if it hits. | |||
}} | }} | ||
|getdata= | |getdata= | ||
| Line 1,911: | Line 1,979: | ||
{{EnemyInfo | {{EnemyInfo | ||
|image={{BattleField |style=bn1 |nocol1=true |nocol2=true |nocol3=true |object52=mosqurito3 }} | |image={{BattleField |style=bn1 |nocol1=true |nocol2=true |nocol3=true |object52=mosqurito3 }} | ||
|name_en= | |name_en=Drain3<ref name="Drain"/> |name_jp=チクリート3rd |name_tl=Chikurīto 3rd | ||
|hp=200 |contact=200 |element=none | |hp=200 |contact=200 |element=none | ||
|airshoes=y |superarmor= | |airshoes=y |superarmor= | ||
|info= | |info= | ||
|locations=[[ | |locations=[[Undernet 11]] (9.4%) | ||
|attacks= | |attacks= | ||
{{EnemyInfo/Attack |name_en= | {{EnemyInfo/Attack |name_en=Drain3 |name_jp=モスキート3 |name_tl=Mosquito 3 | ||
|attack=200 |element=none | |attack=200 |element=none | ||
|info=Recovers 200 HP if it hits. | |||
}} | }} | ||
|getdata= | |getdata= | ||
| Line 1,934: | Line 2,003: | ||
{{EnemyInfo | {{EnemyInfo | ||
|image={{BattleField |style=bn1 |nocol1=true |nocol2=true |nocol3=true |object52=poitton }} | |image={{BattleField |style=bn1 |nocol1=true |nocol2=true |nocol3=true |object52=poitton }} | ||
|name_en=Poitton |name_jp=ポイットン |name_tl= | |name_en=Poitton<ref name="Poitton">Mega Man Battle Network Official Complete Works</ref> |name_jp=ポイットン |name_tl=Poitton | ||
|hp=100 |contact=200 |element=wood | |hp=100 |contact=200 |element=wood | ||
|airshoes= |superarmor= | |airshoes= |superarmor= | ||
|info= | |info= | ||
|locations=[[Internet 4 (MMBN1)|Internet 4]] (24.9%), [[ | |locations=[[Internet 4 (MMBN1)|Internet 4]] (24.9%), [[Lunch Stand Comp]] (16.5%) | ||
|attacks= | |attacks= | ||
{{EnemyInfo/Attack |name_en= | {{EnemyInfo/Attack |name_en=Dynamyte1 |name_jp=ダイナマイト1 |name_tl=Dynamite 1 | ||
|attack=200 |element=none | |attack=200 |element=none | ||
|info=Dynamyte has 30 HP. | |||
}} | }} | ||
|getdata= | |getdata= | ||
| Line 1,956: | Line 2,026: | ||
{{EnemyInfo | {{EnemyInfo | ||
|image={{BattleField |style=bn1 |nocol1=true |nocol2=true |nocol3=true |object52=poitton2 }} | |image={{BattleField |style=bn1 |nocol1=true |nocol2=true |nocol3=true |object52=poitton2 }} | ||
|name_en=Poitton2 |name_jp=ポイットン2nd |name_tl= | |name_en=Poitton2<ref name="Poitton"/> |name_jp=ポイットン2nd |name_tl=Poitton 2nd | ||
|hp=250 |contact=200 |element=wood | |hp=250 |contact=200 |element=wood | ||
|airshoes= |superarmor= | |airshoes= |superarmor= | ||
| Line 1,962: | Line 2,032: | ||
|locations=[[Undernet 8]] (16.7%) | |locations=[[Undernet 8]] (16.7%) | ||
|attacks= | |attacks= | ||
{{EnemyInfo/Attack |name_en= | {{EnemyInfo/Attack |name_en=Dynamyte2 |name_jp=ダイナマイト2 |name_tl=Dynamite 2 | ||
|attack=200 |element=none | |attack=200 |element=none | ||
|info=Dynamyte has 30 HP. | |||
}} | }} | ||
|getdata= | |getdata= | ||
| Line 1,978: | Line 2,049: | ||
{{EnemyInfo | {{EnemyInfo | ||
|image={{BattleField |style=bn1 |nocol1=true |nocol2=true |nocol3=true |object52=poitton3 }} | |image={{BattleField |style=bn1 |nocol1=true |nocol2=true |nocol3=true |object52=poitton3 }} | ||
|name_en=Poitton3 |name_jp=ポイットン3rd |name_tl= | |name_en=Poitton3<ref name="Poitton"/> |name_jp=ポイットン3rd |name_tl=Poitton 3rd | ||
|hp=300 |contact=200 |element=wood | |hp=300 |contact=200 |element=wood | ||
|airshoes= |superarmor= | |airshoes= |superarmor= | ||
| Line 1,984: | Line 2,055: | ||
|locations=[[Blackboard Comp (MMBN1)|Blackboard Comp]] (52.1%) | |locations=[[Blackboard Comp (MMBN1)|Blackboard Comp]] (52.1%) | ||
|attacks= | |attacks= | ||
{{EnemyInfo/Attack |name_en= | {{EnemyInfo/Attack |name_en=Dynamyte3 |name_jp=ダイナマイト3 |name_tl=Dynamite 3 | ||
|attack=200 |element=none | |attack=200 |element=none | ||
|info=Dynamyte has 30 HP. | |||
}} | }} | ||
|getdata= | |getdata= | ||
| Line 2,001: | Line 2,073: | ||
{{EnemyInfo | {{EnemyInfo | ||
|image={{BattleField |style=bn1 |nocol1=true |nocol2=true |nocol3=true |object52=mole }} | |image={{BattleField |style=bn1 |nocol1=true |nocol2=true |nocol3=true |object52=mole }} | ||
|name_en=Mole |name_jp=ラッシュ |name_tl=Rush | |name_en=Mole<ref name="Mole">Mega Man Battle Network 2; named '''Rush''' in Mega Man Battle Network 3 to 6.</ref> |name_jp=ラッシュ |name_tl=Rush | ||
|hp=10 |contact=1 |element=none | |hp=10 |contact=1 |element=none | ||
|airshoes= |superarmor= | |airshoes= |shadowshoes=y |superarmor= | ||
|info= | |info=Unaffected by MagicFire's 25% instant delete chance. | ||
|locations=[[Undernet 9]] (6.6%), [[ | |locations=[[Undernet 9]] (6.6%), [[Undernet 10]] (6.2%), [[Undernet 11]] (5.9%) | ||
|attacks= | |attacks= | ||
{{EnemyInfo/Attack |name_en=Escape |name_jp=エスケープ |name_tl= | {{EnemyInfo/Attack |name_en=Escape |name_jp=エスケープ |name_tl=Escape | ||
}} | }} | ||
|getdata= | |getdata= | ||
| Line 2,017: | Line 2,089: | ||
}} | }} | ||
== | ==References== | ||
<references /> | |||
[[Category:Mega Man Battle Network Series]] [[Category:Mega Man Battle Network]] | [[Category:Mega Man Battle Network Series]] [[Category:Mega Man Battle Network]] | ||
[[Category:Enemies]] | |||
Latest revision as of 00:06, 11 April 2024
This page lists every enemy which can appear in battle in Mega Man Battle Network 1.
Viruses
Mettool
Canodumb
VolGear
Spooky
Beetank
 |
||
|---|---|---|
 |
||
|---|---|---|
 |
||
|---|---|---|
Handy
Flappy
Froshell
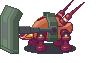 |
||
|---|---|---|
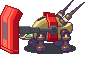 |
||
|---|---|---|
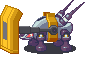 |
||
|---|---|---|
HardHead
Swordy
 |
||
|---|---|---|
 |
||
|---|---|---|
 |
||
|---|---|---|
Fishy
 |
||
|---|---|---|
 |
||
|---|---|---|
Piranha
 |
||
|---|---|---|
 |
||
|---|---|---|
 |
||
|---|---|---|
Puffy
ColdBear
 |
||
|---|---|---|
 |
||
|---|---|---|
 |
||
|---|---|---|
Cloudy
 |
||
|---|---|---|
 |
||
|---|---|---|
 |
||
|---|---|---|
Ratty
Miney
Ammonicule
 |
||
|---|---|---|
 |
||
|---|---|---|
 |
||
|---|---|---|
Jelly
Gaia
 |
||
|---|---|---|
 |
||
|---|---|---|
 |
||
|---|---|---|
Popper
Satella
Fan
 |
||
|---|---|---|
 |
||
|---|---|---|
Twisty & Remobit
Billy
 |
||
|---|---|---|
 |
||
|---|---|---|
 |
||
|---|---|---|
Prog
Megalian
 |
||
|---|---|---|
 |
||
|---|---|---|
 |
||
|---|---|---|
CanDevil
 |
||
|---|---|---|
 |
||
|---|---|---|
 |
||
|---|---|---|
Anaconda
Drain
Poitton
Mole
References
- ↑ 1.0 1.1 1.2 Derived from "All Helmet"; Interview with TOM-PON
- ↑ 2.0 2.1 2.2 Mega Man Battle Network 2
- ↑ Mega Man Battle Network 4
- ↑ Not officially named in English
- ↑ 5.0 5.1 5.2 Mega Man Battle Network 2, Mega Man Battle Network 3; named Ghost in Mega Man Battle Network 5 (internal text data for e-Reader cards)
- ↑ 6.0 6.1 6.2 Mega Man Battle Network 2; named BugTank in Mega Man Battle Network 5
- ↑ 7.0 7.1 7.2 Mega Man Battle Network 2; named Handi in Mega Man Battle Network 5
- ↑ 8.0 8.1 8.2 Mega Man Battle Network 2; named Powie in Mega Man Battle Network 5
- ↑ 9.0 9.1 9.2 Mega Man Battle Network 5 (internal text data for e-Reader cards); named Floshell in Mega Man Battle Network Official Complete Works
- ↑ 10.0 10.1 10.2 Mega Man Battle Network 2
- ↑ Mega Man Battle Network 2
- ↑ Mega Man Battle Network 2
- ↑ Mega Man Battle Network 2
- ↑ Mega Man Battle Network 2
- ↑ Mega Man Battle Network 2
- ↑ 16.0 16.1 16.2 Mega Man Battle Network 5 (internal text data for e-Reader cards), Mega Man Battle Network 6
- ↑ Mega Man Battle Network 2
- ↑ Mega Man Battle Network 2
- ↑ 19.0 19.1 19.2 Mega Man Network Transmission Official Strategy Guide; named PolarBear in MegaMan NT Warrior MegaHandbook
- ↑ 20.0 20.1 20.2 Mega Man Battle Network 2
- ↑ 21.0 21.1 21.2 Mega Man Battle Network 2
- ↑ 22.0 22.1 22.2 Mega Man Battle Network Official Complete Works
- ↑ 23.0 23.1 23.2 Mega Man Battle Network Official Complete Works
- ↑ Mega Man Battle Network 3
- ↑ Mega Man Battle Network 3
- ↑ 26.0 26.1 26.2 Mega Man Battle Network 4
- ↑ 27.0 27.1 27.2 Mega Man Battle Network 2
- ↑ 28.0 28.1 28.2 Mega Man Battle Network Official Complete Works
- ↑ 29.0 29.1 29.2 Mega Man Battle Network 5 (internal text data for e-Reader cards); named Fanner in Mega Man Battle Network Official Complete Works
- ↑ 30.0 30.1 30.2 Mega Man Battle Network 2
- ↑ 31.0 31.1 31.2 Mega Man Battle Network 4
- ↑ 32.0 32.1 32.2 Not officially named in English
- ↑ 33.0 33.1 33.2 Mega Man Battle Network 2; named Heady in Mega Man Battle Network 6
- ↑ 34.0 34.1 34.2 Mega Man Battle Network 2; named Candela in Mega Man Battle Network 5 (internal text data for e-Reader cards)
- ↑ Mega Man Battle Network 5 (internal text data for e-Reader cards); named BigSnake in Mega Man Battle Network Official Complete Works
- ↑ Not officially named in English
- ↑ Not officially named in English
- ↑ 38.0 38.1 38.2 Mega Man Battle Network 5 (internal text data for e-Reader cards); named Mosqurito in Mega Man Battle Network Official Complete Works
- ↑ 39.0 39.1 39.2 Mega Man Battle Network Official Complete Works
- ↑ Mega Man Battle Network 2; named Rush in Mega Man Battle Network 3 to 6.