Enemies in LoN: Difference between revisions
From The Rockman EXE Zone Wiki
No edit summary |
No edit summary |
||
| Line 10: | Line 10: | ||
|airshoes= |shadowshoes= |floatshoes= |statusguard= |superarmor= | |airshoes= |shadowshoes= |floatshoes= |statusguard= |superarmor= | ||
|info= | |info= | ||
|locations= | |locations=[[Lan's HP (LoN)|Lan's HP]] (100.0%), [[Doghouse Comp (LoN)|Doghouse Comp]] (63.0%), [[Kitchen Comp (LoN)|Kitchen Comp]] (61.1%), [[ACDC Area 1 (LoN)|ACDC Area 1]] (61.1%), [[ACDC Area 2 (LoN)|ACDC Area 2]] (51.9%), [[Mayl's HP (LoN)|Mayl's HP]] (38.9%), [[Monument Comp (LoN)|Monument Comp]] (38.9%), [[Giant Screen Comp]] (38.9%), [[Ticket Gate Comp]] (35.2%), [[TV Comp (LoN)|TV Comp]] (33.3%), [[Shrine Gate Comp]] (33.3%), [[ACDC Area 3 (LoN)|ACDC Area 3]] (29.6%), [[SciLab Comp 1]] (27.8%), [[Government Area 1 (LoN)|Government Area 1]] (24.2%), [[SciLab Comp 3]] (22.2%), [[Government Area 3 (LoN)|Government Area 3]] (20.7%), [[SciLab Comp 2]] (20.4%), [[Dad's HP]] (18.5%), [[Government Area 2 (LoN)|Government Area 2]] (14.8%), [[Lion Dog Comp]] (7.4%) | ||
|attacks= | |attacks= | ||
{{EnemyInfo/Attack |name_en=Shockwave |name_jp=ショックウェーブ |name_tl=Shock Wave | {{EnemyInfo/Attack |name_en=Shockwave |name_jp=ショックウェーブ |name_tl=Shock Wave | ||
| Line 30: | Line 30: | ||
|airshoes= |shadowshoes= |floatshoes= |statusguard= |superarmor= | |airshoes= |shadowshoes= |floatshoes= |statusguard= |superarmor= | ||
|info= | |info= | ||
|locations= | |locations=[[Roadside Tree Comp]] (33.3%), [[Departure Counter Comp]] (22.2%), [[Seat Comp (LoN)|Seat Comp]] (22.2%), [[Undernet 2 (LoN)|Undernet 2]] (22.2%), [[Undernet 3 (LoN)|Undernet 3]] (22.2%), [[Shrine Comp 1]] (22.2%), [[Airplane Comp 1 (LoN)|Airplane Comp 1]] (18.5%), [[Undernet 1 (LoN)|Undernet 1]] (17.3%), [[Airplane Comp 4 (LoN)|Airplane Comp 4]] (14.8%), [[Airplane Comp 5 (LoN)|Airplane Comp 5]] (14.8%), [[Shrine Comp 2]] (11.1%), [[Shrine Comp 3]] (11.1%), [[Flight Board Comp (LoN)|Flight Board Comp]] (11.1%), [[Sink Area 1]] (10.4%), [[Sink Area 2]] (7.4%), [[Airplane Comp 2 (LoN)|Airplane Comp 2]] (7.4%), [[Airplane Comp 3 (LoN)|Airplane Comp 3]] (7.4%), [[Stone Tablet Comp]] (7.4%), [[Luxury Seat Comp]] (7.4%), [[Fossil Comp]] (7.4%), [[Picture Frame Comp]] (7.4%), [[Sink Area 3]] (6.9%), [[Att Area 1]] (3.7%), [[Att Area 2]] (3.7%), [[Cart Comp]] (3.7%), [[Pudding Stand Comp]] (3.7%) | ||
|attacks= | |attacks= | ||
{{EnemyInfo/Attack |name_en=Shockwave |name_jp=ショックウェーブ |name_tl=Shock Wave | {{EnemyInfo/Attack |name_en=Shockwave |name_jp=ショックウェーブ |name_tl=Shock Wave | ||
| Line 50: | Line 50: | ||
|airshoes= |shadowshoes= |floatshoes= |statusguard= |superarmor= | |airshoes= |shadowshoes= |floatshoes= |statusguard= |superarmor= | ||
|info= | |info= | ||
|locations= | |locations=[[Ancient Ruins Comp 1]] (22.2%), [[Ancient Ruins Comp 2]] (22.2%), [[Ancient Ruins Comp 3]] (18.5%), [[Ancient Ruins Comp 4]] (18.5%), [[Digging Tool Comp]] (18.5%), [[Ancient Ruins Comp 5]] (14.8%), [[Ancient Ruins Comp 6]] (14.8%), [[Undernet 5 (LoN)|Undernet 5]] (3.7%), [[SciLab Core Comp 1]] (3.7%), [[SciLab Core Comp 2]] (3.7%), [[SciLab Core Comp 3]] (3.7%), [[SciLab Core Comp 4]] (3.7%), [[Undernet 4 (LoN)|Undernet 4]] (3.5%) | ||
|attacks= | |attacks= | ||
{{EnemyInfo/Attack |name_en=Shockwave |name_jp=ショックウェーブ |name_tl=Shock Wave | {{EnemyInfo/Attack |name_en=Shockwave |name_jp=ショックウェーブ |name_tl=Shock Wave | ||
| Line 70: | Line 70: | ||
|airshoes= |shadowshoes= |floatshoes= |statusguard= |superarmor= | |airshoes= |shadowshoes= |floatshoes= |statusguard= |superarmor= | ||
|info= | |info= | ||
|locations= | |locations=[[Trojan Comp 1]] (14.8%), [[Undernet 6 (LoN)|Undernet 6]] (11.1%), [[Undernet 7 (LoN)|Undernet 7]] (11.1%), [[Trojan Comp 2]] (7.4%), [[Trojan Comp 3]] (7.4%), [[Trojan Comp 4]] (7.4%), [[Trojan Comp 5]] (7.4%), [[Research Tool Comp]] (7.4%) | ||
|attacks= | |attacks= | ||
{{EnemyInfo/Attack |name_en=Shockwave |name_jp=ショックウェーブ |name_tl=Shock Wave | {{EnemyInfo/Attack |name_en=Shockwave |name_jp=ショックウェーブ |name_tl=Shock Wave | ||
| Line 90: | Line 90: | ||
|airshoes= |shadowshoes= |floatshoes= |statusguard= |superarmor= | |airshoes= |shadowshoes= |floatshoes= |statusguard= |superarmor= | ||
|info= | |info= | ||
|locations= | |locations=[[Ticket Gate Comp]] (44.4%), [[ACDC Area 2 (LoN)|ACDC Area 2]] (41.5%), [[Monument Comp (LoN)|Monument Comp]] (40.7%), [[Giant Screen Comp]] (40.7%), [[ACDC Area 1 (LoN)|ACDC Area 1]] (38.9%), [[Kitchen Comp (LoN)|Kitchen Comp]] (38.9%), [[ACDC Area 3 (LoN)|ACDC Area 3]] (38.9%), [[Doghouse Comp (LoN)|Doghouse Comp]] (37.0%), [[Mayl's HP (LoN)|Mayl's HP]] (35.2%), [[SciLab Comp 1]] (33.3%), [[Government Area 2 (LoN)|Government Area 2]] (16.7%), [[SciLab Comp 2]] (14.8%), [[SciLab Comp 3]] (14.8%), [[TV Comp (LoN)|TV Comp]] (14.8%), [[Dad's HP]] (14.8%), [[Shrine Gate Comp]] (14.8%), [[Government Area 1 (LoN)|Government Area 1]] (13.8%), [[Government Area 3 (LoN)|Government Area 3]] (12.1%), [[Lion Dog Comp]] (7.4%) | ||
|attacks= | |attacks= | ||
{{EnemyInfo/Attack |name_en=Cannon |name_jp=キャノン |name_tl=Cannon | {{EnemyInfo/Attack |name_en=Cannon |name_jp=キャノン |name_tl=Cannon | ||
| Line 109: | Line 109: | ||
|airshoes= |shadowshoes= |floatshoes= |statusguard= |superarmor= | |airshoes= |shadowshoes= |floatshoes= |statusguard= |superarmor= | ||
|info= | |info= | ||
|locations= | |locations=[[Stone Tablet Comp]] (22.2%), [[Odd Bronze Statue Comp]] (14.8%), [[Exhibit Bronze Statue Comp]] (14.8%), [[Undernet 2 (LoN)|Undernet 2]] (11.1%), [[Undernet 3 (LoN)|Undernet 3]] (11.1%), [[Shrine Comp 2]] (11.1%), [[Shrine Comp 3]] (11.1%), [[Cart Comp]] (11.1%), [[Luxury Seat Comp]] (11.1%), [[Sink Area 2]] (7.4%), [[Shrine Comp 1]] (7.4%), [[Museum Comp 1]] (7.4%), [[Museum Comp 2]] (7.4%), [[Roadside Tree Comp]] (7.4%), [[Signboard Comp (LoN)|Signboard Comp]] (7.4%), [[Sink Area 3]] (6.9%), [[Att Area 2]] (3.7%), [[Airplane Comp 1 (LoN)|Airplane Comp 1]] (3.7%), [[Airplane Comp 4 (LoN)|Airplane Comp 4]] (3.7%), [[Airplane Comp 5 (LoN)|Airplane Comp 5]] (3.7%), [[Museum Comp 3]] (3.7%), [[Museum Comp 4]] (3.7%), [[Pudding Stand Comp]] (3.7%), [[Att Area 3]] (3.5%), [[Sink Area 1]] (3.5%) | ||
|attacks= | |attacks= | ||
{{EnemyInfo/Attack |name_en=Cannon |name_jp=キャノン |name_tl=Cannon | {{EnemyInfo/Attack |name_en=Cannon |name_jp=キャノン |name_tl=Cannon | ||
| Line 128: | Line 128: | ||
|airshoes= |shadowshoes= |floatshoes= |statusguard= |superarmor= | |airshoes= |shadowshoes= |floatshoes= |statusguard= |superarmor= | ||
|info= | |info= | ||
|locations= | |locations=[[Ancient Ruins Comp 3]] (18.5%), [[Ancient Ruins Comp 4]] (18.5%), [[Digging Tool Comp]] (18.5%), [[Ancient Ruins Comp 1]] (14.8%), [[Ancient Ruins Comp 2]] (14.8%), [[Ancient Ruins Comp 5]] (14.8%), [[Ancient Ruins Comp 6]] (14.8%), [[Undernet 5 (LoN)|Undernet 5]] (7.4%), [[Undernet 4 (LoN)|Undernet 4]] (6.9%), [[SciLab Core Comp 1]] (3.7%), [[SciLab Core Comp 2]] (3.7%) | ||
|attacks= | |attacks= | ||
{{EnemyInfo/Attack |name_en=Cannon |name_jp=キャノン |name_tl=Cannon | {{EnemyInfo/Attack |name_en=Cannon |name_jp=キャノン |name_tl=Cannon | ||
| Line 146: | Line 146: | ||
|airshoes= |shadowshoes= |floatshoes= |statusguard= |superarmor= | |airshoes= |shadowshoes= |floatshoes= |statusguard= |superarmor= | ||
|info= | |info= | ||
|locations= | |locations=[[Trojan Comp 3]] (14.8%), [[Trojan Comp 5]] (14.8%), [[Research Tool Comp]] (14.8%), [[Trojan Comp 1]] (11.1%), [[Trojan Comp 2]] (11.1%), [[Trojan Comp 4]] (11.1%), [[Ancient Under Area 1]] (7.4%), [[Undernet 6 (LoN)|Undernet 6]] (3.7%), [[Undernet 7 (LoN)|Undernet 7]] (3.7%), [[Ancient Under Area 2]] (3.7%) | ||
|attacks= | |attacks= | ||
{{EnemyInfo/Attack |name_en=Cannon |name_jp=キャノン |name_tl=Cannon | {{EnemyInfo/Attack |name_en=Cannon |name_jp=キャノン |name_tl=Cannon | ||
| Line 166: | Line 166: | ||
|airshoes= |shadowshoes= |floatshoes= |statusguard= |superarmor= | |airshoes= |shadowshoes= |floatshoes= |statusguard= |superarmor= | ||
|info= | |info= | ||
|locations= | |locations=[[Piano Comp (LoN)|Piano Comp]] (83.3%), [[SciLab Comp 2]] (27.8%), [[SciLab Comp 3]] (20.4%), [[Dad's HP]] (20.4%) | ||
|attacks= | |attacks= | ||
{{EnemyInfo/Attack |name_en=LongSword |name_jp=ロングソード |name_tl=Long Sword | {{EnemyInfo/Attack |name_en=LongSword |name_jp=ロングソード |name_tl=Long Sword | ||
| Line 185: | Line 185: | ||
|airshoes= |shadowshoes= |floatshoes= |statusguard= |superarmor= | |airshoes= |shadowshoes= |floatshoes= |statusguard= |superarmor= | ||
|info= | |info= | ||
|locations= | |locations=[[Airplane Comp 4 (LoN)|Airplane Comp 4]] (14.8%), [[Airplane Comp 5 (LoN)|Airplane Comp 5]] (14.8%), [[SciLab Core Comp 1]] (3.7%), [[SciLab Core Comp 2]] (3.7%), [[SciLab Core Comp 3]] (3.7%), [[SciLab Core Comp 4]] (3.7%) | ||
|attacks= | |attacks= | ||
{{EnemyInfo/Attack |name_en=LongSword |name_jp=ロングソード |name_tl=Long Sword | {{EnemyInfo/Attack |name_en=LongSword |name_jp=ロングソード |name_tl=Long Sword | ||
| Line 204: | Line 204: | ||
|airshoes= |shadowshoes= |floatshoes= |statusguard= |superarmor= | |airshoes= |shadowshoes= |floatshoes= |statusguard= |superarmor= | ||
|info= | |info= | ||
|locations= | |locations=[[Museum Comp 3]] (37.0%), [[Museum Comp 4]] (37.0%), [[Museum Comp 1]] (18.5%), [[Museum Comp 2]] (18.5%), [[Tourist Map Comp]] (14.8%) | ||
|attacks= | |attacks= | ||
{{EnemyInfo/Attack |name_en=LongSword |name_jp=ロングソード |name_tl=Long Sword | {{EnemyInfo/Attack |name_en=LongSword |name_jp=ロングソード |name_tl=Long Sword | ||
| Line 223: | Line 223: | ||
|airshoes= |shadowshoes= |floatshoes= |statusguard= |superarmor= | |airshoes= |shadowshoes= |floatshoes= |statusguard= |superarmor= | ||
|info= | |info= | ||
|locations= | |locations=[[Atlampia Area 1]] (7.4%), [[Atlampia Area 2]] (7.4%), [[Atlampia Area 3]] (7.4%), [[Ancient Under Area 1]] (3.7%), [[Ancient Under Area 2]] (3.7%) | ||
|attacks= | |attacks= | ||
{{EnemyInfo/Attack |name_en=LongSword |name_jp=ロングソード |name_tl=Long Sword | {{EnemyInfo/Attack |name_en=LongSword |name_jp=ロングソード |name_tl=Long Sword | ||
| Line 243: | Line 243: | ||
|airshoes= |shadowshoes= |floatshoes= |statusguard= |superarmor= | |airshoes= |shadowshoes= |floatshoes= |statusguard= |superarmor= | ||
|info= | |info= | ||
|locations= | |locations=[[Lion Dog Comp]] (53.7%), [[Stone Tablet Comp]] (44.4%), [[ACDC Area 3 (LoN)|ACDC Area 3]] (31.5%), [[Government Area 1 (LoN)|Government Area 1]] (27.7%), [[Mayl's HP (LoN)|Mayl's HP]] (25.9%), [[Monument Comp (LoN)|Monument Comp]] (20.4%), [[Giant Screen Comp]] (20.4%), [[Government Area 2 (LoN)|Government Area 2]] (18.5%), [[Government Area 3 (LoN)|Government Area 3]] (17.3%) | ||
|attacks= | |attacks= | ||
{{EnemyInfo/Attack |name_en=LineBomb |name_jp=ラインボム |name_tl=Line Bomb | {{EnemyInfo/Attack |name_en=LineBomb |name_jp=ラインボム |name_tl=Line Bomb | ||
| Line 262: | Line 262: | ||
|airshoes= |shadowshoes= |floatshoes= |statusguard= |superarmor= | |airshoes= |shadowshoes= |floatshoes= |statusguard= |superarmor= | ||
|info= | |info= | ||
|locations= | |locations=[[Undernet 1 (LoN)|Undernet 1]] (17.3%), [[Sink Area 1]] (10.4%), [[Undernet 2 (LoN)|Undernet 2]] (7.4%), [[Undernet 3 (LoN)|Undernet 3]] (7.4%), [[Departure Counter Comp]] (7.4%), [[Seat Comp (LoN)|Seat Comp]] (7.4%), [[Cart Comp]] (5.6%), [[Luxury Seat Comp]] (5.6%), [[Odd Bronze Statue Comp]] (5.6%), [[Exhibit Bronze Statue Comp]] (5.6%), [[Airplane Comp 2 (LoN)|Airplane Comp 2]] (3.7%), [[Airplane Comp 3 (LoN)|Airplane Comp 3]] (3.7%) | ||
|attacks= | |attacks= | ||
{{EnemyInfo/Attack |name_en=LineBomb |name_jp=ラインボム |name_tl=Line Bomb | {{EnemyInfo/Attack |name_en=LineBomb |name_jp=ラインボム |name_tl=Line Bomb | ||
| Line 281: | Line 281: | ||
|airshoes= |shadowshoes= |floatshoes= |statusguard= |superarmor= | |airshoes= |shadowshoes= |floatshoes= |statusguard= |superarmor= | ||
|info= | |info= | ||
|locations= | |locations=[[Ancient Ruins Comp 1]] (14.8%), [[Ancient Ruins Comp 2]] (14.8%), [[SciLab Core Comp 1]] (14.8%), [[SciLab Core Comp 2]] (14.8%), [[Ancient Ruins Comp 5]] (14.8%), [[Ancient Ruins Comp 6]] (14.8%), [[Ancient Ruins Comp 3]] (11.1%), [[Ancient Ruins Comp 4]] (11.1%), [[Digging Tool Comp]] (11.1%), [[Undernet 5 (LoN)|Undernet 5]] (7.4%), [[Undernet 4 (LoN)|Undernet 4]] (6.9%), [[SciLab Core Comp 3]] (3.7%), [[SciLab Core Comp 4]] (3.7%) | ||
|attacks= | |attacks= | ||
{{EnemyInfo/Attack |name_en=CrackBomb |name_jp=クラックボム |name_tl=Crack Bomb | {{EnemyInfo/Attack |name_en=CrackBomb |name_jp=クラックボム |name_tl=Crack Bomb | ||
| Line 300: | Line 300: | ||
|airshoes= |shadowshoes= |floatshoes= |statusguard= |superarmor= | |airshoes= |shadowshoes= |floatshoes= |statusguard= |superarmor= | ||
|info= | |info= | ||
|locations= | |locations=[[Undernet 6 (LoN)|Undernet 6]] (7.4%), [[Undernet 7 (LoN)|Undernet 7]] (7.4%), [[Atlampia Area 1]] (7.4%), [[Atlampia Area 2]] (7.4%), [[Atlampia Area 3]] (7.4%), [[Ancient Under Area 1]] (7.4%), [[Ancient Under Area 2]] (3.7%) | ||
|attacks= | |attacks= | ||
{{EnemyInfo/Attack |name_en=CrossBomb |name_jp=クロスボム |name_tl=Cross Bomb | {{EnemyInfo/Attack |name_en=CrossBomb |name_jp=クロスボム |name_tl=Cross Bomb | ||
| Line 320: | Line 320: | ||
|airshoes= |shadowshoes= |floatshoes= |statusguard= |superarmor= | |airshoes= |shadowshoes= |floatshoes= |statusguard= |superarmor= | ||
|info= | |info= | ||
|locations= | |locations=[[Stone Tablet Comp]] (25.9%), [[Government Area 3 (LoN)|Government Area 3]] (12.1%), [[Shrine Comp 1]] (11.1%), [[Government Area 2 (LoN)|Government Area 2]] (9.3%), [[Shrine Comp 2]] (7.4%), [[Shrine Comp 3]] (7.4%), [[Airplane Comp 1 (LoN)|Airplane Comp 1]] (7.4%), [[Airplane Comp 2 (LoN)|Airplane Comp 2]] (7.4%), [[Airplane Comp 3 (LoN)|Airplane Comp 3]] (7.4%), [[Luxury Seat Comp]] (7.4%), [[Undernet 2 (LoN)|Undernet 2]] (3.7%), [[Undernet 3 (LoN)|Undernet 3]] (3.7%), [[Cart Comp]] (3.7%), [[Undernet 1 (LoN)|Undernet 1]] (3.5%) | ||
|attacks= | |attacks= | ||
{{EnemyInfo/Attack |name_en=Boomer |name_jp=ブーメラン |name_tl=Boomerang | {{EnemyInfo/Attack |name_en=Boomer |name_jp=ブーメラン |name_tl=Boomerang | ||
| Line 339: | Line 339: | ||
|airshoes= |shadowshoes= |floatshoes= |statusguard= |superarmor= | |airshoes= |shadowshoes= |floatshoes= |statusguard= |superarmor= | ||
|info= | |info= | ||
|locations= | |locations=[[Att Area 2]] (11.1%), [[Ancient Ruins Comp 1]] (11.1%), [[Ancient Ruins Comp 2]] (11.1%), [[Ancient Ruins Comp 3]] (11.1%), [[Ancient Ruins Comp 4]] (11.1%), [[Digging Tool Comp]] (11.1%), [[Att Area 3]] (10.4%), [[Undernet 5 (LoN)|Undernet 5]] (7.4%), [[Undernet 4 (LoN)|Undernet 4]] (6.9%), [[Museum Comp 1]] (3.7%), [[Museum Comp 2]] (3.7%) | ||
|attacks= | |attacks= | ||
{{EnemyInfo/Attack |name_en=Boomer |name_jp=ブーメラン |name_tl=Boomerang | {{EnemyInfo/Attack |name_en=Boomer |name_jp=ブーメラン |name_tl=Boomerang | ||
| Line 358: | Line 358: | ||
|airshoes= |shadowshoes= |floatshoes= |statusguard= |superarmor= | |airshoes= |shadowshoes= |floatshoes= |statusguard= |superarmor= | ||
|info= | |info= | ||
|locations= | |locations=[[Trojan Comp 3]] (14.8%), [[SciLab Core Comp 1]] (7.4%), [[SciLab Core Comp 2]] (7.4%), [[SciLab Core Comp 3]] (7.4%), [[SciLab Core Comp 4]] (7.4%), [[Ancient Ruins Comp 5]] (7.4%), [[Ancient Ruins Comp 6]] (7.4%), [[Trojan Comp 5]] (3.7%), [[Research Tool Comp]] (3.7%) | ||
|attacks= | |attacks= | ||
{{EnemyInfo/Attack |name_en=Boomer |name_jp=ブーメラン |name_tl=Boomerang | {{EnemyInfo/Attack |name_en=Boomer |name_jp=ブーメラン |name_tl=Boomerang | ||
| Line 377: | Line 377: | ||
|airshoes= |shadowshoes= |floatshoes= |statusguard= |superarmor= | |airshoes= |shadowshoes= |floatshoes= |statusguard= |superarmor= | ||
|info= | |info= | ||
|locations= | |locations=[[Ancient Under Area 2]] (11.1%), [[Undernet 6 (LoN)|Undernet 6]] (7.4%), [[Undernet 7 (LoN)|Undernet 7]] (7.4%), [[Ancient Under Area 1]] (7.4%) | ||
|attacks= | |attacks= | ||
{{EnemyInfo/Attack |name_en=Boomer |name_jp=ブーメラン |name_tl=Boomerang | {{EnemyInfo/Attack |name_en=Boomer |name_jp=ブーメラン |name_tl=Boomerang | ||
| Line 397: | Line 397: | ||
|airshoes= |shadowshoes= |floatshoes= |statusguard= |superarmor= | |airshoes= |shadowshoes= |floatshoes= |statusguard= |superarmor= | ||
|info= | |info= | ||
|locations= | |locations=[[Odd Bronze Statue Comp]] (37.0%), [[Exhibit Bronze Statue Comp]] (37.0%), [[Pudding Stand Comp]] (29.6%), [[Cart Comp]] (25.9%), [[Luxury Seat Comp]] (22.2%), [[Departure Counter Comp]] (18.5%), [[Seat Comp (LoN)|Seat Comp]] (18.5%), [[Undernet 1 (LoN)|Undernet 1]] (13.8%), [[Undernet 2 (LoN)|Undernet 2]] (11.1%), [[Undernet 3 (LoN)|Undernet 3]] (11.1%) | ||
|attacks= | |attacks= | ||
{{EnemyInfo/Attack |name_en=TwinFang |name_jp=ツインファング |name_tl=Twin Fang | {{EnemyInfo/Attack |name_en=TwinFang |name_jp=ツインファング |name_tl=Twin Fang | ||
| Line 416: | Line 416: | ||
|airshoes= |shadowshoes= |floatshoes= |statusguard= |superarmor= | |airshoes= |shadowshoes= |floatshoes= |statusguard= |superarmor= | ||
|info= | |info= | ||
|locations= | |locations=[[Att Area 2]] (18.5%), [[Att Area 3]] (17.3%), [[Att Area 1]] (14.8%), [[Fossil Comp]] (14.8%), [[Picture Frame Comp]] (14.8%) | ||
|attacks= | |attacks= | ||
{{EnemyInfo/Attack |name_en=TwinFang |name_jp=ツインファング |name_tl=Twin Fang | {{EnemyInfo/Attack |name_en=TwinFang |name_jp=ツインファング |name_tl=Twin Fang | ||
| Line 435: | Line 435: | ||
|airshoes= |shadowshoes= |floatshoes= |statusguard= |superarmor= | |airshoes= |shadowshoes= |floatshoes= |statusguard= |superarmor= | ||
|info= | |info= | ||
|locations= | |locations=[[Ancient Ruins Comp 5]] (14.8%), [[Ancient Ruins Comp 6]] (14.8%) | ||
|attacks= | |attacks= | ||
{{EnemyInfo/Attack |name_en=TwinFang |name_jp=ツインファング |name_tl=Twin Fang | {{EnemyInfo/Attack |name_en=TwinFang |name_jp=ツインファング |name_tl=Twin Fang | ||
| Line 453: | Line 453: | ||
|airshoes= |shadowshoes= |floatshoes= |statusguard= |superarmor= | |airshoes= |shadowshoes= |floatshoes= |statusguard= |superarmor= | ||
|info= | |info= | ||
|locations= | |locations=[[Ancient Under Area 1]] (7.4%), [[Ancient Under Area 2]] (7.4%) | ||
|attacks= | |attacks= | ||
{{EnemyInfo/Attack |name_en=TwinFang |name_jp=ツインファング |name_tl=Twin Fang | {{EnemyInfo/Attack |name_en=TwinFang |name_jp=ツインファング |name_tl=Twin Fang | ||
| Line 473: | Line 473: | ||
|airshoes= |shadowshoes= |floatshoes= |statusguard= |superarmor= | |airshoes= |shadowshoes= |floatshoes= |statusguard= |superarmor= | ||
|info= | |info= | ||
|locations= | |locations=[[Airplane Comp 1 (LoN)|Airplane Comp 1]] (14.8%), [[Airplane Comp 4 (LoN)|Airplane Comp 4]] (11.1%), [[Airplane Comp 5 (LoN)|Airplane Comp 5]] (11.1%), [[Airplane Comp 2 (LoN)|Airplane Comp 2]] (3.7%), [[Airplane Comp 3 (LoN)|Airplane Comp 3]] (3.7%) | ||
|attacks= | |attacks= | ||
{{EnemyInfo/Attack |name_en=Wind |name_jp=ワインド |name_tl=Wind | {{EnemyInfo/Attack |name_en=Wind |name_jp=ワインド |name_tl=Wind | ||
| Line 492: | Line 492: | ||
|airshoes= |shadowshoes= |floatshoes= |statusguard= |superarmor= | |airshoes= |shadowshoes= |floatshoes= |statusguard= |superarmor= | ||
|info= | |info= | ||
|locations= | |locations=[[Signboard Comp (LoN)|Signboard Comp]] (18.5%), [[Sink Area 2]] (11.1%), [[Ancient Ruins Comp 3]] (11.1%), [[Ancient Ruins Comp 4]] (11.1%), [[Digging Tool Comp]] (11.1%), [[Sink Area 1]] (10.4%), [[Sink Area 3]] (10.4%), [[Undernet 5 (LoN)|Undernet 5]] (7.4%), [[Undernet 4 (LoN)|Undernet 4]] (6.9%), [[Airplane Comp 1 (LoN)|Airplane Comp 1]] (3.7%), [[Ancient Ruins Comp 1]] (3.7%), [[Ancient Ruins Comp 2]] (3.7%) | ||
|attacks= | |attacks= | ||
{{EnemyInfo/Attack |name_en=Wind |name_jp=ワインド |name_tl=Wind | {{EnemyInfo/Attack |name_en=Wind |name_jp=ワインド |name_tl=Wind | ||
| Line 510: | Line 510: | ||
|hp=180 |element=none | |hp=180 |element=none | ||
|airshoes= |shadowshoes= |floatshoes= |statusguard= |superarmor= | |airshoes= |shadowshoes= |floatshoes= |statusguard= |superarmor= | ||
|info= | |info=Unused version of Heavy. | ||
|locations= | |locations=Does not appear in any battles. | ||
|attacks= | |attacks= | ||
{{EnemyInfo/Attack |name_en=Wind |name_jp=ワインド |name_tl=Wind | {{EnemyInfo/Attack |name_en=Wind |name_jp=ワインド |name_tl=Wind | ||
| Line 530: | Line 530: | ||
|airshoes= |shadowshoes= |floatshoes= |statusguard= |superarmor= | |airshoes= |shadowshoes= |floatshoes= |statusguard= |superarmor= | ||
|info= | |info= | ||
|locations= | |locations=[[Undernet 6 (LoN)|Undernet 6]] (7.4%), [[Undernet 7 (LoN)|Undernet 7]] (7.4%), [[Atlampia Area 1]] (7.4%), [[Atlampia Area 2]] (7.4%), [[Atlampia Area 3]] (7.4%) | ||
|attacks= | |attacks= | ||
{{EnemyInfo/Attack |name_en=Wind |name_jp=ワインド |name_tl=Wind | {{EnemyInfo/Attack |name_en=Wind |name_jp=ワインド |name_tl=Wind | ||
| Line 550: | Line 550: | ||
|airshoes= |shadowshoes= |floatshoes= |statusguard= |superarmor= | |airshoes= |shadowshoes= |floatshoes= |statusguard= |superarmor= | ||
|info= | |info= | ||
|locations= | |locations=[[Departure Counter Comp]] (33.3%), [[Seat Comp (LoN)|Seat Comp]] (33.3%), [[Undernet 1 (LoN)|Undernet 1]] (24.2%), [[Undernet 2 (LoN)|Undernet 2]] (14.8%), [[Undernet 3 (LoN)|Undernet 3]] (14.8%), [[Cart Comp]] (7.4%), [[Pudding Stand Comp]] (7.4%), [[Luxury Seat Comp]] (3.7%), [[Odd Bronze Statue Comp]] (3.7%), [[Exhibit Bronze Statue Comp]] (3.7%) | ||
|attacks= | |attacks= | ||
{{EnemyInfo/Attack |name_en=TankCannon |name_jp=センシャホウ |name_tl=Tank Gun | {{EnemyInfo/Attack |name_en=TankCannon |name_jp=センシャホウ |name_tl=Tank Gun | ||
| Line 569: | Line 569: | ||
|airshoes= |shadowshoes= |floatshoes= |statusguard= |superarmor= | |airshoes= |shadowshoes= |floatshoes= |statusguard= |superarmor= | ||
|info= | |info= | ||
|locations= | |locations=[[Signboard Comp (LoN)|Signboard Comp]] (51.9%), [[Sink Area 2]] (40.7%), [[Sink Area 3]] (38.0%), [[Sink Area 1]] (27.7%) | ||
|attacks= | |attacks= | ||
{{EnemyInfo/Attack |name_en=TankCannon |name_jp=センシャホウ |name_tl=Tank Gun | {{EnemyInfo/Attack |name_en=TankCannon |name_jp=センシャホウ |name_tl=Tank Gun | ||
| Line 588: | Line 588: | ||
|airshoes= |shadowshoes= |floatshoes= |statusguard= |superarmor= | |airshoes= |shadowshoes= |floatshoes= |statusguard= |superarmor= | ||
|info= | |info= | ||
|locations= | |locations=[[Ancient Ruins Comp 5]] (18.5%), [[Ancient Ruins Comp 6]] (18.5%) | ||
|attacks= | |attacks= | ||
{{EnemyInfo/Attack |name_en=TankCannon |name_jp=センシャホウ |name_tl=Tank Gun | {{EnemyInfo/Attack |name_en=TankCannon |name_jp=センシャホウ |name_tl=Tank Gun | ||
| Line 607: | Line 607: | ||
|airshoes= |shadowshoes= |floatshoes= |statusguard= |superarmor= | |airshoes= |shadowshoes= |floatshoes= |statusguard= |superarmor= | ||
|info= | |info= | ||
|locations= | |locations=[[Undernet 6 (LoN)|Undernet 6]] (7.4%), [[Undernet 7 (LoN)|Undernet 7]] (7.4%), [[Ancient Under Area 1]] (7.4%), [[Ancient Under Area 2]] (7.4%) | ||
|attacks= | |attacks= | ||
{{EnemyInfo/Attack |name_en=TankCannon |name_jp=センシャホウ |name_tl=Tank Gun | {{EnemyInfo/Attack |name_en=TankCannon |name_jp=センシャホウ |name_tl=Tank Gun | ||
| Line 627: | Line 627: | ||
|airshoes= |shadowshoes= |floatshoes= |statusguard= |superarmor= | |airshoes= |shadowshoes= |floatshoes= |statusguard= |superarmor= | ||
|info= | |info= | ||
|locations= | |locations=[[Luxury Seat Comp]] (20.4%), [[Cart Comp]] (16.7%), [[Odd Bronze Statue Comp]] (13.0%), [[Exhibit Bronze Statue Comp]] (13.0%), [[Undernet 2 (LoN)|Undernet 2]] (11.1%), [[Undernet 3 (LoN)|Undernet 3]] (11.1%) | ||
|attacks= | |attacks= | ||
{{EnemyInfo/Attack |name_en=Charge |name_jp=噛み付き |name_tl=Bite | {{EnemyInfo/Attack |name_en=Charge |name_jp=噛み付き |name_tl=Bite | ||
| Line 646: | Line 646: | ||
|airshoes= |shadowshoes= |floatshoes= |statusguard= |superarmor= | |airshoes= |shadowshoes= |floatshoes= |statusguard= |superarmor= | ||
|info= | |info= | ||
|locations= | |locations=[[Ancient Ruins Comp 1]] (14.8%), [[Ancient Ruins Comp 2]] (14.8%), [[Ancient Ruins Comp 3]] (11.1%), [[Ancient Ruins Comp 4]] (11.1%), [[Digging Tool Comp]] (11.1%) | ||
|attacks= | |attacks= | ||
{{EnemyInfo/Attack |name_en=Charge |name_jp=噛み付き |name_tl=Bite | {{EnemyInfo/Attack |name_en=Charge |name_jp=噛み付き |name_tl=Bite | ||
| Line 665: | Line 665: | ||
|airshoes= |shadowshoes= |floatshoes= |statusguard= |superarmor= | |airshoes= |shadowshoes= |floatshoes= |statusguard= |superarmor= | ||
|info= | |info= | ||
|locations= | |locations=[[Ancient Ruins Comp 5]] (11.1%), [[Ancient Ruins Comp 6]] (11.1%) | ||
|attacks= | |attacks= | ||
{{EnemyInfo/Attack |name_en=Charge |name_jp=噛み付き |name_tl=Bite | {{EnemyInfo/Attack |name_en=Charge |name_jp=噛み付き |name_tl=Bite | ||
| Line 684: | Line 684: | ||
|airshoes= |shadowshoes= |floatshoes= |statusguard= |superarmor= | |airshoes= |shadowshoes= |floatshoes= |statusguard= |superarmor= | ||
|info= | |info= | ||
|locations= | |locations=[[Ancient Under Area 1]] (11.1%), [[Ancient Under Area 2]] (11.1%) | ||
|attacks= | |attacks= | ||
{{EnemyInfo/Attack |name_en=Charge |name_jp=噛み付き |name_tl=Bite | {{EnemyInfo/Attack |name_en=Charge |name_jp=噛み付き |name_tl=Bite | ||
| Line 704: | Line 704: | ||
|airshoes= |shadowshoes= |floatshoes= |statusguard= |superarmor= | |airshoes= |shadowshoes= |floatshoes= |statusguard= |superarmor= | ||
|info= | |info= | ||
|locations= | |locations=[[Undernet 2 (LoN)|Undernet 2]] (7.4%), [[Undernet 3 (LoN)|Undernet 3]] (7.4%), [[Departure Counter Comp]] (7.4%), [[Seat Comp (LoN)|Seat Comp]] (7.4%), [[Undernet 1 (LoN)|Undernet 1]] (6.9%), [[Airplane Comp 1 (LoN)|Airplane Comp 1]] (3.7%), [[Airplane Comp 2 (LoN)|Airplane Comp 2]] (3.7%), [[Airplane Comp 3 (LoN)|Airplane Comp 3]] (3.7%) | ||
|attacks= | |attacks= | ||
{{EnemyInfo/Attack |name_en=Wind |name_jp=トップウ |name_tl=Toppuu | {{EnemyInfo/Attack |name_en=Wind |name_jp=トップウ |name_tl=Toppuu | ||
| Line 721: | Line 721: | ||
|airshoes= |shadowshoes= |floatshoes= |statusguard= |superarmor= | |airshoes= |shadowshoes= |floatshoes= |statusguard= |superarmor= | ||
|info= | |info= | ||
|locations= | |locations=[[Museum Comp 3]] (11.1%), [[Museum Comp 4]] (11.1%), [[Tourist Map Comp]] (7.4%), [[Att Area 1]] (3.7%), [[Att Area 2]] (3.7%), [[Museum Comp 1]] (3.7%), [[Museum Comp 2]] (3.7%), [[Pudding Stand Comp]] (3.7%), [[Fossil Comp]] (3.7%), [[Picture Frame Comp]] (3.7%) | ||
|attacks= | |attacks= | ||
{{EnemyInfo/Attack |name_en=Fan |name_jp=スイコミ |name_tl=Suikomi | {{EnemyInfo/Attack |name_en=Fan |name_jp=スイコミ |name_tl=Suikomi | ||
| Line 738: | Line 738: | ||
|airshoes= |shadowshoes= |floatshoes= |statusguard= |superarmor= | |airshoes= |shadowshoes= |floatshoes= |statusguard= |superarmor= | ||
|info= | |info= | ||
|locations= | |locations=[[Signboard Comp (LoN)|Signboard Comp]] (7.4%), [[Sink Area 1]] (6.9%), [[Sink Area 2]] (3.7%), [[Ancient Ruins Comp 3]] (3.7%), [[Ancient Ruins Comp 4]] (3.7%), [[Ancient Ruins Comp 5]] (3.7%), [[Ancient Ruins Comp 6]] (3.7%), [[Trojan Comp 3]] (3.7%), [[Digging Tool Comp]] (3.7%), [[Sink Area 3]] (3.5%) | ||
|attacks= | |attacks= | ||
{{EnemyInfo/Attack |name_en=Wind |name_jp=トップウ |name_tl=Toppuu | {{EnemyInfo/Attack |name_en=Wind |name_jp=トップウ |name_tl=Toppuu | ||
| Line 755: | Line 755: | ||
|airshoes= |shadowshoes= |floatshoes= |statusguard= |superarmor= | |airshoes= |shadowshoes= |floatshoes= |statusguard= |superarmor= | ||
|info= | |info= | ||
|locations= | |locations=[[Undernet 6 (LoN)|Undernet 6]] (3.7%), [[Undernet 7 (LoN)|Undernet 7]] (3.7%), [[Atlampia Area 1]] (3.7%), [[Atlampia Area 2]] (3.7%), [[Atlampia Area 3]] (3.7%), [[Ancient Under Area 1]] (3.7%), [[Ancient Under Area 2]] (3.7%), [[SciLab Core Comp 1]] (3.7%), [[SciLab Core Comp 2]] (3.7%) | ||
|attacks= | |attacks= | ||
{{EnemyInfo/Attack |name_en=Fan |name_jp=スイコミ |name_tl=Suikomi | {{EnemyInfo/Attack |name_en=Fan |name_jp=スイコミ |name_tl=Suikomi | ||
| Line 773: | Line 773: | ||
|airshoes= |shadowshoes= |floatshoes= |statusguard= |superarmor= | |airshoes= |shadowshoes= |floatshoes= |statusguard= |superarmor= | ||
|info= | |info= | ||
|locations= | |locations=[[Lion Dog Comp]] (31.5%), [[Government Area 1 (LoN)|Government Area 1]] (27.7%), [[Government Area 3 (LoN)|Government Area 3]] (24.2%), [[Pudding Stand Comp]] (22.2%), [[Government Area 2 (LoN)|Government Area 2]] (22.2%), [[Cart Comp]] (14.8%), [[Luxury Seat Comp]] (11.1%), [[Odd Bronze Statue Comp]] (11.1%), [[Exhibit Bronze Statue Comp]] (11.1%), [[Shrine Comp 1]] (7.4%) | ||
|attacks= | |attacks= | ||
{{EnemyInfo/Attack |name_en=Hell's Burner |name_jp=ダルストブレス |name_tl=Darusuto Breath | {{EnemyInfo/Attack |name_en=Hell's Burner |name_jp=ダルストブレス |name_tl=Darusuto Breath | ||
| Line 792: | Line 792: | ||
|airshoes= |shadowshoes= |floatshoes= |statusguard= |superarmor= | |airshoes= |shadowshoes= |floatshoes= |statusguard= |superarmor= | ||
|info= | |info= | ||
|locations= | |locations=[[Att Area 1]] (22.2%), [[Att Area 3]] (20.7%), [[Att Area 2]] (18.5%), [[Fossil Comp]] (11.1%), [[Picture Frame Comp]] (11.1%), [[Undernet 5 (LoN)|Undernet 5]] (3.7%), [[Pudding Stand Comp]] (3.7%), [[Undernet 4 (LoN)|Undernet 4]] (3.5%) | ||
|attacks= | |attacks= | ||
{{EnemyInfo/Attack |name_en=Hell's Burner |name_jp=ダルストブレス |name_tl=Darusuto Breath | {{EnemyInfo/Attack |name_en=Hell's Burner |name_jp=ダルストブレス |name_tl=Darusuto Breath | ||
| Line 811: | Line 811: | ||
|airshoes= |shadowshoes= |floatshoes= |statusguard= |superarmor= | |airshoes= |shadowshoes= |floatshoes= |statusguard= |superarmor= | ||
|info= | |info= | ||
|locations= | |locations=[[SciLab Core Comp 3]] (37.0%), [[SciLab Core Comp 4]] (37.0%), [[Trojan Comp 4]] (29.6%), [[SciLab Core Comp 1]] (18.5%), [[SciLab Core Comp 2]] (18.5%), [[Trojan Comp 5]] (7.4%), [[Research Tool Comp]] (7.4%) | ||
|attacks= | |attacks= | ||
{{EnemyInfo/Attack |name_en=Hell's Burner |name_jp=ダルストブレス |name_tl=Darusuto Breath | {{EnemyInfo/Attack |name_en=Hell's Burner |name_jp=ダルストブレス |name_tl=Darusuto Breath | ||
| Line 829: | Line 829: | ||
|airshoes= |shadowshoes= |floatshoes= |statusguard= |superarmor= | |airshoes= |shadowshoes= |floatshoes= |statusguard= |superarmor= | ||
|info= | |info= | ||
|locations= | |locations=[[Undernet 6 (LoN)|Undernet 6]] (7.4%), [[Undernet 7 (LoN)|Undernet 7]] (7.4%), [[Ancient Under Area 1]] (7.4%), [[Ancient Under Area 2]] (7.4%) | ||
|attacks= | |attacks= | ||
{{EnemyInfo/Attack |name_en=Hell's Burner |name_jp=ダルストブレス |name_tl=Darusuto Breath | {{EnemyInfo/Attack |name_en=Hell's Burner |name_jp=ダルストブレス |name_tl=Darusuto Breath | ||
| Line 849: | Line 849: | ||
|airshoes= |shadowshoes= |floatshoes= |statusguard= |superarmor= | |airshoes= |shadowshoes= |floatshoes= |statusguard= |superarmor= | ||
|info= | |info= | ||
|locations= | |locations=[[Shrine Comp 1]] (29.6%), [[Airplane Comp 1 (LoN)|Airplane Comp 1]] (25.9%), [[Airplane Comp 2 (LoN)|Airplane Comp 2]] (14.8%), [[Airplane Comp 3 (LoN)|Airplane Comp 3]] (14.8%), [[Airplane Comp 4 (LoN)|Airplane Comp 4]] (14.8%), [[Airplane Comp 5 (LoN)|Airplane Comp 5]] (14.8%), [[Shrine Comp 2]] (7.4%), [[Shrine Comp 3]] (7.4%) | ||
|attacks= | |attacks= | ||
{{EnemyInfo/Attack |name_en=FireHit |name_jp=ファイアパンチ |name_tl=Fire Punch | {{EnemyInfo/Attack |name_en=FireHit |name_jp=ファイアパンチ |name_tl=Fire Punch | ||
| Line 868: | Line 868: | ||
|airshoes= |shadowshoes= |floatshoes= |statusguard= |superarmor= | |airshoes= |shadowshoes= |floatshoes= |statusguard= |superarmor= | ||
|info= | |info= | ||
|locations= | |locations=[[Sink Area 2]] (25.9%), [[Sink Area 3]] (24.2%), [[Sink Area 1]] (20.7%), [[Signboard Comp (LoN)|Signboard Comp]] (14.8%), [[Undernet 5 (LoN)|Undernet 5]] (3.7%), [[Ancient Ruins Comp 1]] (3.7%), [[Ancient Ruins Comp 2]] (3.7%), [[Ancient Ruins Comp 3]] (3.7%), [[Ancient Ruins Comp 4]] (3.7%), [[Digging Tool Comp]] (3.7%), [[Undernet 4 (LoN)|Undernet 4]] (3.5%) | ||
|attacks= | |attacks= | ||
{{EnemyInfo/Attack |name_en=FireHit |name_jp=ファイアパンチ |name_tl=Fire Punch | {{EnemyInfo/Attack |name_en=FireHit |name_jp=ファイアパンチ |name_tl=Fire Punch | ||
| Line 887: | Line 887: | ||
|airshoes= |shadowshoes= |floatshoes= |statusguard= |superarmor= | |airshoes= |shadowshoes= |floatshoes= |statusguard= |superarmor= | ||
|info= | |info= | ||
|locations= | |locations=[[Trojan Comp 4]] (29.6%), [[SciLab Core Comp 1]] (25.9%), [[SciLab Core Comp 2]] (25.9%), [[SciLab Core Comp 3]] (18.5%), [[SciLab Core Comp 4]] (18.5%), [[Trojan Comp 5]] (3.7%), [[Research Tool Comp]] (3.7%) | ||
|attacks= | |attacks= | ||
{{EnemyInfo/Attack |name_en=FireHit |name_jp=ファイアパンチ |name_tl=Fire Punch | {{EnemyInfo/Attack |name_en=FireHit |name_jp=ファイアパンチ |name_tl=Fire Punch | ||
| Line 905: | Line 905: | ||
|airshoes= |shadowshoes= |floatshoes= |statusguard= |superarmor= | |airshoes= |shadowshoes= |floatshoes= |statusguard= |superarmor= | ||
|info= | |info= | ||
|locations= | |locations=[[Undernet 6 (LoN)|Undernet 6]] (7.4%), [[Undernet 7 (LoN)|Undernet 7]] (7.4%), [[Atlampia Area 1]] (7.4%), [[Atlampia Area 2]] (7.4%), [[Atlampia Area 3]] (7.4%), [[Ancient Under Area 1]] (3.7%) | ||
|attacks= | |attacks= | ||
{{EnemyInfo/Attack |name_en=FireHit |name_jp=ファイアパンチ |name_tl=Fire Punch | {{EnemyInfo/Attack |name_en=FireHit |name_jp=ファイアパンチ |name_tl=Fire Punch | ||
| Line 925: | Line 925: | ||
|airshoes= |shadowshoes= |floatshoes= |statusguard= |superarmor= | |airshoes= |shadowshoes= |floatshoes= |statusguard= |superarmor= | ||
|info= | |info= | ||
|locations= | |locations=[[Airplane Comp 4 (LoN)|Airplane Comp 4]] (18.5%), [[Airplane Comp 5 (LoN)|Airplane Comp 5]] (18.5%), [[Undernet 2 (LoN)|Undernet 2]] (11.1%), [[Undernet 3 (LoN)|Undernet 3]] (11.1%), [[Departure Counter Comp]] (11.1%), [[Seat Comp (LoN)|Seat Comp]] (11.1%), [[Undernet 1 (LoN)|Undernet 1]] (10.4%), [[Airplane Comp 3 (LoN)|Airplane Comp 3]] (3.7%) | ||
|attacks= | |attacks= | ||
{{EnemyInfo/Attack |name_en=FlameTower |name_jp=フレイムタワー |name_tl=Flame Tower | {{EnemyInfo/Attack |name_en=FlameTower |name_jp=フレイムタワー |name_tl=Flame Tower | ||
| Line 944: | Line 944: | ||
|airshoes= |shadowshoes= |floatshoes= |statusguard= |superarmor= | |airshoes= |shadowshoes= |floatshoes= |statusguard= |superarmor= | ||
|info= | |info= | ||
|locations= | |locations=[[Tourist Map Comp]] (27.8%), [[Undernet 5 (LoN)|Undernet 5]] (11.1%), [[Undernet 4 (LoN)|Undernet 4]] (10.4%) | ||
|attacks= | |attacks= | ||
{{EnemyInfo/Attack |name_en=FlameTower |name_jp=フレイムタワー |name_tl=Flame Tower | {{EnemyInfo/Attack |name_en=FlameTower |name_jp=フレイムタワー |name_tl=Flame Tower | ||
| Line 963: | Line 963: | ||
|airshoes= |shadowshoes= |floatshoes= |statusguard= |superarmor= | |airshoes= |shadowshoes= |floatshoes= |statusguard= |superarmor= | ||
|info= | |info= | ||
|locations= | |locations=[[Trojan Comp 4]] (22.2%), [[SciLab Core Comp 1]] (18.5%), [[SciLab Core Comp 2]] (18.5%), [[SciLab Core Comp 3]] (14.8%), [[SciLab Core Comp 4]] (14.8%), [[Trojan Comp 5]] (3.7%), [[Research Tool Comp]] (3.7%) | ||
|attacks= | |attacks= | ||
{{EnemyInfo/Attack |name_en=FlameTower |name_jp=フレイムタワー |name_tl=Flame Tower | {{EnemyInfo/Attack |name_en=FlameTower |name_jp=フレイムタワー |name_tl=Flame Tower | ||
| Line 982: | Line 982: | ||
|airshoes= |shadowshoes= |floatshoes= |statusguard= |superarmor= | |airshoes= |shadowshoes= |floatshoes= |statusguard= |superarmor= | ||
|info= | |info= | ||
|locations= | |locations=[[Undernet 6 (LoN)|Undernet 6]] (7.4%), [[Undernet 7 (LoN)|Undernet 7]] (7.4%), [[Ancient Under Area 1]] (3.7%), [[Ancient Under Area 2]] (3.7%) | ||
|attacks= | |attacks= | ||
{{EnemyInfo/Attack |name_en=FlameTower |name_jp=フレイムタワー |name_tl=Flame Tower | {{EnemyInfo/Attack |name_en=FlameTower |name_jp=フレイムタワー |name_tl=Flame Tower | ||
| Line 1,002: | Line 1,002: | ||
|airshoes= |shadowshoes= |floatshoes= |statusguard= |superarmor= | |airshoes= |shadowshoes= |floatshoes= |statusguard= |superarmor= | ||
|info= | |info= | ||
|locations= | |locations=[[Shrine Comp 2]] (24.1%), [[Shrine Comp 3]] (24.1%), [[Shrine Comp 1]] (18.5%) | ||
|attacks= | |attacks= | ||
{{EnemyInfo/Attack |name_en=AquaTower |name_jp=アクアタワー |name_tl=Aqua Tower | {{EnemyInfo/Attack |name_en=AquaTower |name_jp=アクアタワー |name_tl=Aqua Tower | ||
| Line 1,021: | Line 1,021: | ||
|airshoes= |shadowshoes= |floatshoes= |statusguard= |superarmor= | |airshoes= |shadowshoes= |floatshoes= |statusguard= |superarmor= | ||
|info= | |info= | ||
|locations= | |locations=[[Tourist Map Comp]] (20.4%), [[Undernet 5 (LoN)|Undernet 5]] (11.1%), [[Undernet 4 (LoN)|Undernet 4]] (10.4%) | ||
|attacks= | |attacks= | ||
{{EnemyInfo/Attack |name_en=AquaTower |name_jp=アクアタワー |name_tl=Aqua Tower | {{EnemyInfo/Attack |name_en=AquaTower |name_jp=アクアタワー |name_tl=Aqua Tower | ||
| Line 1,040: | Line 1,040: | ||
|airshoes= |shadowshoes= |floatshoes= |statusguard= |superarmor= | |airshoes= |shadowshoes= |floatshoes= |statusguard= |superarmor= | ||
|info= | |info= | ||
|locations= | |locations=[[Trojan Comp 2]] (22.2%), [[Trojan Comp 5]] (7.4%), [[Research Tool Comp]] (7.4%) | ||
|attacks= | |attacks= | ||
{{EnemyInfo/Attack |name_en=AquaTower |name_jp=アクアタワー |name_tl=Aqua Tower | {{EnemyInfo/Attack |name_en=AquaTower |name_jp=アクアタワー |name_tl=Aqua Tower | ||
| Line 1,059: | Line 1,059: | ||
|airshoes= |shadowshoes= |floatshoes= |statusguard= |superarmor= | |airshoes= |shadowshoes= |floatshoes= |statusguard= |superarmor= | ||
|info= | |info= | ||
|locations= | |locations=[[Atlampia Area 1]] (11.1%), [[Atlampia Area 2]] (11.1%), [[Atlampia Area 3]] (11.1%), [[Ancient Under Area 1]] (3.7%), [[Ancient Under Area 2]] (3.7%) | ||
|attacks= | |attacks= | ||
{{EnemyInfo/Attack |name_en=AquaTower |name_jp=アクアタワー |name_tl=Aqua Tower | {{EnemyInfo/Attack |name_en=AquaTower |name_jp=アクアタワー |name_tl=Aqua Tower | ||
| Line 1,079: | Line 1,079: | ||
|airshoes= |shadowshoes= |floatshoes= |statusguard= |superarmor= | |airshoes= |shadowshoes= |floatshoes= |statusguard= |superarmor= | ||
|info= | |info= | ||
|locations= | |locations=[[Shrine Comp 2]] (16.7%), [[Shrine Comp 3]] (16.7%) | ||
|attacks= | |attacks= | ||
{{EnemyInfo/Attack |name_en=AquaWhirl |name_jp=アクアワール |name_tl=Aqua Whirl | {{EnemyInfo/Attack |name_en=AquaWhirl |name_jp=アクアワール |name_tl=Aqua Whirl | ||
| Line 1,098: | Line 1,098: | ||
|airshoes= |shadowshoes= |floatshoes= |statusguard= |superarmor= | |airshoes= |shadowshoes= |floatshoes= |statusguard= |superarmor= | ||
|info= | |info= | ||
|locations= | |locations=[[Museum Comp 1]] (22.2%), [[Museum Comp 2]] (22.2%), [[Museum Comp 3]] (7.4%), [[Museum Comp 4]] (7.4%), [[Tourist Map Comp]] (7.4%), [[Undernet 5 (LoN)|Undernet 5]] (3.7%), [[Undernet 4 (LoN)|Undernet 4]] (3.5%) | ||
|attacks= | |attacks= | ||
{{EnemyInfo/Attack |name_en=AquaWhirl |name_jp=アクアワール |name_tl=Aqua Whirl | {{EnemyInfo/Attack |name_en=AquaWhirl |name_jp=アクアワール |name_tl=Aqua Whirl | ||
| Line 1,117: | Line 1,117: | ||
|airshoes= |shadowshoes= |floatshoes= |statusguard= |superarmor= | |airshoes= |shadowshoes= |floatshoes= |statusguard= |superarmor= | ||
|info= | |info= | ||
|locations= | |locations=[[Trojan Comp 2]] (35.2%), [[Trojan Comp 5]] (14.8%), [[Research Tool Comp]] (14.8%) | ||
|attacks= | |attacks= | ||
{{EnemyInfo/Attack |name_en=AquaWhirl |name_jp=アクアワール |name_tl=Aqua Whirl | {{EnemyInfo/Attack |name_en=AquaWhirl |name_jp=アクアワール |name_tl=Aqua Whirl | ||
| Line 1,136: | Line 1,136: | ||
|airshoes= |shadowshoes= |floatshoes= |statusguard= |superarmor= | |airshoes= |shadowshoes= |floatshoes= |statusguard= |superarmor= | ||
|info= | |info= | ||
|locations= | |locations=[[Atlampia Area 1]] (11.1%), [[Atlampia Area 2]] (11.1%), [[Atlampia Area 3]] (11.1%), [[Ancient Under Area 1]] (3.7%), [[Ancient Under Area 2]] (3.7%) | ||
|attacks= | |attacks= | ||
{{EnemyInfo/Attack |name_en=AquaWhirl |name_jp=アクアワール |name_tl=Aqua Whirl | {{EnemyInfo/Attack |name_en=AquaWhirl |name_jp=アクアワール |name_tl=Aqua Whirl | ||
| Line 1,156: | Line 1,156: | ||
|airshoes= |shadowshoes= |floatshoes= |statusguard= |superarmor= | |airshoes= |shadowshoes= |floatshoes= |statusguard= |superarmor= | ||
|info= | |info= | ||
|locations= | |locations=[[Shrine Comp 2]] (18.5%), [[Shrine Comp 3]] (18.5%), [[Shrine Comp 1]] (3.7%) | ||
|attacks= | |attacks= | ||
{{EnemyInfo/Attack |name_en=WideShot |name_jp=ワイドショット |name_tl=Wide Shot | {{EnemyInfo/Attack |name_en=WideShot |name_jp=ワイドショット |name_tl=Wide Shot | ||
| Line 1,175: | Line 1,175: | ||
|airshoes= |shadowshoes= |floatshoes= |statusguard= |superarmor= | |airshoes= |shadowshoes= |floatshoes= |statusguard= |superarmor= | ||
|info= | |info= | ||
|locations= | |locations=[[Museum Comp 1]] (22.2%), [[Museum Comp 2]] (22.2%), [[Museum Comp 3]] (9.3%), [[Museum Comp 4]] (9.3%), [[Tourist Map Comp]] (9.3%), [[Undernet 5 (LoN)|Undernet 5]] (3.7%), [[Undernet 4 (LoN)|Undernet 4]] (3.5%) | ||
|attacks= | |attacks= | ||
{{EnemyInfo/Attack |name_en=WideShot |name_jp=ワイドショット |name_tl=Wide Shot | {{EnemyInfo/Attack |name_en=WideShot |name_jp=ワイドショット |name_tl=Wide Shot | ||
| Line 1,194: | Line 1,194: | ||
|airshoes= |shadowshoes= |floatshoes= |statusguard= |superarmor= | |airshoes= |shadowshoes= |floatshoes= |statusguard= |superarmor= | ||
|info= | |info= | ||
|locations= | |locations=[[Trojan Comp 2]] (24.1%), [[Trojan Comp 5]] (7.4%), [[Research Tool Comp]] (7.4%) | ||
|attacks= | |attacks= | ||
{{EnemyInfo/Attack |name_en=WideShot |name_jp=ワイドショット |name_tl=Wide Shot | {{EnemyInfo/Attack |name_en=WideShot |name_jp=ワイドショット |name_tl=Wide Shot | ||
| Line 1,212: | Line 1,212: | ||
|airshoes= |shadowshoes= |floatshoes= |statusguard= |superarmor= | |airshoes= |shadowshoes= |floatshoes= |statusguard= |superarmor= | ||
|info= | |info= | ||
|locations= | |locations=[[Atlampia Area 1]] (7.4%), [[Atlampia Area 2]] (7.4%), [[Atlampia Area 3]] (7.4%), [[Ancient Under Area 1]] (3.7%) | ||
|attacks= | |attacks= | ||
{{EnemyInfo/Attack |name_en=WideShot |name_jp=ワイドショット |name_tl=Wide Shot | {{EnemyInfo/Attack |name_en=WideShot |name_jp=ワイドショット |name_tl=Wide Shot | ||
| Line 1,232: | Line 1,232: | ||
|airshoes= |shadowshoes= |floatshoes= |statusguard= |superarmor= | |airshoes= |shadowshoes= |floatshoes= |statusguard= |superarmor= | ||
|info= | |info= | ||
|locations= | |locations=[[TV Comp (LoN)|TV Comp]] (51.9%), [[SciLab Comp 1]] (38.9%), [[Shrine Gate Comp]] (37.0%), [[Dad's HP]] (33.3%), [[SciLab Comp 3]] (25.9%), [[SciLab Comp 2]] (24.1%), [[Ticket Gate Comp]] (20.4%), [[Government Area 2 (LoN)|Government Area 2]] (18.5%), [[Government Area 3 (LoN)|Government Area 3]] (6.9%), [[Shrine Comp 2]] (3.7%), [[Shrine Comp 3]] (3.7%) | ||
|attacks= | |attacks= | ||
{{EnemyInfo/Attack |name_en=Thunder |name_jp=サンダーボール |name_tl=Thunder Ball | {{EnemyInfo/Attack |name_en=Thunder |name_jp=サンダーボール |name_tl=Thunder Ball | ||
| Line 1,251: | Line 1,251: | ||
|airshoes= |shadowshoes= |floatshoes= |statusguard= |superarmor= | |airshoes= |shadowshoes= |floatshoes= |statusguard= |superarmor= | ||
|info= | |info= | ||
|locations= | |locations=[[Flight Board Comp (LoN)|Flight Board Comp]] (40.7%), [[Airplane Comp 1 (LoN)|Airplane Comp 1]] (22.2%), [[Airplane Comp 2 (LoN)|Airplane Comp 2]] (22.2%), [[Att Area 3]] (17.3%), [[Att Area 1]] (14.8%), [[Airplane Comp 3 (LoN)|Airplane Comp 3]] (14.8%), [[Museum Comp 1]] (14.8%), [[Museum Comp 2]] (14.8%), [[Odd Bronze Statue Comp]] (14.8%), [[Exhibit Bronze Statue Comp]] (14.8%), [[Undernet 5 (LoN)|Undernet 5]] (11.1%), [[Cart Comp]] (11.1%), [[Luxury Seat Comp]] (11.1%), [[Fossil Comp]] (11.1%), [[Picture Frame Comp]] (11.1%), [[Undernet 4 (LoN)|Undernet 4]] (10.4%), [[Att Area 2]] (7.4%), [[Airplane Comp 4 (LoN)|Airplane Comp 4]] (7.4%), [[Airplane Comp 5 (LoN)|Airplane Comp 5]] (7.4%), [[Museum Comp 3]] (7.4%), [[Museum Comp 4]] (7.4%), [[Sink Area 2]] (3.7%), [[Ancient Ruins Comp 3]] (3.7%), [[Ancient Ruins Comp 4]] (3.7%), [[Pudding Stand Comp]] (3.7%), [[Digging Tool Comp]] (3.7%), [[Sink Area 1]] (3.5%), [[Sink Area 3]] (3.5%) | ||
|attacks= | |attacks= | ||
{{EnemyInfo/Attack |name_en=Thunder |name_jp=サンダーボール |name_tl=Thunder Ball | {{EnemyInfo/Attack |name_en=Thunder |name_jp=サンダーボール |name_tl=Thunder Ball | ||
| Line 1,270: | Line 1,270: | ||
|airshoes= |shadowshoes= |floatshoes= |statusguard= |superarmor= | |airshoes= |shadowshoes= |floatshoes= |statusguard= |superarmor= | ||
|info= | |info= | ||
|locations= | |locations=[[Trojan Comp 1]] (40.7%), [[Trojan Comp 5]] (11.1%), [[Research Tool Comp]] (11.1%), [[Ancient Ruins Comp 1]] (7.4%), [[Ancient Ruins Comp 2]] (7.4%), [[SciLab Core Comp 3]] (3.7%), [[SciLab Core Comp 4]] (3.7%) | ||
|attacks= | |attacks= | ||
{{EnemyInfo/Attack |name_en=Thunder |name_jp=サンダーボール |name_tl=Thunder Ball | {{EnemyInfo/Attack |name_en=Thunder |name_jp=サンダーボール |name_tl=Thunder Ball | ||
| Line 1,289: | Line 1,289: | ||
|airshoes= |shadowshoes= |floatshoes= |statusguard= |superarmor= | |airshoes= |shadowshoes= |floatshoes= |statusguard= |superarmor= | ||
|info= | |info= | ||
|locations= | |locations=[[Undernet 6 (LoN)|Undernet 6]] (11.1%), [[Undernet 7 (LoN)|Undernet 7]] (11.1%), [[Atlampia Area 1]] (11.1%), [[Atlampia Area 2]] (11.1%), [[Atlampia Area 3]] (11.1%), [[Ancient Under Area 1]] (3.7%), [[Ancient Under Area 2]] (3.7%) | ||
|attacks= | |attacks= | ||
{{EnemyInfo/Attack |name_en=Thunder |name_jp=サンダーボール |name_tl=Thunder Ball | {{EnemyInfo/Attack |name_en=Thunder |name_jp=サンダーボール |name_tl=Thunder Ball | ||
| Line 1,309: | Line 1,309: | ||
|airshoes= |shadowshoes= |floatshoes= |statusguard= |superarmor= | |airshoes= |shadowshoes= |floatshoes= |statusguard= |superarmor= | ||
|info= | |info= | ||
|locations= | |locations=[[Airplane Comp 4 (LoN)|Airplane Comp 4]] (14.8%), [[Airplane Comp 5 (LoN)|Airplane Comp 5]] (14.8%), [[Airplane Comp 3 (LoN)|Airplane Comp 3]] (3.7%) | ||
|attacks= | |attacks= | ||
{{EnemyInfo/Attack |name_en=ElecPulse |name_jp=エレキパルス |name_tl=Elec Pulse | {{EnemyInfo/Attack |name_en=ElecPulse |name_jp=エレキパルス |name_tl=Elec Pulse | ||
| Line 1,328: | Line 1,328: | ||
|airshoes= |shadowshoes= |floatshoes= |statusguard= |superarmor= | |airshoes= |shadowshoes= |floatshoes= |statusguard= |superarmor= | ||
|info= | |info= | ||
|locations= | |locations=[[Flight Board Comp (LoN)|Flight Board Comp]] (25.9%), [[Museum Comp 1]] (7.4%), [[Museum Comp 2]] (7.4%), [[Ancient Ruins Comp 1]] (7.4%), [[Ancient Ruins Comp 2]] (7.4%), [[Ancient Ruins Comp 3]] (7.4%), [[Ancient Ruins Comp 4]] (7.4%), [[Digging Tool Comp]] (7.4%), [[Museum Comp 3]] (3.7%), [[Museum Comp 4]] (3.7%) | ||
|attacks= | |attacks= | ||
{{EnemyInfo/Attack |name_en=ElecPulse |name_jp=エレキパルス |name_tl=Elec Pulse | {{EnemyInfo/Attack |name_en=ElecPulse |name_jp=エレキパルス |name_tl=Elec Pulse | ||
| Line 1,347: | Line 1,347: | ||
|airshoes= |shadowshoes= |floatshoes= |statusguard= |superarmor= | |airshoes= |shadowshoes= |floatshoes= |statusguard= |superarmor= | ||
|info= | |info= | ||
|locations= | |locations=[[Trojan Comp 1]] (11.1%) | ||
|attacks= | |attacks= | ||
{{EnemyInfo/Attack |name_en=ElecPulse |name_jp=エレキパルス |name_tl=Elec Pulse | {{EnemyInfo/Attack |name_en=ElecPulse |name_jp=エレキパルス |name_tl=Elec Pulse | ||
| Line 1,365: | Line 1,365: | ||
|airshoes= |shadowshoes= |floatshoes= |statusguard= |superarmor= | |airshoes= |shadowshoes= |floatshoes= |statusguard= |superarmor= | ||
|info= | |info= | ||
|locations= | |locations=[[Ancient Under Area 2]] (18.5%), [[Undernet 6 (LoN)|Undernet 6]] (7.4%), [[Undernet 7 (LoN)|Undernet 7]] (7.4%), [[Ancient Under Area 1]] (7.4%) | ||
|attacks= | |attacks= | ||
{{EnemyInfo/Attack |name_en=ElecPulse |name_jp=エレキパルス |name_tl=Elec Pulse | {{EnemyInfo/Attack |name_en=ElecPulse |name_jp=エレキパルス |name_tl=Elec Pulse | ||
| Line 1,385: | Line 1,385: | ||
|airshoes= |shadowshoes= |floatshoes= |statusguard= |superarmor= | |airshoes= |shadowshoes= |floatshoes= |statusguard= |superarmor= | ||
|info= | |info= | ||
|locations= | |locations=[[SciLab Comp 3]] (16.7%), [[Piano Comp (LoN)|Piano Comp]] (16.7%), [[Shrine Gate Comp]] (14.8%), [[SciLab Comp 2]] (13.0%), [[Dad's HP]] (13.0%) | ||
|attacks= | |attacks= | ||
{{EnemyInfo/Attack |name_en=ElecReel |name_jp=エレキリール |name_tl=Elec Reel | {{EnemyInfo/Attack |name_en=ElecReel |name_jp=エレキリール |name_tl=Elec Reel | ||
| Line 1,404: | Line 1,404: | ||
|airshoes= |shadowshoes= |floatshoes= |statusguard= |superarmor= | |airshoes= |shadowshoes= |floatshoes= |statusguard= |superarmor= | ||
|info= | |info= | ||
|locations= | |locations=[[Flight Board Comp (LoN)|Flight Board Comp]] (22.2%), [[Museum Comp 3]] (20.4%), [[Museum Comp 4]] (20.4%), [[Tourist Map Comp]] (13.0%), [[Undernet 5 (LoN)|Undernet 5]] (7.4%), [[Undernet 4 (LoN)|Undernet 4]] (6.9%) | ||
|attacks= | |attacks= | ||
{{EnemyInfo/Attack |name_en=ElecReel |name_jp=エレキリール |name_tl=Elec Reel | {{EnemyInfo/Attack |name_en=ElecReel |name_jp=エレキリール |name_tl=Elec Reel | ||
| Line 1,423: | Line 1,423: | ||
|airshoes= |shadowshoes= |floatshoes= |statusguard= |superarmor= | |airshoes= |shadowshoes= |floatshoes= |statusguard= |superarmor= | ||
|info= | |info= | ||
|locations= | |locations=[[Trojan Comp 1]] (22.2%), [[SciLab Core Comp 3]] (7.4%), [[SciLab Core Comp 4]] (7.4%), [[Trojan Comp 5]] (3.7%), [[Research Tool Comp]] (3.7%) | ||
|attacks= | |attacks= | ||
{{EnemyInfo/Attack |name_en=ElecReel |name_jp=エレキリール |name_tl=Elec Reel | {{EnemyInfo/Attack |name_en=ElecReel |name_jp=エレキリール |name_tl=Elec Reel | ||
| Line 1,442: | Line 1,442: | ||
|airshoes= |shadowshoes= |floatshoes= |statusguard= |superarmor= | |airshoes= |shadowshoes= |floatshoes= |statusguard= |superarmor= | ||
|info= | |info= | ||
|locations= | |locations=[[Undernet 6 (LoN)|Undernet 6]] (11.1%), [[Undernet 7 (LoN)|Undernet 7]] (11.1%), [[Ancient Under Area 1]] (3.7%), [[Ancient Under Area 2]] (3.7%) | ||
|attacks= | |attacks= | ||
{{EnemyInfo/Attack |name_en=ElecReel |name_jp=エレキリール |name_tl=Elec Reel | {{EnemyInfo/Attack |name_en=ElecReel |name_jp=エレキリール |name_tl=Elec Reel | ||
| Line 1,462: | Line 1,462: | ||
|airshoes= |shadowshoes= |floatshoes= |statusguard= |superarmor= | |airshoes= |shadowshoes= |floatshoes= |statusguard= |superarmor= | ||
|info= | |info= | ||
|locations= | |locations=[[Roadside Tree Comp]] (29.6%), [[Airplane Comp 2 (LoN)|Airplane Comp 2]] (18.5%), [[Airplane Comp 3 (LoN)|Airplane Comp 3]] (18.5%) | ||
|attacks= | |attacks= | ||
{{EnemyInfo/Attack |name_en=Popbomb |name_jp=ポップボム |name_tl=Pop Bomb | {{EnemyInfo/Attack |name_en=Popbomb |name_jp=ポップボム |name_tl=Pop Bomb | ||
| Line 1,481: | Line 1,481: | ||
|airshoes= |shadowshoes= |floatshoes= |statusguard= |superarmor= | |airshoes= |shadowshoes= |floatshoes= |statusguard= |superarmor= | ||
|info= | |info= | ||
|locations= | |locations=[[Fossil Comp]] (37.0%), [[Picture Frame Comp]] (37.0%), [[Att Area 1]] (29.6%), [[Att Area 2]] (18.5%), [[Pudding Stand Comp]] (14.8%), [[Att Area 3]] (13.8%), [[Undernet 5 (LoN)|Undernet 5]] (7.4%), [[Undernet 4 (LoN)|Undernet 4]] (6.9%) | ||
|attacks= | |attacks= | ||
{{EnemyInfo/Attack |name_en=Popbomb |name_jp=ポップボム |name_tl=Pop Bomb | {{EnemyInfo/Attack |name_en=Popbomb |name_jp=ポップボム |name_tl=Pop Bomb | ||
| Line 1,500: | Line 1,500: | ||
|airshoes= |shadowshoes= |floatshoes= |statusguard= |superarmor= | |airshoes= |shadowshoes= |floatshoes= |statusguard= |superarmor= | ||
|info= | |info= | ||
|locations= | |locations=[[Trojan Comp 3]] (25.9%), [[Trojan Comp 5]] (7.4%), [[Research Tool Comp]] (7.4%) | ||
|attacks= | |attacks= | ||
{{EnemyInfo/Attack |name_en=Popbomb |name_jp=ポップボム |name_tl=Pop Bomb | {{EnemyInfo/Attack |name_en=Popbomb |name_jp=ポップボム |name_tl=Pop Bomb | ||
| Line 1,518: | Line 1,518: | ||
|airshoes= |shadowshoes= |floatshoes= |statusguard= |superarmor= | |airshoes= |shadowshoes= |floatshoes= |statusguard= |superarmor= | ||
|info= | |info= | ||
|locations= | |locations=[[Atlampia Area 1]] (14.8%), [[Atlampia Area 2]] (14.8%), [[Atlampia Area 3]] (14.8%), [[Ancient Under Area 1]] (3.7%), [[Ancient Under Area 2]] (3.7%) | ||
|attacks= | |attacks= | ||
{{EnemyInfo/Attack |name_en=Popbomb |name_jp=ポップボム |name_tl=Pop Bomb | {{EnemyInfo/Attack |name_en=Popbomb |name_jp=ポップボム |name_tl=Pop Bomb | ||
| Line 1,538: | Line 1,538: | ||
|airshoes= |shadowshoes= |floatshoes= |statusguard= |superarmor= | |airshoes= |shadowshoes= |floatshoes= |statusguard= |superarmor= | ||
|info= | |info= | ||
|locations= | |locations=[[Roadside Tree Comp]] (29.6%), [[Airplane Comp 2 (LoN)|Airplane Comp 2]] (18.5%), [[Airplane Comp 3 (LoN)|Airplane Comp 3]] (18.5%) | ||
|attacks= | |attacks= | ||
{{EnemyInfo/Attack |name_en=WoodTower |name_jp=ウッディタワー |name_tl=Woody Tower | {{EnemyInfo/Attack |name_en=WoodTower |name_jp=ウッディタワー |name_tl=Woody Tower | ||
| Line 1,557: | Line 1,557: | ||
|airshoes= |shadowshoes= |floatshoes= |statusguard= |superarmor= | |airshoes= |shadowshoes= |floatshoes= |statusguard= |superarmor= | ||
|info= | |info= | ||
|locations= | |locations=[[Att Area 2]] (14.8%), [[Fossil Comp]] (14.8%), [[Picture Frame Comp]] (14.8%), [[Att Area 1]] (11.1%), [[Att Area 3]] (10.4%), [[Pudding Stand Comp]] (7.4%), [[Undernet 5 (LoN)|Undernet 5]] (3.7%), [[Undernet 4 (LoN)|Undernet 4]] (3.5%) | ||
|attacks= | |attacks= | ||
{{EnemyInfo/Attack |name_en=WoodTower |name_jp=ウッディタワー |name_tl=Woody Tower | {{EnemyInfo/Attack |name_en=WoodTower |name_jp=ウッディタワー |name_tl=Woody Tower | ||
| Line 1,576: | Line 1,576: | ||
|airshoes= |shadowshoes= |floatshoes= |statusguard= |superarmor= | |airshoes= |shadowshoes= |floatshoes= |statusguard= |superarmor= | ||
|info= | |info= | ||
|locations= | |locations=[[Trojan Comp 3]] (33.3%), [[Trojan Comp 5]] (7.4%), [[Research Tool Comp]] (7.4%) | ||
|attacks= | |attacks= | ||
{{EnemyInfo/Attack |name_en=WoodTower |name_jp=ウッディタワー |name_tl=Woody Tower | {{EnemyInfo/Attack |name_en=WoodTower |name_jp=ウッディタワー |name_tl=Woody Tower | ||
| Line 1,595: | Line 1,595: | ||
|airshoes= |shadowshoes= |floatshoes= |statusguard= |superarmor= | |airshoes= |shadowshoes= |floatshoes= |statusguard= |superarmor= | ||
|info= | |info= | ||
|locations= | |locations=[[Atlampia Area 1]] (11.1%), [[Atlampia Area 2]] (11.1%), [[Atlampia Area 3]] (11.1%) | ||
|attacks= | |attacks= | ||
{{EnemyInfo/Attack |name_en=WoodTower |name_jp=ウッディタワー |name_tl=Woody Tower | {{EnemyInfo/Attack |name_en=WoodTower |name_jp=ウッディタワー |name_tl=Woody Tower | ||
| Line 1,616: | Line 1,616: | ||
|airshoes= |shadowshoes= |floatshoes= |statusguard= |superarmor= | |airshoes= |shadowshoes= |floatshoes= |statusguard= |superarmor= | ||
|info= | |info= | ||
|locations= | |locations=[[SciLab Comp 3]] (story) | ||
|attacks= | |attacks= | ||
|getdata= | |getdata= | ||
| Line 1,629: | Line 1,629: | ||
|airshoes= |shadowshoes= |floatshoes= |statusguard= |superarmor= | |airshoes= |shadowshoes= |floatshoes= |statusguard= |superarmor= | ||
|info= | |info= | ||
|locations= | |locations=[[ACDC Area 2 (LoN)|ACDC Area 2]] (6.7%) | ||
|attacks= | |attacks= | ||
|getdata= | |getdata= | ||
| Line 1,643: | Line 1,643: | ||
|airshoes= |shadowshoes= |floatshoes= |statusguard= |superarmor= | |airshoes= |shadowshoes= |floatshoes= |statusguard= |superarmor= | ||
|info= | |info= | ||
|locations= | |locations=[[ACDC Area 2 (LoN)|ACDC Area 2]] (6.7%) | ||
|attacks= | |attacks= | ||
|getdata= | |getdata= | ||
| Line 1,657: | Line 1,657: | ||
|airshoes= |shadowshoes= |floatshoes= |statusguard= |superarmor= | |airshoes= |shadowshoes= |floatshoes= |statusguard= |superarmor= | ||
|info= | |info= | ||
|locations= | |locations=[[ACDC Area 2 (LoN)|ACDC Area 2]] (6.7%) | ||
|attacks= | |attacks= | ||
|getdata= | |getdata= | ||
| Line 1,673: | Line 1,673: | ||
|airshoes= |shadowshoes= |floatshoes= |statusguard= |superarmor= | |airshoes= |shadowshoes= |floatshoes= |statusguard= |superarmor= | ||
|info= | |info= | ||
|locations= | |locations=[[Shrine Comp 3]] (story) | ||
|attacks= | |attacks= | ||
|getdata= | |getdata= | ||
| Line 1,686: | Line 1,686: | ||
|airshoes= |shadowshoes= |floatshoes= |statusguard= |superarmor= | |airshoes= |shadowshoes= |floatshoes= |statusguard= |superarmor= | ||
|info= | |info= | ||
|locations= | |locations=[[Government Area 1 (LoN)|Government Area 1]] (6.7%) | ||
|attacks= | |attacks= | ||
|getdata= | |getdata= | ||
| Line 1,700: | Line 1,700: | ||
|airshoes= |shadowshoes= |floatshoes= |statusguard= |superarmor= | |airshoes= |shadowshoes= |floatshoes= |statusguard= |superarmor= | ||
|info= | |info= | ||
|locations= | |locations=[[Government Area 1 (LoN)|Government Area 1]] (6.7%) | ||
|attacks= | |attacks= | ||
|getdata= | |getdata= | ||
| Line 1,714: | Line 1,714: | ||
|airshoes= |shadowshoes= |floatshoes= |statusguard= |superarmor= | |airshoes= |shadowshoes= |floatshoes= |statusguard= |superarmor= | ||
|info= | |info= | ||
|locations= | |locations=[[Government Area 1 (LoN)|Government Area 1]] (6.7%) | ||
|attacks= | |attacks= | ||
|getdata= | |getdata= | ||
| Line 1,730: | Line 1,730: | ||
|airshoes= |shadowshoes= |floatshoes= |statusguard= |superarmor= | |airshoes= |shadowshoes= |floatshoes= |statusguard= |superarmor= | ||
|info= | |info= | ||
|locations= | |locations=[[Undernet 3 (LoN)|Undernet 3]] (story) | ||
|attacks= | |attacks= | ||
|getdata= | |getdata= | ||
| Line 1,743: | Line 1,743: | ||
|airshoes= |shadowshoes= |floatshoes= |statusguard= |superarmor= | |airshoes= |shadowshoes= |floatshoes= |statusguard= |superarmor= | ||
|info= | |info= | ||
|locations= | |locations=[[Undernet 1 (LoN)|Undernet 1]] (6.7%) | ||
|attacks= | |attacks= | ||
|getdata= | |getdata= | ||
| Line 1,757: | Line 1,757: | ||
|airshoes= |shadowshoes= |floatshoes= |statusguard= |superarmor= | |airshoes= |shadowshoes= |floatshoes= |statusguard= |superarmor= | ||
|info= | |info= | ||
|locations= | |locations=[[Undernet 1 (LoN)|Undernet 1]] (6.7%) | ||
|attacks= | |attacks= | ||
|getdata= | |getdata= | ||
| Line 1,771: | Line 1,771: | ||
|airshoes= |shadowshoes= |floatshoes= |statusguard= |superarmor= | |airshoes= |shadowshoes= |floatshoes= |statusguard= |superarmor= | ||
|info= | |info= | ||
|locations= | |locations=[[Undernet 1 (LoN)|Undernet 1]] (6.7%) | ||
|attacks= | |attacks= | ||
|getdata= | |getdata= | ||
| Line 1,787: | Line 1,787: | ||
|airshoes= |shadowshoes= |floatshoes= |statusguard= |superarmor= | |airshoes= |shadowshoes= |floatshoes= |statusguard= |superarmor= | ||
|info= | |info= | ||
|locations= | |locations=[[Airplane Comp 5 (LoN)|Airplane Comp 5]] (story) | ||
|attacks= | |attacks= | ||
|getdata= | |getdata= | ||
| Line 1,800: | Line 1,800: | ||
|airshoes= |shadowshoes= |floatshoes= |statusguard= |superarmor= | |airshoes= |shadowshoes= |floatshoes= |statusguard= |superarmor= | ||
|info= | |info= | ||
|locations= | |locations=[[Government Area 3 (LoN)|Government Area 3]] (6.7%) | ||
|attacks= | |attacks= | ||
|getdata= | |getdata= | ||
| Line 1,814: | Line 1,814: | ||
|airshoes= |shadowshoes= |floatshoes= |statusguard= |superarmor= | |airshoes= |shadowshoes= |floatshoes= |statusguard= |superarmor= | ||
|info= | |info= | ||
|locations= | |locations=[[Government Area 3 (LoN)|Government Area 3]] (6.7%) | ||
|attacks= | |attacks= | ||
|getdata= | |getdata= | ||
| Line 1,828: | Line 1,828: | ||
|airshoes= |shadowshoes= |floatshoes= |statusguard= |superarmor= | |airshoes= |shadowshoes= |floatshoes= |statusguard= |superarmor= | ||
|info= | |info= | ||
|locations= | |locations=[[Government Area 3 (LoN)|Government Area 3]] (6.7%) | ||
|attacks= | |attacks= | ||
|getdata= | |getdata= | ||
| Line 1,844: | Line 1,844: | ||
|airshoes= |shadowshoes= |floatshoes= |statusguard= |superarmor= | |airshoes= |shadowshoes= |floatshoes= |statusguard= |superarmor= | ||
|info= | |info= | ||
|locations= | |locations=NetBattle with Shuichi (Ch. 6) | ||
|attacks= | |attacks= | ||
|getdata= | |getdata= | ||
| Line 1,857: | Line 1,857: | ||
|airshoes= |shadowshoes= |floatshoes= |statusguard= |superarmor= | |airshoes= |shadowshoes= |floatshoes= |statusguard= |superarmor= | ||
|info= | |info= | ||
|locations= | |locations=NetBattle with Shuichi (Ch. 6) | ||
|attacks= | |attacks= | ||
|getdata= | |getdata= | ||
| Line 1,871: | Line 1,871: | ||
|airshoes= |shadowshoes= |floatshoes= |statusguard= |superarmor= | |airshoes= |shadowshoes= |floatshoes= |statusguard= |superarmor= | ||
|info= | |info= | ||
|locations= | |locations=NetBattle with Shuichi (Ch. 7) | ||
|attacks= | |attacks= | ||
|getdata= | |getdata= | ||
| Line 1,885: | Line 1,885: | ||
|airshoes= |shadowshoes= |floatshoes= |statusguard= |superarmor= | |airshoes= |shadowshoes= |floatshoes= |statusguard= |superarmor= | ||
|info= | |info= | ||
|locations= | |locations=NetBattle with Shuichi (Ch. 8) | ||
|attacks= | |attacks= | ||
|getdata= | |getdata= | ||
| Line 1,901: | Line 1,901: | ||
|airshoes= |shadowshoes= |floatshoes= |statusguard= |superarmor= | |airshoes= |shadowshoes= |floatshoes= |statusguard= |superarmor= | ||
|info= | |info= | ||
|locations= | |locations=[[Museum Comp 4]] (story) | ||
|attacks= | |attacks= | ||
|getdata= | |getdata= | ||
| Line 1,914: | Line 1,914: | ||
|airshoes= |shadowshoes= |floatshoes= |statusguard= |superarmor= | |airshoes= |shadowshoes= |floatshoes= |statusguard= |superarmor= | ||
|info= | |info= | ||
|locations= | |locations=[[Att Area 3]] (6.7%) | ||
|attacks= | |attacks= | ||
|getdata= | |getdata= | ||
| Line 1,928: | Line 1,928: | ||
|airshoes= |shadowshoes= |floatshoes= |statusguard= |superarmor= | |airshoes= |shadowshoes= |floatshoes= |statusguard= |superarmor= | ||
|info= | |info= | ||
|locations= | |locations=[[Att Area 3]] (6.7%) | ||
|attacks= | |attacks= | ||
|getdata= | |getdata= | ||
| Line 1,942: | Line 1,942: | ||
|airshoes= |shadowshoes= |floatshoes= |statusguard= |superarmor= | |airshoes= |shadowshoes= |floatshoes= |statusguard= |superarmor= | ||
|info= | |info= | ||
|locations= | |locations=[[Att Area 3]] (6.7%) | ||
|attacks= | |attacks= | ||
|getdata= | |getdata= | ||
| Line 1,958: | Line 1,958: | ||
|airshoes= |shadowshoes= |floatshoes= |statusguard= |superarmor= | |airshoes= |shadowshoes= |floatshoes= |statusguard= |superarmor= | ||
|info= | |info= | ||
|locations= | |locations=[[Ancient Ruins Comp 4]] (story) | ||
|attacks= | |attacks= | ||
|getdata= | |getdata= | ||
| Line 1,971: | Line 1,971: | ||
|airshoes= |shadowshoes= |floatshoes= |statusguard= |superarmor= | |airshoes= |shadowshoes= |floatshoes= |statusguard= |superarmor= | ||
|info= | |info= | ||
|locations= | |locations=[[Sink Area 1]] (6.7%) | ||
|attacks= | |attacks= | ||
|getdata= | |getdata= | ||
| Line 1,985: | Line 1,985: | ||
|airshoes= |shadowshoes= |floatshoes= |statusguard= |superarmor= | |airshoes= |shadowshoes= |floatshoes= |statusguard= |superarmor= | ||
|info= | |info= | ||
|locations= | |locations=[[Sink Area 1]] (6.7%) | ||
|attacks= | |attacks= | ||
|getdata= | |getdata= | ||
| Line 1,999: | Line 1,999: | ||
|airshoes= |shadowshoes= |floatshoes= |statusguard= |superarmor= | |airshoes= |shadowshoes= |floatshoes= |statusguard= |superarmor= | ||
|info= | |info= | ||
|locations= | |locations=[[Sink Area 1]] (6.7%) | ||
|attacks= | |attacks= | ||
|getdata= | |getdata= | ||
| Line 2,015: | Line 2,015: | ||
|airshoes= |shadowshoes= |floatshoes= |statusguard= |superarmor= | |airshoes= |shadowshoes= |floatshoes= |statusguard= |superarmor= | ||
|info= | |info= | ||
|locations= | |locations=[[SciLab Core Comp 4]] (story) | ||
|attacks= | |attacks= | ||
|getdata= | |getdata= | ||
| Line 2,028: | Line 2,028: | ||
|airshoes= |shadowshoes= |floatshoes= |statusguard= |superarmor= | |airshoes= |shadowshoes= |floatshoes= |statusguard= |superarmor= | ||
|info= | |info= | ||
|locations= | |locations=[[Undernet 4 (LoN)|Undernet 4]] (6.7%) | ||
|attacks= | |attacks= | ||
|getdata= | |getdata= | ||
| Line 2,042: | Line 2,042: | ||
|airshoes= |shadowshoes= |floatshoes= |statusguard= |superarmor= | |airshoes= |shadowshoes= |floatshoes= |statusguard= |superarmor= | ||
|info= | |info= | ||
|locations= | |locations=[[Undernet 4 (LoN)|Undernet 4]] (6.7%) | ||
|attacks= | |attacks= | ||
|getdata= | |getdata= | ||
| Line 2,056: | Line 2,056: | ||
|airshoes= |shadowshoes= |floatshoes= |statusguard= |superarmor= | |airshoes= |shadowshoes= |floatshoes= |statusguard= |superarmor= | ||
|info= | |info= | ||
|locations= | |locations=[[Undernet 4 (LoN)|Undernet 4]] (6.7%) | ||
|attacks= | |attacks= | ||
|getdata= | |getdata= | ||
| Line 2,072: | Line 2,072: | ||
|airshoes= |shadowshoes= |floatshoes= |statusguard= |superarmor= | |airshoes= |shadowshoes= |floatshoes= |statusguard= |superarmor= | ||
|info= | |info= | ||
|locations= | |locations=[[Ancient Ruins Comp 6]] (story) | ||
|attacks= | |attacks= | ||
|getdata= | |getdata= | ||
| Line 2,085: | Line 2,085: | ||
|airshoes= |shadowshoes= |floatshoes= |statusguard= |superarmor= | |airshoes= |shadowshoes= |floatshoes= |statusguard= |superarmor= | ||
|info= | |info= | ||
|locations= | |locations=[[Sink Area 3]] (6.7%) | ||
|attacks= | |attacks= | ||
|getdata= | |getdata= | ||
| Line 2,099: | Line 2,099: | ||
|airshoes= |shadowshoes= |floatshoes= |statusguard= |superarmor= | |airshoes= |shadowshoes= |floatshoes= |statusguard= |superarmor= | ||
|info= | |info= | ||
|locations= | |locations=[[Sink Area 3]] (6.7%) | ||
|attacks= | |attacks= | ||
|getdata= | |getdata= | ||
| Line 2,113: | Line 2,113: | ||
|airshoes= |shadowshoes= |floatshoes= |statusguard= |superarmor= | |airshoes= |shadowshoes= |floatshoes= |statusguard= |superarmor= | ||
|info= | |info= | ||
|locations= | |locations=[[Sink Area 3]] (6.7%) | ||
|attacks= | |attacks= | ||
|getdata= | |getdata= | ||
| Line 2,129: | Line 2,129: | ||
|airshoes= |shadowshoes= |floatshoes= |statusguard= |superarmor= | |airshoes= |shadowshoes= |floatshoes= |statusguard= |superarmor= | ||
|info= | |info= | ||
|locations= | |locations=[[Undernet 7 (LoN)|Undernet 7]] (story) | ||
|attacks= | |attacks= | ||
|getdata= | |getdata= | ||
| Line 2,142: | Line 2,142: | ||
|airshoes= |shadowshoes= |floatshoes= |statusguard= |superarmor= | |airshoes= |shadowshoes= |floatshoes= |statusguard= |superarmor= | ||
|info= | |info= | ||
|locations= | |locations=[[Atlampia Area 3]] (story) | ||
|attacks= | |attacks= | ||
|getdata= | |getdata= | ||
| Line 2,155: | Line 2,155: | ||
|airshoes= |shadowshoes= |floatshoes= |statusguard= |superarmor= | |airshoes= |shadowshoes= |floatshoes= |statusguard= |superarmor= | ||
|info= | |info= | ||
|locations= | |locations=NetBattle in [[Atlampia Area 3]] | ||
|attacks= | |attacks= | ||
|getdata= | |getdata= | ||
| Line 2,168: | Line 2,168: | ||
|airshoes= |shadowshoes= |floatshoes= |statusguard= |superarmor= | |airshoes= |shadowshoes= |floatshoes= |statusguard= |superarmor= | ||
|info= | |info= | ||
|locations= | |locations=NetBattle in [[Atlampia Area 3]] | ||
|attacks= | |attacks= | ||
|getdata= | |getdata= | ||
| Line 2,182: | Line 2,182: | ||
|airshoes= |shadowshoes= |floatshoes= |statusguard= |superarmor= | |airshoes= |shadowshoes= |floatshoes= |statusguard= |superarmor= | ||
|info= | |info= | ||
|locations= | |locations=[[Trojan Comp 5]] (story) | ||
|attacks= | |attacks= | ||
|getdata= | |getdata= | ||
| Line 2,193: | Line 2,193: | ||
|airshoes= |shadowshoes= |floatshoes= |statusguard= |superarmor= | |airshoes= |shadowshoes= |floatshoes= |statusguard= |superarmor= | ||
|info= | |info= | ||
|locations= | |locations=[[Ancient Under Area 2]] (story) | ||
|attacks= | |attacks= | ||
|getdata= | |getdata= | ||
| Line 2,206: | Line 2,206: | ||
|airshoes= |shadowshoes= |floatshoes= |statusguard= |superarmor= | |airshoes= |shadowshoes= |floatshoes= |statusguard= |superarmor= | ||
|info= | |info= | ||
|locations= | |locations=NetBattle in [[Ancient Under Area 2]] | ||
|attacks= | |attacks= | ||
|getdata= | |getdata= | ||
| Line 2,219: | Line 2,219: | ||
|airshoes= |shadowshoes= |floatshoes= |statusguard= |superarmor= | |airshoes= |shadowshoes= |floatshoes= |statusguard= |superarmor= | ||
|info= | |info= | ||
|locations= | |locations=NetBattle in [[Ancient Under Area 2]] | ||
|attacks= | |attacks= | ||
|getdata= | |getdata= | ||
Revision as of 22:25, 29 April 2024
| This page uses unofficial terminology. |
| Some parts of this page are based on media which has not been officially released in English. Names and terms may be inferred from other sources or based on fan localizations. |
| Based on The Rockman EXE Zone's Mega Man: Legend of the Network fan localization. |
| This section is under construction. |
| The information may not be complete or 100% accurate. |
Viruses
Mettaur
CanGuard
Swordy
 |
||
|---|---|---|
 |
||
|---|---|---|
 |
||
|---|---|---|
 |
||
|---|---|---|
Bugtank
Boomer
Walla
Heavy
Catack
Dominerd
WindBox
OldStove
Champy
 |
||
|---|---|---|
 |
||
|---|---|---|
 |
||
|---|---|---|
 |
||
|---|---|---|
VolGear
WolGear
Whirly
Lark
 |
||
|---|---|---|
 |
||
|---|---|---|
 |
||
|---|---|---|
 |
||
|---|---|---|
Billy
PulseBulb
Eleogre
BombCorn
Shrubby
Bosses
ThunderMan
AquaMan
TomahawkMan
 |
||
|---|---|---|
|
||
|---|---|---|
|
||
|---|---|---|
|
||
|---|---|---|
SearchMan
 |
||
|---|---|---|
|
||
|---|---|---|
|
||
|---|---|---|
|
||
|---|---|---|
HatMan
 |
||
|---|---|---|
|
||
|---|---|---|
|
||
|---|---|---|
|
||
|---|---|---|
ProtoMan
 |
||
|---|---|---|
|
||
|---|---|---|
|
||
|---|---|---|
|
||
|---|---|---|
RideMan
 |
||
|---|---|---|
|
||
|---|---|---|
|
||
|---|---|---|
|
||
|---|---|---|
FlameMan
Reverse RideMan
 |
||
|---|---|---|
|
||
|---|---|---|
|
||
|---|---|---|
|
||
|---|---|---|
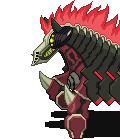
Bass
 |
||
|---|---|---|
|
||
|---|---|---|
|
||
|---|---|---|
|
||
|---|---|---|
TrojanHorse
 |
||
|---|---|---|
|
||
|---|---|---|
|
||
|---|---|---|
|
||
|---|---|---|
References
- ↑ 1.0 1.1 1.2 1.3 Derived from "All Helmet"; Interview with TOM-PON